


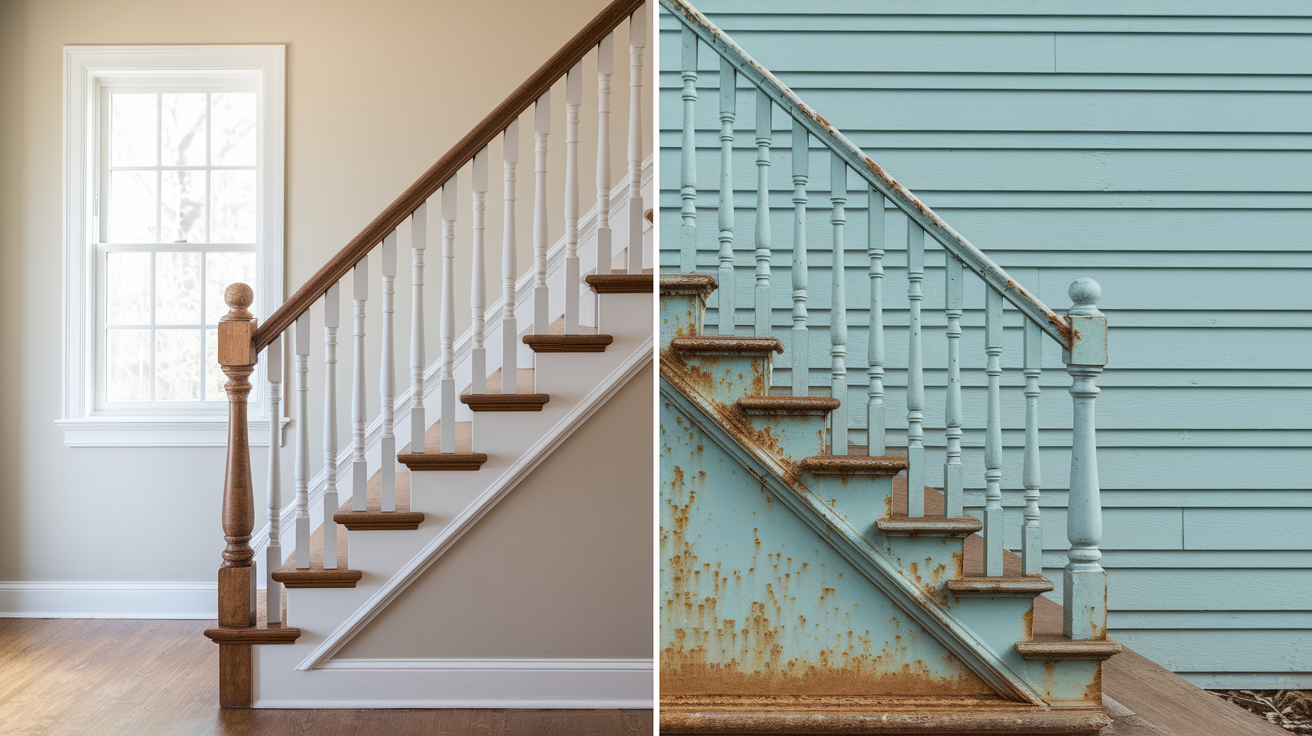
A wobbly handrail is one of those problems you notice every single time you use the stairs, and it gets a little worse each week. That slight wiggle becomes real movement, and eventually someone’s going to grab it for balance and find out it won’t hold them. The good news is most loose handrails can be fixed in under an hour with basic tools and the right approach. This guide walks through exactly how to diagnose what’s causing the wobble, tighten or replace the right hardware, and make sure the repair actually holds up long term.
Quick Fixes and Comprehensive Repair Methods

Most loose handrail problems can be sorted out with basic tools and a clear plan. The key is catching it before minor wobbling turns into an actual safety hazard.
Before you start turning screws, figure out exactly where the movement’s coming from. Grab the handrail and apply firm pressure in different directions. Feel for which connection point is moving the most. That’s where you’ll focus.
Complete Repair Process:
-
Inspect all connection points and identify loose hardware. Check every bracket, bolt, and set screw along the entire handrail length. Mark or mentally note which ones show the most movement.
-
Clean debris from screw heads and mounting surfaces. Dust, paint buildup, and grime in screw heads prevent proper tool engagement and can lead to stripped fasteners.
-
Start with hand tightening to assess current tightness level. This tells you whether the fastener has completely backed out or just loosened slightly. If it spins freely, you likely have a stripped hole problem.
-
Use appropriate tool based on fastener type. Standard screws need a drill or screwdriver, hex bolts need a wrench or socket, and set screws (those recessed connections on the rail itself) need an Allen wrench.
-
Tighten to firm resistance then add only 1/4 turn more. This is the most important step. When the fastener feels snug, give it just a quarter turn beyond that point. Stop there.
-
Check for set screws on rail connections that frequently loosen. These Allen head screws live in small holes on the underside or side of the handrail where it connects to posts. They back out over time from vibration and often get overlooked.
-
Test stability with firm pressure after each adjustment. Push down and pull up on the rail. If it still moves, continue to the next fastener. If it’s solid, you’re done with that section.
-
Re-check all fasteners as tightening one may affect others. Securing one end of a bracket can shift load to the other end, so go back through and verify everything stayed tight.
Quick tightening works when the hardware itself is still good and the mounting material is solid. If screws tighten easily but the rail still wobbles, or if fasteners won’t grab at all, you’re dealing with stripped holes or deteriorated wood. That means moving to hardware replacement or adding new mounting points. Catching a loose handrail early, when it’s just starting to wiggle, usually means a five minute tightening job instead of a half day repair project.
The main risk with overtightening is stripping the threads inside the mounting hole or cracking a metal base plate. Once threads strip, the fastener spins uselessly and you’ve made the problem worse. With mounting plates, overtightening can crack the plate around the bolt hole, especially on cast iron or brittle metals.
Diagnosing Why Handrails Loosen
Fixing a loose handrail without understanding why it loosened just sets you up for the same problem in a few months.
Systematic Diagnostic Process:
- Apply pressure at different points to identify movement location (push down at the middle of the rail span, then near each bracket, then pull up and sideways)
- Visually inspect all mounting points for damage (look for rust stains, cracks in wall surface around screws, gaps between brackets and wall, or rust on metal railings)
- Distinguish between bracket looseness vs structural flex (a bracket pulling away from the wall feels different than the whole section of rail bending)
- Test each connection point individually (isolate each bracket or post by holding adjacent ones steady while testing the suspect connection)
- Document which areas show the most movement (this helps you prioritize repairs and track whether new areas develop problems later)
Daily use puts constant stress on handrail connections. Every time someone grips the rail going up or down stairs, that creates leverage force pulling fasteners incrementally looser. A railing might get grabbed fifty times a day in an active household. Over months and years, even properly installed hardware works its way loose from this repetitive stress. Heavier people leaning on railings, kids swinging on them, and the natural habit of pulling yourself up steep stairs all accelerate normal loosening.
Wood deterioration changes everything about how well fasteners hold. Moisture is the main culprit, either from humidity in the air or direct water contact on exterior railings. As wood fibers break down, screw threads have less material to grip. Surface wood can look fine while the layers where screws bite have turned soft or punky. This is especially common on outdoor deck railings and in humid basements where wall studs behind drywall slowly deteriorate. Once wood degrades, tightening existing screws just spins them in oversized holes.
Poor installation creates problems from day one that eventually reveal themselves. Common mistakes include using drywall anchors instead of hitting wall studs, choosing screws that are too short to reach solid framing, installing brackets rated for lighter railings on heavy wrought iron systems, and spacing supports too far apart. A handrail mounted into drywall might feel solid at first, but drywall crumbles under repeated stress. Screws that only penetrate half an inch into a wall stud don’t have enough grip to resist the leverage forces. These installations might last months or even a year or two before the wobbling starts, but they were never properly secured.
Houses move. Seasonal temperature changes cause materials to expand and contract. Foundations settle, especially in the first few years after construction. Humidity cycles make wood swell and shrink. All this movement stresses handrail attachment points and can gradually loosen fasteners or crack mounting surfaces. You’ll also find hidden problems like wall studs that have dried, split, or rotted behind finished surfaces, and hardware that was undersized for the railing weight and leverage it’s supporting. When you’ve tightened everything, replaced fasteners, and the rail still comes loose within weeks, that’s your signal. The problem is structural, not just loose hardware, and you need to look deeper or bring in someone who can access what’s behind the walls or under the floors.
Essential Tools and Materials for Handrail Repairs

Getting the right tools together before you start prevents the frustration of stopping mid project to run to the hardware store.
Essential Tools:
- Stud finder (electronic models work better than magnetic for locating wall framing)
- Power drill with bits (drill bit set including pilot hole sizes and a countersink bit)
- Screwdriver set (both Phillips and flathead, plus precision sizes for set screws)
- Adjustable wrench (for hex bolts on newel posts and base plates)
- Level (2 foot or 4 foot length for checking handrail alignment)
- Measuring tape (for spacing supports and locating studs)
- Safety glasses (drilling overhead on stair railings puts debris in your face)
- Work gloves (for handling splintered wood and sharp metal edges)
| Material | Purpose | When to Use |
|---|---|---|
| Wood screws (2″, 3″, 4″ lengths) | Primary fasteners for wood to wood connections | Replacing short screws or when mounting into solid framing requires deeper penetration |
| Toggle bolts | Hollow wall anchors that spread load | When stud location makes direct mounting impossible and you must secure to drywall |
| Drywall anchors | Light duty hollow wall fasteners | Only for very light handrails in non critical locations, not recommended for main stair railings |
| Wood filler | Fills stripped screw holes before refastening | When original holes are slightly enlarged but wood is otherwise sound |
| Epoxy | Structural adhesive for serious repairs | When wood is soft or crumbly, or when reinforcing connections that keep failing |
| Mounting brackets | Add support points or replace damaged brackets | When spacing between existing supports exceeds 3 to 4 feet or when brackets are bent or cracked |
Wall Mounted Handrail Repair Techniques
Wall mounted handrails depend entirely on proper attachment to the wall structure behind the finished surface.
Locating and Securing to Wall Studs
Wall studs are the only reliable anchor points for handrails that will be used for support. Drywall or plaster alone can’t handle the forces from someone catching themselves or pulling themselves up stairs. Stud finders work by detecting changes in wall density or locating nails that attach drywall to framing. Mark the stud center, then verify by drilling a small test hole or driving a finish nail at an angle. Studs run vertically every 16 or 24 inches in most homes.
Screws must be minimum 3 inches long to work properly. That length gets you through half inch drywall, past any gap behind it, and approximately 2 inches into the solid wood stud. Shorter screws might catch the near edge of the stud but won’t have enough thread engagement to resist pulling out. Drill pilot holes slightly smaller than the screw diameter to prevent the wood from splitting, especially near stud edges. The pilot hole should go through the drywall and about halfway into the stud depth.
Mounting into drywall alone fails because drywall crumbles under sustained stress. Even heavy duty drywall anchors have load limits well below what a handrail experiences when someone’s full weight suddenly jerks on it. Anchors might hold initially, but the drywall around them gradually crushes and the connection loosens. Every hardware store carries toggle bolts and other hollow wall fasteners, but these are not appropriate for primary handrail support on stairs or anywhere someone depends on the rail for balance.
Repairing Stripped Mounting Holes
Small stripped holes where screws have loosened can often be saved with wood filler. Drill out the hole slightly to clean damaged wood, fill it completely with filler, let it cure for the time specified on the package (usually several hours), then drill a new pilot hole and install the screw. The filler creates fresh material for threads to bite into. Epoxy works better for larger damaged areas because it bonds more strongly and doesn’t shrink as it cures, but it takes longer to set up.
When a hole is too far gone for filler, relocate the bracket two or three inches up or down to fresh wood. Mark the new position, drill pilot holes, and install screws in virgin material. If the old holes will be visible, fill them for appearance, but structurally you’re done once the new position is secure. Upgrading from 2 inch to 3 inch or even 4 inch screws gives you deeper bite into the stud, which matters when the surface layers of wood have softened from age or moisture. Longer screws bypass deteriorated surface wood and grab solid material deeper in.
Complete wood replacement is necessary when rot or severe damage affects the entire mounting area. This means cutting out the compromised section of wall stud or rail mounting surface, splicing in new material that matches the dimensions, and securing it properly before remounting the handrail. For wall studs, this typically requires opening the drywall, installing a sister stud or replacement section, then patching the wall surface. It’s not a quick fix, but it’s the only reliable solution when wood has deteriorated past the point where fasteners can hold.
Installing Additional Support Brackets
Handrails need support every 3 to 4 feet to stay stable. Longer unsupported spans will flex and eventually loosen at the connection points from the leverage. Measure your handrail length and add intermediate brackets if the span exceeds 4 feet. The new bracket positions should divide the span into roughly equal segments.
Each additional bracket must mount into a wall stud. Use your stud finder to locate framing at the point where you need support. If there’s no stud exactly where you need it, you have two options: shift the bracket position slightly to hit the nearest stud (usually acceptable if it’s within a few inches), or install blocking between studs by opening the wall and adding horizontal framing. For finished spaces where opening the wall isn’t practical, properly rated toggle bolts are a compromise, though not ideal.
Proper bracket installation means drilling pilot holes at a slight upward angle so the force on the handrail tends to tighten the screws rather than pull them out. Attach the bracket loosely at first, check that the handrail sits level or at the correct angle, then tighten all fasteners fully. Test each new bracket individually before moving to the next.
Newel Post and Baluster Connection Repairs

The newel post is where the entire railing system’s structural load concentrates, making it the most critical connection point.
A wobbly newel post changes everything. While a loose bracket on the wall might just be annoying, an unstable newel post means the main anchor point is compromised. The base of the post typically connects to the floor structure with a base plate secured by four to six bolts. Check each bolt for tightness and look for any cracking or damage to the plate itself.
Proper tightening technique prevents damage while still securing the connection. Thread the wrench onto each bolt and turn it until you feel firm resistance. That’s the point where the bolt is snug against the mounting surface. From there, add only a quarter turn more. That slight additional torque compresses the connection without exceeding what the threads or base plate can handle. If a bolt keeps turning without ever getting tight, the threads are stripped or the mounting hole has enlarged.
Common Newel Post Repair Solutions:
- Tightening base plate bolts systematically, checking each one in sequence and then rechecking after all have been addressed
- Upgrading bolt diameter from 3/8″ to 1/2″ when original holes have enlarged, which requires drilling out the existing holes and installing thicker bolts with larger washers
- Adding construction adhesive between the base plate and mounting surface when mechanical fasteners alone don’t provide enough friction
- Installing support blocking beneath floors by accessing the space under the staircase and adding wood bracing that supports the post from below
- Replacing damaged base plates when the original has cracked or the bolt holes have elongated past the point where larger bolts will help
- Reinforcing floor joists underneath the post location when the floor structure itself has weakened, which requires opening the ceiling below or accessing the crawlspace
Repair Methods for Different Handrail Materials
The material your handrail is made from determines which repair approaches will work and which hardware you need.
Wooden Handrail Repairs
Wood handrails and wooden mounting surfaces respond well to screw based repairs, but you need to account for wood type and condition. Softwoods like pine require longer screws because the wood compresses more easily under stress, giving threads less holding power. Hardwoods like oak grip screws more firmly but also split more easily if you don’t drill proper pilot holes.
Moisture damage is the main enemy of wooden handrail stability. Check carefully for soft spots, especially where water might have contacted the wood over time. Press a screwdriver tip into the wood near mounting points. Solid wood resists hard pressure, while deteriorated wood dents easily or crumbles. When installing screws into wood, aim for 2 to 3 inches of penetration into solid material. That means going past any surface deterioration into the sound wood deeper in the piece.
Metal and Wrought Iron Railing Repairs
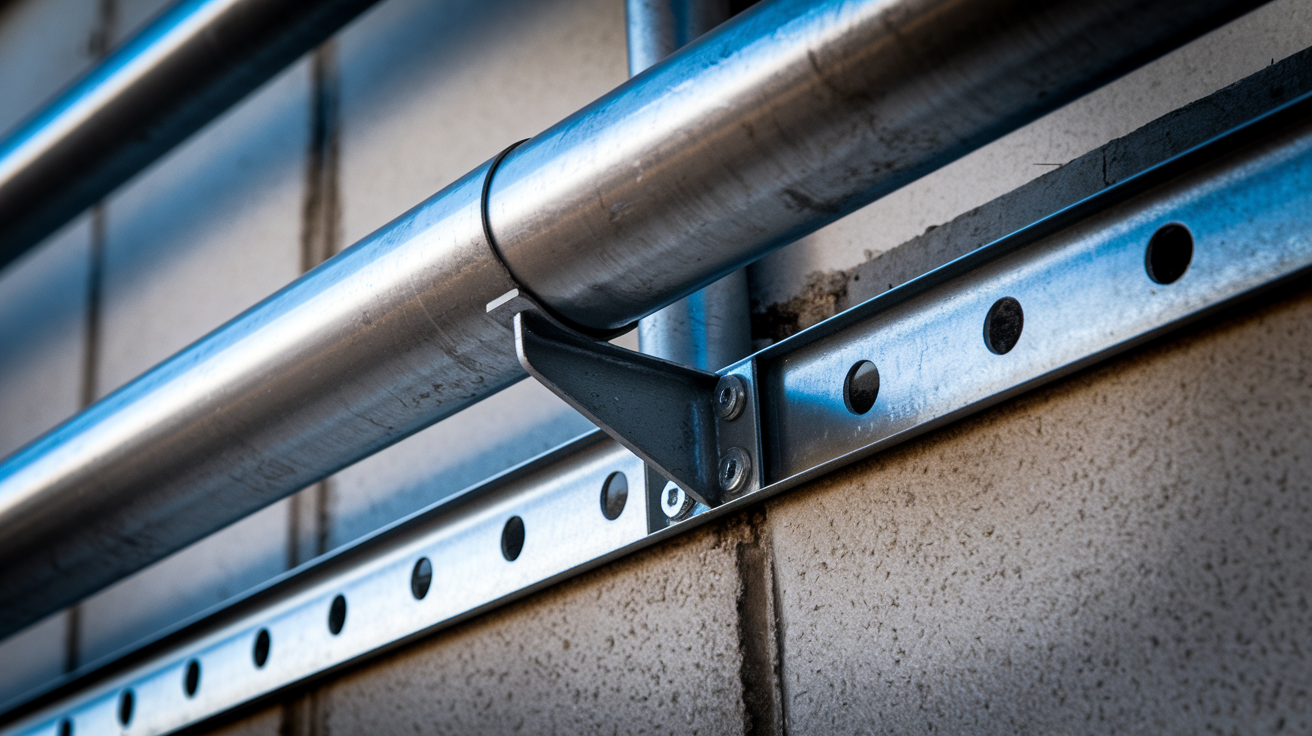
Metal railings, especially wrought iron, create different challenges because of their weight. The constant downward pressure at mounting points is significantly higher than with wood railings. This means hardware must be rated for the additional load, and mounting points need more secure foundations.
Use only galvanized or stainless steel fasteners with metal railings. Regular steel hardware will rust where it contacts the railing, and rust expansion breaks connections and stains the surfaces. Base plates for metal posts should be larger than those for wood. Upgrading from 4 inch to 6 inch base plates spreads the load over more anchor points and more floor surface area. The larger plate also allows repositioning bolt holes if the original locations have failed.
Outdoor metal railings need regular finish maintenance. Check the painted or powder coated surface for any chips or scratches that expose bare metal. Moisture reaching bare iron starts rust that spreads under the finish. Touch up damaged spots immediately with metal primer and paint matched to the existing finish. Small rust spots turn into structural problems if left alone.
Material type affects how long repairs last. Wood installations properly sealed against moisture should stay tight for years between maintenance checks. Metal installations with appropriate hardware and good rust prevention typically outlast wood, but failures are more dramatic when mounting points give way under the greater weight.
Interior Versus Exterior Handrail Repair Considerations
The location of your handrail determines what challenges you’ll face and which repair methods are appropriate.
Interior handrails benefit from controlled conditions but come with their own complications. Drywall is the most common interior wall surface, and while it’s easy to work with, it requires hitting the studs behind it for any real support. Plaster walls, common in older homes, are harder and more brittle. Drilling into plaster requires sharp bits, steady pressure, and sometimes pre drilling with smaller bits to avoid cracking. Baseboards often interfere with the bottom bracket placement on stair railings, requiring careful notching of the baseboard or positioning the bracket just above it. Interior repairs also demand cleaner finished appearance because the work is more visible in living spaces.
Exterior handrails face weather, temperature swings, and moisture all the time. Wood expands in humid summers and contracts in dry winters, loosening fasteners through the cycle. Metal railings get hot in direct sun and cold in winter, and the expansion and contraction can gradually work bolts loose. UV exposure breaks down finishes on both wood and metal, letting moisture reach the base material. Exterior stairs and porches also tend to vibrate more from foot traffic, which accelerates hardware loosening.
Masonry and concrete mounting presents specific technical requirements. Never use standard expansion anchors for heavy railings mounted in concrete. They can pull out under stress. Wedge anchors or sleeve anchors work by expanding inside the drilled hole and mechanically locking into the concrete. For proper installation, drill the hole to the exact diameter and depth specified for the anchor size. Clean dust out of the hole before inserting the anchor. Tighten the bolt to the specified torque, which causes the anchor to expand and lock in place.
If an anchor has failed in concrete, don’t try to reuse that hole. Drill new anchor locations at least three inches away from the failed hole. The concrete around a failed anchor has typically cracked or crumbled, so it won’t provide reliable support anymore. Space the new holes to match your base plate or bracket hole pattern, which might mean installing a larger plate or repositioning the post slightly.
Weatherproofing and corrosion prevention separate repairs that last from those that fail in a season or two. Seal all penetrations through exterior wood with caulk to block water entry. Use stainless steel or hot dipped galvanized hardware, not just zinc plated fasteners that rust quickly outdoors. Apply wood preservative or sealer to any raw wood exposed during repairs. For metal railings, make sure every fastener hole and any scratches in the finish get sealed or touched up before moisture gets in.
Safety Assessment and Building Code Requirements
Loose handrails create serious fall risks that affect everyone who uses the stairs, especially children, elderly family members, and anyone with balance or mobility challenges.
Falls on stairs account for a significant portion of home injuries every year. A handrail that suddenly gives way when someone grabs it can turn a small stumble into a serious fall. Young kids and pets often pull or swing on railings in ways that put more stress on connections than normal use. Older adults who depend on railings for balance face the greatest risk because they may not be able to catch themselves if the rail fails.
Building codes set minimum standards because inadequate railings have caused too many injuries. The International Residential Code (IRC) provides the baseline requirements that most local codes follow or build on.
Key IRC Handrail Requirements:
- Height specifications 34 to 38 inches measured from the nosing of the stair treads to the top of the handrail, ensuring it’s positioned where people naturally reach for support
- Graspability standards requiring the rail to be shaped so a hand can close around it, with maximum perimeter dimensions that prevent rails from being too thick to grip
- Load bearing capacity minimums specifying that rails must resist specific forces in all directions (typically 200 pounds concentrated load) without pulling loose or deflecting excessively
- Continuous path requirements meaning handrails can’t have gaps along the stair run where someone might lose their grip
- Spacing between supports limiting the distance between mounting points to prevent excessive flex, which is where the 3 to 4 foot maximum comes from
Home inspections will flag loose or non compliant handrails. If you’re selling your house, loose railings become negotiation points or required repairs. Buyers will either request the work be completed before closing or deduct estimated repair costs from their offer. Beyond the transaction concerns, there’s potential liability if someone is injured due to a handrail you knew was loose but didn’t fix. This matters in rental properties especially, where landlord responsibility for safe conditions is legally defined.
Advanced Reinforcement Techniques for Persistent Problems
When basic repairs don’t hold, or when handrails keep loosening despite multiple tightening attempts, you need structural reinforcement.
Angle brackets add diagonal support that changes the force dynamics at mounting points. Position an angle bracket beneath the handrail where it mounts to the wall, with one leg against the wall and one leg against the bottom of the rail. This transfers some of the downward force directly to the wall rather than putting all the stress on the screws. Heavy duty steel angle brackets work better than thin aluminum ones. Use lag screws rather than standard wood screws for bracket attachment. Lag screws have coarser threads and hex heads that allow more torque without stripping. They come in sizes up to 6 inches long and 1/2 inch diameter for serious reinforcement.
Hardware specification upgrades make significant differences in holding power. Standard wood screws have fine threads designed for easy installation, but they don’t resist pulling forces as well as lag screws. Carriage bolts create through connections by going completely through the mounting material and securing with a nut and washer on the back side. This works for newel posts mounted to rim joists or where you can access both sides of the mounting surface. For newel post base plates, increasing the bolt diameter from 3/8 inch to 1/2 inch might seem like a small change, but it significantly increases the shear strength and pull out resistance. Larger bolts also fit more snugly in holes that have elongated slightly from the original bolts rocking back and forth.
Upgrading base plate size from 4 inches to 6 inches spreads load over a larger floor area and provides room for more anchor points. Instead of four bolts in a 4 inch plate, a 6 inch plate typically has six bolts. The additional fasteners reduce the stress on each individual bolt, and the larger footprint means the post is less likely to rock. This matters most for heavy wrought iron railings where weight creates constant stress.
Structural reinforcement behind finished surfaces addresses problems you can’t see. Adding blocking between wall studs means opening the drywall, cutting and installing horizontal wood pieces between the vertical studs at the exact height where the handrail mounts, then closing the wall back up. This gives you solid backing material across the entire bracket location instead of depending on hitting studs. For newel posts, reinforcement involves supporting the floor structure beneath the post location. This might mean installing a jack post in the basement or crawlspace directly under the newel post, or sistering additional floor joists beside the existing ones to increase the floor’s rigidity. These are not simple repairs, but they solve problems that surface repairs can’t touch.
Cost Estimates for Handrail Repair Projects
Understanding the cost range for different repair levels helps you budget appropriately and decide whether to handle it yourself or hire help.
DIY costs stay low when you’re working with basic tightening and hardware replacement. Professional costs include labor, which typically runs from $75 to $150 per hour depending on your location and the contractor’s experience, plus materials and any required permits for structural work.
Cost Scenarios:
-
Basic tightening and adjustment (DIY: $0 to $20 in materials), if existing hardware is functional and you just need to tighten everything, your only cost might be an Allen wrench set or a specific screwdriver size you don’t already own. Wood filler for minor stripped holes costs a few dollars.
-
Hardware replacement (DIY: $15 to $50), a box of properly sized wood screws costs $5 to $12, brackets run $3 to $15 each depending on size and weight rating, and any wood filler or epoxy adds another $5 to $10. For multiple brackets or heavy duty hardware, expect the higher end.
-
Bracket addition and reinforcement (DIY: $30 to $80), adding support points means buying additional brackets, longer screws or lag bolts, possibly a stud finder if you don’t have one, and the fasteners to match. Heavy duty angle brackets cost more, and longer lag screws run $8 to $15 for a small box.
-
Professional basic repair ($150 to $350), for a contractor to assess the problem, tighten existing hardware, replace a few stripped fasteners, and add a support bracket or two, expect 1 to 2 hours of labor plus materials. Simple jobs at the low end, more complex situations with multiple problem areas at the high end.
-
Professional structural repair ($400 to $800), when repairs require opening walls to add blocking, reinforcing floor framing, or replacing deteriorated structural wood, costs increase substantially. This typically involves 4 to 8 hours of skilled labor plus materials, wall patching, and paint touch up.
-
Complete railing replacement (reference point: $800 to $2500+), while not a repair, this provides context. If repair costs approach 40 to 50% of replacement cost, and the railing is old or has multiple ongoing problems, replacement might make more sense financially.
The big cost difference comes from intervening early versus waiting. A loose bracket caught early costs almost nothing to tighten. That same bracket left alone eventually strips its mounting holes, requiring wood filler and new hardware. If ignored longer, it pulls away and damages the wall surface, requiring drywall repair. Eventually, the other brackets fail under the additional stress, and you’re looking at structural reinforcement or complete replacement.
When Professional Handrail Repair Is Necessary

Some repairs look simple on the surface but involve underlying problems that need professional assessment, especially when safety and structural integrity are at stake.
Not every loose handrail requires a contractor, but knowing when you’ve reached the limit of what DIY can accomplish prevents wasted effort and potential safety problems.
Situations Requiring Professional Help:
-
Newel post instability at base/floor connection, the newel post is the main structural anchor, and wobbling at the base usually means problems with floor framing or foundation that require access from below and structural knowledge to assess properly
-
Repeated failure after multiple DIY repair attempts, if you’ve tightened everything twice, replaced fasteners, added support brackets, and the railing still comes loose within weeks, there’s a structural issue you’re not seeing
-
Structural damage to wall framing or floor joists, rot in wall studs, cracked floor joists under newel posts, or deteriorated rim joists where railings attach require carpentry skills and often mean opening up finished surfaces to access the damage
-
Code compliance concerns for home sale or inspection, older railings often don’t meet current code for height, strength, or configuration, and an inspector will flag these issues, sometimes requiring certified work to satisfy requirements
-
Complex installations involving load bearing modifications, any time a repair involves cutting into or adding support to load bearing walls or floor systems, that’s structural work that should be engineered and properly installed
-
Extensive wood rot requiring structural replacement, once rot extends into the actual structure, not just surface trim or rails, you need someone who can assess how far it goes, what needs replacing, and what can be saved
-
Liability concerns in rental properties, if you own rental property, having documented professional repairs protects you legally and ensures tenants have safe railings that meet code
| Approach | Duration | When to Use | Limitations |
|---|---|---|---|
| Quick tightening | Few days to weeks | Emergency stabilization until proper repair can be scheduled | Doesn’t address underlying causes; problem will return |
| Adhesive reinforcement | Several months to a year | Stripped holes in otherwise sound material where wood filler or epoxy can restore holding power | Eventually fails if root cause involves structural movement or continued moisture exposure |
| Hardware replacement | 1 to 3 years typically | Worn or undersized fasteners when the mounting surfaces themselves are still solid | Won’t help if wood is deteriorated or if the installation design is fundamentally inadequate |
| Structural repair | Many years to permanent | Addressing inadequate framing, deteriorated wood, or insufficient anchoring with proper reinforcement or replacement | Higher upfront cost; requires skilled contractor; may need wall or floor opening |
Selecting a qualified contractor starts with verifying they carry general liability insurance and workers compensation coverage. Ask for documentation. Check that they have specific experience with handrail and staircase repairs, not just general handyman work. Someone who regularly works on stairs understands the code requirements and structural considerations. Ask for references from similar projects and actually call them.
Professional repairs come with warranties on workmanship, typically one to two years, meaning if the same problem recurs during that period, they’ll fix it at no additional charge. The long term cost difference often favors professional work when you account for time spent on failed DIY attempts. Paying $400 once for structural repair beats spending $50 every few months on temporary fixes that don’t last. Timeline matters too. DIY repairs happen around your schedule and can stretch over weeks when you’re working evenings and weekends. Professionals typically complete most handrail repairs in a day or two, getting your stairs safe quickly.
Preventive Maintenance for Long Term Handrail Stability
Regular inspection and minor maintenance prevents the small issues from becoming major repair projects and keeps your handrails safe.
Spending fifteen minutes twice a year checking your handrails costs almost nothing and catches problems when they’re still easy to fix.
Biannual Inspection Checklist:
-
Test stability with firm pressure, grip the handrail at several points and push down, pull up, and push sideways. Feel for any movement that wasn’t there before. Compare the feel to your last check.
-
Check all visible fasteners for tightness, use a screwdriver or Allen wrench to verify that screws and set screws are snug. You’re not removing anything, just checking that each fastener still has resistance when you try to tighten it.
-
Inspect for wood deterioration or rust, look closely at the wood around mounting points for soft spots, cracks, or dark staining that indicates moisture damage. On metal railings, check for rust spots, especially where the finish has chipped.
-
Verify wall bracket security, check that brackets sit flush against the wall with no gaps. Inspect the wall surface around each bracket for cracks or crumbling that might indicate the fasteners are pulling out.
-
Examine finish for chips exposing bare material, any place where paint or coating is damaged on exterior railings needs attention before moisture reaches the base metal or wood.
-
Tighten set screws on rail connections, these small Allen head screws in the rail itself back out from vibration more than any other fastener. A quick check with the right size Allen wrench keeps them snug.
Schedule your checks in spring and fall, which naturally coincides with other seasonal home maintenance. The spring check catches any damage from winter weather, freezing and thawing cycles, or moisture that accumulated during heating season when humidity indoors was higher. The fall check prepares railings for winter and catches summer wear from higher use, UV exposure, and humidity. For exterior railings, pay special attention after winter. Ice, snow removal, temperature extremes, and moisture all stress outdoor railings more than other seasons. Keep a simple log noting the date and what you found. If you start noticing that a particular bracket needs tightening every six months, that tells you there’s an underlying problem developing before it becomes a safety issue. Regular maintenance extends the lifespan of your handrail installation by years and maintains your home’s safety without major expense.
Final Words
A loose handrail repair doesn’t have to turn into a major project if you catch it early and address the root cause.
Tightening hardware, upgrading fasteners, and reinforcing mounting points solve most stability issues when done with the right technique and materials.
Regular inspections twice a year keep small problems from becoming safety hazards.
If wobbling keeps coming back despite your best efforts, that’s your signal to bring in a pro who can assess what’s happening behind the walls or beneath the floor.
Either way, you’re taking the right step toward a safer, more stable home.
FAQ
How to strengthen a wobbly handrail?
A wobbly handrail is strengthened by first tightening all existing hardware to firm resistance plus only a quarter turn more, then replacing any stripped fasteners with longer screws (3 inches minimum for wall brackets) driven into wall studs. For persistent wobbling, add intermediate support brackets every 3 to 4 feet or upgrade base plate size from 4 inches to 6 inches to distribute load over more anchor points.
How much does it cost to repair a loose stair railing?
Loose stair railing repair costs range from $0 to $20 for basic DIY tightening and adjustment, $15 to $50 for hardware replacement, and $30 to $80 for adding brackets and reinforcement. Professional basic repairs typically cost $150 to $350, while structural repairs requiring framing work run $400 to $800 depending on the extent of deterioration and reinforcement needed.
How do you tighten a loose banister?
A loose banister is tightened by inspecting all connection points for loose hardware, cleaning debris from screw heads, hand-tightening first to assess current tightness, then using the appropriate tool to tighten to firm resistance plus only a quarter turn more. Check for set screws (Allen-head screws) on rail connections that frequently back out, and test stability after each adjustment since tightening one fastener may affect others.
How to fix a wobbly spindle?
A wobbly spindle is fixed by identifying whether the looseness is at the top rail connection, bottom rail connection, or both, then tightening the specific connection points. For top connections, check set screws or finish nails and re-secure with wood glue if needed. For bottom connections, ensure the spindle is properly seated in its mortise or shoe rail, adding wood filler or construction adhesive to reinforce small gaps before re-securing.