


You’ve dealt with sticking doors before, right? You push a little harder, jiggle the knob, maybe kick the bottom corner until it finally closes. That rubbing sound and the effort it takes every single time gets old fast. Here’s the thing: most sticking doors trace back to one simple problem, loose hinge screws, and you can fix it in 15 to 20 minutes with a screwdriver and a couple longer screws. This guide walks you through the fix that works about 70 percent of the time, plus backup solutions if your door needs something more.
The Immediate Fix: Tightening Loose Hinge Screws
About 70 percent of sticking doors? It’s loose hinge screws. The door opens and closes, opens and closes, and eventually those screws start backing out. The door sags on the hinge side. Now the whole thing’s out of alignment. Top corner hits the frame, or the bottom drags the floor.
Good news is you can fix this in 15 to 20 minutes with a screwdriver and some longer screws.
-
Open the door all the way so you can reach every hinge. Test each screw by hand to see if it wiggles.
-
Tighten every screw using a manual screwdriver. Don’t use a drill, it spins too fast and strips the holes or chews up the screwhead.
-
Find the middle screw on each hinge (the center one out of three or four).
-
Pull that middle screw out completely.
-
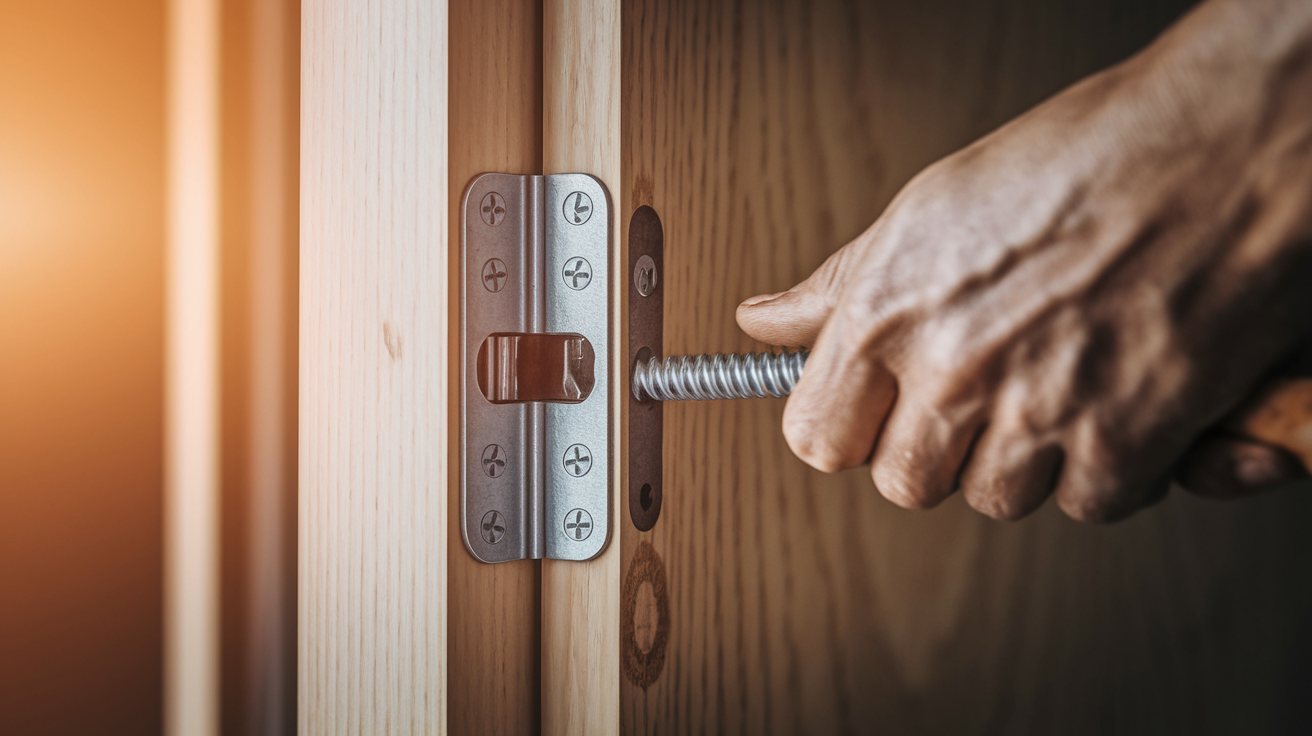
Replace it with a 3 inch screw that’ll go through the jamb and into the wall stud behind it.
-
If you hit resistance, drill a small pilot hole first so the wood doesn’t split.
-
Drive the 3 inch screw through until it’s snug, then give it one more quarter turn.
-
Test the door and see if the binding’s gone.
If the door still rubs along the latch side after you’ve tightened everything, you can pull the jamb inward to make clearance. Find the middle of where it’s rubbing on the latch side jamb. Drill a pilot hole through the jamb there, then drive a 3 inch screw through into the stud. As you tighten it, the screw pulls the jamb toward the wall, opening up space for the door. Watch the trim while you’re doing this. If gaps start showing up where trim meets jamb or wall, stop. You’ve pulled it as far as it’ll go without causing visible damage. Sink the screwhead slightly below the surface and fill it with wood filler.
Screws won’t tighten and just spin in stripped holes? Pull the screw out and squeeze wood glue into the hole. Push wooden golf tees in there or pack it with filler. Let it dry overnight. Re-drill a pilot hole through the hardened filler, then put the screw back in. The new material gives the threads something solid to grab.
If tightening the hinges completely fixed it, you’re done. Door should swing smooth with no rubbing or resistance. You only need the other sections if it still sticks after you’ve properly tightened every hinge and swapped at least one screw per hinge for a 3 inch screw that reaches the stud.
Complete Diagnosis Table and Problem Identification
If tightening didn’t work, you need to figure out exactly where and when the door’s sticking. The specific location and pattern points right to the cause and tells you which fix will actually work.
| Sticking Location | Symptom Details | Most Likely Cause | Solution (Section Reference) |
|---|---|---|---|
| Top corner on hinge side | Door binds when closing near the top hinge | Loose bottom hinge | Tighten screws and replace with 3 inch screws |
| Top corner on latch side | Door won’t close without force at top | Door sag from loose hinges | Tighten all hinges, shim top hinge outward |
| Bottom corner drags floor | Scraping sound and drag marks on floor | Loose top hinge or new carpet | Tighten hinges or trim door bottom |
| Entire latch side binds | Consistent friction along full door height | Frame pulled away or wood swelling | Plane door edge (Section 6) |
| Binds at top and bottom but not middle | Door has twisted appearance | Warped door | Plane high spots or replace door |
| Sticks only in humid weather | Seasonal pattern, worse in summer | Wood expansion from moisture | Sand or plane edge and seal (Section 4) |
| Door edge shows paint buildup | Shiny rubbing spots and paint transfer | Multiple paint layers over years | Remove excess paint (Section 5) |
| Latch won’t engage strike plate | Door closes but bounces back open | Misaligned strike plate | Adjust strike plate position (Section 6) |
Close the door slowly and watch where it binds. Look for drag marks or shiny spots on the door edge and jamb where they’re rubbing. Check the gap between door and frame at different points around the perimeter. A nickel should fit easily all the way around. If the gap’s tighter in some spots, that’s your problem area. Check all hinge screws again even if they looked fine before. Sometimes a screw that seems tight will still turn when you put a screwdriver to it.
If the door looks bowed or twisted, lay a long straightedge along the edge to check for warping. A minor warp under a quarter inch can usually be fixed by planing the high spots. Severe warps over a quarter inch typically mean you need a new door. Solid wood doors warp less than hollow core, but they absorb more moisture and swell harder in humid conditions.
Hinge adjustments usually take 15 to 30 minutes. Paint removal or light sanding takes one to two hours. Planing or trimming the edge takes one to two hours once you’ve got the door off. If you’re finding binding all over the door, or several doors started sticking at once, that often means foundation settling or other structural stuff that needs a professional rather than DIY fixes.
Essential Tools and Materials for Door Repairs

Get everything together before you start so you don’t have to stop halfway through for a hardware store run. Most repairs use basic tools you probably already have.
| Tool or Material | Purpose | Cost Range |
|---|---|---|
| Screwdriver set (Phillips and flathead) | Tightening hinge screws | $10 to $25 |
| 3 inch screws (6 to 8 count) | Reaching wall studs through jamb | $3 to $6 |
| Cordless drill with bit set | Pilot holes and countersinking | $40 to $120 (if needed) |
| Sandpaper (80 grit and 120 grit) | Removing material and smoothing edges | $4 to $8 |
| Hand planer or belt sander | Removing wood from door edge | $25 to $90 |
| Wood shims (pack) | Adjusting hinge depth | $3 to $5 |
| Graphite powder or silicone spray | Lubricating hinges | $4 to $8 |
| Wood filler | Filling screw holes and countersinks | $5 to $10 |
| Hammer | Removing hinge pins | $10 to $20 (if needed) |
| Level (2 foot or 4 foot) | Checking door and frame alignment | $8 to $25 |
Most people already have screwdrivers, a drill, sandpaper, and a hammer. The materials you’ll actually use (screws, wood filler, maybe some sandpaper) typically run between $15 and $40 total for a standard sticking door repair. You might not need the hand planer or belt sander if simple hinge adjustments or light sanding does the job.
Humidity and Wood Swelling in Sticking Doors
Wood doors absorb moisture during humid spring and summer months. The wood expands by an eighth to a quarter inch across the width. This is especially bad for exterior doors facing weather directly, and for interior doors in bathrooms or kitchens where moisture runs higher. A door that swings perfect in January can bind tight against the frame by July.
You can spot moisture related sticking by the pattern. Door sticks worse during humid weather and seasons. It improves or disappears completely during dry winter months when indoor heating pulls moisture out of the air. The swelling’s usually uniform along the entire edge rather than concentrated in one spot like a loose hinge causes.
Here’s how to fix moisture related door sticking:
- Run a dehumidifier to keep humidity between 30 and 50 percent year round, which keeps wood dimensions stable
- Sand or plane the swollen edge to create clearance (this is permanent and works even after humidity drops)
- Improve ventilation in problem areas by running exhaust fans longer or opening windows when weather permits
- Seal all six edges of the door (top, bottom, both long edges, and ideally the faces) with primer and paint to slow moisture absorption
- Install or replace weather stripping on exterior doors to block humid outdoor air from getting in around the perimeter
Prevention beats reactive fixes for moisture problems. Seal any raw wood edges with primer before you install a new door or after you’ve trimmed an existing one. Apply multiple coats of paint or finish to create a moisture barrier. Fix moisture sources near the door like leaky gutters dripping water near the entry, poor attic ventilation letting humid air build up, or bathroom exhaust fans that aren’t vented outside. If moisture problems come from bigger issues like water damage or ongoing leaks, fix those first or the door will keep swelling.
Removing Paint Buildup from Door Edges
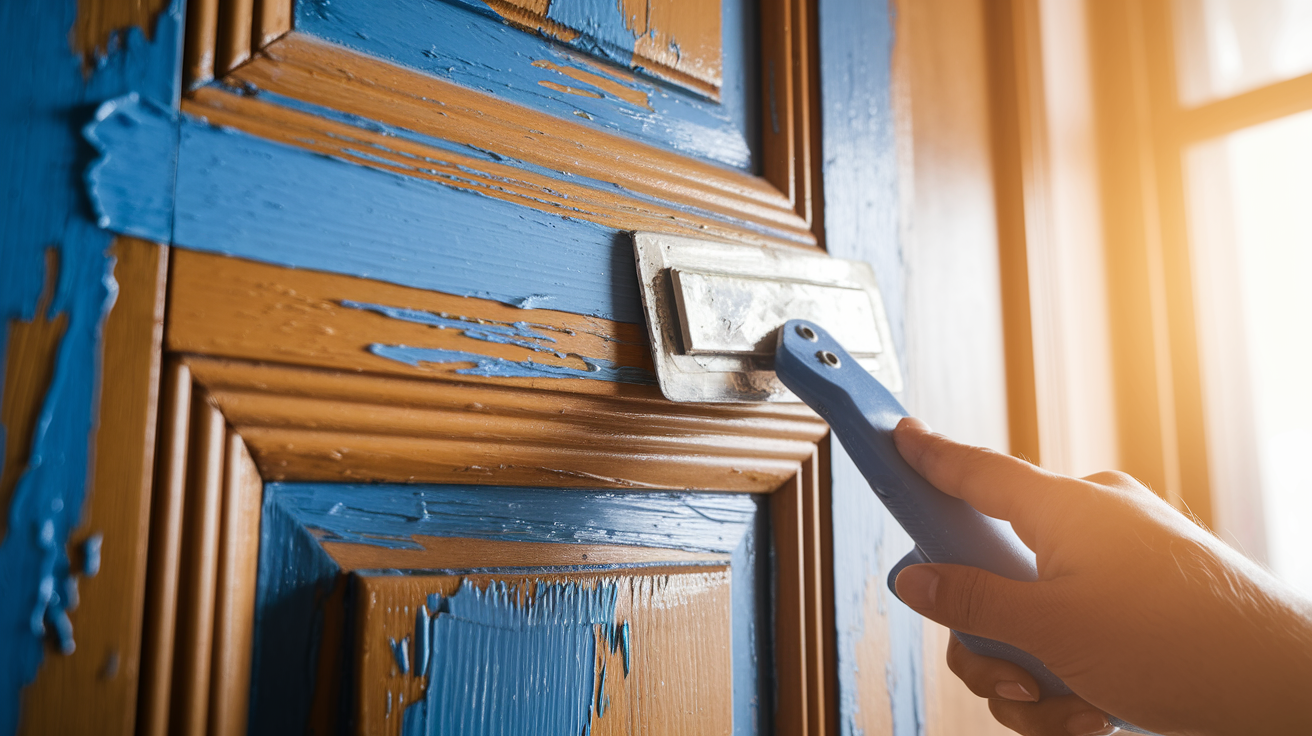
Multiple coats of paint over the years can add a sixteenth inch or more to a door edge. This builds up gradually, so you might not notice until the layers finally cause binding. The problem shows up most where the door edge meets the jamb when closed.
Signs of paint buildup: shiny rubbing spots on the edge where paint’s been polished smooth by repeated contact, paint transfer marks on the jamb, and obvious thick ridges visible when you look close at the edge. Sometimes you can see multiple color layers if the door’s been repainted several times.
-
Close the door and use a pencil to mark where it binds against the frame.
-
Open it and apply painter’s tape to the finished door face on both sides, right up to the edge, to protect the surface you want to keep nice.
-
Use 80 grit sandpaper or a paint scraper to remove excess paint from the door edge only, focusing on the areas you marked.
-
Sand until the paint layer’s flush with the original wood or down to an earlier, thinner layer.
-
Smooth the sanded area with 120 grit sandpaper, then reseal the bare edge with primer and paint that matches the door.
For doors with extremely thick latex paint buildup, a heat gun can soften it for easier scraping. Use this carefully. Heat guns create fumes and are a fire risk if you hold them too close or in one spot too long. Point the heat gun at the paint for a few seconds until it bubbles, then scrape it off immediately. Work in a well ventilated area. For most buildup, simple sanding with 80 grit removes enough material without the hazards of heat.
Adjusting Strike Plates and Removing Material from Doors
When simpler fixes don’t work, you need to adjust the strike plate or remove material from the door itself. These take more time, usually one to two hours, but they create permanent solutions for doors sticking from wood expansion, frame misalignment, or clearance issues.
Strike Plate and Latch Adjustment
Strike plate problems show up as a door that latches but needs an extra push to close fully, a latch bolt that rubs or scrapes against the strike plate instead of sliding smooth into the opening, and a door that closes but bounces right back open because the latch can’t engage.
-
Close the door slowly and watch how the latch bolt aligns with the strike plate opening.
-
If the latch hits high or low on the strike plate, use a metal file to enlarge the opening vertically until the latch slides in smooth.
-
If the latch is off to the side, loosen the strike plate screws and move the whole plate up to an eighth inch in the direction needed.
-
Test the door repeatedly and adjust little by little rather than making big changes all at once.
-
Once the door latches smooth, touch up any bare metal or wood around the strike plate area with paint.
If strike plate problems started recently and other doors are also showing alignment issues, that often means foundation settling. Small amounts of settling are normal, but rapid changes or cracks appearing in walls mean you should get a professional assessment rather than just adjusting the strike plate and ignoring what’s underneath.
Removing Material from Door Edges and Top
Start by taking the door completely off. Tap out the hinge pins from bottom to top using a hammer and screwdriver placed under the pin head. Lift the door off once all pins are out. Lay it across two sawhorses so you can work comfortably. Look at the edge for drag marks, shiny spots, or areas where the finish’s worn away, which shows exactly where the door’s rubbing.
-
Apply masking tape along the door edge where you’ll be working so the pencil line shows up clear.
-
Set a compass to one eighth inch gap (pencil tip and metal point one eighth inch apart).
-
Hold the compass with the metal point running along the jamb while the pencil marks the door edge, scribing a line that shows exactly how much material to remove.
-
Secure the door on its edge using clamps or by wedging it between sawhorses so it won’t move while you work.
-
Use a belt sander with 80 grit sandpaper or a hand planer to remove wood up to the pencil line without crossing it.
-
Check your progress often with a straightedge held against the edge to make sure you’re keeping it square and not creating a bevel.
-
Finish with 120 grit sandpaper to create a smooth surface.
Seal the bare wood right after sanding. Unsealed wood absorbs moisture fast and will swell again within days. Apply primer first, then paint or stain to match the rest of the door. Use a lint free rag to apply the finish carefully to the edge only. A brush tends to slop finish onto the door face, creating drips and an uneven look that’s hard to fix once it dries.
Door Bottom Trimming and Clearance
Doors should have half to three quarters inch of clearance above the finished floor. Problems happen when someone installs new carpet without trimming the doors first, when floor tile gets added during a bathroom remodel, when the door sags from loose hinges, or when thresholds get installed or replaced with thicker versions.
Common causes and fixes:
- New carpet or padding added: Trim the door bottom to restore proper clearance
- Uneven floor from settling: Shim the hinges on the high side to level the door rather than trimming it
- Threshold installed too high: Either plane the door bottom or remove and reinstall a lower threshold
- Debris or floor damage: Clean thoroughly and check for water damaged subflooring that may have swelled
To trim material off the bottom, remove the door and lay it on sawhorses. Mark your cut line with a pencil and straightedge, allowing three quarters inch clearance above the finished floor. Use a circular saw with a fine tooth blade designed for finish carpentry. Cut from the finished side to prevent splintering of the visible surface. Seal the cut edge right away with primer and paint to block moisture absorption.
Hollow core doors have limited trimming capacity. You can safely remove one to two inches from top or bottom before you hit the hollow interior. Once you cut into the hollow core, the door loses structure and looks obviously damaged. Solid wood doors can be trimmed more because they’re solid all the way through, though removing more than two inches starts to look out of proportion and may mess with door hardware.
Material-Specific Sticking Door Solutions
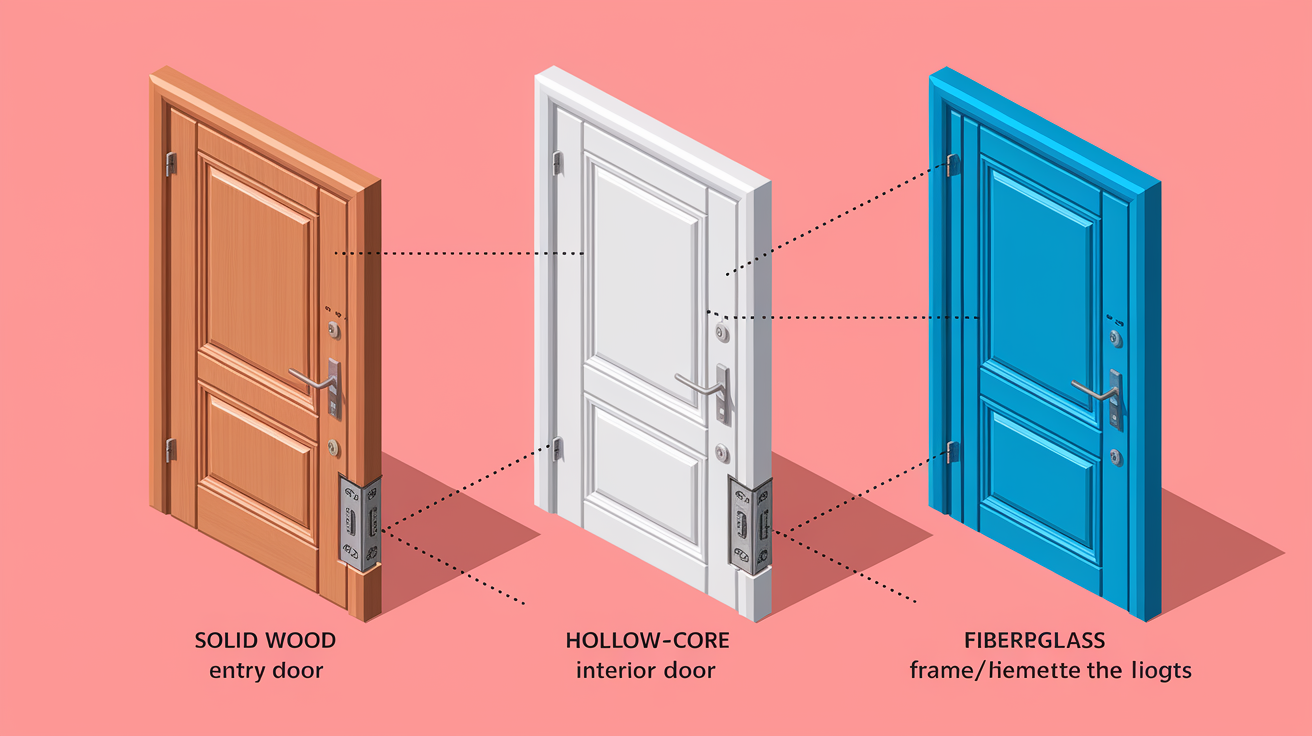
The repair approach that works depends partly on what the door’s made from and whether it’s inside or facing exterior weather.
Wood and Solid Wood Doors
Solid wood’s the most forgiving door material for DIY repairs. You can sand it, plane it, and trim it a lot without worrying about hitting hollow sections or damaging a thin veneer. The main issue with wood doors is moisture absorption, which causes seasonal swelling. Wood doors respond well to all the repair techniques described earlier. The key after any repair that removes material is sealing the bare edge immediately with primer and paint or polyurethane finish. Unsealed wood edges absorb moisture fast and the door will start sticking again within days or weeks.
Hollow Core Interior Doors
These lightweight doors have a wood frame around the perimeter with a hollow center, making them affordable and easy to hang. The catch is how much material you can remove. You can safely trim one to two inches from top or bottom before you expose the hollow interior. You can’t plane the long edges hard because the solid frame’s only about an inch wide. If you sand too deep, you’ll hit hollow space and create a visible dip. For hollow core doors, focus first on hinge adjustments and frame modifications using the long screw technique. If the door’s severely warped or damaged, replacement’s usually more practical than trying extensive repairs.
Metal and Fiberglass Entry Doors
You can’t sand or plane metal or fiberglass doors. Sticking in these usually points to hinge problems or frame settlement rather than door material issues. Use wood shims behind the hinges to shift the door position and improve alignment. If the door’s binding because of compressed weather stripping, remove and replace it with new material. Check whether the frame itself has pulled away from the wall, which sometimes happens with exterior doors as the house settles. If the frame’s moved, use the long screw technique to draw it back against the wall framing. Metal and fiberglass doors may also need frame adjustment using shims to make the frame opening square again if settling’s distorted it.
When door material shows damage like severe warping that creates a permanent twist, rot in a wood door from water exposure, or major dents in a metal door, replacement becomes more cost effective than repair. A moderately warped door you spend hours trying to adjust will likely warp again. A rotted door will keep deteriorating even after you’ve sanded and sealed the damaged area.
Preventing Future Door Sticking Problems
Preventive maintenance takes less time and saves more money than fixing problems after they develop. Simple regular attention keeps doors swinging smooth for years.
- Tighten hinge screws once a year before they work loose enough to cause sag and binding
- Seal all six surfaces of the door (top edge, bottom edge, both long edges, and both flat faces where they meet the frame) with paint or polyurethane to block moisture movement in and out of the wood
- Keep indoor humidity between 30 and 50 percent year round using humidifiers in winter and dehumidifiers in summer to prevent wood expansion and contraction
- Lubricate door hinges annually with silicone spray or graphite powder so they swing smooth without resistance
- Inspect weather stripping on exterior doors every fall and replace any sections that are compressed, torn, or no longer sealing tight
- Fix water leaks and drainage problems near doors right away, including leaky gutters, missing downspout extensions, or poor grading directing water toward the foundation
- Don’t paint the door edge to the jamb, which creates a paint bridge that glues the door to the frame
- Check door operation seasonally and address minor binding right away before it gets worse and needs more extensive repairs
Watch how your doors behave as seasons change. Mark your calendar to check doors in late spring when humidity rises and wood starts to swell, and again in fall when dry indoor heating begins and wood contracts. Pay attention to which specific doors show seasonal patterns of sticking and smooth operation. Exterior doors and bathroom doors usually show the most dramatic seasonal changes because they get the biggest swings in moisture exposure.
When a door keeps sticking despite your repair attempts, or when the sticking gets worse over months, that often means foundation settling, frame rot where the wood’s lost structure, or other structural problems DIY repairs can’t fix. These underlying issues need professional evaluation to figure out whether you need foundation work, frame replacement, or if you’re dealing with normal house movement that just needs ongoing minor adjustments. If you’re facing persistent structural or frame issues that keep causing doors to stick, a professional assessment can identify solutions that prevent the problem from coming back.
When to Call a Professional for Door Repairs

Most sticking door problems are straightforward DIY fixes, but certain situations need professional expertise. Attempting repairs in these cases might make things worse, waste money on ineffective solutions, or miss underlying issues that need attention.
- Multiple doors throughout the house suddenly start sticking at the same time (foundation settlement affecting door frames throughout the structure)
- Door frame’s visibly pulling away from the wall with gaps appearing between frame and wall surface (structural issue needing frame re-anchoring)
- Door jamb shows rot, soft spots, or water damage (needs frame replacement, not just adjustment)
- Door shows severe warping beyond half an inch that creates a visible twist (door replacement needed)
- Problems keep coming back despite multiple repair attempts (underlying cause hasn’t been identified or fixed)
- Gaps appear in walls or ceilings near the door opening (structural movement that may mean foundation problems)
- Exterior door frame damage affects home security or allows air and water in (needs proper weatherproofing and structural integrity)
Professional diagnosis typically costs $75 to $150 for a carpenter to evaluate the problem and recommend solutions. Simple repairs like frame adjustments or strike plate repositioning run $150 to $300. Full frame replacement costs $300 to $600 depending on size and location. Complete door and frame replacement ranges from $400 to $1,200 depending on whether you’re installing a standard interior hollow core door or an insulated exterior entry door with hardware.
Professionals can identify root causes that prevent recurring problems. A carpenter with experience will recognize whether that sticking door means normal wood movement, foundation settling, moisture sources like hidden leaks, or structural issues needing engineering assessment. That expertise potentially saves money long term compared to repeated DIY attempts that address symptoms without solving what’s underneath.
Final Words
Most sticking doors come down to loose hinge screws that have worked themselves free over time. Tighten them with 3-inch screws through the jamb, and you’ll often solve the problem in 20 minutes.
If that doesn’t work, knowing how to fix a sticking door means matching the symptom to the cause. Paint buildup, humidity swelling, or misaligned strike plates each need their own approach.
The good news? You can handle most of these repairs yourself with basic tools and a little patience. Seal your work when you’re done, and the fix should hold for years.
FAQ
How do you fix a door that’s sticking?
A door that’s sticking is usually fixed by tightening loose hinge screws with a manual screwdriver, then replacing the middle screw on each hinge with a 3-inch screw that drives through the jamb into the wall stud, which eliminates door sag and binding in about 70% of cases.
How do you fix a door rubbing at the top?
A door rubbing at the top is typically fixed by tightening the bottom hinge screws with 3-inch screws to pull the door back into alignment, or by shimming out the top hinge slightly if tightening alone doesn’t create enough clearance between the door and frame.
How do you stop a swollen door from sticking?
A swollen door is stopped from sticking by sanding or planing the door edge where it binds, then immediately sealing the bare wood with primer and paint to prevent future moisture absorption, while also addressing humidity sources by running a dehumidifier or improving ventilation.
Why is my front door suddenly hard to open?
A front door suddenly becomes hard to open because hinge screws have worked loose over time allowing the door to sag, or because wood swelling from humidity has expanded the door, or because paint buildup has created friction points where the door meets the frame.
What causes a door to stick only in humid weather?
A door sticking only in humid weather is caused by wood absorbing moisture from the air and expanding 1/8 to 1/4 inch, particularly affecting exterior doors and interior doors in bathrooms, with the problem improving during dry winter months when wood contracts.
Can you fix a sticking door without removing it?
You can fix a sticking door without removing it by tightening all hinge screws and replacing middle screws with 3-inch versions, or by sanding binding areas while the door remains hung, though removing the door allows more precise planing and edge work.
How much clearance should a door have?
A door should have 1/2 to 3/4 inch clearance above the finished floor, a nickel-width gap around the perimeter between door edge and frame, and enough space that it swings freely without rubbing or requiring force to close.
What tools do you need to fix a sticking door?
You need a screwdriver set, 3-inch screws, sandpaper in 80 and 120 grit, a hand planer or belt sander, wood shims, a level, graphite powder or silicone spray, wood filler, and a hammer to fix most sticking door problems.
How do you know if a door is warped?
You know a door is warped by laying a straightedge along the door edge and checking for gaps or bowing, noting if the door binds at top and bottom but not the middle, or observing a twisted appearance when looking down the door length.
Can hollow core doors be trimmed?
Hollow core doors can be trimmed a maximum of 1 to 2 inches from the top or bottom before exposing the hollow interior section, making them less forgiving than solid wood doors and sometimes requiring replacement instead of trimming for significant adjustments.
How do you adjust a strike plate?
You adjust a strike plate by filing the opening with a metal file if the latch is slightly misaligned, or by loosening the screws and repositioning the plate up to 1/8 inch in any direction, testing repeatedly until the latch engages smoothly.
What causes paint buildup on door edges?
Paint buildup on door edges is caused by multiple paint layers applied over years without sanding between coats, adding 1/16 inch or more thickness that creates friction, visible as shiny rubbing spots and paint transfer marks on the jamb.
How do you prevent doors from sticking?
You prevent doors from sticking by tightening hinge screws annually, sealing all six door edges with paint or polyurethane, maintaining indoor humidity between 30 and 50%, lubricating hinges with silicone spray, and addressing minor binding immediately before it worsens.
When should you call a professional for a sticking door?
You should call a professional when multiple doors throughout the house suddenly stick indicating foundation settlement, when the door frame shows rot or pulls away from the wall, when severe warping exceeds 1/2 inch, or when problems recur despite multiple repair attempts.
How long does it take to fix a sticking door?
Fixing a sticking door takes 15 to 30 minutes for simple hinge adjustments, 1 to 2 hours for paint removal or sanding door edges, and 1 to 2 hours for planing or trimming material, with total time depending on the severity and number of binding locations.