


You just spotted a brownish ring on your ceiling and figured you’d slap some paint over it this weekend. That rarely works. The stain bleeds through in days, often darker than before, because you skipped the steps that actually matter. Fixing a ceiling water stain without tearing out drywall is possible, but only if you stop the leak first, prep the surface right, and use the correct primer. Miss any of those, and you’re repainting the same spot in a month.
Finding and Stopping the Leak Source Before Ceiling Repair

You can’t fix a ceiling water stain until you stop the water coming in. Painting over a stain while water’s still leaking is like putting a bandage on a cut that won’t stop bleeding. The stain will reappear within days or weeks, often worse than before, and you’ll have wasted time, materials, and effort on a repair that never had a chance of working.
Roof-Related Water Sources
Roof problems are the most common cause of ceiling stains in single-story rooms or top-floor spaces. Damaged or missing shingles let rainwater seep through, often traveling along roof decking or rafters before dripping onto your ceiling in a spot that’s not directly under the roof damage. Compromised flashing around chimneys, skylights, or vent pipes creates gaps where water sneaks in. Clogged gutters force water to back up under shingles, especially at the roof edge. Ice dams in winter cause melt water to pool and work its way under roofing materials.
The timing tells you a lot. If your ceiling stain appears during or right after rain, or when snow melts, you’re looking at a roof issue. Check your attic during the next storm with a flashlight. Look for water running down rafters, wet insulation, or drips. Trace the water path uphill. The actual roof breach is usually higher than where you see water in the attic.
Plumbing Leak Indicators
Plumbing leaks create stains that show up on ceilings below bathrooms, kitchens, or anywhere pipes run through the ceiling space. Supply line leaks (the pipes bringing water to fixtures) often create spreading stains because they’re under pressure and leak continuously when water’s running. Drain pipe issues might only stain when someone uses the fixture above. Think shower, sink, or toilet. You might notice the stain grows right after someone takes a bath upstairs.
Look for these signs: stain directly below a bathroom or kitchen, water spots that appear when fixtures are used, rust-colored rings suggesting metal pipe corrosion, or localized wet areas on the ceiling. Check the area above the stain. A toilet with a wax ring seal problem, a leaking shower pan, a dripping supply line under the sink, or a water heater with a slow drip can all cause ceiling damage in the room below.
Condensation and HVAC Issues
These issues create recurring stains that are harder to pin down because there’s no dramatic leak. Attic condensation happens when warm, moist indoor air meets cold roof decking, especially in poorly ventilated or under-insulated attics during winter. The moisture condenses and drips down, creating ceiling stains that might appear on cold nights. Poor bathroom or kitchen ventilation traps moisture that eventually saturates drywall and shows as stains.
HVAC systems cause problems when condensate drain pans overflow, drain lines clog, or ductwork sweats because of missing insulation. These typically create smaller, sometimes spreading stains that might come and go with system use. You might notice a musty smell before you see the stain. If your stains appear seasonally, don’t follow rain patterns, and seem to happen when humidity is high or when heating and cooling systems run hard, you’re probably dealing with condensation or HVAC issues.
Skipping the source repair is the most expensive mistake you can make with a water stain. Every day water keeps coming in, damage spreads through drywall, insulation, and framing. What started as a $50 paint job becomes a $500 drywall replacement, then a $2,000 structural repair. Fix the leak first, let everything dry completely, then repair the cosmetic damage. That’s the order that works.
Understanding Different Types of Ceiling Water Stains
The way a water stain looks tells you what caused it, how bad the damage is, and whether you need to act fast or can take your time with the repair. Fresh stains from active leaks look different than old, dried stains from a problem that’s already fixed. Knowing what you’re looking at helps you decide if this is a weekend DIY project or something that needs a professional right now.
| Stain Appearance | Likely Cause | Urgency Level |
|---|---|---|
| Brown or rust-colored ring with darker center | Active or recent leak, water still present or just dried | High. Address immediately, water source likely still active |
| Yellow dispersed stain with soft edges | Old water damage or ongoing condensation issue | Medium. Source may be resolved, but verify before repairing |
| Dark brown with sagging or bulging ceiling | Severe water saturation, drywall compromised | Immediate. Potential collapse risk, call professional |
| Small clustered spots, greyish tint | Condensation buildup or minor plumbing drip | Medium. Monitor for growth, improve ventilation |
| Irregular spreading pattern, wet to touch | Ongoing leak, water actively entering | High. Stop water source immediately, may need emergency repair |
| Circular stain with sharp, defined edges | Past leak that has stopped, fully dried | Low if completely dry. Safe to repair once source confirmed fixed |
If you repair a stain and it comes back within weeks, your leak source isn’t actually fixed. The water’s finding a way in, either from the original problem that wasn’t fully resolved or from a separate issue you haven’t found yet. This is the clearest sign you need to do more detective work before touching paint or primer again. Recurring stains also help you decide between DIY and professional help. One stain that appeared months ago and hasn’t changed? Probably DIY-friendly once you verify it’s dry and the source is resolved. Multiple stains showing up in different areas, or one stain that keeps growing? That’s your cue to bring in someone with moisture detection equipment and structural assessment experience.
When to Call a Professional for Ceiling Water Damage Repair

Most small, fully dried water stains can be cleaned, primed, and painted by a homeowner with basic skills and patience. But some situations are beyond DIY scope, and recognizing them early saves you from starting a project you can’t finish properly. You don’t want to invest a weekend and $75 in materials only to realize halfway through that you needed professional help from the start.
Here are the situations where professional assessment and repair make sense:
Stain reappears within weeks or months after you’ve repaired it. Ceiling is sagging, feels soft or spongy when you press it, or has visible bulging. Damaged area is larger than 2 feet in any direction. You have multiple stains in different locations suggesting widespread issues. Visible mold growth covers more than 10 square feet. Water came from a sewage backup, toilet overflow, or other contaminated source. You suspect damage to ceiling joists, framing, or structural components. You can’t locate where the water is coming from after checking obvious sources. Ceiling is plaster rather than drywall (requires different repair techniques). You’re preparing the home for sale and repairs need to pass inspector scrutiny.
Professionals bring tools most homeowners don’t own. Moisture meters that detect hidden dampness behind surfaces, thermal imaging cameras that reveal water paths inside walls and ceilings, and proper mold testing equipment when contamination is suspected. They can assess whether ceiling joists are weakened, if insulation needs replacement, and whether electrical wiring in the ceiling has been compromised. That structural knowledge prevents cosmetic repairs that hide dangerous underlying damage.
Professional ceiling repair also includes proper documentation, detailed moisture readings before and after drying, and warranties on completed work. If you need to file an insurance claim, professional estimates and documentation carry weight that DIY repairs don’t. The cost difference matters less when you factor in the time value of your weekend, the risk of incomplete repairs, and the potential for making the problem worse by sealing moisture inside with primer and paint before everything is completely dry. A professional job also means you’re not spending a Saturday on a ladder with your neck cramped, holding a roller overhead, which has real value when you’re trying to decide if DIY is worth it.
Tools and Materials Needed for Water Stain Repair
Having everything you need before starting prevents mid-project trips to the store and the frustration of letting primer half-dry while you hunt for a tool. Organization matters more than you might think when you’re working overhead.
For a basic small to medium water stain repair, expect to spend between $30 and $80 on materials if you already own basic tools like a ladder and drop cloths. The single most important purchase is quality stain-blocking primer, which runs $15 to $25 per quart but makes the difference between a repair that holds and one that fails.
| Category | Specific Items | Purpose |
|---|---|---|
| Safety & Protection | Drop cloths, safety glasses, dust mask or respirator, gloves, sturdy ladder | Protect floors and furniture, keep paint and dust out of eyes and lungs, prevent slips and falls |
| Cleaning & Prep | Mild detergent or white vinegar, spray bottle, clean rags or sponges, fine-grit sandpaper (150 to 220), sanding block or pole sander, vacuum or tack cloth | Remove dirt, mildew, and loose material so primer can bond properly |
| Patching & Repair | Joint compound or patching compound, putty knife (4-inch and 6-inch), drywall tape if needed for cracks | Fill holes, smooth damaged areas, rebuild surface so ceiling is flat before priming |
| Priming | Stain-blocking primer (shellac-based like BIN or oil-based like Kilz), angled brush for edges, roller and roller frame, roller extension pole | Seal water stain and prevent it from bleeding through topcoat paint |
| Finishing Paint | Flat ceiling paint (white or color-matched), paint tray and liner, additional roller covers, angled brush for touch-ups | Final cosmetic layer that blends repair into surrounding ceiling |
The primer choice really matters. Stain-blocking formulas like Kilz Original (oil-based) or Zinsser BIN (shellac-based) are engineered to seal tannins, smoke, water stains, and other discolorations that regular primers and paints can’t cover. You’ll see the difference immediately when you apply them. These primers are thick, they smell strong, and they seal stains in one coat where standard primer takes three coats and still lets brown bleed through. Spend the extra $8 on a proper stain blocker. It’s not an area to save money.
Drying and Assessing Water Damage to Your Ceiling
Once you’ve stopped the leak, the ceiling needs time to dry completely before you can repair the stain. Rushing this step is one of the most common mistakes in water stain repair. Paint and primer seal moisture inside drywall, creating perfect conditions for mold growth and causing the stain to reappear within weeks. Minimum drying time is 48 to 72 hours after the leak stops, but that’s just a starting point. Thicker drywall, colder weather, high humidity, or heavy saturation all require longer drying periods.
You can tell a ceiling is properly dried by touch and appearance. The stained area should feel cool and dry to your hand, not damp or clammy. The drywall texture should be firm when you press it gently, not soft or spongy. If you see any darkening of the stain or feel moisture, wait another day or two. A moisture meter (available at hardware stores for under $30) gives you objective readings. Look for moisture content below 16% before proceeding with repairs. Professional restorers often use readings below 12% as their threshold. If you don’t have a meter, the touch test combined with adequate drying time works for most DIY repairs.
Watch for warning signs that indicate damage beyond simple staining. A ceiling that sags even slightly has absorbed significant water weight and the drywall is compromised. Soft spots where your finger pressure creates a dimple mean the drywall paper and gypsum core have lost structural integrity. Bulging areas suggest water is pooling on top of the drywall. Loose or bubbling drywall tape at seams means water has destroyed the joint compound bond. Any of these conditions require cutting out and replacing the damaged drywall section, not just painting over the stain. Trying to repair these problems with joint compound and paint is temporary at best and hides damage that weakens your ceiling structure.
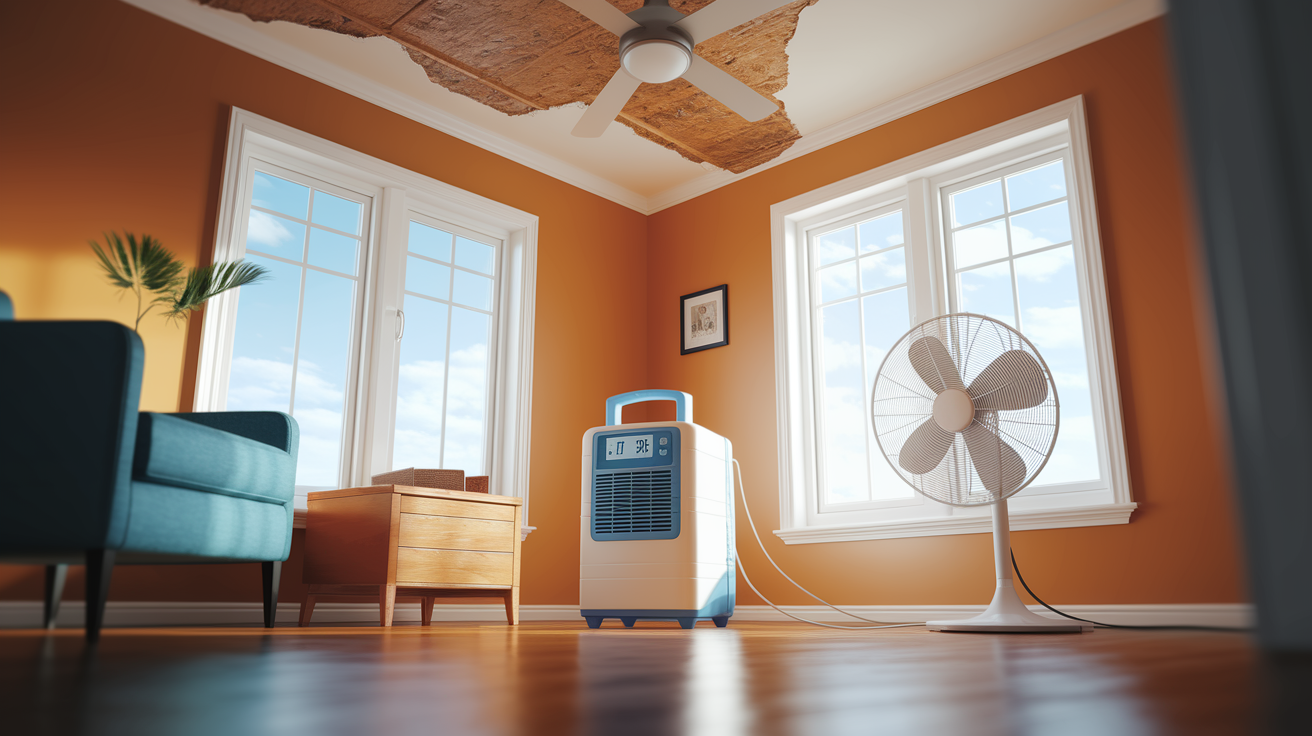
Speed up drying by creating airflow and reducing humidity in the space. Open windows when outdoor humidity is lower than indoor levels. Point a fan at the ceiling to move air across the wet surface. Run a dehumidifier in the room to pull moisture from the air, which accelerates evaporation from the ceiling. Increase heat slightly if it’s cold. Warm air holds more moisture and speeds drying. This active drying approach can cut drying time in half while reducing the risk of mold growth that starts within 48 hours in damp conditions. Don’t aim heat guns or high-temperature devices directly at drywall. That can warp the surface or create new problems.
Cleaning and Preparing the Ceiling Surface for Repair
Proper surface preparation determines whether your repair lasts years or fails in months. Dirt, dust, grease, mildew, and loose paint prevent primer from bonding to the ceiling. Taking an extra 20 minutes to prepare the surface correctly saves you from redoing the entire repair later.
Here’s the cleaning and prep sequence:
Lay drop cloths on floors and cover furniture directly below the work area. Ceiling work creates drips and dust that spread farther than you expect.
Wipe down the entire stained area and surrounding 12 inches with a cleaning solution of mild detergent and warm water, or a mix of equal parts white vinegar and water. Use a damp sponge or rag, not a soaking wet one. You’re removing surface contamination, not saturating the ceiling again.
If you see any dark spots that might be mildew, treat them with a diluted bleach solution (one part bleach to three parts water). Spray or wipe it on, let it sit for 10 minutes, then wipe clean with plain water. Make sure the room is well ventilated. Bleach fumes are harsh in enclosed spaces.
Let the cleaned area dry completely. This usually takes 2 to 4 hours depending on humidity and air circulation. Don’t skip ahead while the surface is damp.
Remove any loose or peeling paint by scraping gently with a putty knife. You want edges that won’t lift when you apply primer, not perfect smoothness yet.
Sand the stained area and surrounding 6 inches with fine-grit sandpaper (150 to 220 grit works well). You’re creating a slightly rough surface texture that helps primer grab. Use a sanding block or pole sander to reach comfortably. Light pressure is enough. You’re not trying to remove material, just scuff the surface.
Cleaning removes the layer of grime, cooking oils, dust, and other contaminants that accumulate on ceilings over time. These substances create an invisible barrier between your primer and the ceiling surface. Even if the ceiling looks clean, it probably has a film you can’t see. When primer tries to bond to contaminated drywall, it adheres to the contamination layer instead of the drywall itself. That contamination layer eventually releases, taking your carefully applied primer and paint with it. A clean surface means the primer soaks into the drywall paper and creates a mechanical and chemical bond that holds for years.
Wear safety glasses when working overhead to keep cleaning solution and sanding dust out of your eyes. Use a dust mask during sanding. Drywall dust is fine and irritating to breathe. Ventilate the area when using bleach or strong cleaners by opening windows and using a fan to move air out of the room. If you’re dealing with visible mold beyond a few small spots, or if you have respiratory sensitivities, consider wearing a respirator rated for mold spores rather than a basic dust mask. Most water stain cleaning and prep work doesn’t require heavy-duty protection, but respect chemicals and dust that can irritate eyes, lungs, and skin.
Patching Damaged Drywall on Water-Stained Ceilings
Water damage often goes beyond surface staining and creates small holes, cracks, or areas where the drywall paper has delaminated from the gypsum core. These problems need patching before you can prime and paint. Minor damage where the surface is just rough or slightly pitted can be repaired with spackle and light sanding. Deeper damage where water has dissolved the gypsum core or created holes requires layered application of joint compound or patching compound.
Follow this patching sequence for surface repairs:
Cut away any damaged drywall that’s soft, crumbling, or delaminated until you reach sound material. Use a utility knife to score and remove loose sections. The edges should be firm, not papery or soft.
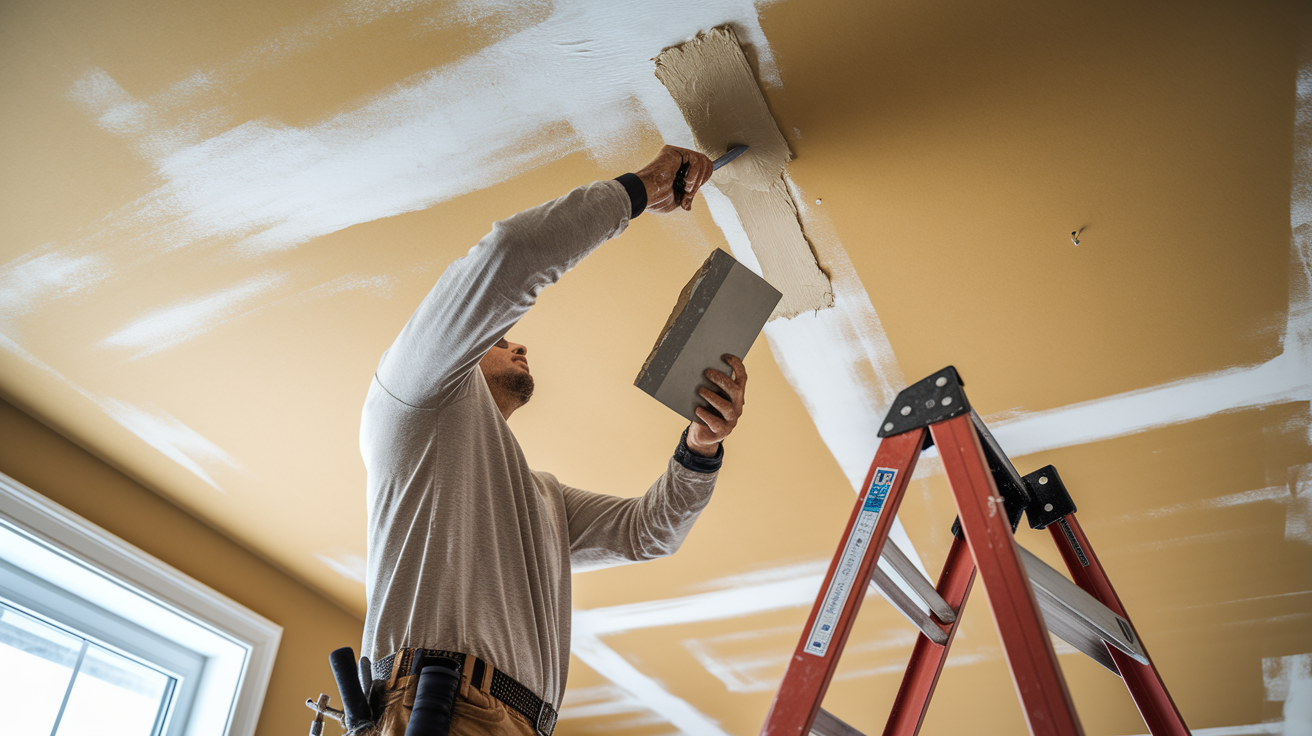
Apply a thin first layer of patching compound or joint compound with a 4-inch putty knife. Press it firmly into the damaged area, filling voids and smoothing it roughly level with the surrounding ceiling. Thin layers work better than one thick application.
Let the compound dry completely. This takes 2 to 4 hours for thin layers, longer if you applied it thicker than a dime’s thickness. The compound will change from dark or pink to white or pale as it dries.
Apply a second layer if the first coat shrinks below the surrounding surface, which is common. Feather the edges slightly beyond the first coat so you’re building a gradual transition rather than a defined lump.
Once the final coat is dry, sand the entire patched area smooth with 150-grit sandpaper on a sanding block. Work in light circular motions and check your progress by holding a straight edge or running your hand across the surface. The goal is a flat repair flush with the surrounding ceiling.
Apply a final skim coat if low spots remain after sanding. Let dry and sand again until you have a smooth, flat surface.
Wipe the area clean with a damp cloth or vacuum and tack cloth to remove all dust before priming. Dust under primer creates bumps that show through your final paint.
Patching adds one to two days to your project timeline when you account for drying time between coats and final sanding. Don’t rush the drying steps. Compound that hasn’t fully cured will gum up your sandpaper and creates uneven texture that shows through paint. You can speed things slightly with a fan pointed at the patched area, but there’s no way to skip the chemical drying process that turns wet compound into a solid surface.
When damage extends over 12 inches or you’re dealing with multiple scattered damaged areas, cutting out and replacing drywall sections becomes more practical than patching. Patching large areas requires multiple compound layers, extensive sanding, and careful feathering that’s difficult to get smooth enough to blend invisibly. A drywall patch (cutting a clean rectangle, installing backing, screwing in new drywall, then taping and finishing the seams) creates a better long-term result. This crosses into more advanced DIY territory or professional work depending on your comfort level with drywall installation and finishing.
Applying Stain-Blocking Primer to Prevent Water Marks
Standard primer and paint can’t cover water stains. The tannins and minerals dissolved in the water bleed right through multiple coats over time. You’ll paint the ceiling, it’ll look perfect for a week, then a ghostly brown shadow reappears. That’s where stain-blocking primer comes in. These specialized formulas seal and encapsulate stains chemically so they can’t migrate through your topcoat.
The difference between standard primer and stain blockers is in the binder chemistry. Regular latex primers are porous at a microscopic level, which works fine for new drywall but lets water-based stains pass through. Shellac-based blockers like Zinsser BIN create an alcohol-based barrier that dries hard and non-porous, sealing everything under it. Oil-based blockers like Kilz Original use petroleum solvents and cure into a tough, impermeable film. Both types work. Shellac-based primers dry faster (usually 45 minutes to an hour) and have extremely strong odor but unmatched stain blocking. Oil-based primers take longer to dry (3 to 4 hours) but have slightly lower odor and can be easier to work with for beginners.
Here’s the application technique for invisible repairs:
Shake or stir the primer thoroughly. These products often separate in the can and need aggressive mixing to recombine properly.
Cut in the edges of your repair area with an angled brush, extending about 2 to 3 inches beyond the stain perimeter. This extended coverage prevents edge bleed-through.
Load a roller with primer and apply it to the stained area in overlapping passes. Don’t overwork the primer or go back over areas that are starting to dry. This creates drag marks and uneven texture.
Maintain a wet edge by working in sections. Start at one side and work across without stopping until the area is covered.
Apply primer in one smooth, medium thick coat. Trying to stretch it thin leaves gaps. Applying it too thick creates sags and extended dry time.
Extend coverage 2 to 3 inches beyond the visible stain in all directions. Stains often spread farther into drywall than the surface discoloration shows.
Drying time depends on primer type, temperature, and humidity. Shellac-based BIN is usually ready for topcoat in 1 to 2 hours in normal conditions (65°F to 75°F, moderate humidity). Oil-based Kilz needs 3 to 4 hours minimum. Check the can instructions for specific guidance. Test if primer is ready by touching an inconspicuous spot lightly with your finger. It should feel dry and not tacky. If it’s still soft or sticky, wait longer. Painting over uncured primer softens both layers and can cause blending problems.
Common application problems include streaking (too little primer on the roller, solution is to load it properly and work faster), incomplete coverage where brown shows through (apply a second coat of primer after the first dries fully, don’t try to fix it with paint), and drips from overloading the roller (use moderate primer amounts and roll excess back into the tray before going overhead). Primer problems are easier to fix than paint problems, so take your time with this step and do it right. The primer layer is your insurance policy against stain reappearance.
Painting Over Primed Ceiling Water Stains

Once your stain-blocking primer is fully dry, you’re ready for the final paint layer that blends the repair into your existing ceiling. Ceiling paint is formulated differently than wall paint. It has a flat (matte) finish with almost no sheen, which hides small imperfections and creates uniform light reflection across the surface. Even minor sheen differences create visible patches on ceilings because light rakes across the surface at low angles and highlights irregularities.
Choose flat or matte ceiling paint, never use satin, eggshell, or semi-gloss on ceilings unless the entire room is painted in that sheen. The flatness matters more than the exact brand. Most standard white ceiling paints blend reasonably well with each other because ceiling paint doesn’t yellow as fast as wall paint. If your existing ceiling has aged significantly, you might notice a slight color difference between fresh white paint and the older yellowed surface, but this usually becomes less obvious as the new paint cures and ambient light equalizes the appearance.
Painting Technique for Invisible Repairs
Cut in the edges of your repair area with an angled brush loaded moderately with ceiling paint. Work 2 to 3 inches beyond the primed zone, creating an extended transition area between repair and existing ceiling.
Load your roller with paint and apply the first coat over the entire primed area plus the brushed-in border. Use moderate pressure and overlapping passes in a consistent direction. Roll slowly to avoid spattering paint.
Allow the first coat to dry for 2 to 4 hours depending on temperature and humidity. Follow the paint can instructions for recoat time.
Assess coverage under natural light and from multiple angles. Water stains often require a second coat even over proper primer because the texture difference between new and old paint shows until you build sufficient thickness.
Apply a second coat, this time feathering the edges 6 to 12 inches beyond the first coat’s perimeter. Use lighter pressure as you work away from the repair center, gradually blending into the untouched ceiling. This feathering technique creates a gradual transition that prevents a visible patch line.
Blend into the surrounding ceiling by rolling with very light pressure in random directions at the repair perimeter. You’re not adding significant paint, just softening the boundary between new and old.
Color matching presents the biggest challenge in spot repairs. Ceiling paint yellows over time from cooking oils, smoke, dust, and UV exposure. A ceiling that was bright white five years ago is now cream or light yellow, even if it doesn’t look that way to your eyes because the change was gradual. Fresh white paint creates an obvious bright patch. You have three options: touch up the stain and accept a slight color difference that will fade somewhat as the new paint ages, paint the entire ceiling for perfect uniformity (the professional approach), or paint larger sections (like the area between beams or corners) to create intentional breaks that hide the color transition. Most DIY repairs opt for the first approach and find the difference becomes less obvious over several weeks.
Drying time between coats is usually 2 to 4 hours for ceiling paint. The surface will feel dry to touch after an hour, but the paint hasn’t cured enough for a second coat yet. Applying subsequent coats too soon softens the previous layer and causes the roller to pull and drag, creating texture problems. Inspect your work under different lighting conditions, including natural light at different times of day and overhead artificial light at night. Stains that disappear in dim light sometimes show faintly in bright morning sun, especially in the first few days before the paint fully cures. If you see a faint ghost stain after two coats, a third coat usually eliminates it. If the stain bleeds through after three coats, your primer application missed a spot or the stain is wicking moisture from behind, which means the leak isn’t fully resolved.
Restoring Texture to Popcorn and Specialty Ceilings
Textured ceilings require additional steps beyond the flat ceiling repair process because you need to match the existing pattern after patching. The most common textured ceiling is popcorn (also called acoustic texture), which has a bumpy, irregular surface. Other textures include knockdown (flattened peaks), orange peel (light dimpled texture), and hand-troweled patterns. Flat ceiling repair techniques leave smooth spots that stand out obviously on textured surfaces.
Popcorn texture is the trickiest to match. The texture itself is either hand-applied using a specialized spray gun or applied from pressurized cans available at hardware stores. Spray-on acoustic texture in cans costs $8 to $12 and works for small repairs under about 2 square feet. Shake the can vigorously for at least two minutes, test the spray pattern on cardboard, then apply light coats from 12 to 18 inches away, building texture gradually until it matches the surrounding ceiling height and density. Multiple light coats create more realistic texture than one heavy application that drips or creates unnatural clumps.
Here are your texture matching options for different ceiling types:
Spray-on acoustic texture in aerosol cans works for small popcorn ceiling repairs. Easiest DIY option but limited to small areas. Hand-applied texture using a dampened sponge dabbed in diluted joint compound recreates light orange peel or stipple textures. Knockdown texture requires applying thick texture compound with a trowel or knife, letting it set up for a few minutes, then lightly flattening the peaks with a clean trowel blade. Professional texture sprayers are necessary for large areas or precise matching of aged textures. Rental equipment available at tool rental centers. Texture matching kits sold at paint stores include sample cards and application tools for common patterns.
Matching aged texture is harder than it looks. Popcorn texture settles, yellows, and compresses over decades, creating a distinctive appearance that new bright-white texture can’t replicate immediately. You can get close by lightly misting the new texture with diluted tan or light beige paint after it dries, which ages it artificially, but perfect blending is difficult. Consider texturing a slightly larger area, working out to a natural break like a corner or beam, rather than creating a small textured island in the middle of a textured ceiling.
One critical note about older popcorn ceilings: homes built before 1980 often used acoustic texture that contained asbestos fibers. Disturbing this material by sanding, scraping, or removing it creates serious health risks. If your home was built before 1980 and has popcorn ceilings, have a sample tested by a certified asbestos lab before doing any repair work. Testing costs $30 to $50 and takes a few days. If asbestos is present, encapsulation (sealing with paint) is safe, but removal or significant disturbance requires professional abatement, not DIY repair.
Preventing Mold Growth During Ceiling Water Stain Repair

Water damage creates ideal conditions for mold growth, which starts within 48 to 72 hours after materials get wet. Mold needs three things: moisture, organic material (like the paper facing on drywall), and temperatures between 40°F and 100°F. Your ceiling provides the organic material and comfortable temperature. Managing moisture properly during repair prevents turning a cosmetic stain issue into a health and structural problem.
Visible mold requires treatment before you seal it with primer and paint. Small areas of surface mold, typically black, green, or grey spots or streaks covering less than 10 square feet, can be cleaned with a bleach solution (one part bleach to three parts water) or commercial mildewcide cleaners. Spray the solution on the moldy area, let it sit for 10 to 15 minutes to kill the mold, then wipe clean and allow the area to dry completely. Wear gloves and safety glasses when working with bleach, and ventilate the space well because the fumes are harsh. The goal is killing mold on the surface, not just wiping away the visible discoloration. Dead mold can be sealed and painted over, but live mold will continue growing under your fresh paint.
When visible mold covers more than 10 square feet, appears fuzzy or thick, or you smell persistent musty odors even after cleaning, call a mold remediation specialist rather than treating it yourself. Extensive mold suggests the problem goes deeper than the surface, possibly into insulation or framing, which requires professional assessment and proper containment during removal. Mold in ceiling cavities can affect indoor air quality and cause health symptoms like respiratory irritation, headaches, or allergy-like reactions. Painting over significant mold growth without proper treatment and source elimination doesn’t solve the problem. It temporarily hides it while making the situation worse.
Prevent mold during the repair process by controlling moisture and maintaining air circulation. After stopping the leak, set up fans to move air across the wet ceiling continuously until it’s completely dry. Use a dehumidifier in the room to lower ambient humidity, which speeds drying and prevents new moisture problems. Open windows when outdoor humidity is lower than indoor levels to exchange moist indoor air with drier outside air. Monitor the ceiling daily, feeling for dampness and watching for new staining or mold spots. If drying isn’t progressing after three to four days, you might need professional drying equipment like commercial dehumidifiers or air movers to pull moisture out of thick materials.
Long-term mold prevention after ceiling repair focuses on controlling the moisture sources that caused the original problem. Improve ventilation in bathrooms by installing exhaust fans that vent to the outside (not into the attic) and running them during showers and for 15 to 20 minutes after. Use exhaust fans in kitchens when cooking releases steam. Check that attic ventilation is adequate with proper soffit and ridge venting to prevent condensation buildup on cold surfaces. Run dehumidifiers in basements or humid climates to keep indoor humidity between 30% and 50%, which discourages mold without over-drying the air. Fix plumbing drips promptly and inspect areas prone to condensation like cold water pipes, which can be wrapped with foam insulation to prevent surface moisture. These ongoing practices prevent the conditions that led to your water damage and staining, reducing the chance you’ll be repairing ceiling stains again in a year or two.
Safety Precautions When Repairing Ceiling Water Damage
Working overhead on a ladder with chemicals, dust, and paint creates risks that don’t exist with floor-level projects. Your neck gets tired, your arms ache, drips land in your face, and maintaining balance while reaching adds physical challenge to every step.
Take basic safety seriously to avoid injuries that turn a weekend project into a trip to urgent care:
Use a sturdy step ladder or scaffolding rated for your weight plus tools and materials, position it on level ground, and never overreach to avoid repositioning it. Wear safety glasses or goggles to protect eyes from drips, dust, and debris falling from overhead. Use a dust mask or respirator when sanding drywall or working around any visible mold. The fine dust irritates lungs. Wear chemical-resistant gloves when using cleaning solutions, bleach, primer, or paint to protect skin from irritation. Turn off electricity at the breaker to any ceiling fixtures or fans in your work area before starting repair to prevent shock risk from wet conditions. Test ceiling stability by pressing gently before applying weight or pressure. Sagging or soft sections can collapse unexpectedly. Have a helper hold the ladder or hand you tools during overhead work.
Final Words
Ceiling water stains won’t fix themselves, and the stain you see is only part of the story.
The real work is finding and stopping the water source, letting everything dry completely, and then sealing it properly with stain-blocking primer before you paint.
Skip any of those steps and you’ll be back on the ladder in a few months doing it again.
When you learn how to fix ceiling water stains the right way, you protect your home’s structure, prevent mold, and get results that actually last.
If the damage runs deeper than surface stains, or you’re not sure where the water’s coming from, call someone who can trace it down and fix it right the first time.
FAQ
Can you remove water stains from a ceiling?
You can remove water stains from a ceiling by cleaning the area, sanding lightly, applying stain-blocking primer, and repainting with matching ceiling paint. The key is ensuring the leak source is completely fixed and the ceiling is fully dried before starting any cosmetic repair work.
Can a water damaged ceiling be fixed?
A water damaged ceiling can be fixed if the damage is identified early and the water source is stopped. Minor stains require cleaning, priming, and paint, while severe damage with sagging, soft spots, or extensive moisture may need drywall replacement and professional structural assessment before repair.
How do you touch up water stains on a ceiling?
You touch up water stains on a ceiling by first confirming the area is completely dry, then cleaning the stain, applying stain-blocking primer like Killz or BIN, and painting with flat ceiling paint. Feather the edges 6-12 inches beyond the stain to blend the repair seamlessly into the surrounding ceiling.
How much does it cost to fix water stains on a ceiling?
Fixing water stains on a ceiling costs approximately $30-$80 for small DIY repairs under two square feet, including materials like primer, paint, and sandpaper. Professional repairs range from $150-$500 for small stains to $1,000 or more for large areas requiring drywall replacement or structural work.
How long does a ceiling need to dry after water damage?
A ceiling needs to dry for a minimum of 48-72 hours after the water source stops before beginning repair work. Use fans, dehumidifiers, and open windows to accelerate drying. Confirm dryness by touch test or moisture meter, as painting over damp areas traps moisture and causes mold growth.
What primer blocks ceiling water stains permanently?
Stain-blocking primers like Killz or BIN block ceiling water stains permanently by sealing discoloration and preventing bleed-through to the topcoat. Oil-based and shellac-based formulas work better than standard primers because they create a barrier that stops tannins and minerals from migrating through new paint layers.
When should you call a professional for ceiling water damage?
You should call a professional for ceiling water damage when stains keep returning after repair, the ceiling is sagging or soft, damage exceeds two feet in any direction, visible mold covers over 10 square feet, or you cannot locate the water source. Professionals bring moisture detection equipment and structural assessment expertise.
How do you prevent mold after ceiling water damage?
You prevent mold after ceiling water damage by maintaining air circulation with fans, using dehumidifiers to control humidity, ensuring complete drying before sealing with primer, and treating any visible mold with diluted bleach solution before repair. Mold grows within 48-72 hours of water exposure without proper drying.
Can you paint over water stains without primer?
You cannot paint over water stains without primer and expect lasting results. Water stains contain minerals and tannins that bleed through standard paint, causing discoloration to reappear within days or weeks. Stain-blocking primer creates a sealed barrier that prevents this bleed-through before applying ceiling paint.
How do you match popcorn texture on ceiling repairs?
You match popcorn texture on ceiling repairs using spray-on acoustic texture in cans for small areas or professional texture guns for larger sections. Apply after priming, then paint once dry. Matching aged texture perfectly is difficult and may require texturing a larger area for consistent appearance across the entire ceiling.