



Ever notice how a 20 degree drop outside makes certain rooms feel 10 degrees colder, even with the heat cranked up? That’s drafty windows pulling heated air out while cold outside air rushes in to replace it. Sealing those gaps stops the air exchange, cuts heating bills, and makes rooms comfortable again without touching the thermostat. This guide walks you through finding leaks, understanding what causes them, and fixing them with weatherstripping, caulk, and temporary seals that cost $5 to $50 per window instead of $300 to $1,000 for replacement.
Detecting Window Drafts and Air Leaks

Finding drafts before you start sealing saves you from wasting time and materials on windows that don’t actually leak. Drafts show up in weird places sometimes, not just the obvious gaps you can see right away. Spending half an hour testing your windows tells you exactly which ones need work and what kind of fix each one needs.
You can find drafts five different ways:
Visual inspection on windy days. Stand next to each window and watch for moving curtains, blinds, or loose weatherstripping. Run a wet hand slowly around the frame. Cold spots and air movement are way easier to feel when your skin’s damp.
Smoke test. Light an incense stick and hold it near window edges, corners, and where the frame meets the wall. Watch the smoke. Steady smoke means good seal. Smoke that wavers, gets pulled sideways, or disappears into a gap shows you exactly where air’s leaking.
Check for visible gaps or cracked caulk. Look closely at caulk lines around the exterior and interior trim. Cracks, missing sections, or gaps behind trim let cold air in.
Look for condensation between double pane windows. Moisture trapped between glass layers that won’t wipe away means broken seals. Once seals fail, outside air passes between the panes and the window loses most of its insulating value.
Note which rooms feel coldest. The coldest rooms usually have the worst window leaks. Temperature differences of 5 to 10 degrees between rooms often point to specific problem windows.
Best time for testing is windy, cold days with your heat running at normal temperature. This creates maximum pressure difference between inside and outside, making drafts way easier to spot. On a calm 50 degree day, small leaks might not be noticeable. On a windy 20 degree day, those same gaps will be obvious.
Professional energy audits cost $200 to $500 but provide thermal imaging that shows exactly where heat escapes. Infrared cameras reveal temperature differences you can’t see, showing cold spots around frames, behind walls, and in corners where insulation’s failed or shifted.
Understanding What Causes Drafty Windows
Drafts result from age, settling, and temperature changes creating gaps in areas that used to be sealed. What sealed perfectly 10 or 20 years ago gradually fails as materials break down and the house shifts.
Seven causes create most drafts:
House settling over 10 to 20 years creates gaps between window frames and wall framing as foundations shift and lumber dries and shrinks.
Caulk becomes brittle and cracks after 5 to 10 years of UV exposure and temperature cycling from negative 20 degree winters to 100 degree summers.
Weatherstripping compresses and loses elasticity after 3 to 5 years of windows opening and closing, leaving gaps where sashes meet frames.
Broken seals in double pane windows let insulating gas escape, reducing thermal performance and allowing air to pass between glass layers.
Warped wood frames from moisture cycles prevent proper closure when wood swells in humid months and shrinks in dry periods.
Insulation behind window frames falls down or shifts if installers didn’t secure it properly during construction.
Thermal bridging through metal frames conducts cold directly inside. Aluminum frames especially turn into cold bars that radiate chill into rooms.
The stack effect explains why drafts worsen as temperatures drop. Heated indoor air rises and escapes through attics and upper story leaks, creating negative pressure inside. This vacuum actively pulls cold outside air through any gaps around windows and doors on lower floors. The greater the temperature difference, the stronger this effect becomes. On a zero degree night with indoor temperature at 68, the pressure difference can pull air through gaps with surprising force.
Single pane windows conduct 50 to 70% more heat than double pane equivalents, making frame sealing even more critical. When the glass itself is cold, any air leaks around the frame feel worse because you’re dealing with both heat loss through the glass and heat loss from air movement. Sealing gaps around single pane windows provides immediate comfort improvement even though the glass remains inefficient.
Essential Materials and Tools for Window Draft Repairs
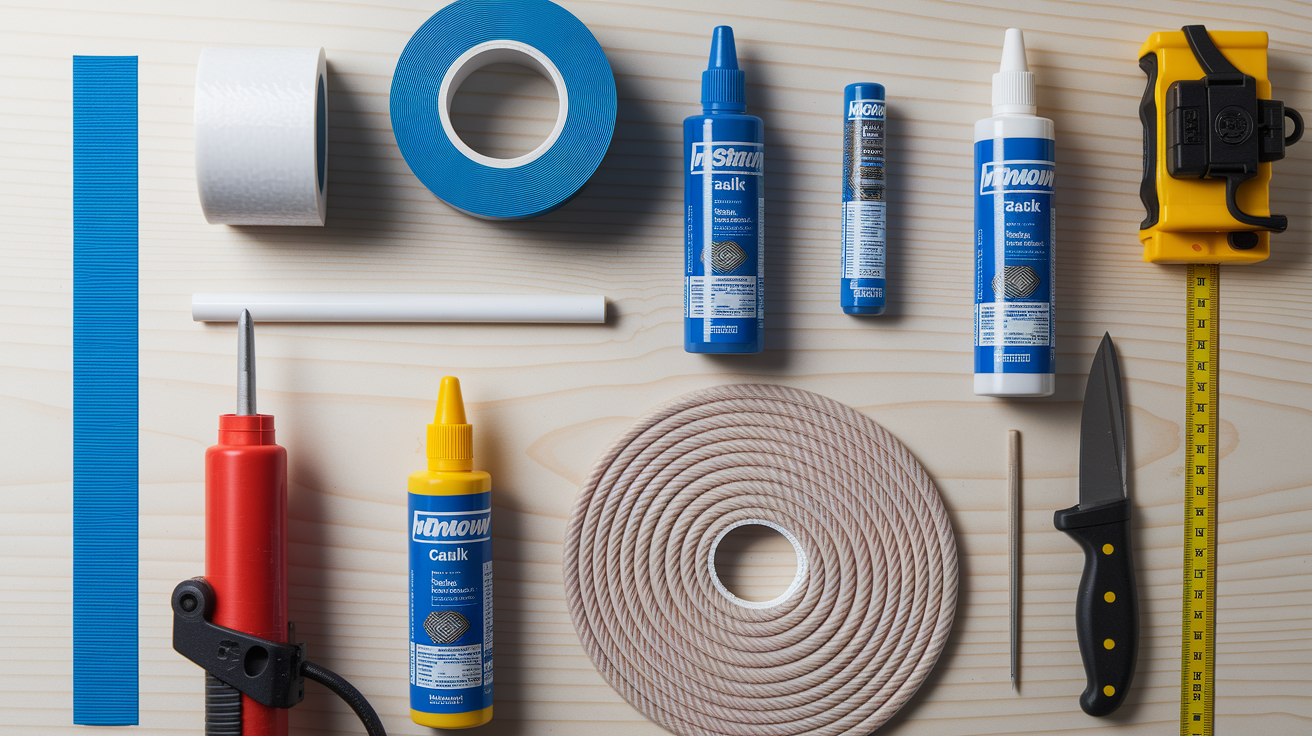
Having the right materials ensures repairs last and saves repeat trips to the store. Quality matters more than price for sealing materials. Cheap caulk and weatherstripping fail within a year or two, forcing you to redo the work.
| Material Type | Best For | Estimated Cost |
|---|---|---|
| V-strip weatherstripping | Window sashes and meeting rails | $8 to $15 per package |
| Foam tape weatherstripping | Uneven surfaces and compression sealing | $5 to $12 per roll |
| Silicone caulk | Exterior gaps exposed to weather | $8 to $12 per tube |
| Acrylic latex caulk | Interior trim that will be painted | $5 to $9 per tube |
| Window insulation film kit | Temporary winter sealing | $15 to $25 (covers 5 to 6 windows) |
| Rope caulk | Seasonal gaps and removable sealing | $4 to $8 per package |
| Caulk gun | Applying tube caulk | $6 to $15 |
| Utility knife and measuring tape | Cutting materials to size | $5 to $12 each |
Weatherstripping varieties serve different purposes based on gap size and how the window operates. Compression seals work for tight gaps of 1/16 to 1/4 inch where surfaces press together when the window closes. Adhesive foam tape handles uneven surfaces where gaps vary. V-strip creates a spring tension seal for window sashes that slide up and down. Magnetic weatherstrip attaches to metal frames and creates a flexible seal without adhesive. Choosing the right type for each location determines whether the seal lasts three years or just one season.
Quality differences matter. Spending $8 to $12 on premium silicone caulk versus $3 economy tubes results in repairs lasting 10 to 20 years instead of 2 to 3 years. Premium caulk remains flexible through temperature extremes and UV exposure. Economy caulk becomes brittle within two years, cracks apart, and falls out of gaps. Same pattern applies to weatherstripping. $12 high density foam holds its compression resistance through hundreds of open close cycles while $5 foam compresses flat and stops sealing within a year.
Step-by-Step Solutions to Stop Window Drafts
Drafts come from gaps in window seals and frames, not the glass itself. Even brand new double pane windows will feel drafty if the gap between the window frame and house framing isn’t sealed. Understanding this helps you focus on the actual problem areas.
Six repair methods from easiest to most involved:
Check and fix window locks for proper closure. Bent or broken locks prevent windows from pulling tight against weatherstripping. A window that doesn’t fully close leaves a gap all the way around the sash.
Apply new weatherstripping around movable window parts. This seals where sashes slide against frames and where upper and lower sashes meet. Detailed instructions appear in the next section.
Caulk gaps around window frames and trim. Seal the junction between window frame and interior or exterior trim, and between frame and siding. Complete caulking instructions follow in a later section.
Install insulation film for temporary winter sealing. Heat shrink plastic creates an air barrier for seasonal draft reduction. Full installation steps appear in an upcoming section.
Add rope caulk for seasonal gaps. Press this removable putty like material into gaps that open and close with seasonal wood movement. It pulls out in spring without damage.
Replace damaged window seals or glazing. This addresses broken seals between glass panes or deteriorated glazing compound on older wood windows.
When each method works best depends on severity and how permanent you need it. Quick fixes like rope caulk and insulation film provide immediate relief for renters or homeowners testing problem areas before committing to permanent repairs. Weatherstripping and caulking offer lasting solutions for homeowners planning to stay more than a few years. Seal and glazing replacement becomes necessary when structural components have failed beyond simple gap filling. The following sections provide complete instructions for weatherstripping, caulking, and film installation.
Most DIY fixes cost $5 to $50 per window versus $300 to $1,000 for professional window replacement. A typical house with 15 windows can be sealed for $150 to $400 in materials and one weekend of work. That same house would cost $4,500 to $15,000 for complete window replacement. The comfort improvement from proper sealing often eliminates the need for replacement unless windows have structural damage or broken seals between glass panes.
Applying Weatherstripping to Stop Window Air Leaks

Weatherstripping seals movable parts where window sashes meet frames and where operable sections come together. These are high movement areas that can’t be permanently caulked because the window needs to open and close. Flexible weatherstripping compresses when the window closes, creating an air barrier that expands back when the window opens.
Seven steps for weatherstripping installation:
Clean window tracks and frames with rubbing alcohol to remove dirt, dust, and oils. Adhesive won’t stick to dirty or greasy surfaces. Let alcohol dry completely.
Measure each side that needs sealing. Top and bottom of lower sash, both sides of moving sashes, and the meeting rail where upper and lower sashes lock together.
Cut weatherstripping to exact length with utility knife. Measure twice and cut once. Pieces that are too short leave gaps. Pieces that are too long bunch up and prevent proper closure.
Remove adhesive backing from weatherstripping. Don’t touch the sticky side with your fingers. Oils from skin reduce adhesion.
Press firmly into place starting at one end. Work slowly and press the full length to ensure complete contact. Avoid stretching the material as you apply it.
Test window closure to ensure it still closes without excessive force. The window should latch normally with moderate pressure. If it binds or requires hard slamming, the weatherstripping’s too thick.
Trim excess if window binds. Remove the weatherstripping and try a thinner compression rating or narrower tape width.
Different weatherstripping placements serve specific functions. Top and bottom of the lower sash seal against the window frame when the sash is closed. Sides of moving sashes seal the gap between sash and vertical frame channels as the window slides. Meeting rails where upper and lower sashes come together require compression seal that creates an air barrier when the lock pulls the sashes tight. Each location needs weatherstripping matched to the gap width and compression pattern.
Common mistakes reduce effectiveness and waste materials. Stretching adhesive strips during application causes them to pull back over time, creating gaps within months. Using too thick weatherstripping prevents windows from latching properly. Forcing the lock damages both the mechanism and the weatherstripping. Applying weatherstripping over painted surfaces that will be painted again causes the paint to glue it in place, and the weatherstripping tears apart when you try to open the window next time.
One double hung window takes 20 to 30 minutes for complete weatherstripping replacement once you have materials ready and surfaces cleaned.
Caulking Window Frames and Gaps
Cracked caulk is the number one cause of window drafts. Proper caulking provides 10 to 20 years of protection when done correctly with quality materials. Caulk seals the stationary gaps between window frames and house structure, places where air sneaks through but the joint doesn’t move enough to require flexible weatherstripping.
Nine steps for lasting caulk application:
Remove old caulk completely with utility knife or caulk removal tool. Scrape out cracked and failed caulk all the way to bare wood or clean surfaces. New caulk won’t bond to old deteriorated caulk.
Clean surfaces with rubbing alcohol and let dry completely. Moisture, dirt, and oils prevent proper adhesion. Wait 30 to 60 minutes after cleaning before caulking.
Identify and avoid sealing weep holes. Small slots at the bottom of window frames drain moisture. They’re usually 1/4 inch wide and located at the corners or center of the bottom frame. Leave these completely open.
Cut caulk tube tip at 45 degree angle for 1/4 inch bead. Start with a small opening. You can always cut more off if needed. Large openings waste caulk and create messy, oversized beads.
Load tube into caulk gun and test flow on cardboard. Steady, even pressure produces smooth beads. Jerky squeezing creates uneven coverage.
Apply steady bead along gap between window frame and house siding or interior trim. Move at consistent speed while maintaining even trigger pressure. Fill the gap completely without leaving voids.
Smooth with wet finger or caulk tool within 5 to 10 minutes. Dip your finger in water, then run it along the fresh caulk to press it into the gap and create a smooth, concave surface. Work in 3 foot sections before caulk skins over.
Allow 24 hours drying time before painting. Caulk needs to cure fully or paint won’t bond properly. Read the tube label for specific drying time. Some formulations require 48 hours.
Check after first rain to ensure no water intrusion. Look for wet spots or water stains around newly caulked areas. Gaps in coverage let water through just like air.
Exterior versus interior caulk selection depends on exposure conditions. Silicone caulk for outside exposure to weather, temperature extremes, and UV radiation. Silicone remains flexible from negative 40 to 150 degrees and resists UV breakdown for 15 to 20 years. Acrylic latex caulk for indoor trim that will be painted. It accepts paint better than silicone and cleans up with water instead of solvents. Most painters refuse to paint over silicone because paint won’t bond to it properly.
Sealing weep holes traps moisture inside window frames and causes wood rot, condensation buildup, and potential structural damage requiring $500 to $2,000 in repairs. Weep holes exist for a reason. They let rainwater that gets past exterior seals drain back outside instead of soaking into framing lumber. Blocked weep holes turn window frames into water reservoirs where wood stays wet, rot fungi grow, and structural integrity fails over several years. If you see weep holes, work around them carefully and leave them completely open.
Installing Window Insulation Film for Winter
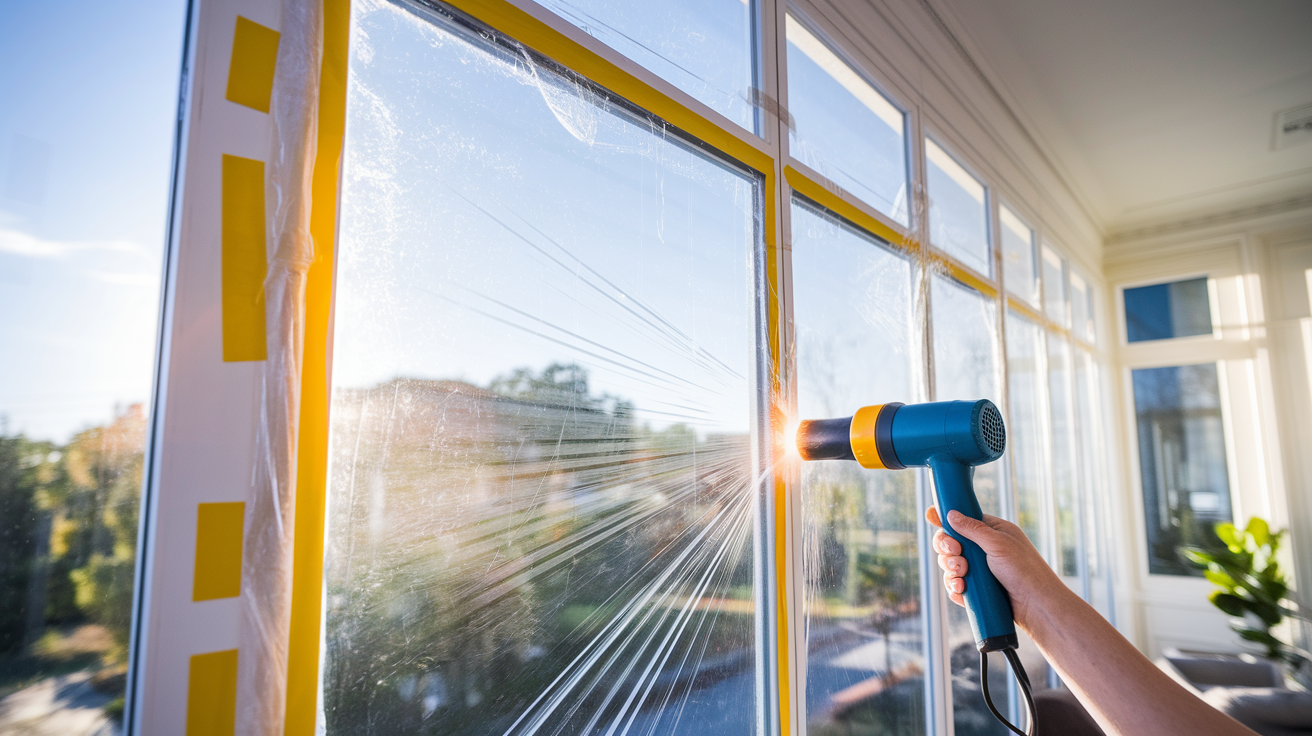
Insulation film creates an air pocket between the plastic and glass, reducing heat transfer by 25 to 35% during winter months. Makes it ideal for renters or temporary fixes while you save for permanent solutions. The dead air space between film and glass acts like a second pane, slowing heat loss without the cost of window replacement.
Six steps for heat shrink film installation:
Clean window frame thoroughly with glass cleaner. Remove all dust, dirt, and oils. The double sided tape must stick firmly to create an airtight seal.
Apply double sided tape around entire window frame perimeter. Press tape onto the frame or wall surface just outside the window opening. Cover all four sides with no gaps in the tape line.
Cut plastic film 1 inch larger than frame on all sides. Extra material ensures full coverage after the film shrinks. Undersized film pulls away from corners when heated.
Press film onto tape starting at top corners. Smooth from center outward to minimize wrinkles. Don’t worry about wrinkles at this stage. They disappear during shrinking.
Use hair dryer on medium heat to shrink film tight. Hold dryer 6 to 12 inches from film and move constantly. Wrinkles disappear as plastic tightens. Don’t overheat or the film will melt and tear.
Trim excess plastic with scissors. Cut close to tape line for neat appearance.
Film limitations mean this is a seasonal solution, not a permanent fix. It blocks 100% of window operation until you remove it in spring, so don’t install it on windows used for emergency exit in bedrooms. The plastic slightly reduces light transmission and view clarity. Everything looks a bit hazy through the film. Most importantly, film provides minimal insulation value compared to proper weatherstripping and caulking. It’s a supplement to other sealing methods, not a replacement.
Cost effectiveness comparison shows better long term options. $3 to $7 per window for film kits that last one season versus $50 to $150 for cellular shades or $400 to $800 for interior storm windows that provide better insulation with year round usability and no visual impact. Film makes sense for renters who can’t modify the property, homeowners testing which windows cause the worst drafts before investing in permanent fixes, or as emergency winterization when you can’t afford better solutions immediately.
Temporary vs. Permanent Window Draft Solutions
The right approach depends on whether you rent, plan to sell soon, or want permanent comfort improvement that adds value to your home. Temporary solutions provide immediate relief at low cost but require seasonal reapplication. Permanent fixes cost more upfront but solve the problem for years or decades.
| Solution Type | Duration | Cost Range | Best For |
|---|---|---|---|
| Rope caulk | 1 season | $5 to $10 | Renters or testing problem areas |
| Window film | 1 season | $3 to $7 per window | Temporary winter boost |
| Draft stoppers | Reusable | $8 to $20 | Immediate comfort in specific rooms |
| Weatherstripping replacement | 3 to 5 years | $15 to $40 per window | Homeowners wanting moderate term fix |
| Caulking and sealing | 10 to 20 years | $25 to $75 per window | Permanent draft elimination |
| Window replacement | 20 to 40 years | $300 to $1,000 per window | Severe damage or efficiency upgrade |
Decision factors guide you toward the right solution. Renters should stick to removable solutions that won’t damage the property or require landlord approval. Rope caulk, film kits, and draft stoppers all remove cleanly when you move. Homeowners planning to stay 5+ years benefit from permanent fixes that reduce heating costs $150 to $400 annually. The repair pays for itself through energy savings within 2 to 4 years. Homes with moisture damage or wood rot around windows need professional assessment before sealing to avoid trapping water that accelerates deterioration.
Proper window sealing prevents water intrusion that causes structural damage requiring costly repairs. When gaps around window frames let rain blow through during storms, water soaks into wall cavities, insulation, and framing lumber. Over time this creates conditions for mold growth, wood rot, and damage to interior finishes. Repairing water damage from years of unaddressed leaks can cost $2,000 to $8,000 depending on how far the moisture traveled and what materials need replacement.
When to Replace Windows Instead of Repairing Drafts
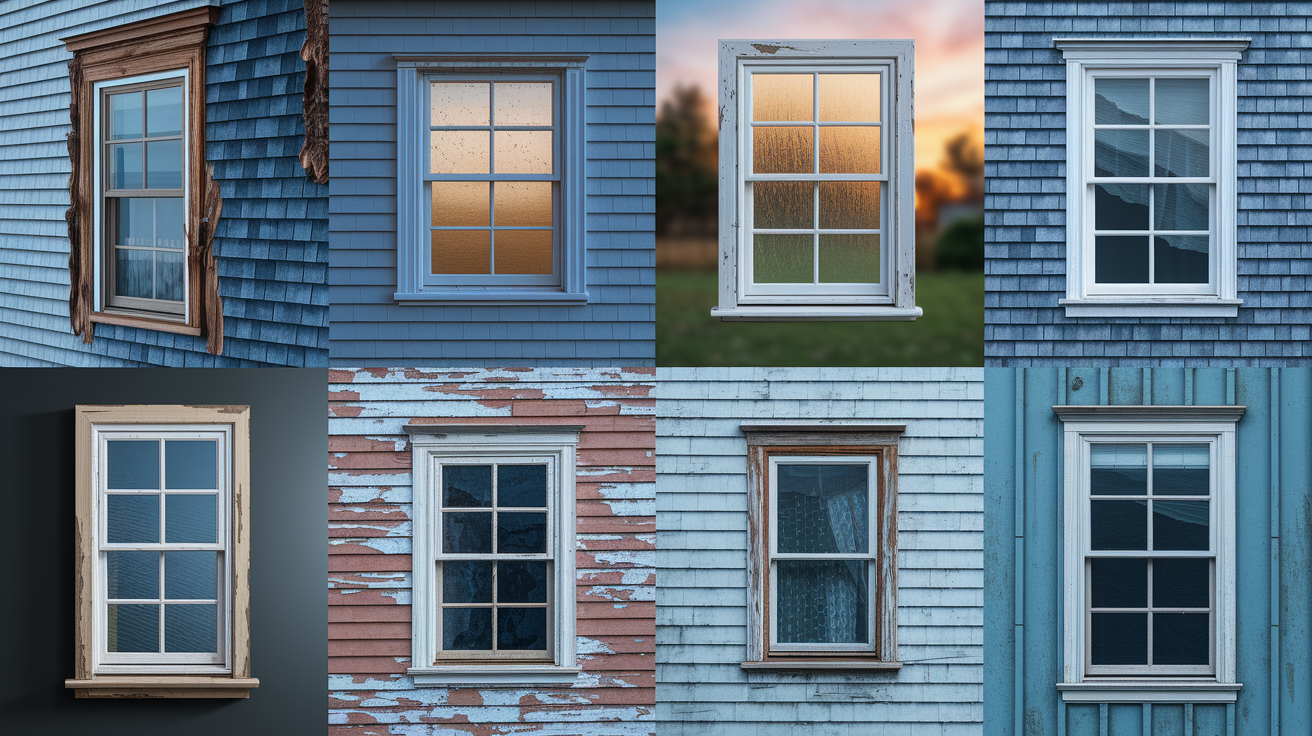
Replacement makes sense when structural damage exceeds repair costs or energy savings justify the investment over 10 to 15 years of ownership. Some window problems can’t be fixed with caulk and weatherstripping. The window itself has failed beyond economical repair.
Six replacement indicators:
Visible wood rot around window frames that’s soft to touch. Poke the frame with a screwdriver and if the wood feels spongy or the tool sinks in easily, rot has compromised structural integrity.
Condensation permanently trapped between double pane glass layers shows broken seal. Once the factory seal fails, there’s no way to remove moisture or restore the insulating gas between panes.
Windows that won’t open or close due to severe warping. When frames have twisted so badly that sashes bind in the opening or won’t latch, the window has moved beyond alignment repair.
Single pane windows in climates with cold winters where heating bills exceed $200 monthly. The heat loss through old single pane glass costs more over 5 years than replacement windows.
Frames with multiple layers of failed paint and deteriorated wood that won’t hold new caulk or weatherstripping. When the substrate is crumbling, sealing materials have nothing solid to grip.
Windows original to homes built before 1980 that lack any thermal breaks. Metal frames from this era conduct cold directly inside with no insulation value.
Replacement ROI shows measurable financial and comfort returns. New windows reduce heating and cooling costs 15 to 30% in homes with original single pane or early double pane windows from before 1990. Homeowners recover 63 to 67% of installation cost at resale according to cost versus value data, making window replacement one of the better returning exterior improvements. The immediate comfort improvement is worth more than dollar savings to most homeowners. Eliminating cold drafts, reducing outside noise, and making rooms feel warmer at lower thermostat settings improves quality of life every day.
Proper installation and sealing of new windows is critical because air leaks occur at the junction between window frame and house framing, not through the glass. Replacement without addressing gaps around the rough opening leaves drafts unsolved even with brand new windows. Installers must seal the gap between new window frame and existing framing with low expansion foam or backer rod and caulk, then seal exterior trim to both the window and siding. Skipping these steps means you’ve spent thousands on new windows but still have cold drafts because air flows through the installation gaps.
Reducing Heat Loss and Lowering Energy Bills
Air leaks waste 40% of heating and cooling energy, with windows accounting for 10 to 25% of total heat loss in typical homes. A house with $200 monthly winter heating bills loses $20 to $50 per month through window drafts alone. Over a five month heating season, that’s $100 to $250 disappearing through gaps you can seal for less than the cost of one month’s waste.
Five benefit categories from sealing window drafts:
Reduced heating costs of $150 to $500 annually after sealing all windows. Actual savings depend on climate, current window condition, and heating fuel costs.
Improved room comfort with 3 to 7 degree temperature increase near windows. Rooms feel warmer even at the same thermostat setting because cold drafts no longer blow across your skin.
Decreased furnace runtime extending equipment life 2 to 5 years. When the furnace doesn’t have to fight constant air infiltration, it cycles less frequently and experiences less wear.
Elimination of cold drafts that make rooms feel uncomfortable even at 68 to 70 degree thermostat settings. Still air at 68 degrees feels comfortable, but moving air at the same temperature feels cold.
Reduced condensation on window glass that causes mold and moisture damage. When warm indoor air doesn’t flow across cold glass, less moisture condenses and drips onto sills and walls.
Cumulative savings from a complete sealing project add up quickly. Spending $200 to $400 to seal all windows in an average home pays back in energy savings within 1 to 3 heating seasons. Professional air sealing combined with attic insulation can cut total energy use by 30 to 50%, reducing both heating and cooling costs while making the home more comfortable year round. The savings compound over time. A $300 sealing project that saves $200 annually returns the investment in 18 months, then provides $200 in savings every year after for as long as the seals last.
Comfort improvement often matters more than dollar savings to homeowners living in the space daily. Eliminating cold drafts near seating areas, bedrooms, and home offices provides quality of life benefits that people value immediately. Nobody likes sitting on the couch with a constant cold breeze on their neck, or sleeping in a bedroom where one side of the bed feels ten degrees colder than the other. Fixing these specific problem areas creates noticeable comfort improvement within hours of completing the work.
Draft Fixes for Different Window Types
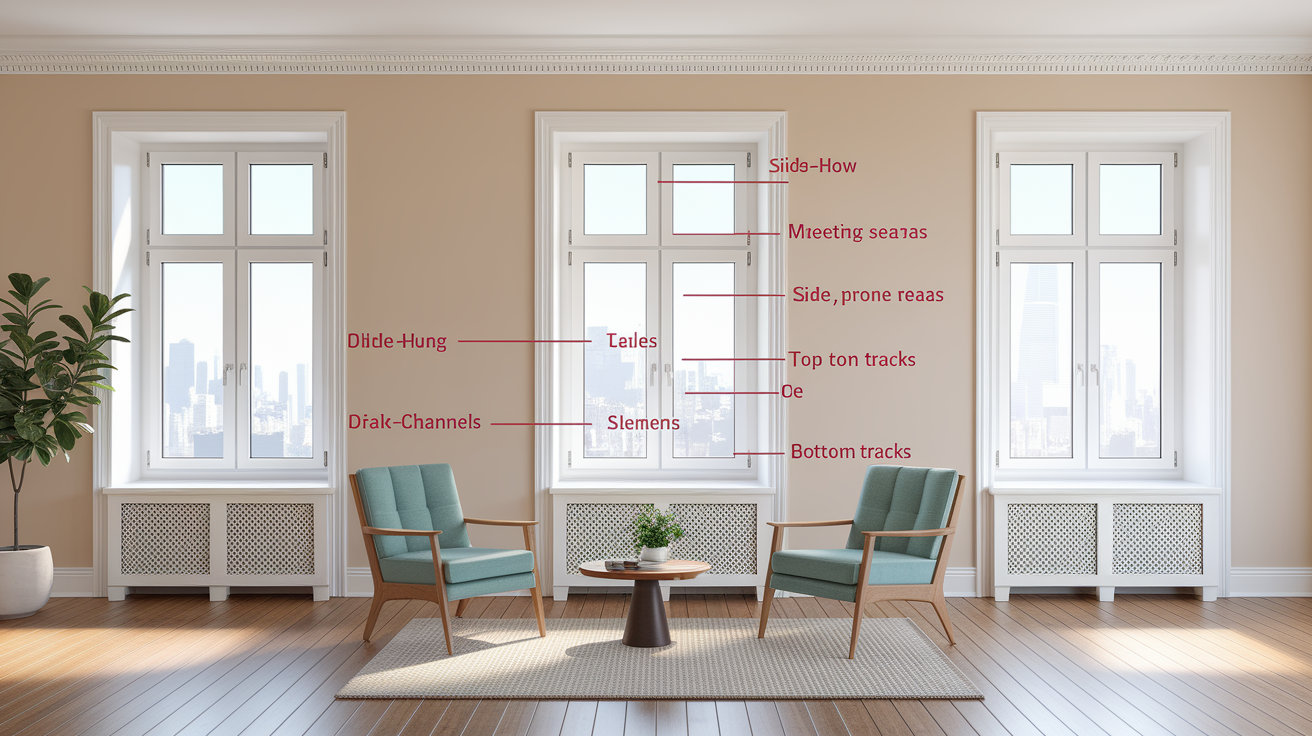
Each window type has specific leak points requiring targeted sealing methods because of how the windows operate and where moving parts create gaps. Understanding your window style helps you focus effort on the actual problem areas instead of sealing parts that don’t leak.
Double Hung Windows
Drafts occur where upper and lower sashes meet (meeting rail), where sashes slide against side channels, and at top and bottom rails. These windows have more potential leak points than any other style because both sashes move and multiple surfaces come together. Apply weatherstripping to all four edges of both sashes. Sides, top, and bottom of each movable section. Add compression seal at the meeting rail where sashes lock together in the middle. This is often the worst leak point because the lock pulls the sashes tight, but old weatherstripping compresses flat and stops sealing. Caulk exterior gaps between frame and siding where the fixed frame meets house structure.
Casement and Awning Windows
These windows seal via compression gasket when cranked closed. The entire perimeter compresses against weatherstripping when the latch pulls the sash tight to the frame. Check that crank mechanism fully closes the window. Bent cranks or worn gears prevent complete closure and leave gaps all around. Replace gasket weatherstripping around the entire opening if it’s compressed flat or has cracked from age and UV exposure. Ensure latch engages properly to compress the seal. If the latch is loose or broken, the window can’t pull tight enough to seal.
Sliding Windows
These are draft prone because they seal at only two points. Where panels overlap and at top and bottom tracks. The design provides less weather protection than windows that compress all the way around. Install compression weatherstripping along the vertical edge where panels meet in the center. Add foam tape in top and bottom tracks where the sash slides. Use brush seals at the sides where fixed and moving panels meet the frame. Even with all these seals, sliding windows typically leak more air than casement or double hung styles.
Vinyl and metal windows rely entirely on factory weatherstripping and aren’t designed for field repairs because replacement seals aren’t widely available. The weatherstripping is molded or clipped into channels that aftermarket products don’t fit. When factory seals fail on these windows, replacement is often more practical than attempting to add improvised sealing. You can sometimes find original manufacturer weatherstripping through specialty suppliers, but installation requires removing the sash and disassembling frame components.
Historic wood windows can be effectively sealed with combination of rope caulk, glazing compound, and standard weatherstripping, preserving original windows while improving performance. The simple construction of old wood windows makes them easier to repair than modern vinyl or metal units. You can remove sashes, reglaze glass panes, add modern weatherstripping, and reinstall everything without specialty tools or manufacturer specific parts. Many historic windows perform as well as mid grade modern windows once properly sealed and fitted with storm windows.
Safety and Common Mistakes to Avoid
Incorrect sealing creates worse problems than drafts. Trapped moisture causes rot, mold, and structural damage costing $500 to $3,000 to repair. What seems like a simple weatherization project can cause serious damage if done wrong. Understanding critical errors prevents expensive fixes down the road.
Seven mistakes to avoid:
Never seal weep holes at bottom of window frames. These drain rainwater and condensation that gets past exterior seals. Blocking them traps moisture inside the frame causing wood rot and mold. Look for small slots or holes 1/4 inch wide at frame corners or center bottom before caulking.
Don’t caulk windows completely shut. Leave small gaps for emergency exit in bedrooms. Building codes require bedroom windows to open for fire escape. Caulking the sash to the frame permanently eliminates this safety feature.
Avoid using expanding spray foam in visible gaps. It’s nearly impossible to remove and looks terrible when it expands beyond the gap. Foam oozing out of cracks between trim and siding creates a mess that requires cutting and sanding to fix. Use it only in hidden cavities where appearance doesn’t matter.
Never apply weatherstripping over dirty surfaces. It won’t stick and fails within weeks. Dust, oils, and moisture prevent adhesive from bonding. Clean with rubbing alcohol and let dry completely before installation.
Don’t over tighten compression weatherstripping. Windows should close with moderate effort. Excessive force indicates too thick material. Slamming windows to get them latched damages both the weatherstripping and window mechanisms.
Avoid painting over weatherstripping. Paint causes it to stick and tear when windows open. If you must paint window frames, carefully mask off weatherstripping or remove it before painting and reinstall after paint dries.
Never seal all air leaks without ensuring adequate ventilation. Homes need controlled fresh air exchange to prevent indoor air quality problems. Completely sealing a house without adding controlled ventilation (bathroom and kitchen fans, fresh air intake) can create stuffiness, excess humidity, and moisture accumulation that damages walls and ceilings.
Ventilation balance matters in tighter homes. Older homes naturally exchange air through leaks at a rate of 0.5 to 1.0 air changes per hour. Completely sealing without adding controlled ventilation reduces this to 0.1 to 0.3 air changes per hour, which isn’t enough to remove moisture, odors, and indoor pollutants. Modern building codes require mechanical ventilation in tight homes. Bathroom exhaust fans rated for continuous operation, range hoods that vent outside, and sometimes whole house ventilation systems. If you’re sealing an old leaky house, consider adding ventilation fans that run on timers or humidity sensors.
Working safely on ladders when sealing upper story windows prevents falls that cause serious injury. Set ladders on firm, level ground at proper angle (base should be one foot out for every four feet of height). Never lean sideways beyond ladder rails. Move the ladder instead. Work with a helper who can steady the ladder and hand up tools and materials. Use a tool belt to keep both hands free for climbing.
Final Words
Drafty windows waste energy and make rooms uncomfortable, but most leaks respond to straightforward fixes you can handle yourself.
Weatherstripping, caulking, and insulation film address the gaps where cold air actually enters—around frames and moving parts, not through the glass.
Start with detection methods that pinpoint problem areas, then match your repair approach to whether you need a quick seasonal fix or a lasting solution.
When you learn how to fix drafty windows using the right materials and techniques, you’ll see lower heating bills and feel the difference in room comfort within days.
And if you find wood rot or broken seals during your inspection, those problems need attention before any surface sealing will hold.
FAQ
How do I stop cold air from coming through my windows?
Cold air coming through windows stops when you apply weatherstripping to movable window parts, caulk gaps between window frames and walls, and check that window locks close properly to compress seals. Most drafts come from deteriorated caulk and worn weatherstripping around frames, not through the glass itself.
How do I permanently fix drafty windows?
Drafty windows are permanently fixed by removing old cracked caulk, applying fresh silicone caulk around exterior frames, and installing new compression weatherstripping on all moving sash edges. This combination addresses both stationary gaps and seal points where window parts meet, typically lasting 10 to 20 years.
How can I stop drafty windows if I rent?
Drafty windows in rental properties can be stopped using removable solutions like rope caulk for seasonal gaps, adhesive foam weatherstripping that peels off without damage, or window insulation film kits that attach to frames with removable tape. These temporary fixes cost $5 to $15 per window and leave no permanent marks.
How do I seal drafty windows for less than $50?
Sealing drafty windows for under $50 involves buying one tube of exterior silicone caulk ($8 to $12), adhesive foam weatherstripping ($15 to $25), and a basic caulk gun ($5 to $10). This covers materials for two to three average-sized windows with enough left over for touch-ups next season.
What causes windows to become drafty over time?
Windows become drafty over time because caulk cracks after 5 to 10 years of temperature cycles and UV exposure, weatherstripping compresses and loses elasticity after 3 to 5 years, and house settling creates gaps between window frames and wall framing. Old single-pane windows conduct significantly more cold than double-pane versions, making any frame gaps feel worse.
How do I know where my window drafts are coming from?
Window drafts are located by holding a lit incense stick near window edges on a windy cold day and watching for smoke movement, feeling along frames with damp hands to detect temperature changes, or looking for visible caulk cracks and gaps. The coldest spots indicate where outside air enters most actively.
Should I use weatherstripping or caulk to fix drafty windows?
Weatherstripping fixes drafts on moving window parts like sashes that slide or swing, while caulk seals stationary gaps between window frames and house walls or trim. Most effective repairs use both—weatherstripping where windows open and close, caulk around the fixed frame perimeter.
When should I replace windows instead of fixing drafts?
Window replacement becomes necessary when you see soft wood rot around frames, permanent condensation trapped between double-pane glass, or severe warping that prevents windows from closing. Single-pane windows in cold climates where monthly heating bills exceed $200 also justify replacement for long-term energy savings.
Does window insulation film really stop drafts?
Window insulation film reduces heat loss by 25 to 35 percent during winter but doesn’t eliminate drafts from frame gaps—it only slows heat transfer through glass. Film works best as a temporary seasonal boost combined with proper weatherstripping and caulking, not as a standalone draft solution.
How much money can I save by fixing drafty windows?
Fixing drafty windows saves $150 to $500 annually in heating costs for an average home, with payback occurring within 1 to 3 heating seasons after spending $200 to $400 on materials. Comfort improvement from eliminating cold drafts near seating and sleeping areas provides immediate quality-of-life benefits beyond dollar savings.