


Ever wonder why some door frames rot out every few years while others last for decades? The difference isn’t the wood quality. It’s whether someone fixed the water problem that caused the rot in the first place. Swapping out the damaged jamb is the visible part of the job. But if you don’t seal everything properly and address the moisture source, you’re just setting yourself up to do this repair again. This guide walks you through assessment, removal, installation, and the weatherproofing steps that actually make the repair hold up.
Step-by-Step Door Frame Replacement: Assessment Through Installation

Replacing a water damaged door frame is doable if you’re willing to work methodically and pay attention to detail. The real trick isn’t just swapping out the rotten wood. It’s making sure you’ve dealt with whatever caused the rot in the first place and sealing everything so it doesn’t happen again.
You’re looking at four to eight hours for a single jamb section. A complete frame might take you one to two days, depending on how bad the damage is. Work when the weather’s dry and make sure you’ve got everything you need before you start.
Assessing Damage and Removing Trim
Look for the obvious stuff first. Discoloration, dark staining, crumbling wood, paint that’s bubbling or peeling. These are your clues about where water’s been sitting. Press on suspicious areas with your thumb or the handle of a screwdriver. Solid wood pushes back. Compromised wood feels spongy or just gives way.
Wet rot looks dark and feels soft when you touch it. Dry rot is different. It’s brittle, cracked, sometimes powdery. And it spreads faster because it can move through masonry and plaster, not just wood. You need to check if the damage has gone past the jamb into the wall framing. Jack studs sit right next to the jamb vertically. King studs are the full height studs outside those. The header board runs horizontally above the door. Use a flashlight to look into gaps or cracks.
Before you can really see what you’re dealing with, the trim has to come off. Score the paint line between trim and wall with a utility knife. This stops the paint from tearing and taking chunks of drywall with it. Get a pry bar behind the casing gently, starting at the bottom and working up. Put wood shims behind the bar so you don’t dent or gouge the wall.
Take trim pieces off carefully. Label them with masking tape if you’re planning to reuse them. Once the trim’s gone, you can see the entire door jamb and inspect for hidden damage in the rough opening. Look for staining on wall framing, feel for soft spots in areas that were covered, and check those bottom corners where water likes to pool.
Cutting Out Rotted Sections and Preparing Replacement
Mark your cut lines at least two inches beyond the visible rot. This matters because wood that looks okay might have enough moisture in it to rot later. If the door’s still hanging and you’re replacing a section, support it with shims or get someone to hold it while you work.
A reciprocating saw cuts through nails and wood at the same time. The blade goes right through embedded fasteners, which saves you from pulling every nail first. Pry the damaged section out carefully, wiggling it free without damaging what’s around it. Clean remaining surfaces of debris, loose paint, and splinters so the new piece sits flush.
Measure the existing jamb width and the height of the replacement section. Door jambs are typically 4 9/16 inches wide for standard walls or 6 9/16 inches for thicker walls. But always measure yours. If you’re replacing the bottom section, account for the sill angle. It slopes slightly outward to shed water. Verify measurements twice before cutting.
Mark cut lines with a carpenter square to make sure they’re perfectly perpendicular. Note where the door stop is positioned. That’s the thin strip of wood the door closes against. Your replacement piece needs to match this profile if you’re splicing into an existing jamb.
Use a miter saw for square cuts. Check edges with your square to make sure they’re smooth and perpendicular. Go with pressure treated lumber, cedar, or composite materials. Regular pine or fir will rot again if moisture comes back. Test fit the replacement piece before you go further. It should slide into place without forcing, with minimal gaps at the joints.
Installing and Securing the New Jamb
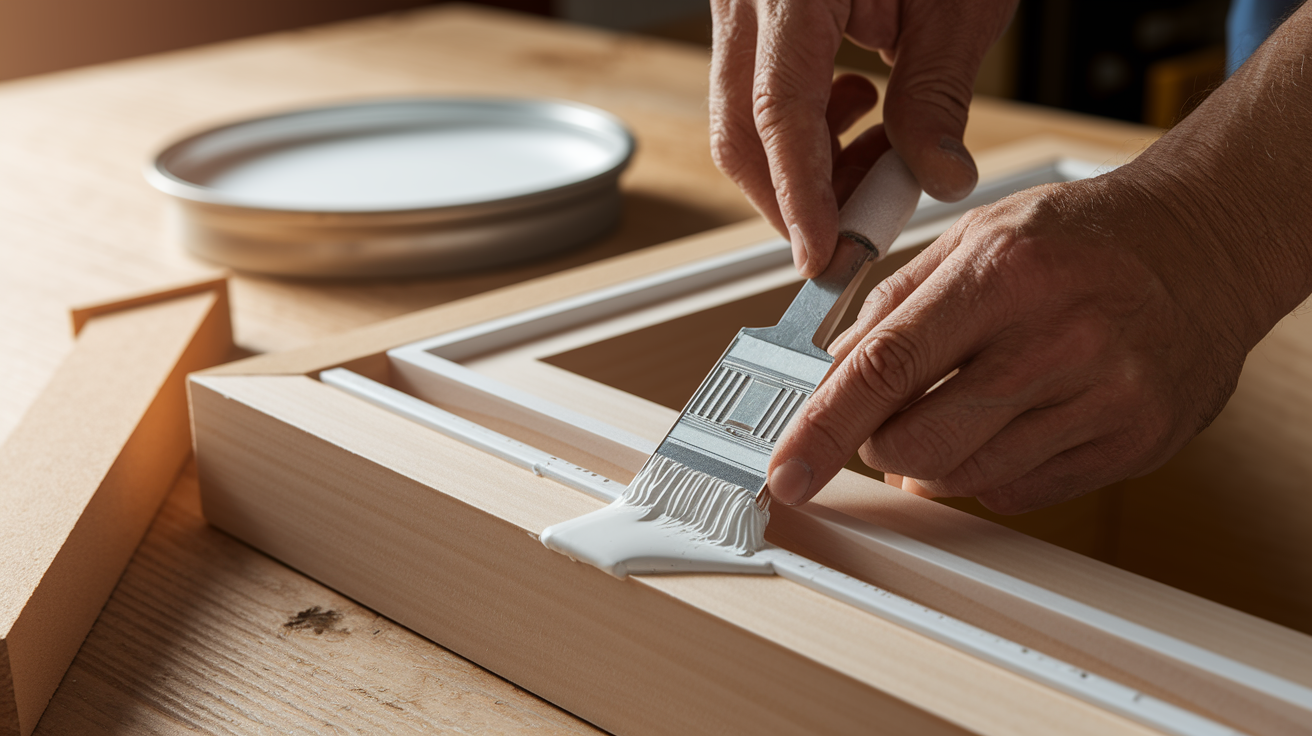
Apply wood hardener or preservative to the new lumber before installation. Brush it on all surfaces, especially the end grain where water absorbs fastest. Let it soak in according to whatever the product directions say. This treatment strengthens wood fibers and creates a barrier against moisture and pests.
Dry fit the replacement piece one more time to verify measurements. Apply construction adhesive to surfaces that will contact existing wood or wall framing. Insert and position the new jamb section, pressing firmly so adhesive makes full contact.
Use shims behind the jamb at hinge locations and every sixteen inches along the length. Shims fill the gap between jamb and rough opening, letting you adjust the jamb position. Check plumb with a level in multiple spots, both across the width and along the height. A door frame that’s not plumb will cause the door to swing open or closed on its own. Or it’ll bind when you try to operate it.
Secure the jamb temporarily with a few nails while you make final adjustments. Pre drill holes for fasteners to prevent splitting, especially near board ends. Use galvanized finish nails or screws through the shims into wall framing. Drive them until the head is just below the surface but not so deep you create a dimple. Do a final level check before the adhesive sets.
Trim excess shim material flush with the jamb using a utility knife or handsaw. Use expandable foam in gaps wider than a quarter inch between jamb and rough opening. This foam seals air leaks and provides backing for caulk. Trim excess foam when it’s fully cured, usually after eight hours.
Apply exterior grade caulk along all joints where new jamb meets old wood, where jamb meets wall, and around the perimeter where trim will cover. Run a continuous bead and smooth it with your finger or a caulk tool to get a weathertight seal.
Full replacement is required when rot affects structural integrity or multiple frame sections. Damage limited to the jamb bottom or a single side is suitable for DIY repair. Minor surface rot under one quarter inch deep can be treated with wood hardener and filler instead of cutting and replacing. But damage to multiple frame sections or compromised king studs and jack studs means complete replacement. Often you need professional evaluation, especially in load bearing walls where improper repair could create safety hazards.
Essential Tools and Materials for Door Frame Replacement
Get everything before you start. Stopping halfway through to run to the hardware store is frustrating.
Tools needed:
- Pry bar
- Reciprocating saw or circular saw
- Hammer
- Chisel
- Utility knife
- Measuring tape
- Carpenter square
- Level
- Nail gun or hammer
- Sandpaper (80 grit and 120 grit)
- Caulking gun
- Safety goggles and gloves
Materials needed:
- Replacement door jamb lumber
- Pressure treated or rot resistant wood
- Shims (cedar or composite)
- Galvanized fasteners (nails or screws)
- Wood hardener or preservative
- Exterior grade caulk or sealant
- Construction adhesive
- Exterior grade primer
- Exterior grade paint
- Expandable foam
Choose pressure treated lumber, cedar, or composite materials for rot resistance. Standard pine looks fine initially but it doesn’t have the preservatives that prevent decay when moisture shows up. Cedar naturally resists rot and insects. Composite materials like PVC or wood plastic blends won’t rot at all, though they cost more. Use galvanized or stainless steel fasteners to prevent rust. Regular nails and screws corrode when moisture is present, creating stains and weakening connections over time.
Finishing the Door Frame: Priming, Painting, and Trim Reinstallation
Proper finishing prevents moisture penetration and extends frame lifespan by creating a sealed barrier that water can’t cross.
Six finishing steps:
- Sand all surfaces smooth including seams where new wood meets old, using 80 grit sandpaper to level high spots and 120 grit for final smoothing
- Apply wood filler to any gaps, nail holes, or small imperfections in the wood surface
- Sand filler smooth when dry, blending it so you can’t feel a ridge when you run your hand across it
- Apply exterior grade primer to all new wood, covering every surface including edges and the back side if accessible
- Apply two coats of exterior grade paint, allowing complete drying between coats according to paint label directions
- Inspect for missed spots by looking at the frame from different angles in good light, touching up any areas where wood shows through
Reinstall the casing and trim pieces you removed earlier. Or use new trim if the old pieces were damaged. Apply a thin bead of caulk between trim and wall before nailing to create a moisture seal. Use finish nails and countersink them slightly below the surface. Fill nail holes with wood filler, let it dry, sand smooth, and touch up with paint. Reinstall door hardware if you removed hinges, strike plates, or the door itself during the repair.
Test door swing by opening and closing it several times. Check for binding or gaps when closed. A properly aligned door swings freely without rubbing against the jamb and sits flush against the door stop when closed. Adjust hinge screws if the door sags or doesn’t close flush with the frame. Tightening the top hinge or loosening the bottom hinge slightly can correct minor sagging. Reposition the strike plate if the latch doesn’t engage properly, using a file to enlarge the strike plate hole slightly if needed. Make final shim adjustments if the door isn’t plumb or level, though this requires reopening the trim work if you’ve already reinstalled it.
Weatherproofing and Long Term Moisture Prevention
Apply flashing above the door frame if you’re working on an exterior door. Metal flashing diverts water away from the top of the frame, preventing it from running down behind the jamb. Caulk all joints between jamb and exterior trim so water can’t sneak into gaps. Check that the drip cap (the angled piece at the very top) extends past the trim and slopes away from the door.
Install a door sill or threshold with proper slope, angling slightly downward toward the outside so water runs off instead of pooling. Seal underneath with exterior grade caulk before screwing it down. Apply weatherstripping along the bottom edge where door meets threshold to block wind driven rain and reduce drafts.
Eight prevention measures:
- Maintain gutters and downspouts by cleaning them twice a year and making sure downspouts direct water at least five feet away from the foundation
- Make sure grading slopes away from the foundation so surface water flows away, not toward the door
- Inspect and repair weatherstripping annually, replacing worn sections that no longer seal tightly
- Check caulking and reseal as needed wherever different materials meet, typically every two to three years
- Paint or seal exposed wood every few years, touching up worn areas before water reaches bare wood
- Fix roof or siding leaks promptly as soon as you notice water stains or drips during rain
- Improve ventilation in humid areas by using exhaust fans or opening windows to prevent condensation buildup
- Install a door canopy or overhang if the door is exposed to direct rain, providing a simple physical barrier
Inspect your door frame in spring and fall as part of regular home maintenance. Look for soft spots by pressing on the wood, especially at the bottom corners. Check for discoloration, dark staining, or paint that’s bubbling or peeling. Run your finger along caulk lines to find gaps or cracks. Test weatherstripping by closing the door on a dollar bill. If you can pull it out easily, the seal isn’t tight. Catching problems early means a small repair instead of full replacement. Most door frame rot is preventable with routine maintenance that takes just a few minutes twice a year.
Cost Breakdown and Time Requirements for Door Frame Replacement

A partial jamb replacement typically takes four to six hours for someone with moderate DIY skills. A full single side jamb takes six to ten hours. A complete frame replacement spans one to two full days. First time DIYers should add extra time for learning and troubleshooting.
You need moderate carpentry skills for this project. Ability to make accurate measurements, cut straight lines with power saws, work safely with tools, and understand basic leveling and plumbing concepts. The learning curve isn’t steep if you take your time. But this isn’t the best first carpentry project if you’ve never used a circular saw or reciprocating saw before.
| Project Scope | Material Cost | Time Required | Skill Level |
|---|---|---|---|
| Bottom jamb section only | $40-$80 | 4-6 hours | Moderate |
| Full single side jamb | $80-$150 | 6-10 hours | Moderate to Advanced |
| Complete frame | $150-$300 | 1-2 days | Advanced |
| Frame plus structural repair | $300-$600+ | 2-3 days | Professional Recommended |
Common Mistakes to Avoid When Replacing Water Damaged Door Frames
Avoiding these mistakes saves time, prevents repeat repairs, and keeps your door frame solid for years.
Nine common mistakes:
- Not identifying and fixing the moisture source. Replacing rotted wood without fixing the leak, drainage problem, or missing caulk means the new wood will rot too.
- Cutting too close to visible rot. Rot extends beyond what you can see, so cut at least two inches past discolored or soft areas.
- Using non treated wood in moisture prone areas. Regular lumber rots quickly when exposed to moisture. Use pressure treated, cedar, or composite materials.
- Inadequate shimming causing door misalignment. Skipping shims or placing them randomly instead of at hinge points leads to doors that bind or won’t latch.
- Skipping wood treatment products. New wood needs hardener or preservative before installation to resist moisture absorption.
- Insufficient sealing and caulking. Leaving gaps allows water and air infiltration, which defeats the purpose of the repair.
- Not allowing proper drying time between steps. Rushing from primer to paint or installing trim before caulk cures traps moisture and creates adhesion problems.
- Reusing rotted trim pieces. Trim that looks okay might have hidden soft spots that crumble when you nail into it.
- Failing to check building codes. Some locations require permits and inspections for door frame replacement, especially on exterior doors.
When to Call a Professional for Door Frame Replacement

Structural damage signs tell you it’s time to get professional help. Rot extending into wall framing beyond the jamb itself affects the structure holding up your wall and potentially the roof load above. A sagging header (the beam above the door) means the door opening is settling and needs structural reinforcement, not just a new jamb. Multiple studs affected by rot, especially jack studs and king studs on both sides, compromise the rough opening and require more extensive carpentry. Load bearing wall concerns require an engineer’s evaluation before cutting into framing. Opening up a load bearing wall incorrectly can cause serious structural damage.
Exterior door replacement often requires building permits in most jurisdictions. Permits make sure work meets local building codes for structural integrity, energy efficiency, and weather resistance. Inspection requirements vary by location, but many areas require inspections before closing up the wall and after final installation. Liability concerns with improper structural repairs matter if you plan to sell your home. Unpermitted work can complicate sales, and improperly installed exterior doors can fail inspection, which means you’ll have to open walls and redo the work.
Think about complexity indicators before deciding to DIY. Lack of carpentry experience makes this project risky if you’ve never used power saws or worked with framing. Specialized tools you don’t own add significant cost if you need to buy a reciprocating saw, miter saw, and nail gun just for this job. Time constraints matter because door frame replacement leaves your home exposed to weather, requiring completion within a day or two. Difficulty accessing damage in tight spaces or behind finished walls makes it hard to assess the full scope. Multi level frame damage affecting jambs, sill, header, and wall framing at the same time indicates a more serious problem that started long ago and has spread throughout the opening.
Final Words
Replacing a water damaged door frame takes patience and attention to detail, but the work pays off in structural safety and long-term durability.
Start with a thorough assessment, remove all rotted wood completely, and seal every joint before you finish.
The key to success is addressing the moisture source first, using rot-resistant materials, and taking time to get the frame plumb and level.
When you’re done, you’ll have a solid, weathertight door frame that should last for years with basic maintenance.
FAQ
Can you repair a water damaged door?
A: You can repair a water damaged door if the damage is minor and limited to surface areas. Treat small soft spots with wood hardener, fill shallow damage with epoxy, sand smooth, then prime and paint. For doors with warping, extensive rot, or structural damage beyond surface treatment, replacement is usually more practical and longer-lasting than repair.
What is the average cost to replace a door frame?
A: The average cost to replace a door frame ranges from $150 to $400 for materials and DIY labor for a standard interior frame. A bottom jamb section replacement costs $50 to $100 in materials, while a complete exterior frame with professional installation typically runs $300 to $800 depending on door size, wood type, and labor rates in your area.
Can a handyman replace a door frame?
A: A handyman can replace a door frame if they have carpentry experience with measuring, cutting, shimming, and leveling door jambs. Most handymen handle single-jamb replacements or bottom section repairs without issue. For extensive structural damage affecting wall framing, king studs, or headers, or when building permits are required, hire a licensed carpenter or contractor instead.
Can I replace a door frame without replacing the door?
A: You can replace a door frame without replacing the door in most cases. Remove the door from its hinges before starting frame work, then rehang it on the new jamb after installation is complete. Check that hinge placements match or be prepared to fill old screw holes and drill new ones if the new jamb dimensions differ slightly from the original.
How long does it take to replace a water damaged door frame?
A: Replacing a water damaged door frame takes 4 to 8 hours for a single jamb section or bottom replacement. A complete frame replacement typically requires 1 to 2 days when you include trim removal, cutting out damaged wood, installing new lumber, shimming, leveling, securing, caulking, priming, painting, and reinstalling trim and hardware.
What type of wood should I use for door frame replacement?
A: Use pressure-treated lumber, cedar, or composite materials for door frame replacement to resist future rot and moisture damage. Pressure-treated wood works well for exterior frames and bottom sills exposed to weather. Cedar naturally resists moisture and insects. Composite materials last longest but cost more and require different fastening techniques than traditional wood.
How do I know if door frame damage is structural?
A: Door frame damage is structural if rot extends beyond the jamb into wall framing like jack studs, king studs, or the header board above the door. Check by probing with a screwdriver where the jamb meets wall framing. A sagging header, visible wall cracks, or doors that suddenly won’t close indicate compromised structure requiring professional evaluation before proceeding with repair.
Do I need a permit to replace a door frame?
A: You typically need a permit to replace an exterior door frame in most jurisdictions because it affects the building envelope and structural components. Interior door frame replacement usually doesn’t require permits unless you’re modifying wall framing or load-bearing elements. Check with your local building department before starting work to avoid code violations and inspection issues.