


Ever notice how baseboard damage never stays small? That chip from the vacuum cleaner sits there for months, then suddenly the wood feels soft when you press it. Most homeowners patch the surface and move on, only to find the same spot crumbling again within a year. That happens because visible damage usually points to moisture, rot, or pests working behind the scenes. This guide walks you through assessing what’s really wrong, deciding between repair and full replacement, and installing new baseboard that actually lasts.
Assessing Damage and Deciding Your Approach
A proper look at your baseboard damage saves you from fixing the wrong thing. Lots of homeowners patch visible chips only to watch the same problem come back within months.
That happens because surface damage often points to something deeper. Soft wood behind fresh paint, a musty smell near the floor, or stains creeping up from the bottom edge all mean moisture or pests got there first.
Identifying Extent of Damage and Underlying Issues
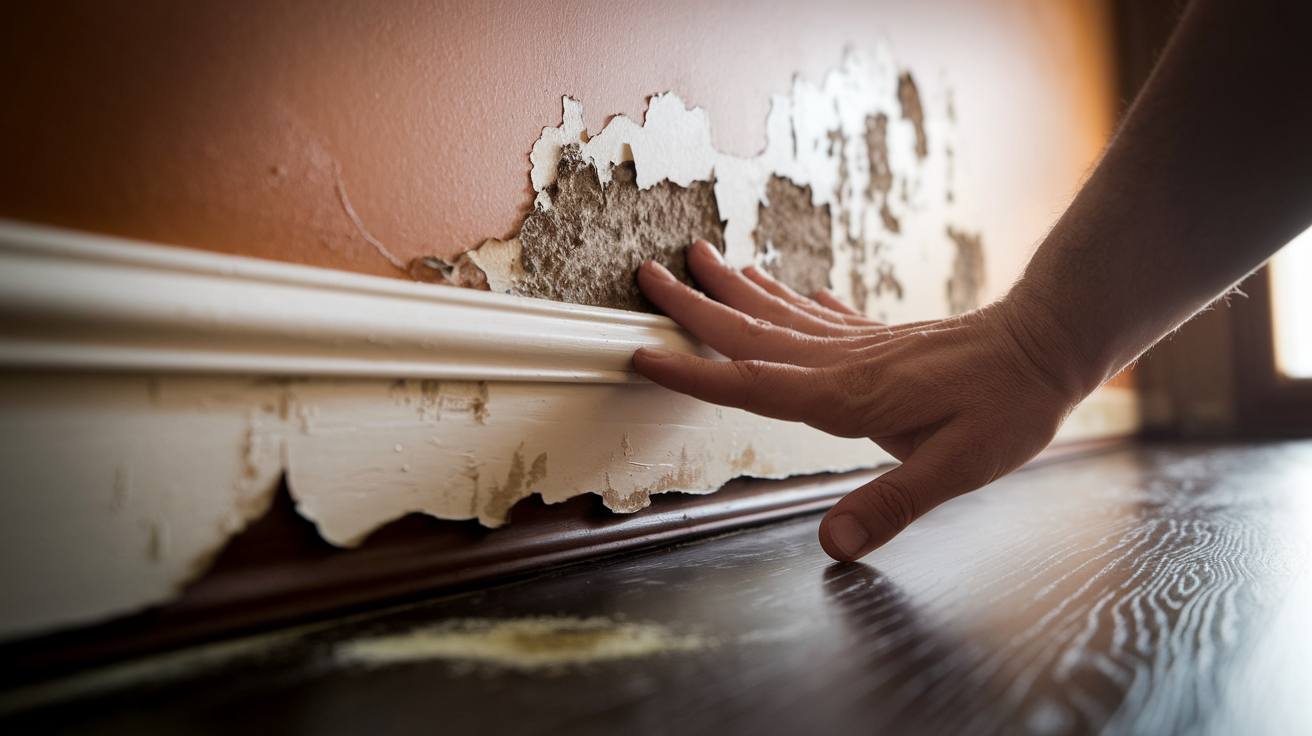
Press your thumb firmly into any discolored or stained sections of baseboard. If the wood feels spongy or your thumb leaves an impression, that’s rot. Solid wood doesn’t give under pressure. Run your hand along the length and feel for warping or sections that pull away from the wall. Check behind the baseboard with a flashlight if you can. Look for dark staining on the drywall, white powdery deposits, or fuzzy growth that signals mold.
A musty odor means moisture stayed long enough to cause problems. Water damage shows up as darkened wood, peeling paint, or visible water lines. When you see these signs, pull back a small section of baseboard to inspect the wall and subfloor underneath. Sometimes the baseboard looks fine but the framing behind it is rotted through. If you find active moisture, soft subfloor, or mold growth, stop the installation work. Address the water source first through proper water damage repair, then let everything dry completely. Installing new baseboard over wet framing just traps moisture and makes the problem worse.
Repair Versus Replacement Decision
Small chips from furniture legs, shallow dents, and isolated gouges don’t need full replacement. For minor surface damage, fill the damaged area with all purpose joint compound, the same mud used for hanging drywall. Apply it with a drywall taping knife, let it dry, then repeat two more times. Sand smooth and paint to match. This works for chips up to about an inch across.
Larger damaged sections respond well to a Dutchman patch. This technique involves routing a shallow rectangular hole around the damage, then gluing in a custom cut wood patch. You create a template, use a router with a flush cutting bit to cut the hole, square the corners with a sharp chisel, and tap the patch into place. It’s precise work, but it’s faster than replacing an entire board when damage covers just one section.
Full replacement makes sense when rot has weakened the wood structure, cracks run along most of the board’s length, or you’re updating the style throughout the room. Water damaged baseboard that feels soft or breaks apart when you press it needs to come out completely.
When to repair or replace based on damage type:
Small surface chips and scratches get repaired with wood filler or joint compound, sand smooth, and paint. Water rotted sections with soft, spongy wood require full replacement after addressing moisture source. Minor dents and shallow gouges get repaired with joint compound applied in three layers. Extensive cracking running along the board’s length needs replacement, as structural integrity is compromised. Isolated gouges or damaged sections several inches wide work with Dutchman patch technique for precise wood repair. Termite damage, pest tunneling, or insect holes need full replacement plus professional pest treatment before installing new material.
Essential Tools and Materials for Baseboard Installation
Getting everything together before you start means you won’t stop halfway through to hunt for a missing tool. The difference between basic and advanced options usually comes down to speed and precision, not whether the job gets done.
| Tool/Material | Purpose | Essential or Optional |
|---|---|---|
| Pry bar or small crowbar | Removing old baseboard without excessive wall damage | Essential |
| Measuring tape (25-foot) | Measuring wall sections and marking cut lines accurately | Essential |
| Miter saw or hand saw | Cutting baseboard to length and creating angled corner cuts | Essential (miter saw optional but recommended) |
| Utility knife | Scoring paint line before removal, trimming excess caulk | Essential |
| Nail gun or hammer with finishing nails | Securing baseboard to wall studs | Essential (nail gun optional but faster) |
| Caulk gun | Applying caulk along top edge and filling gaps | Essential |
| Sandpaper (80, 120, 220 grit) or random-orbit sander | Smoothing filled areas and preparing surface for paint | Essential (sander optional but saves time) |
| Replacement baseboard molding | New material to install | Essential |
| Construction adhesive or wood glue | Bonding baseboard to wall surface | Essential |
| Finishing nails (1.5 to 2 inch) | Mechanical fastening at stud locations | Essential |
| Latex caulk (paintable) | Filling gap between baseboard and wall | Essential |
| Paint, primer, and wood filler | Finishing and sealing baseboard surface | Essential |
Most home centers rent miter saws for about $30 per day. If you’re doing one room and don’t plan future trim projects, renting makes more sense than buying. A hand saw works fine for straight cuts but makes angled corners much harder. Safety equipment matters more than people think. Wear safety glasses when cutting or sanding. A dust mask keeps you from breathing fine wood particles, especially when sanding MDF. Work gloves protect your hands during removal when you’re dealing with sharp edges and old nails. Budget tools will finish the job, but quality measuring tapes and sharp saw blades reduce frustration and wasted material.
Removing Damaged Baseboard Without Wall Damage

Score along the top edge where paint bonds the baseboard to the wall before you pry anything loose. Run a sharp utility knife along that seam with firm, steady pressure. This cuts through the paint seal so the baseboard comes away clean instead of tearing the drywall paper or paint with it. It takes an extra two minutes per section but saves you from patching torn walls later.
Start at one end of the baseboard section with your pry bar positioned near a corner. Slide the flat end behind the board gently, just enough to create a small gap. Don’t force it. Work the bar in gradually, applying steady pressure rather than sudden yanks. Once you have a small opening, move down about 12 inches and repeat. Keep working along the length rather than trying to pull off a whole section at once. The baseboard will start to come loose as you work each spot. When you feel resistance, that usually means you hit a nail location. Apply slightly more leverage at those points, but keep the motion controlled.
Wall studs sit 16 inches apart in most homes, and that’s where builders nail baseboard. You’ll feel more resistance at these spots. Once you locate the first nail, you can predict where the others sit. Some baseboards use construction adhesive instead of or in addition to nails. Adhesive holds tight and requires more patient working of the pry bar along the full length. If the board starts to splinter before it releases, stop and insert the pry bar in multiple locations to distribute the force. Patience here prevents broken baseboard sections that can’t be reused if you’re planning to reinstall them elsewhere.
Drywall damage happens even with careful technique. Small nail holes are normal and simple to fix. Larger gouges or torn paper need attention before new baseboard goes up. Fill nail holes with spackling compound, let it dry, and sand smooth. For torn drywall paper, trim away any loose edges with a utility knife, apply a thin coat of joint compound, let it dry, then sand. If you’ve damaged the drywall more extensively during removal, proper drywall repair creates a solid, smooth surface for your new baseboard. Don’t skip wall repairs. Installing new trim against damaged wall surface shows through the finish and creates gaps that are hard to fill with caulk alone.
Measuring, Calculating Materials, and Planning Costs
Taking accurate measurements determines how much material you buy and how much you spend. Sloppy measurements mean extra trips to the store or not enough baseboard to finish the room.
A 10 to 15 percent waste factor accounts for angled cuts at corners, pieces that split during cutting, and sections that get measured wrong. It feels like you’re buying extra, but this buffer prevents project delays when you’re one piece short.
Tips for accurate baseboard measurements:
Measure twice before writing anything down. Quick measurements lead to expensive mistakes. Account for inside and outside corners separately. Each type requires different cut angles and affects total length needed. Note your longest straight runs first. These pieces often determine whether standard board lengths work or if you need longer sections. Record exact locations of door casings and openings. These interruptions break up continuous runs and change your cutting plan. Mark locations of electrical outlets and heating vents. You’ll need to notch around these obstacles, affecting which board sections work where.
Measure each wall section with your tape pulled tight against the floor. Write down the measurement immediately. Start at one corner, note the distance to the first door casing or obstacle, then continue measuring each section separately. Don’t try to measure an entire room in one pass. Break it into manageable sections between obstacles. This approach helps you plan which board lengths to buy and where seams will fall if you need to join pieces.
Calculate your waste factor after adding up all wall measurements. If your room needs 47 linear feet of baseboard, multiply by 1.15 for a 15% buffer. That gives you 54 feet total to purchase. Angled corner cuts remove more material than straight cuts, especially when you’re learning and need to recut pieces that don’t fit quite right. Damaged boards and unexpected obstacles account for the rest.
| Cost Category | Budget Range | Mid-Range | Premium |
|---|---|---|---|
| Baseboard material (per linear foot) | $0.50 – $1.00 | $1.00 – $2.50 | $2.50 – $5.00+ |
| Adhesive and fasteners | $15 – $25 | $25 – $40 | $40 – $60 |
| Tools and rentals | $30 – $60 | $60 – $150 | $150 – $300+ |
| Paint, primer, and supplies | $25 – $40 | $40 – $70 | $70 – $120 |
| Miscellaneous (caulk, sandpaper, wood filler) | $15 – $25 | $25 – $40 | $40 – $60 |
| Total per average room (12×12) | $110 – $200 | $200 – $400 | $400 – $700+ |
| Professional installation (for comparison) | $300 – $500 | $500 – $800 | $800 – $1,200+ |
Removal takes one to two hours for an average room if the baseboard comes off without complications. Installation runs three to six hours depending on room size and corner complexity. First time installers should double those estimates. The work isn’t physically hard, but precision takes time. Drying and finishing add another 24 to 48 hours before the room is complete. Adhesive needs 30 minutes minimum hold time. Caulk requires at least 15 minutes before you can clean up excess. Paint needs multiple coats with drying time between applications. Plan your project timeline around these waiting periods rather than trying to rush through wet adhesive or paint. Your first baseboard project teaches you techniques you’ll use for years. The time investment builds skills that make future projects faster.
Selecting the Right Baseboard Molding Type
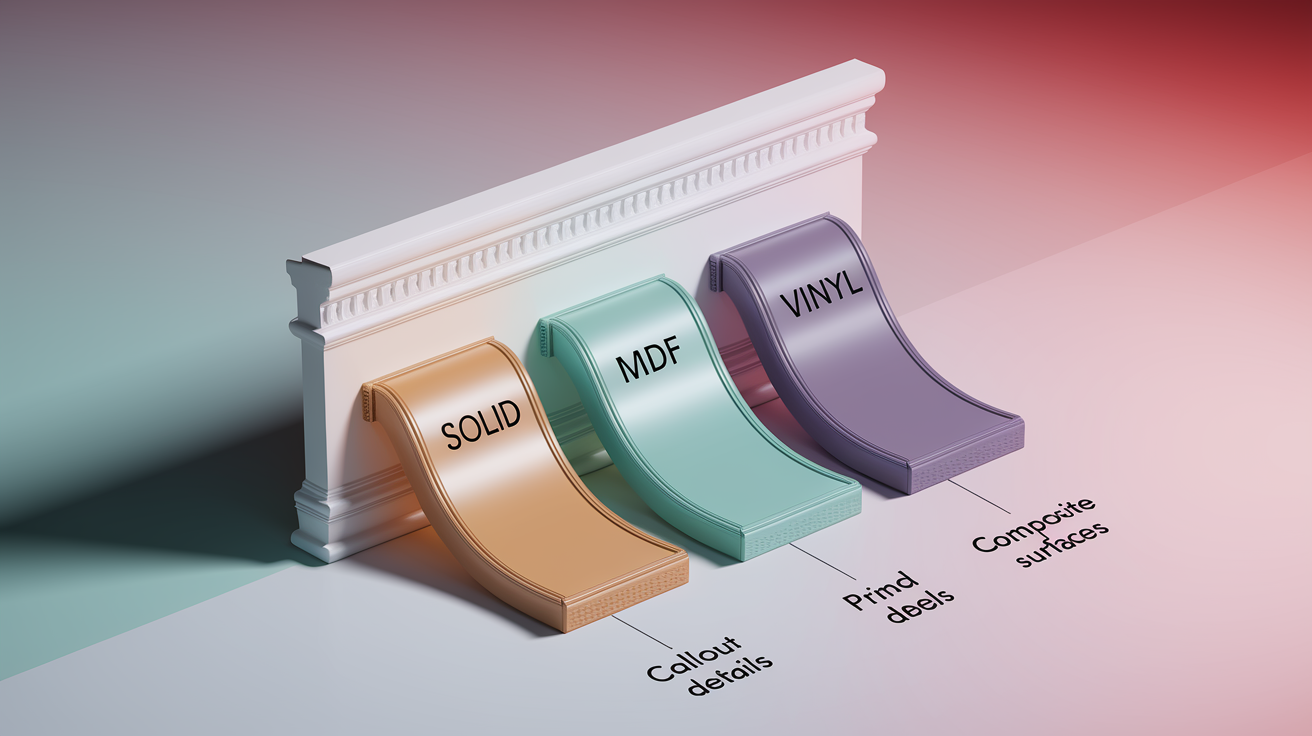
Baseboard options include solid wood, MDF (medium density fiberboard), and vinyl or composite materials. Each type handles differently during installation and holds up differently over time.
MDF costs less than solid wood and comes in many profiles already primed and ready for paint. It cuts cleanly without splintering and doesn’t have grain that shows through paint. The downside is weight. MDF feels heavy for its size, and it doesn’t handle moisture well. In rooms where water splashes or humidity runs high, MDF can swell and weaken. Solid wood costs more but lasts longer in damp conditions. Pine, poplar, and oak are common choices. Pine is softer and easier to cut but dents more easily. Oak is harder, more durable, and shows prominent grain even under paint.
Primed baseboard saves time if you’re painting to match existing trim. The factory primer coat creates a smooth base that’s ready for topcoat paint once you install and caulk. Unfinished baseboard lets you stain the wood if you want natural grain showing, but you’ll need to prime and paint it yourself if you want a painted finish. Raw wood also requires more sanding before it’s ready for finish coats. The choice depends on your finish goals and how much prep work you want to handle.
Matching existing profiles matters when you’re replacing sections in just one room or repairing damage while keeping the rest of the baseboard. Bring a small piece of your current baseboard to the home center or take a photo showing the profile shape. Standard profiles like colonial, ranch, and clamshell are easy to find. Custom or older profiles can be harder to match. If exact matching isn’t possible, replacing all baseboard in the room with a new profile gives you a consistent look without mismatched sections that draw attention.
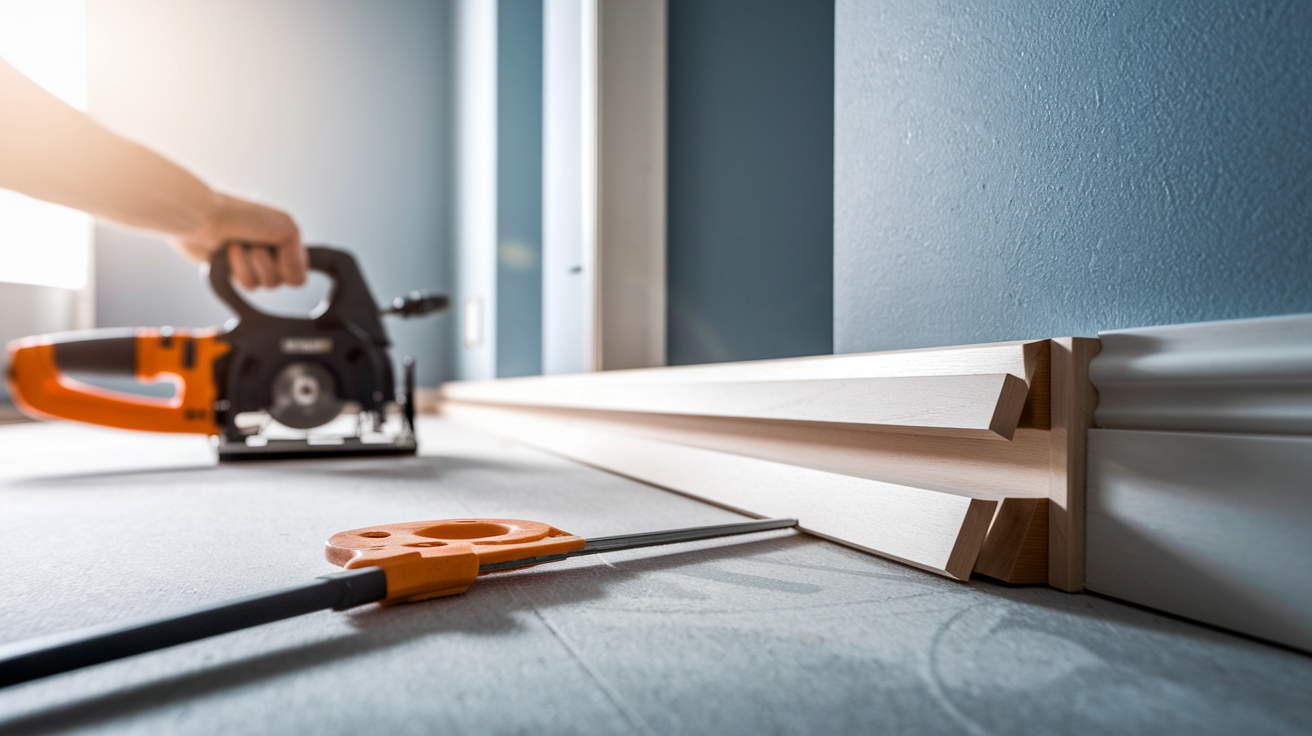
Cutting Precise Angles for Baseboard Corners
Corner cuts separate baseboard projects that look professional from ones that show visible gaps. The challenge isn’t the tool. It’s understanding which angle to cut and how to measure from the right point.
Outside corners and inside corners work differently. One shows the angle to the room, the other hides it.
Outside Corner Miter Cuts
Set your miter saw to 45 degrees for outside corners. Each piece gets cut at this angle so they meet in a point that wraps around the corner. Measure to the long point of the cut, not the short point. That long point is where the baseboard face touches the corner. Mark it clearly with a pencil before you cut. Hold the baseboard against the saw fence with the face side up, exactly how it will sit against the wall.
Make your cut with steady, even pressure. Let the saw do the work. Rushing creates rough edges that don’t fit tightly. Test fit both pieces together at the corner before installing anything. Hold them in position and check the joint. If you see a gap, the walls might not be exactly 90 degrees. Most corners aren’t perfect. Adjust your saw angle slightly, usually by one or two degrees, and recut one piece. Keep testing until the joint closes tight. A thin line where the pieces meet is fine. A gap you can see from across the room means the angle needs adjustment.
Inside Corner Techniques
Inside corners can use simple 45 degree miter cuts on both pieces, just like outside corners. This works, but seasonal humidity changes and settling walls often open up gaps over time. Coped joints fit tighter and stay tighter. Coping means you cut one piece square to fit into the corner, then cut the second piece to follow the profile of the first.
Cut the first piece with a straight 90 degree cut so it butts into the corner. Cut the second piece at 45 degrees with the coped edge, then use a coping saw to cut along the profile of the baseboard face. You’re removing the back portion of the angled cut so what remains matches the face shape of the baseboard. This contoured end nestles against the first piece. It takes more time than a simple miter, but the joint stays tight because it interlocks rather than just touching at an angle. For your first installation, simple miters work fine. As you get comfortable, coping delivers noticeably better results on inside corners.
Attaching Replacement Baseboard to Walls

Combining adhesive with nails gives you the strongest installation. Adhesive bonds the full length of baseboard to the wall surface. Nails secure it at structural points while the adhesive dries and provide long term holding power at wall studs.
Find wall studs before you apply any adhesive. Use a stud finder, or tap along the wall and listen for the solid sound that indicates framing behind the drywall. Studs typically sit 16 inches apart, measured from the center of one stud to the center of the next. Mark stud locations lightly with pencil on the wall above where your baseboard will sit. These marks tell you where to nail once the board is in position. Nailing between studs means you’re only catching drywall, which doesn’t hold.
Apply construction adhesive or wood glue along the back of the baseboard in two lines, one near the top edge, one near the bottom. If your baseboard has a flat back, run adhesive down the center as well. If it has ridges or relief on the back, skip the center. You want adhesive where the board makes contact with the wall. Don’t overdo it. A continuous bead about the width of a pencil is enough. Too much adhesive squeezes out and creates a mess without adding holding power. Press the baseboard firmly against the wall starting at one end. Work your way along the length, pushing it tight to the wall surface. Hold pressure for three to five minutes. The adhesive starts to grab during this time, and the board will stay in position better when you let go.
Once the adhesive has its initial grip, drive finishing nails at each stud location. Angle the nails slightly downward so they pull the baseboard tight against the wall as they sink in. Use 1.5 inch to 2 inch finishing nails depending on your baseboard thickness. Countersink each nail just below the surface using a nail set or the tip of another nail. You’ll fill these small holes later. After nailing, place weights against the baseboard if you have them. A few heavy books or a toolbox works. The weights keep consistent pressure while the adhesive fully cures, usually at least 30 minutes. Don’t skip this step, especially on long sections. Baseboard can pull away from the wall slightly if adhesive dries without pressure.
Fastening best practices for secure installation:
Nail at every stud location, typically 16 inches apart. Skipping studs reduces holding power and can let baseboard pull away over time. Angle finishing nails slightly downward to pull board tight. Straight horizontal nails don’t draw the baseboard firmly against the wall. Avoid splitting by pre drilling nail holes in hardwood baseboard. A small pilot hole prevents cracks, especially near board ends. Keep countersink depth uniform, about 1/16 inch below surface. Consistent depth makes wood filler application easier and more uniform.
Finishing Details: Caulking, Filling, Sanding, and Painting
Finishing work turns installed baseboard into trim that looks like it’s always been part of the room. This stage requires patience. Rushing creates visible flaws that stand out once paint dries.
Caulking and Filling Gaps
Wait until adhesive has completely dried before caulking. Run a bead of paintable latex caulk along the top edge where baseboard meets wall. Cut the caulk tube tip at a 45 degree angle for better control. Start at one end and apply steady, even pressure to the caulk gun trigger. Move at a consistent speed so the bead stays uniform. Stop at the end, release trigger pressure, and smooth the caulk line immediately with your finger. Wet your finger first so the caulk doesn’t stick to your skin. Run your finger along the bead in one smooth motion to press it into the gap and create a clean, slightly concave line.
Wipe excess caulk off your finger with a damp cloth, then clean any smears off the wall or baseboard right away. Wet caulk comes off easily. Dried caulk requires scraping. Allow the caulked area to dry for at least 15 minutes before moving on to other work in the room. Touch it lightly to check. It should feel dry and slightly firm, not tacky.
Fill nail holes with wood putty or filler after caulk dries. Press the filler into each hole with a putty knife, slightly overfilling so it sits just above the surface. This accounts for shrinkage as the filler dries. Let it dry completely according to product directions, usually 30 minutes to an hour. Small gaps between baseboard pieces, at corners, or around patches also need wood filler. Apply it the same way, overfilling slightly, then letting it dry fully before sanding.
Sanding and Surface Preparation
Sand filled areas smooth once everything has dried. Start with 80 grit or 120 grit sandpaper if you’re sanding by hand, or use a random orbit sander on low speed. Sand the filler flush with the surrounding baseboard surface. You should feel no ridge when you run your hand over it. Switch to 220 grit sandpaper for final smoothing. This finer grit removes sanding scratches and creates a surface that won’t show brush marks under paint.
Wipe down the entire baseboard with a tack cloth after sanding. This sticky cloth grabs fine dust that regular rags push around. Get all the dust off. Any that remains will show up as grit under your paint. Run your hand along the baseboard. It should feel completely smooth and clean.
Priming and Painting
Prime raw wood baseboard before painting. Primer seals the wood, prevents tannin bleed through, and gives paint a uniform surface to grip. Primed MDF or pre primed baseboard may not need additional primer, but check the product recommendations. When in doubt, prime it. One coat of primer is usually enough.
Apply paint with a good quality angled brush. The angle helps you control the paint along edges and in corners. Start at one end and work toward the other, using long, smooth strokes. Don’t overload the brush. Dip it about one third of the way into the paint, tap off excess on the side of the can, then apply to the baseboard. Thick paint runs and drips. Thin, even coats look better and dry faster. Allow at least 15 minutes drying time before checking if you need a second coat. Heavy paint application takes longer to dry.
Most baseboard needs two coats of paint for full coverage and durability. Let the first coat dry completely before applying the second. Touch it lightly in an inconspicuous spot. If it feels dry and doesn’t leave a mark on your finger, it’s ready for the next coat. After the final coat dries, inspect for any spots you missed or areas where the paint looks thin. Touch up as needed with a small brush. Stand back and look at the baseboard from different angles. Light hits it differently throughout the day and shows imperfections you miss up close.
Working Around Obstacles During Baseboard Installation
Real rooms have outlets, vents, door casings, and uneven walls that all require adjustments. Precision matters more around obstacles than anywhere else.
Door casings usually sit flush with the wall or project slightly beyond it. You can undercut the casing with a jamb saw so baseboard slides underneath for a clean look, or cut the baseboard to butt against the casing. Undercutting looks more professional but requires a specialized saw or careful work with a handsaw. Butting against the casing is simpler. Measure carefully to where the baseboard end will meet the casing, make a straight cut, then test fit before installing. If the fit isn’t tight, use a sharp chisel to trim small amounts from the baseboard end until it fits snugly. Careful chisel work squares up corners that the saw left slightly rough.
Outlets and heating vents need notches cut into the baseboard back edge so it sits flat against the wall. Measure from the corner or last installed piece to the outlet box, then measure the height from the floor to the bottom and top of the box. Transfer these measurements to your baseboard and mark the notch clearly. Use a jigsaw or coping saw to cut out the marked section. Make the notch slightly larger than the outlet box, about 1/8 inch on all sides. This gives you room for adjustment and accounts for measurement variations. Test fit the board against the wall before applying adhesive. The outlet should sit within the cutout without the baseboard binding against it.
Uneven or wavy walls cause gaps between the wall surface and baseboard. You’ll see light behind the board or feel movement when you press it. For minor variations, adhesive and firm pressure during installation pulls the baseboard to follow the wall contour. For larger gaps, use shims behind the baseboard to fill the space before applying adhesive and nails. Small wooden shims from the home center work well. Tap them into place behind the board, then trim any portion that sticks out above the baseboard top edge. Strategic installation sequence reduces fitting problems. Start with your longest straight wall section to establish a baseline. Work toward corners and complex areas. Address obstacles last after you have the straightforward sections installed and you can measure remaining spaces precisely.
Common mistakes when working around obstacles:
Forcing a poorly fitting piece around an outlet bows the baseboard away from the wall and creates visible gaps that caulk can’t hide. Cutting wrong miter angles where baseboard meets door casings causes problems because each casing intersection requires careful angle measurement, not just standard 45 degrees. Skipping test fits before final installation near obstacles is a mistake since adhesive and nails are hard to undo. Dry fitting catches problems while adjustments are still easy. Not allowing adequate gap clearance around electrical boxes means tight notches can bind on the box and prevent baseboard from sitting flush against the wall. Forgetting to account for floor transitions or carpet thickness creates issues because baseboard that works on hardwood may sit too high when it crosses to carpet. Rushing cuts for complex notches around multiple obstacles leads to gaps and misalignment since intricate cuts require multiple measurements and careful layout.
When to Call a Professional for Baseboard Replacement
Some projects make sense to hand off even if you’re generally comfortable with DIY work. Time, specialized skills, and underlying problems all factor into the decision.
Professionals bring experience with complex cuts, especially where multiple angles meet or intricate molding profiles require precise coping. They own the specialized tools that make these cuts accurately, compound miter saws, pneumatic nailers, and professional grade coping saws. They can match difficult profiles or source custom milling when standard options don’t work. The work gets done in hours instead of days, and it comes with a warranty. If the corners don’t fit right or paint doesn’t cover properly, they come back and fix it at no additional cost.
The value calculation changes when your project involves whole house replacement, complex architectural details, or tight deadlines. Running new baseboard through five or six rooms requires consistency across long distances, managing material orders, and keeping the job moving efficiently. Historic home molding often involves profiles that aren’t available at home centers. A professional knows where to source matching profiles or how to mill custom pieces that blend with original trim. They understand building techniques from different eras and how those homes settle and shift differently than modern construction.
Underlying issues sometimes require licensed contractors with specific expertise. Active water damage with mold growth needs professional mold remediation before new baseboard goes in. Pest damage often signals a larger infestation requiring licensed pest control treatment. Structural concerns like damaged framing or compromised wall cavities belong to a general contractor or carpenter who can assess the full scope and obtain permits if required. Installing new trim over these problems without proper remediation means you’re covering up damage that will continue spreading behind your fresh baseboard.
Situations where professional help makes practical sense:
Historic molding profiles that require custom milling or specialty sourcing need professionals since matching 100 year old trim often needs access to millwork shops and specialized knowledge of period profiles. Whole house baseboard replacement across multiple rooms benefits from bulk material purchasing, consistent installation quality, and efficient workflow that professionals deliver. Active water damage with visible mold requiring remediation needs licensed mold remediation to ensure proper containment, removal, and prevention before new materials get installed. Complex architectural details like curved walls or elaborate trim work require specialized techniques and tools to create clean results on difficult installations. Tight project deadlines with limited personal time available work better with professional crews who complete in days what takes weekends of DIY work, valuable when you need the room finished quickly. Lack of essential tools with rental costs approaching professional installation fees means when tool rental, material waste, and time investment add up, professional installation can cost less overall.
Final Words
Damaged baseboards don’t fix themselves, and now you know how to replace damaged baseboard the right way.
From assessing rot and moisture problems to nailing that final coat of paint, each step builds toward trim that looks clean and holds up.
The work takes patience. Corner cuts need attention. Caulk lines matter. But when you step back and see tight joints, smooth paint, and baseboard that actually protects your wall, you’ll know the effort was worth it.
And if the scope grows or hidden damage shows up, calling a pro is always an option.
FAQ
Can you replace baseboards yourself?
Yes, you can replace baseboards yourself if you have basic carpentry skills and the right tools. The project involves removing damaged boards, measuring and cutting new pieces, and securing them with adhesive and nails. Most homeowners can complete baseboard replacement with patience and careful attention to detail.
What is the 7% rule for baseboards?
The 7% rule for baseboards suggests that baseboard height should be roughly 7% of your ceiling height for balanced proportions. For standard 8-foot ceilings, this means 5 to 7 inch baseboards work well. This guideline helps create visual harmony between floor trim and room dimensions.
What is the average cost to replace baseboards?
The average cost to replace baseboards ranges from $5 to $12 per linear foot for DIY projects (materials only) and $8 to $20 per linear foot with professional installation. Total cost depends on material choice, room size, and complexity of corners and obstacles.
What does black mold look like behind a baseboard?
Black mold behind a baseboard appears as dark greenish-black patches or fuzzy growth on the wall or back of the board. You might notice a musty smell, water stains, or discoloration before seeing actual mold. Soft or spongy baseboard wood often indicates moisture problems and possible mold growth.