

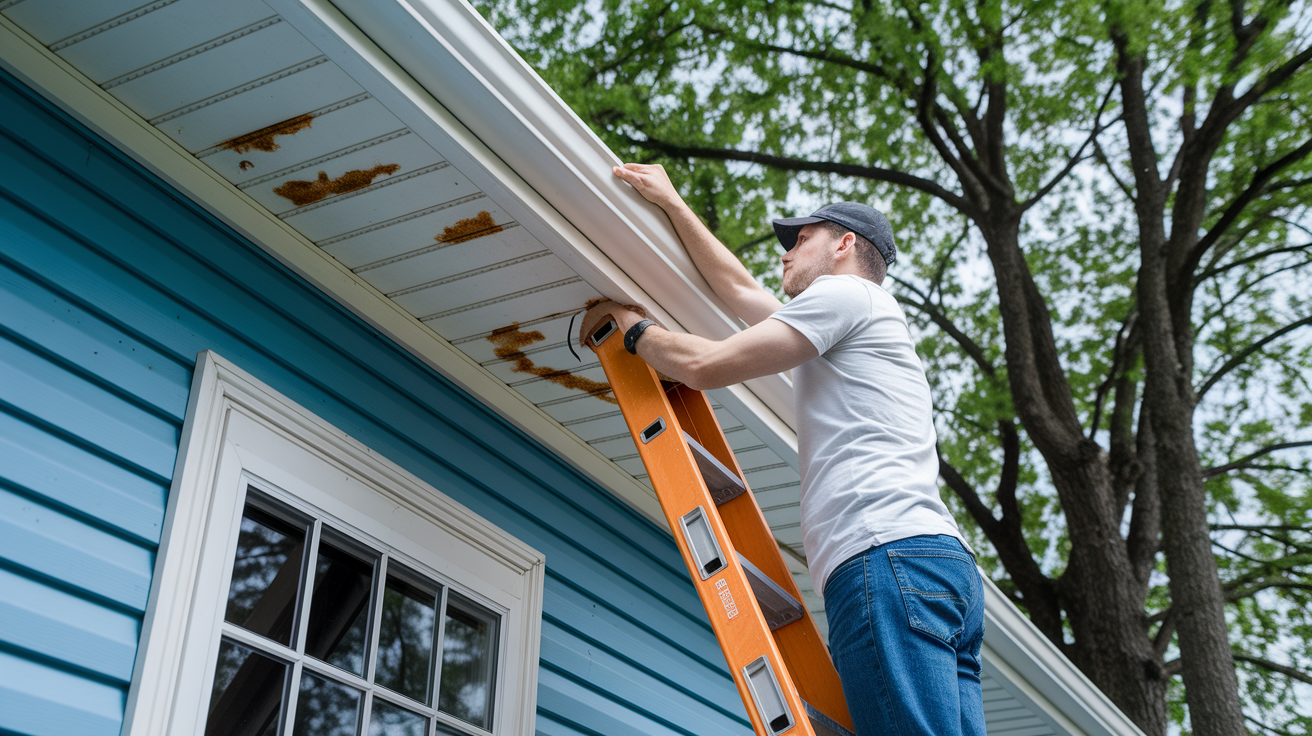

Ever notice how damaged soffits seem fine until you actually look up? That sagging section you’ve been ignoring is letting moisture into your attic right now, and pests are using those cracks as entry points to your wiring and insulation. The good news is most soffit repairs follow a straightforward process homeowners can handle with the right approach and materials. You’ll need to assess the damage accurately, remove rotted sections completely, fix any structural problems in the rafters, and install new panels that actually ventilate. We’ll walk you through each step so your repair holds up instead of falling apart in six months.
Identifying and Assessing Your Soffit Damage
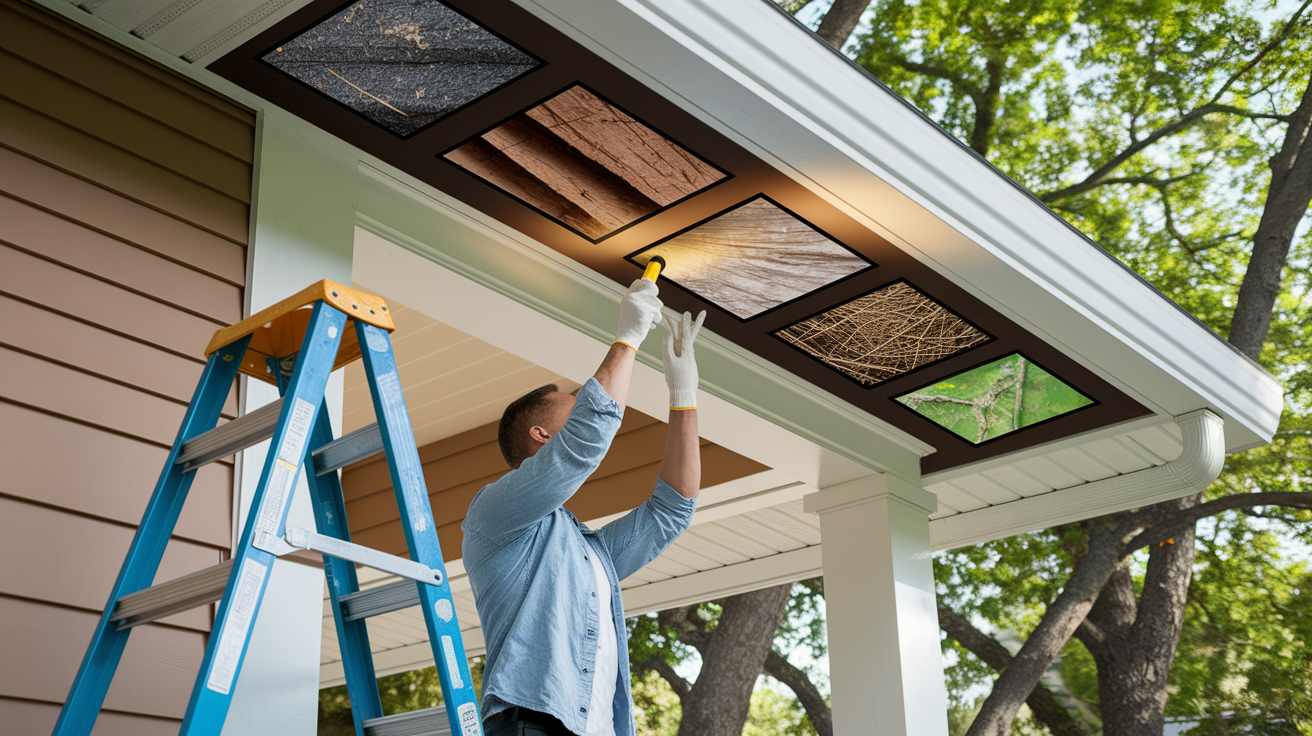
Getting the damage assessment right keeps you from doing incomplete repairs that fall apart in a few months. Rush into soffit work without understanding what you’re dealing with, and you’ll be cutting out sections only to find more rot hiding behind them. That wastes time and materials.
Here’s what to look for when you’re inspecting your soffits:
- Water stains showing up as dark streaks or yellowish patches
- Wood that’s gone soft and compresses when you press it
- Pest activity like holes, nests, or droppings near the edges
- Blocked vents from paint buildup, debris, or closed openings
- Sagging sections or gaps between the soffit and house wall
- Paint that’s peeling or bubbling because moisture got trapped underneath
- Cracks or splits where you can see daylight coming through
- Mold or mildew growing in black, green, or white fuzzy patches
- Gaps between soffit and fascia wide enough to see into your attic
The screwdriver test shows you hidden rot that looks solid from the ground. Tap the soffit gently with a flathead screwdriver and apply light pressure. Healthy wood makes a solid thunk and pushes back. If pieces crumble off or the screwdriver sinks right in, you’ve got active rot that needs fixing now. Test multiple spots across the damaged area since rot doesn’t usually stay contained to one section.
Telling cosmetic damage from structural problems determines how complex your repair gets. Peeling paint and minor surface cracks often just need cleaning, caulking, and fresh paint. Structural issues look different. Soffits that sag noticeably, sections pulling away from the house, or wood that feels spongy across large areas. Push on the fascia boards. If they move or the rafters show dark staining where they meet the soffit, damage goes deeper than what you can see.
Four root causes show up during most assessments. Poor installation leaves gaps that let wind-driven rain into wall cavities and attic spaces. Water intrusion from clogged gutters overflows right onto the soffit wood, causing warping and mildew. Pests including birds, squirrels, rodents, bees, and wasps use cracks as entry points to attics and wiring areas. Dry rot fungus spreads through damp wood from adjacent siding, traveling along moisture pathways you can’t see from outside.
Document everything with photos from multiple angles and measure the affected sections carefully. Note dimensions of rotted areas, count how many soffit panels need replacing, and photograph where soffits meet walls and fascia. These measurements guide your material purchases and save you from making multiple trips to the hardware store mid project.
Essential Tools and Materials for Soffit Repairs
Get all your supplies before you start. Nothing’s worse than being balanced on a ladder with parts half removed and realizing you’re missing something.
| Tool/Material | Purpose | Type/Specification |
|---|---|---|
| Flat bar | Prying trim and panels without splitting wood | 12 inch with thin blade edge |
| Reciprocating saw | Cutting out rotted rafter sections | Variable speed with wood blade |
| Circular saw | Cutting new soffit panels and fascia boards | 7.25 inch blade, corded or cordless |
| Powder actuated nailer | Fastening cleats to masonry surfaces | With appropriate fasteners for brick or concrete |
| Hammer and nail set | Driving and countersinking galvanized nails | 16 ounce framing hammer, 1/8 inch nail set |
| Measuring tape | Measuring sections and cutting materials accurately | 25 foot locking tape |
| Pressure treated lumber | Replacing rotted rafters and structural components | 2×4 and 2×6, rated for ground contact |
| Soffit panels | New underside covering with ventilation | Match existing material: plywood, vinyl, or aluminum |
| Galvanized nails | Rust resistant fastening of fascia and trim | 8d and 10d ring shank for holding power |
| AnchorSeal or similar waxy sealer | Sealing plywood edges against water penetration | Wax based end grain sealer |
| Exterior primer | Protecting wood from moisture before installation | Oil based or stain blocking latex primer |
| Wood putty | Filling countersunk nail holes | Exterior grade, paintable formula |
Material selection depends on matching what’s already there and what your local weather throws at you. Aluminum soffits resist moisture but dent easily. They work best in moderate climates. Vinyl handles humidity well and costs less but can crack when it gets really cold. Wood soffits, usually plywood or tongue and groove boards, give you the most traditional look and easier repairs but they need consistent maintenance. If you’re in an area with frequent rain or high humidity, pressure treated plywood adds years compared to standard exterior grade sheets. Coastal regions with salt air? Aluminum or vinyl outlasts wood that splits and warps despite careful sealing.
Complete Soffit Repair Process From Start to Finish

Soffit repair follows a logical sequence from removal through structural fixes to final finishing. Skip steps or work out of order and you’ll create gaps in protection that shorten how long your repair lasts.
Removing Damaged Components
Work from the top down so you don’t damage components you’ll need later. Start with the shingle mold, that thin trim piece running along the top of the fascia where it meets the roof edge. Slide a flat bar behind it gently and pry away from the fascia, working along the length without splitting the wood if you’re planning to reuse it. Remove one small section at a time rather than forcing the entire piece.
Fascia boards come off next by locating the nails or screws holding them to rafter tails. Support the fascia as you remove the last fasteners since it can drop suddenly and crack. Pull down damaged soffit panels, watching for pest nests that sometimes appear once you expose the space. Squirrel nests, wasp combs, and bird debris fall out as you remove old soffits.
Get rid of rotted materials right away and sweep the area clear. Wet, damaged wood attracts more pests and creates slip hazards on ladders.
Repairing Structural Elements and Rafters
Rafter repairs become necessary when rot extends into the structural wood supporting the roof overhang. You’ll see dark staining, soft spots, or actual gaps where wood has deteriorated.
Cut out rotted rafter sections using a reciprocating saw, making clean square cuts past the damaged area into solid wood. Measure the gap carefully and cut pressure treated lumber to fit, accounting for any angle where the rafter meets the house wall. Pressure treated wood resists moisture and decay far better than standard framing lumber. That’s important for areas that saw water damage.
Installing support cleats provides extra strength where overhangs extend past the house structure. For soffits near brick chimneys or solid masonry walls, attach a 2×4 cleat to the surface using a powder actuated nailer, which drives hardened fasteners into concrete or brick without pre drilling. New rafters get double attachment for maximum holding power. Screw them to the backing board where they meet the house, then secure the other end to the cleat you’ve installed on the chimney.
What matters for structural repairs:
- Use pressure treated wood rated for ground contact in areas prone to moisture
- Keep original rafter spacing to support roof loads properly
- Preserve clear ventilation paths from soffit vents to attic space
- Verify that new rafters sit level and support fascia without sagging
- Make sure all connections are solid before adding soffit and trim weight
Installing New Soffit Panels With Proper Ventilation
Soffits do two things. They protect the rafter area from weather and provide continuous ventilation that prevents attic moisture and mold buildup. Installing new panels requires attention to both.
Prepare plywood soffit panels by applying AnchorSeal or similar waxy sealer to all cut edges. This step prevents water from wicking into the wood grain and causing rot from inside. Brush the sealer on generously and let it soak in. Prime both the top surface that faces the attic and the bottom surface that’s visible from below. Two sided priming stops moisture penetration regardless of which direction water approaches, and it improves paint adhesion for final finishing.
Position panels carefully to maintain ventilation gaps at the wall edge and make sure any vent holes line up with attic airflow paths. Blocking these openings traps humid air in the attic, creating the exact moisture problem you’re fixing. For vented soffit panels with perforations, install them with the vents facing the correct direction and spaced evenly across the eave length.
Here’s the installation sequence:
- Measure and cut the first panel to fit between fascia and house wall
- Position the panel with the rear edge tight to the house and the front edge flush with the fascia
- Secure with galvanized nails or screws every 16 inches along rafters and wall supports
- Keep ventilation openings clear by not covering existing attic vents
- Install the next panels with proper overlap on tongue and groove types or tight butt joints on plywood
- Drive final fasteners after checking that panels sit flat without buckling or gaps
After installation, look up from below and verify you can see vent perforations or designated vent areas. Attic ventilation requires both intake air from soffits and exhaust vents at the roof peak to create airflow. If you’ve got water damage concerns, you can learn more about properly addressing moisture issues at Water Damage Repair and Remediation.
Attaching Fascia and Completing Trim Work
Fascia boards provide the vertical face that gutters attach to and the backing for soffit panels. Proper installation affects both structural integrity and curb appeal.
Slide the new fascia into position against the rafter tails and align it so the top edge sits just below the roof edge. Secure it with galvanized nails every 16 inches into solid rafter wood, angling nails slightly for better holding power. Countersink each nail head slightly below the wood surface using a nail set and hammer. This prevents rust stains and creates a smooth surface for putty.
Crown molding installation seals the gap between the soffit rear edge and the house wall. This trim piece prevents water from running behind the soffit and blocks pest entry through what would otherwise be an open crack. Cut molding to length with 45 degree corners at outside edges, press it tight to both surfaces, and nail through the molding into the wall. Reattach the shingle mold along the fascia top where it meets the roof, nailing into both fascia and roof decking if possible.
Finishing details that separate amateur from professional work:
- Fill all countersunk nail holes with exterior wood putty, slightly overfilling and sanding flush after it dries
- Reattach shingle mold in its original position or slightly higher if adjusting for thicker replacement fascia
- Caulk all joints where trim pieces meet, tooling the caulk smooth with a wet finger
- Seal the seam where soffit meets the house wall to prevent water intrusion
- Final inspection checking that all connections sit tight with no gaps or loose sections
Get water tight seals at every joint by running a thin bead of exterior caulk and pressing trim firmly before fastening. Water finds the smallest gaps and undoes repair work within months if entry points remain.
Sealing, Priming, and Weather Protection for Soffit Repairs
Multiple protection layers extend soffit life from a few years to decades. Each step blocks water and moisture through a different mechanism.
| Protection Step | Product Type | Application Timing |
|---|---|---|
| Edge sealing | Wax based end grain sealer (AnchorSeal) | Before installation on all cut plywood edges |
| Primer application | Oil based or stain blocking exterior primer | Both surfaces before installation, after edge sealing dries |
| Joint caulking | Paintable exterior silicone or acrylic latex caulk | After installation, before painting |
| Paint application | 100% acrylic exterior paint, semi gloss or satin | After primer dries and caulk cures |
| Final sealing | Clear water repellent for wood (optional extra protection) | After paint fully cures, typically 30 days |
| Inspection points | Visual check for missed spots or thin coverage | Each coat application and 24 hours after final coat |
Proper caulking technique matters as much as product choice. Cut the caulk tube tip at a 45 degree angle about 1/4 inch from the end, creating an opening that matches your joint width. Apply steady pressure while pulling the gun along the joint, not pushing it. Immediately tool the bead with a wet finger or caulk tool, pressing it into the gap and smoothing the surface. Caulk needs 24 hours minimum before painting, longer in humid conditions. Check the tube for specific cure times since some formulas require 48 to 72 hours.
Paint and primer selection depends on climate exposure and existing finishes. Oil based primers seal wood grain better and block tannin stains in cedar or redwood, but they require mineral spirits for cleanup. Water based stain blocking primers work nearly as well and clean up easily. For paint, 100% acrylic formulas flex with temperature changes better than oil based options, reducing cracking. Semi gloss or satin sheens shed water more effectively than flat paint and make cleaning easier. If your area sees big temperature swings, choose paint rated for your climate zone with extra flexibility additives.
Allow proper cure time before exposing fresh repairs to weather. Primer needs 24 hours in dry conditions before painting. Paint requires 2 to 3 days before heavy rain, though light mist won’t harm it after 4 to 6 hours. Check weather forecasts before starting and plan the final coats for a dry stretch. Rush this step and you’re inviting paint failure and water penetration within the first season.
Safety Precautions When Working on Soffits and Eaves

Overhead work near roof edges creates specific hazards that ground level projects don’t. Most soffit injuries come from falls, ladder shifts, or debris hitting people below.
What you need to stay safe during soffit work:
- Set ladders on firm, level ground with the base 1 foot out for every 4 feet of height, and keep three point contact when climbing
- Wear safety glasses rated for impact protection since sawdust and wood chips fall into your face
- Use work gloves when handling lumber and prying old materials to prevent splinters and cuts
- Wear a dust mask when removing old soffits since rotted wood releases mold spores and particles
- Don’t work in wet conditions or winds above 15 mph that make ladder work dangerous
- Have a helper stabilize the ladder base and hand up tools and materials rather than climbing with loaded hands
- Protect landscaping below with drop cloths to catch debris and prevent shrub damage
- Make sure you’ve got stable footing on the ladder by choosing the correct height so you’re not reaching overhead or overextending
Power tool safety requires attention to blade guards and cutting technique. Keep reciprocating saw blades sharp so they cut cleanly without binding and kicking back. Support boards fully when cutting with a circular saw so the blade doesn’t pinch. Unplug or remove batteries when changing blades or clearing jams. For powder actuated nailers, treat them like firearms. Point only at the work surface, keep your hand away from the muzzle, and wear hearing and eye protection since the powder charge creates a loud report.
Stop work immediately if conditions become unsafe. Ladders that shift on soft ground, unexpected wind gusts, or sudden rain make continuing dangerous regardless of how close you are to finishing. Fatigue also creates hazards. Take breaks every hour when working overhead, since tired arms can’t grip tools or maintain balance as reliably.
Working near electrical wiring in eave areas requires shutting off power to exterior lights and checking with a non contact voltage tester before cutting or drilling. Soffit areas often contain weatherhead electrical feeds from the utility and light fixture wiring. If you’re uncertain about wire locations or see cables running through the work area, call an electrician before proceeding.
Cost Breakdown and Time Investment for Soffit Damage Repair
Understanding the financial commitment helps you decide between DIY work and hiring professionals. Costs vary quite a bit based on damage extent and material choices.
| Repair Scope | DIY Material Cost | Professional Total Cost | Time Required |
|---|---|---|---|
| Minor patch (under 4 feet) | 35 to 60 dollars | 70 to 150 dollars | 2 to 4 hours |
| Single panel replacement | 50 to 90 dollars | 150 to 250 dollars | 4 to 6 hours |
| Fascia and soffit section (8 to 12 feet) | 120 to 200 dollars | 300 to 600 dollars | 6 to 10 hours |
| Rafter and structural repairs | 180 to 350 dollars | 450 to 900 dollars | 8 to 14 hours |
| Complete soffit replacement (one side of house) | 400 to 700 dollars | 900 to 1800 dollars | 16 to 24 hours |
Material costs depend heavily on soffit type and quality grade. Vinyl soffit panels run 1.50 to 3 dollars per linear foot and require matching J channel and trim pieces. Aluminum panels cost 2 to 4 dollars per linear foot with better durability but more difficult cutting and fitting. Wood soffit using 1/2 inch exterior plywood costs 35 to 50 dollars per 4×8 sheet, which covers about 30 linear feet at standard 12 inch soffit depth. Add fascia boards at 8 to 15 dollars per 12 foot length, pressure treated 2x4s at 6 to 10 dollars each for structural repairs, plus fasteners, primer, paint, caulk, and sealer bringing the supply total up by another 30 to 50 dollars.
Time investment stretches beyond the actual work hours, especially for first time repairs. Expect to spend 2 to 3 hours on initial assessment, measuring, and material shopping. Learning proper techniques by watching videos and reading instructions adds another hour. First time DIYers typically take twice the estimated work time since each step involves problem solving and technique development. A 6 hour repair job becomes a full weekend project when you factor in setup, cleanup, multiple hardware store trips for forgotten items, and the slower pace of unfamiliar tasks.
What increases costs: working on second story eaves requiring scaffolding rental at 100 to 200 dollars per week, restricted access areas where ladders won’t fit safely, extensive structural damage requiring sistered rafters or rebuilt overhangs, and matching custom trim profiles on older homes where standard materials don’t fit. Homes with ornamental brackets, decorative soffit patterns, or unusual eave depths need custom cut materials and precise fitting that takes extra time and generates more waste.
DIY Repair Versus Hiring a Professional Contractor

Deciding whether to tackle soffit repairs yourself or hire help depends on damage complexity, your skill level, and available time. Not every homeowner should attempt this work.
Situations that require professional help:
- Extensive structural damage affecting multiple rafter tails or showing signs of roof sagging
- Multi story homes requiring scaffolding or specialized access equipment beyond standard ladders
- Damage affecting multiple roof areas or extending into fascia, rake boards, and trim on several sides
- Uncertainty about local building codes regarding ventilation requirements or structural modifications
- Lack of necessary tools, particularly reciprocating saws, circular saws, and powder actuated nailers
- Discomfort working on ladders at heights above 12 feet or limited mobility affecting balance
- Time constraints where repair delays allow water damage to spread into walls and attic spaces
Realistic DIY capability assessment starts with honest evaluation of your carpentry skills and tool familiarity. Soffit repair requires accurate measuring and cutting, understanding how structural components connect, recognizing rot versus superficial damage, and producing finished work that looks professional from the street. If you’ve successfully completed deck repairs, fence building, or interior trim work, you likely have the baseline skills. Physical requirements include climbing ladders repeatedly, working overhead with your arms raised for extended periods, and handling 12 foot boards alone or with minimal help.
Professional contractors bring specialized knowledge about ventilation requirements, proper fastening schedules, and weather resistant construction methods. Licensed contractors carry insurance covering property damage and injuries, provide warranties on their work typically ranging from 1 to 5 years, and complete repairs in 1 to 2 days versus the week or more DIY projects often consume. Look for contractors with specific experience in carpentry and exterior trim work, not just general handyman services. Ask for references from jobs completed in the past year, verify their license and insurance status with your state contractor board, and get written estimates detailing materials, labor, timeline, and warranty terms.
Professional diagnosis provides value even if you complete repairs yourself. Many contractors offer inspection services for 75 to 150 dollars where they assess damage extent, identify underlying causes, and provide a detailed scope of work. This prevents the common DIY mistake of repairing visible damage while missing hidden rot or moisture sources. Some jurisdictions require permits for structural work including rafter replacement or modifications affecting roof ventilation. Check with your local building department before starting work that might need inspection. If you need extensive damage repairs or prefer working with experienced professionals, RestoreSafeHome.com Professional Repair Services provides reliable repairs with proper finishing and guarantees.
Maintenance Tips to Prevent Future Soffit Damage
Preventive maintenance costs a fraction of repair work and catches problems when fixes take minutes instead of days. Regular attention extends soffit life by decades.
What homeowners should do for maintenance:
- Conduct biannual visual inspections from ground level using binoculars to spot paint failures, cracks, or staining without climbing ladders
- Clean gutters and check soffit condition at the same time since clogged gutters cause most water damage to soffits
- Seal small cracks immediately when they appear using exterior caulk before they expand and allow water penetration
- Make sure attic insulation doesn’t block soffit vents by checking from inside the attic that you can see daylight at the eave edge
- Trim tree branches that touch or hang over soffits since they trap moisture, drop debris, and provide pest highways to the roof
- Check soffits after severe storms for wind damage, debris impacts, or areas where driving rain may have found entry points
- Annual close inspection of paint condition and wood integrity during spring when you can address any issues before summer weather
Seasonal considerations affect maintenance timing and focus areas. Spring inspections catch winter damage from ice dams, where melting snow backs up under shingles and runs down onto soffits. Check for water staining and soft spots along the lower edge where ice accumulates. Summer heat causes paint to blister and wood to crack as it dries, so this season works well for repainting and sealing. Fall preparation includes clearing leaves from soffit vents and gutters before winter, and checking that all caulked joints remain sealed. Winter inspections from inside the attic can reveal light penetrating through cracks or gaps that show as bright spots on cold days.
Documentation practices help track deterioration patterns and plan maintenance budgets. Photograph each side of your house annually from the same spot, noting the date and any concerns. Compare year to year images to see if staining is spreading, paint is failing faster, or structural changes are occurring. Mark a calendar with maintenance tasks: “April: gutter cleaning and soffit check,” “August: paint touch up,” “October: attic vent inspection.” This regular schedule prevents the out of sight out of mind problem where soffit damage progresses unnoticed for years.
Proper maintenance connects directly to home value and structural protection since soffits form the first defense against water and pest intrusion into wall cavities and attic spaces. Well maintained soffits preserve the roof structure, reduce energy costs through proper ventilation, and maintain the home’s exterior appearance. Small investments in caulk, paint, and cleaning time prevent the expensive structural repairs that neglected soffits eventually require.
Final Words
Knowing how to repair soffit damage comes down to careful assessment, proper material selection, and methodical execution from removal through final sealing.
Start by identifying the full extent of deterioration, including hidden structural issues. Gather the right tools and materials before you begin. Follow the repair sequence systematically: remove damaged components, address any rotten rafters, install new panels with proper ventilation, and finish with weather-tight sealing.
Take safety seriously when working overhead. If you find extensive structural damage or feel uncertain about any step, bringing in a professional makes sense.
With solid repairs and regular maintenance, your soffits will protect your home for years to come.
FAQ
Can I repair my own soffit?
You can repair your own soffit if the damage is limited, you have basic carpentry skills, and you’re comfortable working on ladders with power tools. Small repairs like replacing a single panel or patching minor rot are manageable DIY projects for most homeowners. However, extensive structural damage, multi-story work, or situations involving rafter replacement typically require professional help due to safety concerns and the skill level needed.
Does insurance cover soffit repair?
Insurance typically covers soffit repair when the damage results from a sudden covered event like storm damage, fallen trees, or wind-related incidents. Insurance usually doesn’t cover soffit damage from gradual deterioration, lack of maintenance, pest infestations, or rot that developed over time. Check your specific policy and document the damage with photos before filing a claim to help the adjuster understand the cause.
What is the average cost to replace a soffit?
The average cost to replace a soffit ranges from 70 dollars to 300 dollars for professional installation, depending on the extent of damage and materials used. DIY material costs typically run about half the professional repair price, though this doesn’t include the time investment. Costs increase when repairs involve structural work, hard-to-reach areas, or matching custom trim profiles on older homes.
Do roofers repair soffits?
Roofers do repair soffits as part of their standard roofing and exterior trim services, especially when soffit damage relates to roof issues like gutter overflow or ice dams. Many roofing contractors handle both fascia and soffit repairs since these components connect directly to the roof structure. Homeowners facing extensive damage or lacking DIY experience should hire professional roofers who have the proper equipment and skills for safe, code-compliant repairs.