


Ever notice how a slightly sagging ceiling seems fine until suddenly it’s not? That dip you’ve been ignoring probably won’t crash down tomorrow, but it’s telling you something needs attention now. Sagging drywall happens from poor installation, too much weight, settling, or water sneaking in from above. The fix depends on what caused it and how far it’s gone. We’ll walk you through when you can reinforce what’s there, when you need furring strips or full replacement, and how to stop it from coming back.
Essential Tools and Materials for Drywall Repair
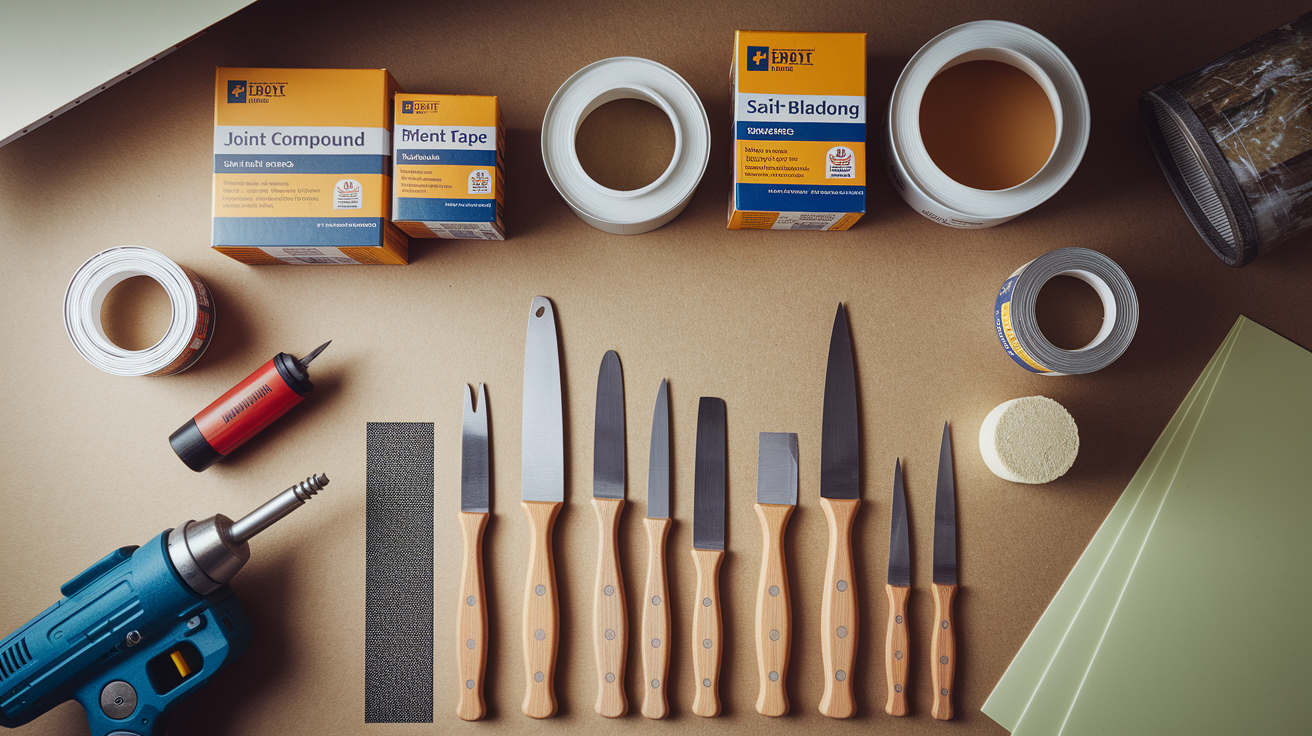
Before you start, grab everything you’ll need. Running to the hardware store halfway through kills your momentum and usually leads to mistakes when you try to make do with whatever’s on hand. Having the right stuff ready makes the whole job smoother.
| Category | Item | Purpose |
|---|---|---|
| Tools | Screw gun or drill | Drives screws into joists and framing to secure drywall |
| Tools | Stud finder | Locates ceiling joists and framing members hidden behind drywall |
| Tools | Utility knife | Cuts drywall panels and trims edges for clean fits |
| Tools | Taping knife (6-inch and 10-inch) | Applies and smooths joint compound over seams and fasteners |
| Tools | Sanding block or pole sander | Smooths dried joint compound between coats |
| Materials | 2-1/2-inch drywall screws | Secures drywall to framing with proper penetration depth |
| Materials | Joint compound | Fills seams, covers fasteners, and creates smooth finish |
| Materials | Mesh tape | Reinforces seams to prevent cracking |
| Materials | Stain-blocking primer (such as Kilz) | Seals water stains and prepares surface for paint |
| Materials | Ceiling paint to match existing finish | Completes repair and restores appearance |
You might need extras depending on what you’re dealing with. Furring strips require 1×3 or 2×2 lumber and new 5/8-inch drywall. Water damage means picking up bleach (1 cup per gallon of warm water) and a sponge. Full replacement jobs need drop cloths unless you enjoy vacuuming dust out of every corner for the next month.
Step-by-Step Process to Fix Sagging Drywall
Two approaches work here. Which one you pick depends on how bad the sagging actually is. Minor sagging (under 3/4 inch) with solid drywall responds to screw reinforcement. Deeper sags or situations where you can’t access the attic call for furring strips, which basically give you a new ceiling framework below the old one.
Screw Reinforcement Method:
-
Find your ceiling joists with a stud finder. Mark each one so you’re not guessing later where solid wood sits behind that drywall.
-
Start at one edge of the sagging zone and work across it systematically. You want every joist in that area identified before you start driving screws.
-
Drive 2-1/2-inch screws through the drywall into each joist, spacing them about 2 feet apart along the joist line.
-
Set each screw just below the surface. You want a small dimple, not a crater. Break through the paper and you’ve created another problem to fix.
-
Press on the area when you’re done. It should feel solid now, no flex or give. If sections still move, add more screws between the ones you just placed.
-
Check that all screw heads sit at the same depth. Consistency here makes the finishing coat easier.
-
Any screw that spins freely missed the joist. Pull it, shift over an inch, and try again.
This method’s straightforward but it only works if the drywall itself hasn’t gone soft. Press on it first. If it feels mushy or stays compressed where you pushed, you’re past the point where more screws help.
Installing Furring Strips for Deeper Sagging
When sagging goes past 3/4 inch or you don’t want to mess with attic insulation, furring strips create a new support layer. Your ceiling drops 3/4 to 2 inches depending on lumber size, so keep that in mind.
Locate all joists and mark them clearly. Furring strips run perpendicular to joists, so mark strip locations every 16 inches across the room. Cut 1×3 lumber (or 2×2 if you need heavier support) to span the room width.
Hold each strip against your marked line and screw through it into every joist it crosses. Space screws about 2 feet apart. Check with a level as you go. If one strip sits noticeably different from its neighbors, adjust screw depth until everything lines up flat.
After all strips are up, cut 5/8-inch drywall to fit and screw it to the strips. Use 2-1/2-inch screws every 12 inches. Any light fixtures need extending down to meet the new ceiling surface. Adjustable box extenders handle this without major electrical work.
Special Considerations for Water-Damaged Sagging
Water damage changes everything. Find and fix the water source first. Period. Otherwise you’re just painting over a problem that’ll come right back.
Yellowish-brown stains, bulging where water pooled, soft spots when you press…that’s water involvement. You might need a plumber for supply lines, a roofer for leaks from above, an HVAC tech for condensation issues. Water damage repair and remediation coordination can help sort out who needs to look at what.
Once the source is fixed, dry everything completely. Set up fans and a dehumidifier. This takes days sometimes, but wet drywall won’t hold fasteners and creates perfect conditions for mold.
Clean stained areas with bleach solution (1 cup per gallon of water). Sponge it on, let it sit a few minutes to kill mold spores, rinse with clean water, dry again. Then hit it with oil-based stain-blocking primer so those stains don’t bleed through your paint later.
Now check if the drywall’s salvageable. Press firmly on the sagged area. Feels solid and springs back? Maybe you can reinforce it. Feels soft, crumbles, stays compressed? That section needs cutting out and replacing.
Finishing All Repair Methods:
After securing the drywall (however you did it), finishing creates the smooth surface you’ll paint. First coat of joint compound goes over all screw heads and seams with your 6-inch knife. Fill those dimples completely.
For seams, press mesh tape into wet compound, then another thin layer over the tape. Let it dry completely. That’s usually 24 hours but check your compound container.
Second coat uses your 10-inch knife. Spread compound 6 to 8 inches past your first coat edges. This feathering blends the repair so you don’t see a ridge later. Dry, then third coat if needed to get it level.
Sand lightly between coats with 120-grit or finer. You’re knocking down high spots and blending edges, not removing material. Too aggressive and you’ll damage the tape or create valleys.
Prime everything before paint. When primer’s dry, apply ceiling paint in thin coats. One coat won’t cut it. Plan on two, letting each dry fully.
If your ceiling’s textured, you need to match that before painting.
Common Causes of Drywall Sagging

Drywall doesn’t sag overnight. Usually it’s several things combining over time. Understanding what caused it helps you fix the actual problem, not just cover up symptoms.
Most common culprits:
-
Undersized drywall for the joist spacing. Like 1/2-inch panels on joists 24 inches apart when that thickness needs 16-inch spacing.
-
Too much insulation weight pressing down on drywall that can’t handle the load.
-
Poor installation. Fasteners spaced too far apart or driven wrong, not securing the drywall properly.
-
Structural settling that lets joists move or flex, pulling fasteners loose.
-
Age. Decades of gravity, temperature changes, and minor moisture exposure gradually weaken the material.
-
Temperature swings causing expansion and contraction that fatigues the drywall over time.
Water’s different because it actively breaks down the gypsum core instead of just stressing it mechanically. When water gets into drywall, the gypsum softens and loses strength. The paper might look fine but the core turns to mush. Creates sagging that looks similar to structural problems but needs completely different fixes.
Water Damage as a Primary Cause of Sagging
Water reaches ceilings from different sources, each leaving patterns that help you identify where it started. Roof leaks show up in spots below missing shingles or failed flashing. Staining appears first near outside walls or follows rafter lines where water runs along framing.
Plumbing leaks create damage along pipe routes. See staining or sagging in a straight line across your ceiling? Suspect a supply line or drain above. These might only leak when certain fixtures run or when pressure peaks.
HVAC condensation problems show up near vents, air handlers, or drain lines. Sagging around a vent or mechanical closet? Check the HVAC system for condensation or clogged drains.
Poor ventilation in bathrooms and kitchens lets moisture condense on ceiling surfaces. This creates widespread but subtle damage building up over months. You might see yellowing, light staining, or gradual sagging across large areas instead of focused spots.
Yellowish-brown stains usually appear first, before any sagging develops. As water accumulates, stained areas start sagging or bulging down. The drywall feels soft when you press it. Severe cases show mold growth as dark spots or fuzzy patches, usually around damaged area edges where moisture levels work perfectly for growth.
You can’t paint over an active leak and expect it to hold. The damage keeps spreading and your repair fails within weeks or months.
Figure out if your sagging comes from structural issues (wrong thickness, bad installation, settling) or water damage (leaks, condensation, ventilation). Structural sagging can often be reinforced. Water damage usually means removing compromised material and fixing the moisture source before installing new drywall.
Identifying When Ceiling Sagging Requires Replacement
Some sagging gets fixed with screws or furring strips. Some needs the damaged drywall cut out and replaced. The difference is whether the drywall’s still structurally sound or has deteriorated past the point where fasteners matter.
Press gently on sagging areas. Healthy drywall feels firm and springs back. Compromised drywall feels soft, spongy, or stays compressed. If your finger pushes in easily or pieces crumble, the gypsum core’s broken down and that section needs replacing.
Warning signs pointing to replacement:
-
Soft or spongy texture when pressed. The core’s lost rigidity and can’t support anything anymore.
-
Visible mold growth. Mold roots penetrate deep into porous gypsum, so it needs removing.
-
Extensive water staining across large areas, especially multiple locations.
-
Multiple sagging spots on the same ceiling. Suggests undersized material originally or widespread water damage.
-
Cracks radiating from sagged areas. The drywall bent past its flex limit and the paper facing tore.
-
Sections sagging more than 1 inch. The material deformed permanently and won’t flatten even with support.
Replacement means cutting out damaged sections back to nearest joists, removing old drywall, checking framing and insulation above for hidden damage, installing properly sized new drywall with correct screw spacing. Then taping, compounding, sanding, finishing to blend with surrounding ceiling.
One small area with minor sagging and no water signs? Reinforcement makes sense. Soft spots, mold, widespread staining, multiple failing areas? Replacement’s the right call. Trying to reinforce compromised material wastes time and money because it won’t hold.
Safety Precautions When Repairing Sagging Drywall
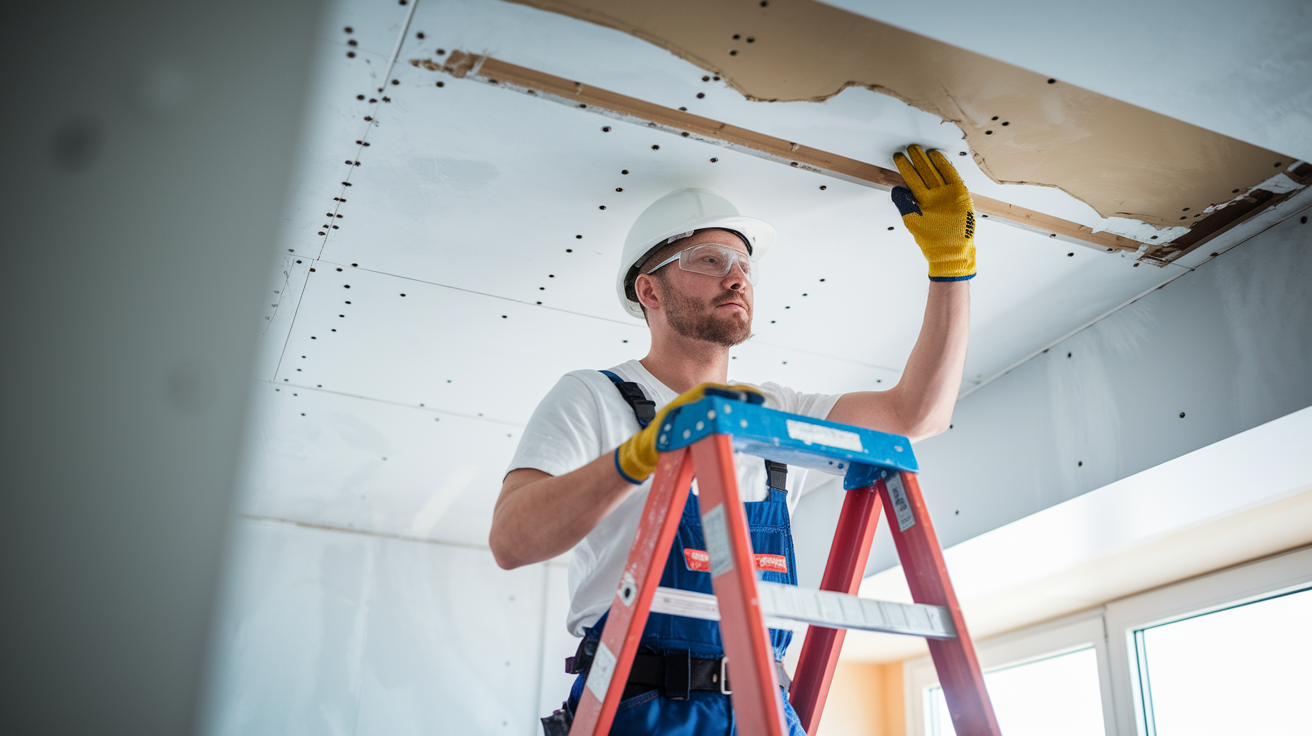
Working overhead creates problems you don’t get with walls or floors. Stuff falls in your face, your arms tire holding tools up, and ladders get less stable when you’re reaching and applying force at weird angles.
Precautions before starting:
-
Position your ladder on solid, level ground. All four legs contact the floor with equal weight. Don’t shim one leg to compensate for uneven floors.
-
Wear safety glasses to protect eyes from falling dust, compound particles, and debris that drops when you drive screws or cut material.
-
Use a dust mask during sanding. Fine particles hang in the air and irritate lungs.
-
Turn off electricity to ceiling fixtures at the breaker before working near electrical boxes. Use a non-contact voltage tester to confirm power’s off.
-
Cover floors and furniture with drop cloths before removing damaged sections. Drywall dust spreads everywhere.
-
Check for asbestos in homes built before 1980, especially textured ceiling finishes. Get professional testing before disturbing these materials.
-
Ensure good ventilation when using primers, paints, or cleaning solutions. Open windows and run fans.
When you’re uncomfortable working on a ladder near electrical fixtures, or the repair area’s large enough that you’d spend hours overhead, that’s a good sign professional help makes sense. Same if you uncover damage that looks more serious than expected. Hidden water damage, framing issues, or electrical problems can turn a simple repair complicated fast.
Cost Breakdown for Sagging Drywall Repair
Fixing sagging drywall costs vary widely depending on repair method, affected area size, and whether you do it yourself or hire someone. Understanding ranges helps you budget and decide which approach makes sense.
| Repair Type | DIY Cost Range | Professional Cost Range |
|---|---|---|
| Minor screw reinforcement (small area) | $15 – $40 | $150 – $300 |
| Furring strip method (average room) | $150 – $400 | $800 – $2,000 |
| Partial drywall replacement (up to 50 sq ft) | $75 – $200 | $400 – $900 |
| Full ceiling replacement (average bedroom) | $300 – $600 | $1,200 – $3,000 |
| Water damage remediation and repair | $200 – $500 (materials only, source fix extra) | $1,000 – $4,000+ (includes source identification) |
DIY costs cover materials like screws, compound, tape, primer, paint, and any lumber or new panels needed. Assumes you already own basic tools. Professional costs include labor, materials, protecting your home during work, and cleanup after.
Several things push costs higher. Ceiling height matters because anything above 9 feet needs scaffolding or special ladders, slowing work. Room size directly affects materials and labor hours. Water damage adds cost because you’re paying for source identification, drying time, possible mold remediation, and fixing whatever caused the leak.
Professional repair makes sense when projects involve tricky access (vaulted ceilings, working over stairs), matching complex textures, or related work like electrical box relocation or insulation replacement. General punch list repairs can identify all issues in one visit instead of discovering problems in stages as DIY work goes.
The cost gap between DIY and professional’s significant. But factor in your time, the physical demands of overhead work, and the learning curve for finishing techniques that create smooth, invisible repairs. A pro finishes in hours what might take you several weekends.
Preventing Future Drywall Sagging Problems

After repairing sagging drywall, you don’t want the same problem back in a few months. Prevention focuses on addressing conditions that cause sagging and catching small problems before they turn major.
Regular maintenance and monitoring prevent most issues:
-
Inspect your roof twice yearly (spring and fall) for missing or damaged shingles, deteriorated flashing, and water entry signs in the attic.
-
Clean gutters at least twice a year to prevent water backup that overflows and runs down walls, eventually reaching ceiling spaces.
-
Run bathroom exhaust fans during showers and for 20 minutes after to remove moisture before it condenses on ceilings.
-
Use range hood fans when cooking to vent steam, especially when boiling water or using multiple burners.
-
Service HVAC systems annually to catch condensation problems, clogged drains, and ductwork issues before they cause water damage.
-
Check visible plumbing regularly for drips, corrosion, or water stains indicating slow leaks starting.
-
Use proper drywall thickness during installations or repairs (5/8-inch for 24-inch joist spacing, 1/2-inch only for 16-inch spacing).
-
Maintain indoor humidity between 30% and 50% using dehumidifiers in summer and humidifiers in winter to prevent moisture-related stress.
Best time for prevention checks is during seasonal transitions. Check your attic in early spring after winter freeze-thaw cycles but before summer heat. Look for water stains, dark spots on insulation, or areas where light shows through the roof. Fall inspections catch summer storm damage and prepare systems before winter.
After completing repairs, monitor those areas more closely the first year. Check every few months to confirm the repair’s holding and no new sagging develops nearby. Take photos right after finishing so you have a baseline for comparison. Small changes are easier to spot with before and after pictures side by side.
If you fixed water-damaged sagging, pay special attention confirming the water source is truly resolved. Check after heavy rains, during the first heating season after summer repairs, or the first cooling season after winter repairs. Sometimes water problems are seasonal or intermittent. You want to catch any moisture return before it damages your new work.
When to Call a Professional for Sagging Drywall Issues
DIY works well for straightforward situations with accessible damage and clear causes. But some sagging involves complications needing professional experience, specialized tools, or knowledge beyond basic repairs. Knowing when you’re in over your head saves money long-term by avoiding failed repairs and additional damage from wrong approaches.
Call a professional when you encounter:
-
Extensive sagging across multiple rooms suggesting a whole-house issue with original construction or widespread water damage from a hidden source.
-
Signs of structural framing failure like joists that sagged, cracked, or separated from supports. Requires engineering assessment and structural repairs.
-
Suspected foundation issues causing ceiling distortion, indicated by cracks radiating from corners, doors and windows that won’t close properly, or progressively worsening sagging.
-
Asbestos in popcorn texture or old drywall compound, requiring certified abatement before repair work can proceed safely.
-
Inaccessible or unclear water sources where you see damage but can’t identify entry points, requiring diagnostic equipment and systematic investigation.
-
Popcorn ceiling texture or complex patterns requiring specialized tools and techniques to match accurately.
-
Situations requiring electrical work near fixtures, especially if wiring needs relocating or fixture boxes need extending through multiple ceiling layers.
A professional inspection assesses full problem scope, not just visible damage. They check framing condition, measure moisture levels with specialized meters, identify likely water sources based on damage patterns, determine if the problem’s isolated or part of something larger. This comprehensive assessment often reveals problems you wouldn’t spot until they became much worse.
Professional repair benefits go beyond getting work done faster. Professionals warrant their work, so if the repair fails due to workmanship issues, they return to fix it at no extra cost. They know building codes and proper installation methods, which matters when you sell the home and an inspector checks the repair. They have experience reinforcing framing, addressing complex water damage, and matching textures so repairs blend invisibly.
For specialized drywall work including sagging ceiling repairs, drywall, plaster, and interior wall/ceiling repairs provide professional assessment and repair services addressing both immediate damage and underlying causes. This prevents the frustration of completing a repair only to watch the same area fail again because the root problem wasn’t fully addressed.
The decision between DIY and professional comes down to your comfort with overhead work, the tools and skills you already have, and the complexity of your specific problem. Simple screw reinforcement on a small area with no water damage sits firmly in DIY territory. Water-damaged sagging across a large area, or sagging combined with structural concerns, benefits from professional expertise.
Final Words
How to repair sagging drywall depends on what caused the sag and how severe the damage is. Minor sagging often responds well to screw reinforcement. Deeper sag may need furring strips or full replacement.
Water damage always requires fixing the source first, then drying, cleaning, and priming before any structural work.
If you’re unsure about the cause, the ceiling feels soft, or the sag keeps getting worse, get a professional inspection. The right repair now prevents bigger problems later and keeps your ceiling safe and solid for years.
FAQ
Why does ceiling drywall sag?
Ceiling drywall sags when undersized panels (usually 1/2-inch on 24-inch joist spacing) lack the strength to support their own weight, insulation above, or when water damage weakens the gypsum core, causing the material to lose structural integrity and pull away from fasteners.
What causes drywall to sag?
Drywall sags due to improper installation with inadequate fastener spacing, undersized panel thickness for the joist span, excessive weight from insulation, water damage from roof or plumbing leaks, structural settling, or age-related deterioration of the gypsum board and fasteners.
Why does my ceiling look like it’s sagging?
Your ceiling looks like it’s sagging because the drywall has lost its tight attachment to the ceiling joists, either from gravity pulling on undersized panels over time, moisture weakening the material, or failed fasteners allowing the board to separate and bow downward.
How do you fix caved in drywall?
You fix caved in drywall by driving 2-1/2-inch screws through the damaged section into ceiling joists every 2 feet to re-secure it, or for severe sagging over 3/4 inch, install 1×3 furring strips at 16-inch centers and attach new 5/8-inch drywall over them.
Can you repair sagging drywall without replacing it?
You can repair sagging drywall without replacing it if the material is still structurally sound and the sag is under 3/4 inch by driving screws into joists to re-secure it, but water-damaged, soft, or moldy sections require complete removal and replacement.
What tools do I need to fix sagging ceiling drywall?
To fix sagging ceiling drywall you need a stud finder to locate joists, screw gun for driving fasteners, 2-1/2-inch drywall screws, joint compound and taping knife for finishing, utility knife for cutting, sanding block, primer, and paint for the final finish.
How do you know if sagging drywall has water damage?
You know sagging drywall has water damage when you see yellowish-brown stains, feel soft or spongy texture when pressing the area, notice a musty smell, observe bulging sections that indicate water accumulation, or find visible mold growth on the surface.
When should you replace sagging drywall instead of repairing it?
You should replace sagging drywall instead of repairing it when the material feels soft or spongy, shows visible mold growth, has extensive water staining across large areas, sags more than 1 inch, or multiple cracks radiate from the damaged section.
How much does it cost to fix sagging ceiling drywall?
Fixing sagging ceiling drywall costs $50-150 for DIY screw reinforcement with materials, $200-400 for the furring strip method, or $400-1,200 professionally depending on room size, extent of damage, ceiling height, and whether water remediation or full replacement is needed.
How do you prevent drywall from sagging in the future?
You prevent drywall from sagging in the future by using 5/8-inch panels on 24-inch joist spacing during installation, maintaining proper bathroom and kitchen ventilation, regularly inspecting for roof and plumbing leaks, cleaning gutters, and controlling indoor humidity levels year-round.