


Ever notice how a tiny crack in old plaster turns into a spiderweb before you get around to fixing it? That’s not bad luck. It’s physics working against hundred year old materials that expand and contract with every season. The good news is that repairing plaster cracks doesn’t require special certifications or expensive tools. Most homeowners can handle hairline to moderate cracks using basic techniques, the right materials, and an understanding of when a crack signals normal settling versus actual structural problems. This guide walks through diagnosing what you’re seeing, gathering what you need, and making repairs that blend invisibly with original plaster.
Diagnosing Plaster Cracks: Hairline vs Structural Damage
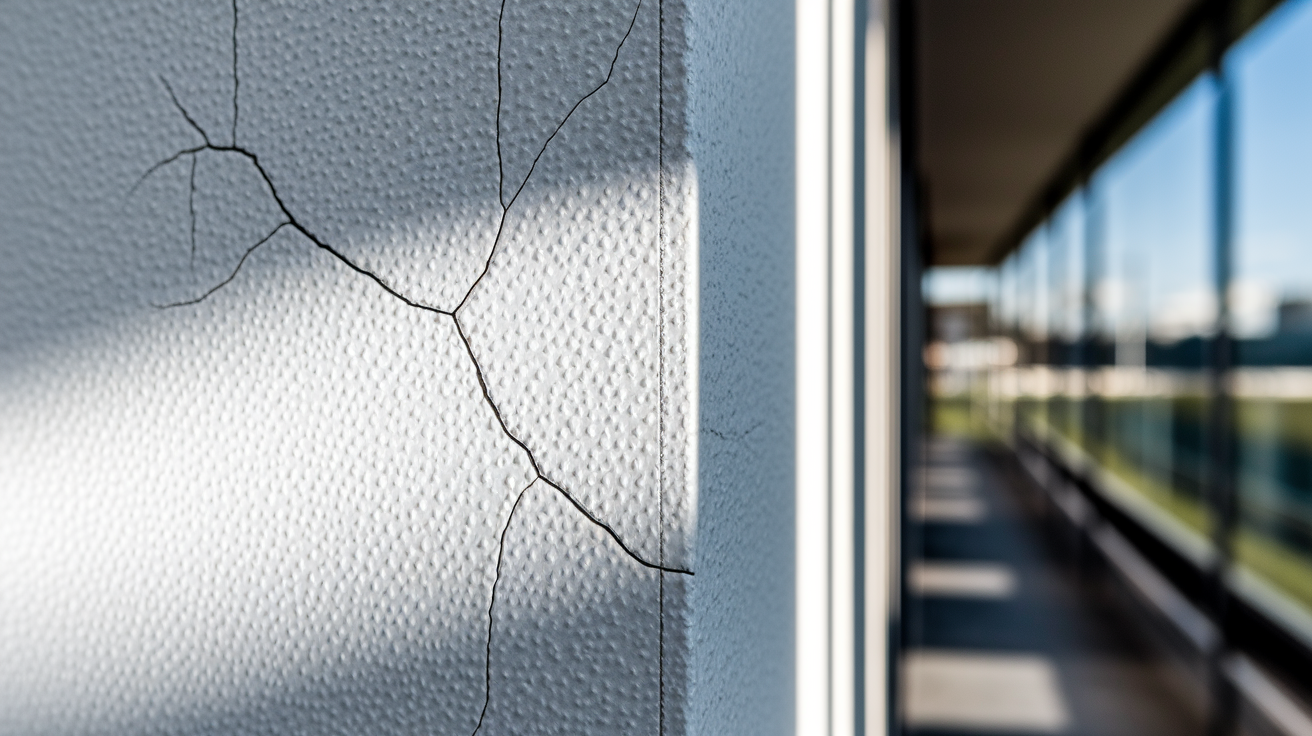
Hairline cracks are thin lines, usually less than 1/8 inch wide, running vertically or at slight angles across plaster. They’re caused by normal house movement, minor settling, and the expansion and contraction that comes with temperature and humidity shifts. Structural cracks tell a different story. They measure wider than 1/4 inch, often run diagonally across walls or follow a stair-step pattern along mortar joints in underlying masonry, and may widen noticeably at one end.
Warning signs separate normal aging from serious problems. Foundation issues appear as cracks that start wide at the floor and taper toward the ceiling, or cracks running horizontally along the lower third of walls. Settlement cracks in old houses that have stood for decades usually stay stable. Active structural movement creates cracks that change size with seasons or continue widening over months.
Key diagnostic indicators to check:
- Width measurements using a dime (1/16 inch) or pencil (1/4 inch) as reference
- Crack patterns including vertical cracks (usually cosmetic), diagonal cracks (potential structural concern), and horizontal cracks (serious structural warning)
- Location at stress points like door and window corners, ceiling to wall joints, and where additions meet original structure
- Changes over time tracked by marking crack ends with pencil and date, then checking monthly
- Accompanying symptoms including doors that suddenly stick, windows that won’t open smoothly, or floors developing new slopes
- Seasonal movement patterns where cracks open slightly in winter dry air and close in summer humidity without worsening year to year
Call a structural engineer before attempting repairs if you notice cracks wider than 1/2 inch, any horizontal cracks in foundation walls, or multiple diagonal cracks appearing in several rooms at once.
Essential Tools and Materials for Old House Plaster Repair
Plaster work needs specific tools that differ from modern drywall repair equipment. Plaster trowels have more flexibility than drywall knives, hawk boards hold working material at the wall, and the materials themselves need different mixing and application techniques than joint compound designed for drywall seams.
| Tool/Material | Purpose | Approximate Cost |
|---|---|---|
| Utility knife with fresh blades | Widening cracks and cutting mesh tape | $8-15 |
| Putty knives (3-inch, 6-inch) | Applying compound in tight areas | $12-20 for set |
| Trowel (10-12 inch) | Smoothing and feathering large areas | $15-25 |
| Hawk tool | Holding working plaster near wall | $12-18 |
| Sanding block and paper (120, 150, 220 grit) | Smoothing dried compound between coats | $10-15 |
| Fiberglass mesh tape | Reinforcing cracks and preventing re-cracking | $8-12 per roll |
| Bonding agent (PVA primer) | Improving adhesion to old plaster | $15-25 per quart |
| Joint compound or plaster mix | Filling and building up repair area | $12-20 per container |
| Plaster-specific primer | Sealing repair before painting | $18-30 per quart |
| Drop cloths | Protecting floors and furniture | $10-20 |
| Shop vacuum with brush attachment | Removing plaster dust from cracks | $40-80 (if not owned) |
| Mixing bucket and paddle | Preparing plaster to proper consistency | $8-15 |
Safety equipment matters more with plaster than drywall because old plaster creates finer dust that travels deeper into lungs. A dust mask rated N95 or higher filters particles down to 0.3 microns. Safety goggles with side shields keep dust out of eyes during sanding and mixing. Open windows and use a box fan to push dust outside rather than circulating it through the house. Never rely on a simple paper mask or work in closed rooms without ventilation.
Lead Paint Testing and Safety Precautions in Pre-1978 Homes
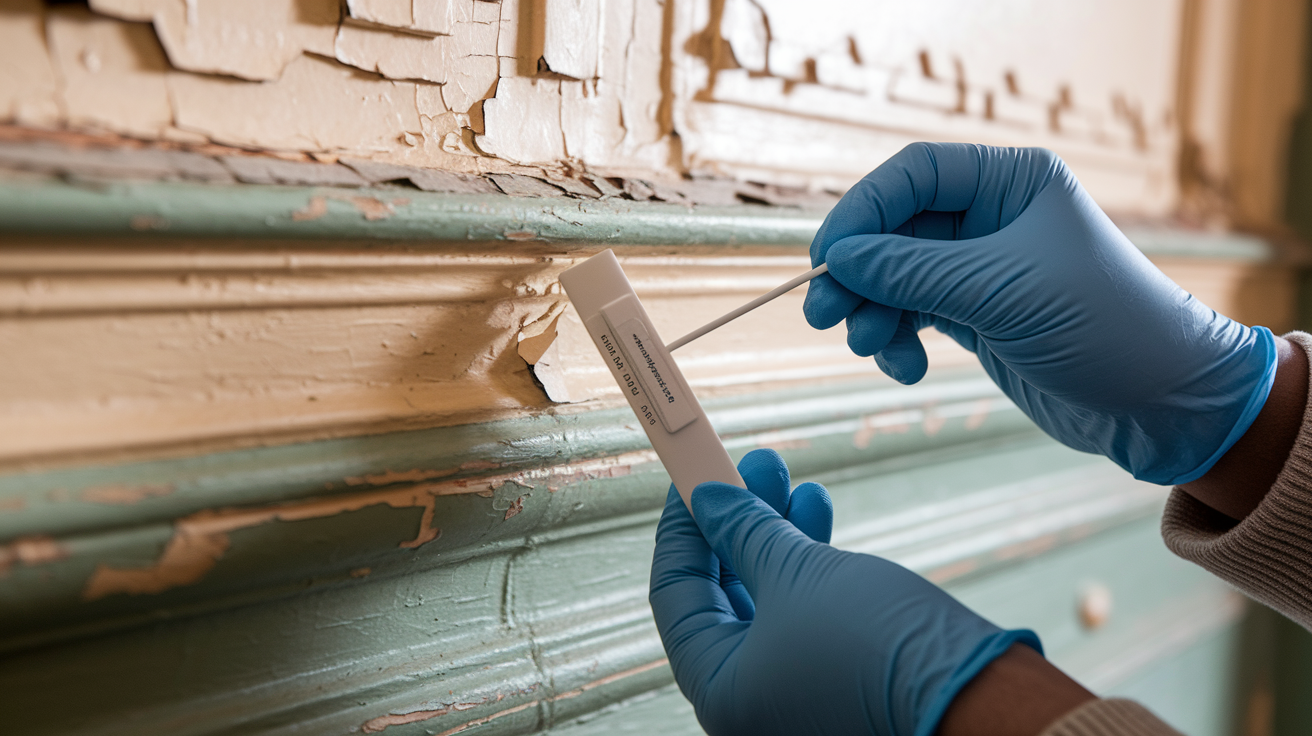
Houses built before 1978 almost certainly contain lead paint somewhere, often buried under layers of newer paint. Sanding or scraping plaster creates dust that carries lead particles, and these particles cause serious health problems. Children and pregnant women face the highest risk because lead damages developing brains and nervous systems. Even small amounts of lead dust on hands, toys, or floors create exposure when children put things in their mouths.
Lead paint testing gives you three options. EPA recognized test kits from hardware stores cost $10 to $25 and show immediate results when you swipe the test stick on scraped paint. Professional testing runs $200 to $400 but provides lab analysis and documentation useful for real estate transactions. Many contractors working on old houses simply assume lead is present and follow safe work practices without testing, which satisfies most situations. If you plan significant work that disturbs more than six square feet of painted surface, EPA regulations require either testing or lead safe practices, and contractors must have EPA Lead Safe Certification.
Safe work practices contain dust rather than trying to eliminate it completely. Seal doorways with plastic sheeting and tape, creating an airlock entry if possible. Cover floors with thick plastic or rosin paper taped at all edges. Use a HEPA filtered vacuum to clean work areas, not a regular shop vacuum that just blows fine lead dust back into the air. Wet sanding techniques keep dust from becoming airborne in the first place. Wear an N95 or better respirator, not just a dust mask, because standard masks don’t filter lead particles. Dispose of plastic sheeting, dust, and debris in sealed bags labeled as contaminated material. Clean the entire work area by wet mopping floors and wiping surfaces with disposable cloths. Wash work clothes separately from family laundry, and shower immediately after work to avoid tracking lead dust through the house.
Preparing Plaster Walls and Cracks for Repair
Widening a hairline crack seems backwards, but it’s necessary for lasting repairs. A crack measuring 1/16 inch wide leaves no room for filler material to grip both sides. Use a utility knife or the pointed edge of a can opener to widen the crack to about 1/4 inch, creating a V shaped groove that’s slightly wider at the surface than at the back. This undercut profile gives the filler mechanical grip so it locks in place rather than just sitting on top. Scrape away any loose plaster crumbs or flaking paint inside the crack. The goal is solid material on both sides of the groove, not loose debris that prevents adhesion.
Dust removal makes the difference between filler that bonds and filler that pops out months later. Use a stiff brush to knock loose material out of the crack, then follow with a shop vacuum using the crevice tool to pull dust from deep in the groove. Pay special attention to the bottom of the crack where fine dust settles. Finish with a damp cloth or sponge wiped firmly along the crack to pick up the finest particles that vacuuming missed. Let the dampness dry for 15 to 20 minutes before moving to the next step. Clean plaster surfaces feel slightly rough and show a consistent color without white dust film.
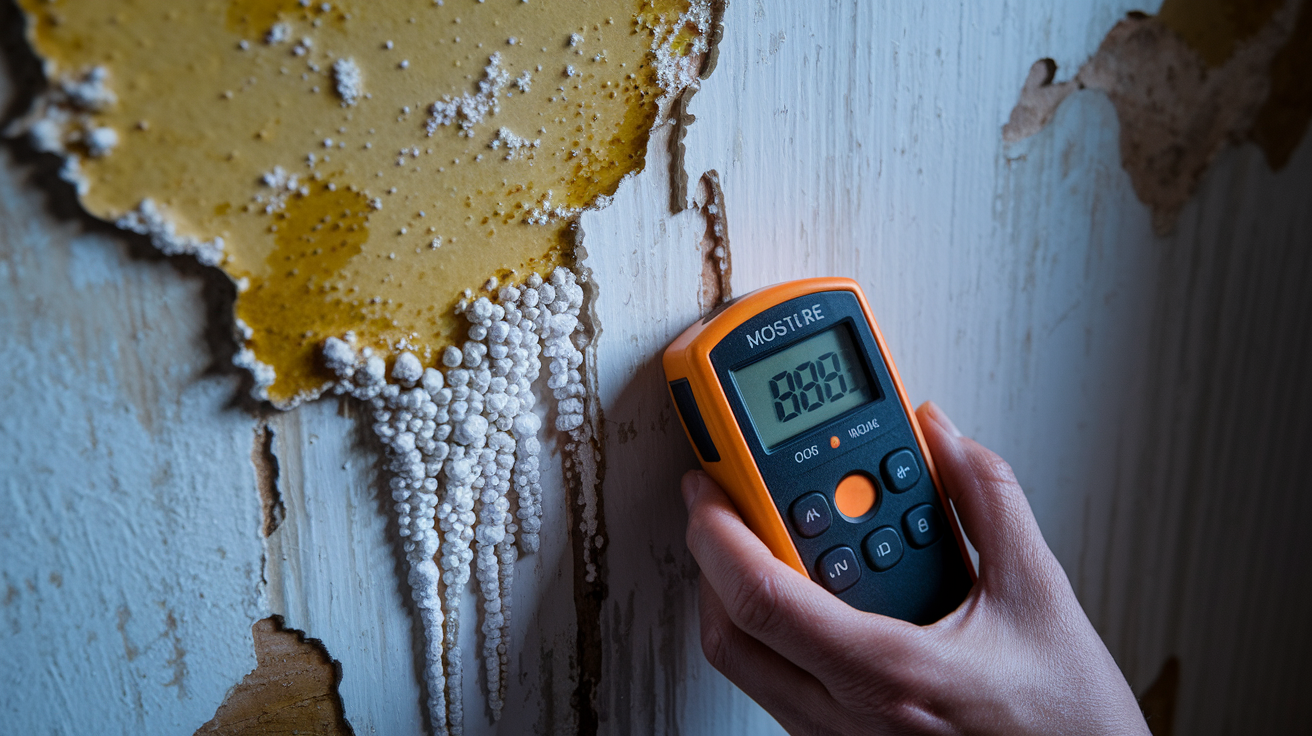
Moisture testing catches problems before you seal them behind new plaster. Touch your finger to the inside of the crack and the surrounding wall. Dampness feels cool and may leave moisture on your fingertip. Look at the plaster around the crack for water stains that show as yellow, brown, or gray discoloration. Check for efflorescence, which appears as white powder or crusty deposits where water has carried minerals to the surface. If you find moisture, stop and trace the source. Common causes include roof leaks, plumbing problems, or exterior water getting past siding. Let wet areas dry for at least two weeks, using fans and dehumidifiers if needed. Repairing over damp plaster traps moisture that causes mold growth and makes the new filler separate from the wall. In consistently damp areas like old basements or behind bathrooms with plumbing leaks, consider mold inspection before proceeding.
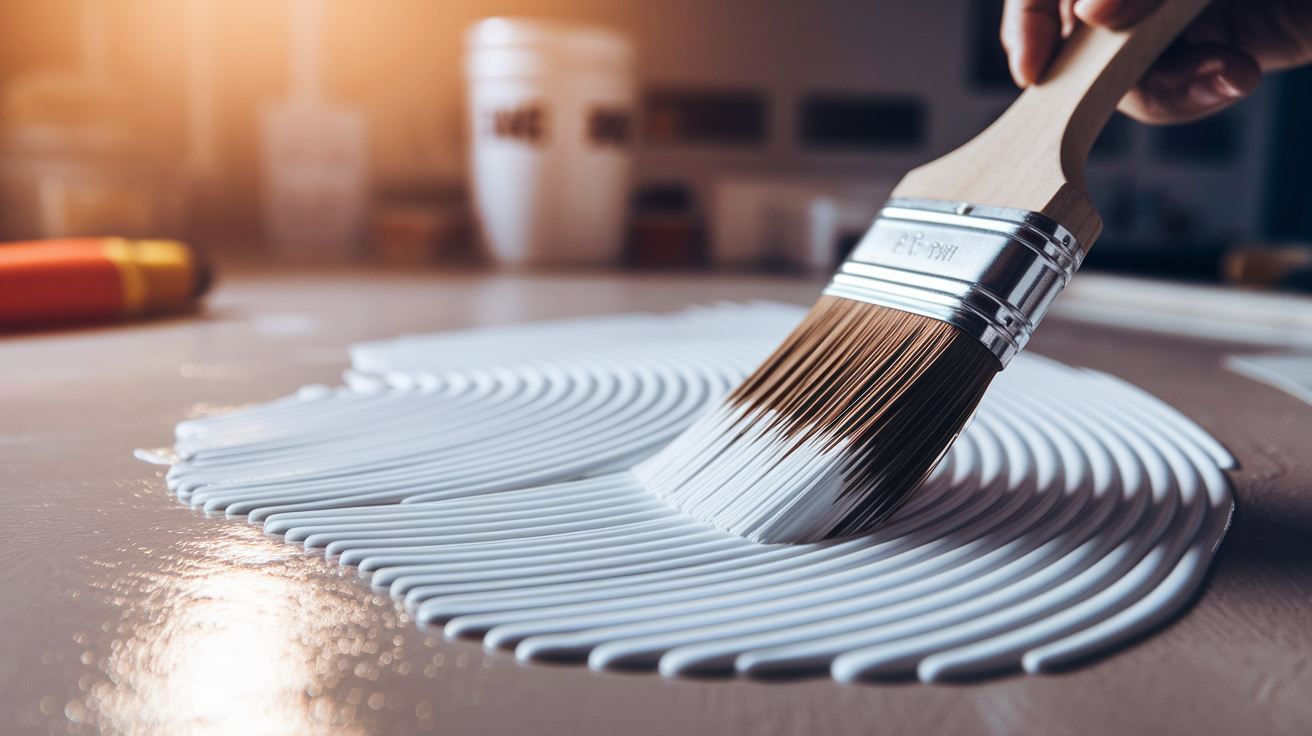
Applying Bonding Agents and Mesh Tape to Plaster Cracks
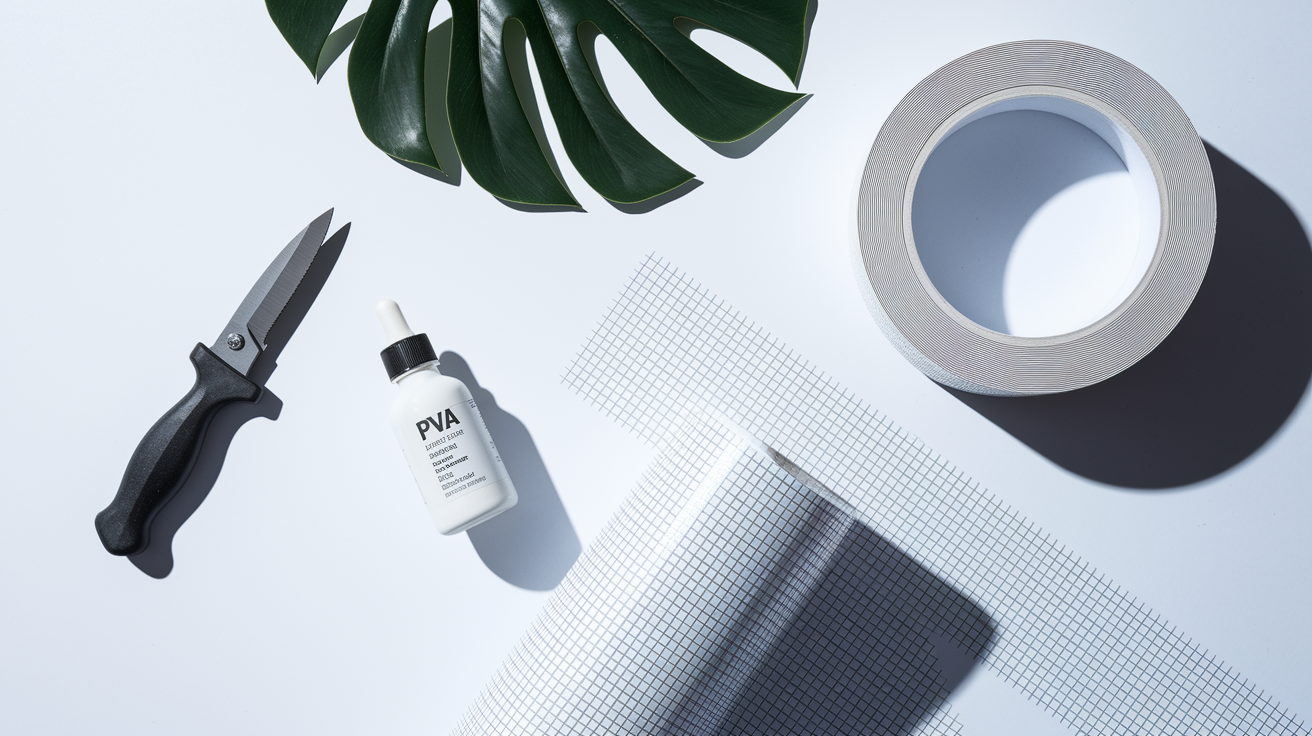
Old plaster surfaces develop a dusty, powdery layer over decades, even after cleaning. This chalky film prevents good adhesion between old material and new filler. Bonding agents, usually PVA (polyvinyl acetate) or acrylic based primers, soak into this powdery layer and create a sticky surface that new plaster can grab. Brush or roll bonding agent onto the crack and the surrounding plaster, extending about two inches beyond the repair area. The bonding agent looks milky when wet and dries clear, usually within 30 to 45 minutes. Apply filler while the bonding agent still feels slightly tacky, which gives the best mechanical bond.
Mesh tape bridges cracks wider than 1/4 inch and prevents them from reopening through the repair. Cut fiberglass mesh tape to length and press it firmly over the crack, centering it so the tape extends at least two inches past each end. The tape has a slightly sticky backing that holds it in place temporarily. Smooth the tape flat against the wall, working out any bubbles or wrinkles. You’ll apply filler over the tape in the next steps, and the mesh gets embedded in the compound, distributing stress across a wider area than the crack itself.
Situations requiring mesh tape:
- Cracks measuring 1/4 inch wide or more
- Cracks located at corners where walls meet or where walls meet ceilings
- Areas where previous repairs have failed and cracks returned
- Cracks that show seasonal movement during humidity changes
- Any crack in a ceiling, regardless of width, because gravity works against repairs
Mixing and Applying Plaster Compound: Materials and Techniques
Proper mixing and application determine whether a repair lasts five years or fifty. Rushing through these steps causes repairs to crack, shrink away from edges, or develop a different texture than the surrounding wall.
Choosing Between Lime and Gypsum Plaster
Lime plaster served as the standard material in houses built before 1950. It contains lime, sand, and sometimes horsehair or other fibers for strength. Lime plaster breathes, allowing moisture to move through the wall rather than trapping it, and it flexes slightly with building movement without cracking. Historic homes, especially those built before 1920, often show better results when repaired with lime based materials that match the original plaster’s properties. Modern gypsum based joint compound works fine for small repairs in houses built after 1940 or where the original plaster was already gypsum based. To determine what you have, scratch a hidden area. Lime plaster feels harder and produces powder that dissolves slowly in water. Gypsum plaster feels slightly softer and dissolves quickly. When in doubt on a significant historic home, consult a preservation specialist.
Proper Mixing Technique
Follow the manufacturer’s water to plaster ratio printed on the bag, which typically runs about three parts powder to one part water by volume. Add powder to water, never water to powder, which creates lumps. Stir slowly with a mixing paddle attached to a drill, keeping the paddle submerged to avoid whipping air bubbles into the mix. The finished consistency should resemble peanut butter, thick enough to cling to a trowel held vertically but smooth enough to spread without dragging. Mix small batches that you can use within 15 to 20 minutes. Setting type plaster hardens chemically and can’t be retempered by adding water, so only mix what you’ll apply before it stiffens.
Application in Thin Layers
Hold the hawk board in your non dominant hand near the work area and load a golf ball sized amount of plaster onto your trowel or putty knife. Apply the first coat at roughly a 45 degree angle to the wall, pressing firmly to force material into the crack. Pull the trowel across the crack in overlapping strokes, feathering the edges so the compound tapers onto the surrounding wall. This first coat fills the crack but leaves a slight depression, usually 1/8 inch below the finished surface. Thin coats prevent the cracking and shrinkage that occur when thick applications dry unevenly. Thick layers, anything over 1/8 inch, develop internal stresses as the outside dries faster than the inside, which causes cracks within the repair itself even if you can’t see them at first.
Drying Time Between Coats
Humidity between 50 and 70% and temperature between 60 and 75°F create ideal drying conditions. Good ventilation speeds drying but avoid direct fan air on fresh plaster, which dries the surface too fast and causes surface cracking. Plaster thickness affects drying time more than anything else. Setting type compounds harden enough for a second coat in 2 to 4 hours. Air dry joint compound needs a full 24 hours between coats. Test by pressing your fingernail into the repair. If it leaves a mark, wait longer. Each layer should extend slightly beyond the previous layer, feathering further onto the surrounding wall. This overlapping technique blends the repair by creating a gradual transition rather than a defined edge. Work the compound outward from the center of the repair, pulling the trowel toward undamaged areas with decreasing pressure so the material thins as it extends.
Matching Texture and Finish on Old Plaster Walls
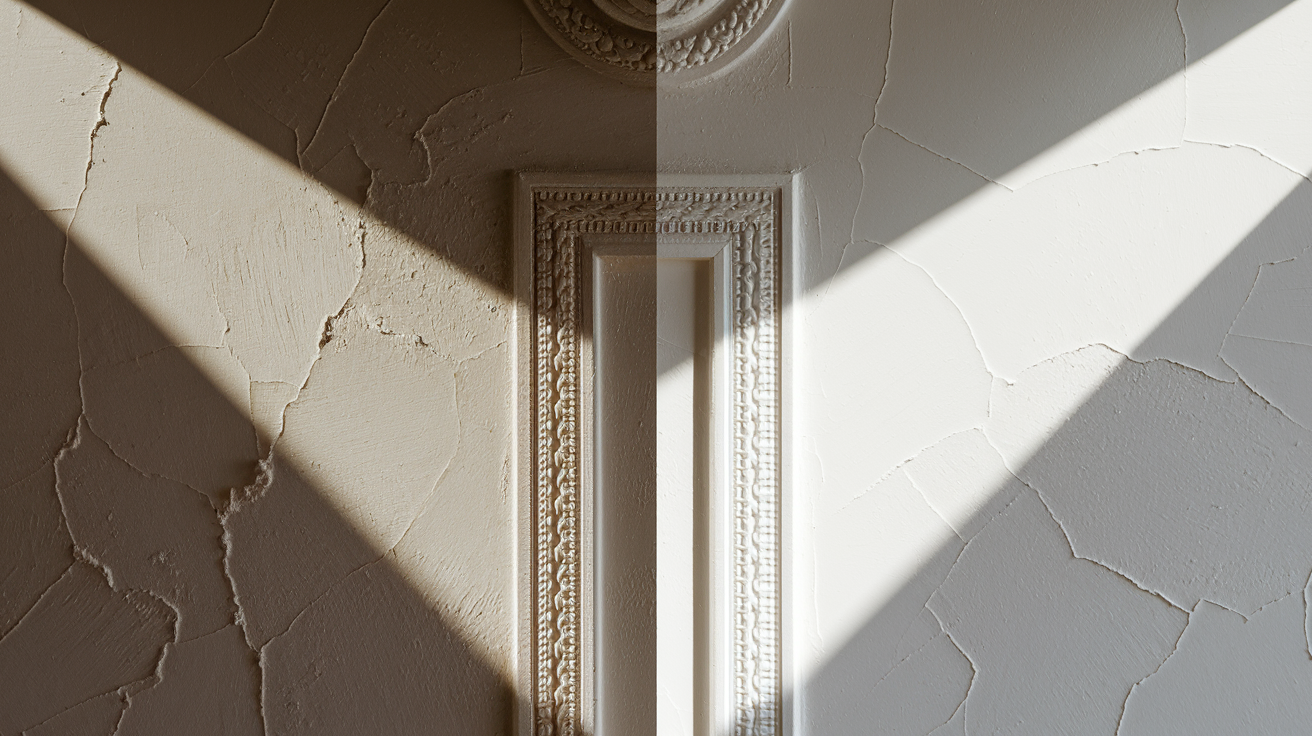
Examine the surrounding wall under raking light, which means shining a flashlight or work light at a low angle across the surface. This reveals texture patterns that disappear under normal overhead lighting. Look closely at the pattern. Is it completely smooth, showing only trowel marks? Does it have a fine, random stipple? Can you see slight ridges or swirls? Take photos from different angles with your phone as reference while working. Testing texture techniques on a piece of cardboard before touching the wall saves frustration and wasted material.
Tools for recreating texture include natural sea sponges for stippled effects, stipple brushes that create a random pattern when dabbed on wet compound, steel trowels that create smooth finishes when held nearly flat and pulled in long strokes, and foam brushes for lighter textures. Practice the surrounding pattern on cardboard or drywall scraps. Load your texture tool with compound or use it on wet compound already applied to the test surface. Work quickly before the material starts to set, usually within 5 to 10 minutes.
Common historic plaster textures:
- Smooth trowel finish, most common in homes built before 1920, shows subtle variations and occasional trowel lines but no intentional pattern. Feels nearly flat to the hand.
- Light orange peel texture has a fine, random bumpy surface like the skin of an orange. Created by thinned compound sprayed or stippled on.
- Knockdown texture starts as peaks created by stippling or spraying, then lightly flattened with a trowel while still wet. Looks like flattened popcorn.
- Spanish lace shows as irregular swirled patterns created by pulling a trowel through thick compound. Adds depth and hides imperfections.
- Skip trowel finish creates random flat areas and textured areas by dragging a trowel loaded with compound lightly over the surface. Covers only 50 to 70% of the wall.
Sanding and Smoothing Repaired Plaster Surfaces
Sanding transforms visible repairs into invisible ones, but aggressive sanding damages surrounding original plaster that may have historical or textural value. This step requires patience and frequent checking.
Start with 120 grit sandpaper to knock down high spots and ridges where compound overlaps or built up thick. Wrap sandpaper around a sanding block for flat surfaces, which prevents creating dips and waves. Use circular motions with light pressure, letting the sandpaper do the work rather than pressing hard. Check progress by running your hand lightly over the surface, which picks up slight irregularities your eyes might miss. Shine a flashlight at a low angle across the repair to highlight any remaining ridges or dips. Progress to 150 grit sandpaper once obvious bumps are gone. This intermediate grit smooths scratches left by the 120 grit paper. Finish with 220 grit sandpaper for a smooth surface that matches most plaster finishes. Use folded sandpaper for inside corners and tight areas where sanding blocks don’t fit.
Vacuum between grit changes to remove sanding dust before it gets worked into the surface by the next grit. Use the soft brush attachment and move slowly across the repair and surrounding wall. Wipe the entire area with a slightly damp microfibre cloth for final dust removal, making sure no powder remains in surface pores. Open windows or use a fan to exhaust fine dust that hangs in the air, but let the wall dry completely before priming.
Priming and Painting Repaired Plaster Cracks
Unprimed plaster sucks paint into its porous surface like a sponge, creating flat, dull spots that show through even multiple finish coats. The repaired area ends up looking different from the surrounding wall because it absorbs more paint. PVA primer specifically formulated for plaster seals these pores and creates a uniform surface that accepts finish paint evenly.
Apply primer with a brush or small roller, starting at the center of the repair and working outward. Extend primer 2 to 3 inches beyond the repair area in all directions to ensure no abrupt transition where primed surface meets unprimed wall. Feather the primer edges by using less material as you move away from the repair, which creates a gradual blend. Allow the full dry time printed on the primer can, typically 2 to 4 hours. Rushed primer causes finish paint to bubble or peel as solvents try to escape through the paint film.
Paint matching creates the biggest challenge in plaster repair. Take a chip of paint from a hidden area like inside a closet or behind a door to the paint store for computerized color matching. The computer scans the chip and provides a formula. Paint the entire wall section rather than just the patched area. A patch only approach almost always shows because age affects paint sheen and color. Even perfect color matches look different when new paint sits next to 20 year old paint that has faded and collected dirt. Painting corner to corner or trim to trim creates a clean break line where slight color differences appear intentional rather than accidental. Apply two finish coats for uniform appearance, allowing proper drying time between coats.
Repairing Exposed or Damaged Lath Behind Plaster
Securing Loose Plaster to Intact Lath
Loose plaster separated from its lath backing makes a hollow sound when tapped and may flex when pushed. Plaster washers reattach loose sections without removing material. Drill 3/16 inch holes through the loose plaster into the lath behind, spacing holes about 3 inches apart in a grid pattern that covers the loose area. Insert plaster washers, which are flat metal discs with a hole in the center, over each hole. Drive drywall screws through the washer holes into the lath behind, tightening carefully until the plaster firms against the lath. Stop tightening when the plaster stops moving inward. Over tightening cracks the plaster around the screw. Cover washers with joint compound, building up in layers until flush with the surrounding surface. Big Wally’s Plaster Magic offers an alternative adhesive system that eliminates visible hardware by injecting adhesive through small holes that get patched with included caps, creating seamless repairs.
Replacing Broken Wooden Lath
Broken lath strips behind plaster leave unsupported areas that eventually sag and crack further. Identify broken lath by looking through cracks or holes in the plaster. Cut back damaged plaster carefully with a utility knife to expose the full extent of broken lath, working in a rectangular section that reaches from one solid stud or joist to the next. Remove damaged lath sections by prying gently to avoid disturbing adjacent areas that are still solid. Cut new wood lath strips to fit between studs or joists, matching the thickness of original lath, usually 1/4 inch by 1.5 inches. Secure new lath with small nails driven into studs or joists. Apply a scratch coat of plaster over the new lath by pressing material through the gaps between strips so it forms keys on the back side that lock the plaster in place. Let the scratch coat dry completely, usually 24 to 48 hours, before applying the next layers that build up to the finished surface.
Addressing Moisture Problems Before Plaster Crack Repair
Repairing cracks over active moisture guarantees the repair will fail within months, and trapped moisture behind new plaster creates ideal conditions for mold growth. Water travels through old plaster systems in ways that seem random but follow the path of least resistance. A roof leak on one side of the house can show up as a crack or stain on the opposite wall because water ran along framing members before soaking into plaster.
Common moisture sources in old houses:
- Roof leaks at worn shingles, damaged flashing, or deteriorated valleys
- Gutter overflow from clogs or undersized gutters that dump water against foundation walls
- Missing or damaged flashing around chimneys, skylights, or where roofs meet walls
- Basement moisture wicking up walls through capillary action in foundations without vapor barriers
- Plumbing leaks behind walls from old galvanized pipes, corroded fittings, or failed supply lines
- Condensation from poor bathroom or kitchen ventilation that allows humid air to condense on cool plaster surfaces
- Failed exterior paint allowing rain to penetrate siding and reach plaster from outside
Test for moisture using a pin type moisture meter pushed into the plaster at several points around the crack, looking for readings above 15%. Visual inspection reveals efflorescence, which appears as white crusty powder or crystal formations where water has evaporated and left mineral deposits on the surface. Musty, mildew odors indicate moisture even when surfaces feel dry to the touch. Walls with significant moisture need 2 to 4 weeks of drying time after the source is fixed, using fans, dehumidifiers, and open windows to move air across damp surfaces. Don’t rely on feeling with your hand, because plaster can hold moisture deep inside while the surface feels dry.
Repairing Ceiling Plaster Cracks and Sagging Areas
Ceiling cracks demand more cautious assessment because gravity amplifies every weakness. A ceiling crack that seems stable can suddenly release when disturbed, dropping plaster and lath on anyone below. Identify dangerous sagging by holding a straight board or level against the ceiling perpendicular to joists. Any deflection measuring more than 1/4 inch suggests the plaster has separated from lath and may collapse. Small cosmetic cracks that show no deflection and don’t widen seasonally can be repaired with standard techniques.
Overhead work requires proper setup, not improvised solutions. Use sturdy scaffolding or a platform that spans at least 4 feet, allowing you to reach the ceiling comfortably without stretching. Never stand on chairs, unstable ladders, or stacked furniture that can shift during work. Protect your neck from falling debris with a hood or cap, and wear safety goggles because even small plaster particles cause eye injuries when they fall from above. Have a helper hand materials and tools up to you so you maintain three points of contact with the platform. Ceiling work is physically demanding because holding your arms above your head causes rapid fatigue. Take breaks every 20 to 30 minutes to rest arms and neck.
Ceiling specific repair considerations include always using fiberglass mesh tape even for cracks that measure less than 1/4 inch, because gravity pulls at repairs more than on walls. Work in smaller sections, about 2 feet square, to prevent arm fatigue from affecting quality. Apply slightly thicker compound than you would on walls to resist sagging before the material sets, but still build up in multiple coats rather than one thick application. Pay critical attention to drying time. Fresh plaster on ceilings needs at least 24 hours between coats because gravity pulls wet material away from the surface if the base coat hasn’t hardened fully.
Common Mistakes When Repairing Plaster Cracks in Old Houses
Even experienced DIYers make mistakes that cause cracks to return or repairs to stand out visibly. Knowing these errors in advance saves materials, time, and the frustration of redoing work.
| Mistake | Why It Fails | Correct Approach |
|---|---|---|
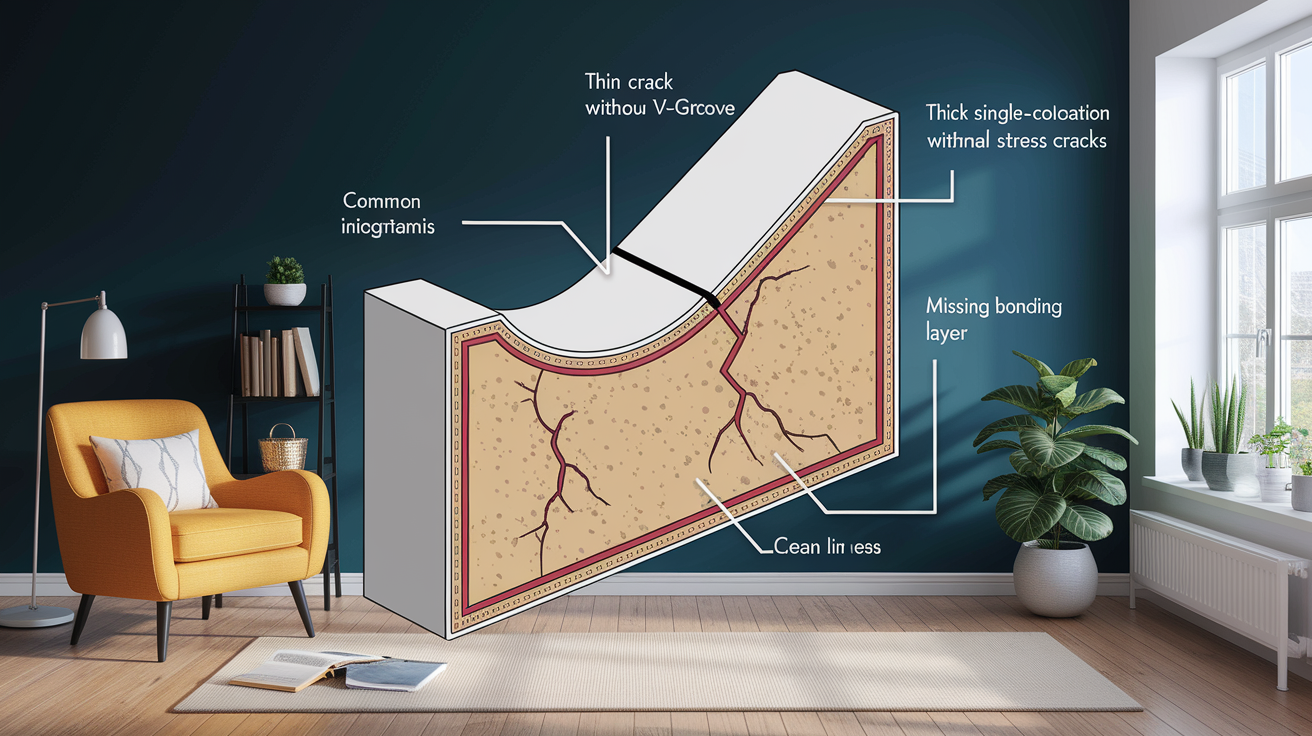
| Filling without widening crack | No mechanical grip for filler, which sits on surface and pops out | Widen crack to 1/4 inch with V shaped profile before filling |
| Skipping bonding agent | Dusty old plaster surface prevents adhesion of new material | Apply PVA primer to crack interior and surrounding area before compound |
| Applying thick single coat | Compound cracks internally as outside dries faster than inside | Build up in layers no thicker than 1/8 inch with drying time between coats |
| Insufficient drying between coats | Wet lower layers release moisture that causes upper coats to crack or separate | Allow 24 hours for air dry compounds, test with fingernail before next coat |
| Sanding too aggressively | Creates dip in repair area or damages surrounding historic plaster texture | Use light pressure with progressively finer grits, check frequently by feel |
| Painting without proper primer | Porous plaster absorbs paint unevenly creating flat spots that show through | Use plaster specific PVA primer before finish paint, extend beyond repair area |
Mistakes on hidden areas provide valuable learning before tackling visible walls. Practice in closets, behind furniture that won’t be moved, or in basements where imperfect results don’t affect living spaces. Failed repairs can be scraped out and redone. Use a putty knife to remove compound that didn’t bond properly, clean the area thoroughly, and start fresh with corrected technique.
Monitoring Repairs: Settlement Cracks vs. Active Movement
Most old houses more than 50 years old have completed their major settlement and the cracks you see are now stable rather than actively growing. The house has shifted as far as it’s going to shift under normal conditions. Test for active movement using simple painter’s tape placed across the crack. Mark both edges of the tape with a pen line that continues onto the wall, write the date, and check monthly for 3 to 6 months. If the pen line separates or the crack opens wider than the tape, you’re seeing ongoing movement that requires structural assessment.
Seasonal movement is normal in old houses and doesn’t indicate structural failure. Expansion happens in summer humidity when wood framing absorbs moisture from the air and swells slightly. Contraction occurs in winter dryness when heating systems remove moisture from indoor air and framing shrinks. This cycle causes some hairline cracks to open 1/16 inch in winter and nearly close in summer. The movement repeats annually without getting worse. These cracks can be repaired with flexible filler or accepted as part of living in an old house.
Signs of problematic active movement requiring structural evaluation:
- Cracks widening more than 1/16 inch over 6 months of monitoring
- New cracks appearing in multiple rooms on different walls simultaneously
- Doors and windows that suddenly stick or won’t close when they functioned properly for years
- Sloping or sagging floors developing where floor was previously level
- Cracks accompanied by fresh separation gaps at trim, baseboards, or crown molding
Cost Considerations for DIY vs. Professional Plaster Repair

DIY saves money compared to professional rates, but time investment and skill development have value. Some repairs justify professional cost when complexity exceeds available time or skill level.
| Repair Type | DIY Cost | Professional Cost | Time Investment |
|---|---|---|---|
| Simple hairline cracks (under 12 inches) | $5-10 | $75-150 | 2-3 hours plus drying |
| Large crack repair (1-3 feet) | $15-25 | $150-300 | 4-6 hours plus drying |
| Small hole repair (under 6 inches diameter) | $10-20 | $125-250 | 3-5 hours plus drying |
| Extensive damage (multiple walls) | $100-200 | $800-2000 | 20-30 hours over multiple days |
| Ceiling repair | $25-50 | $300-600 | 6-8 hours plus platform setup |
Factors that tip decisions toward hiring professionals include working at heights above 10 feet where scaffolding rental and safety equipment add cost and complexity. Matching ornate historic plaster details like decorative moldings or medallions requires specialized casting and installation skills. Extensive lath replacement behind large damaged areas involves carpentry skills and access to appropriate materials. Rooms requiring historically accurate lime plaster techniques to maintain period character benefit from craftspeople trained in traditional methods. Time constraints when preparing a house for sale justify paying for speed and guaranteed results that meet buyer inspection standards.
When to Call a Professional for Old House Plaster Work
Knowing your limits prevents costly mistakes and safety hazards. Professionals have specialized tools including scaffolding systems, spray texture equipment, and matching materials for historic work. They carry insurance that covers damage or injuries, and they stand behind their work with warranties. Attempting repairs beyond your skill level can create more damage than the original problem.
Historic home considerations add another layer of complexity. Houses in designated historic districts may require permits for interior work and approval from historic commissions before repairs begin. Preservation standards specify using appropriate materials and techniques that maintain the home’s character. Specialized lime plaster techniques require knowledge of traditional mixing ratios, application methods, and finishing that modern drywall contractors often lack. Water damage repair and remediation becomes important when dealing with plaster damaged by leaks or flooding, because these situations require coordinated assessment and repair that addresses moisture sources, structural damage, and potential mold growth together.
Situations requiring professional expertise:
- Cracks wider than 1/2 inch that suggest foundation settlement or structural movement requiring engineering assessment before cosmetic repair
- Ceiling sagging more than 1/4 inch indicating plaster has separated from lath and risks collapse
- Water damaged plaster requiring mold remediation coordination with moisture source repairs
- Ornamental plaster features including ceiling medallions, cornices, or decorative moldings needing replication through casting
- Entire room re plastering where multiple walls need base coat, brown coat, and finish coat application
- Three coat system application in historic homes requiring traditional lime plaster materials and techniques
- Work in designated historic districts where permits and inspection are required
- Repairs triggering building permit requirements based on size or scope of work
Long Term Plaster Crack Prevention Strategies for Old Houses

Humidity control prevents most cracking by minimizing the expansion and contraction that stresses plaster. Maintain 40 to 50% relative humidity year round using humidifiers during winter heating season when indoor air becomes extremely dry and plaster shrinks. Run dehumidifiers in summer, especially in bathrooms and basements, when moisture makes plaster expand. This consistent humidity range keeps plaster movement within tolerances that don’t cause cracking. Install bathroom exhaust fans that vent outdoors, not into attics, and run them during showers and for 20 minutes afterward. Use kitchen range hoods during cooking to remove moisture from boiling water and steaming food before it migrates to walls and ceilings.
Temperature management reduces stress from expansion and contraction cycles. Avoid dramatic thermostat changes, especially sudden 10 to 15 degree increases when returning from vacation or warming a cold house quickly. Gradual adjustments of 2 to 3 degrees per hour allow the building to adapt without sudden movement. Maintain consistent heat in all rooms during winter rather than closing off unused spaces where temperatures drop significantly below occupied areas. Differential temperatures create zones of expansion and contraction at doorways and partition walls. Keep furniture slightly away from exterior walls, 1 to 2 inches of gap, to allow air circulation. Furniture pressed tight against walls traps moisture and creates temperature differences that contribute to cracking.
Inspection routines catch small problems before they expand into large repairs. Walk through the home twice yearly in spring and fall with a
Final Words
Learning how to repair plaster cracks in old houses takes patience, but the skills pay off for years.
Start with accurate diagnosis. Use proper materials. Work in thin layers.
Most importantly, fix the moisture source before you fix the crack.
Your old house has stood for decades. With the right approach, these repairs will hold just as long.
FAQ
How do you fix cracks in old plaster walls?
You fix cracks in old plaster walls by first widening the crack with a utility knife to create a V-shaped groove, removing all loose debris, applying bonding agent to the cleaned crack, then filling with joint compound in thin layers, allowing each coat to dry completely before adding the next.
Is it normal for plaster to crack in old houses?
It is normal for plaster to crack in old houses due to natural settlement, temperature fluctuations, and humidity changes. Most homes over 50 years old have completed major settling, and hairline cracks under 1/8 inch wide are typical cosmetic issues rather than structural concerns.
What is the correct material to fill cracks in plaster?
The correct material to fill cracks in plaster depends on crack width. Hairline cracks need joint compound or setting-type plaster, while cracks wider than 1/4 inch require fiberglass mesh tape as backing before compound application. Historic homes often benefit from lime-based plaster that matches original materials.
How do you tell if a crack is cosmetic or structural?
You tell if a crack is cosmetic or structural by examining its width, pattern, and location. Cosmetic cracks measure less than 1/8 inch, run vertically, and appear stable. Structural cracks exceed 1/4 inch, run diagonally or form stair-step patterns, and often accompany sticking doors or uneven floors.
When should you use mesh tape on plaster cracks?
You should use mesh tape on plaster cracks wider than 1/4 inch, cracks located at corners or joints, areas with previous repair failures, cracks showing movement over time, and all ceiling cracks regardless of width to provide reinforcement and prevent the repair from failing.
How long should plaster dry between coats?
Plaster should dry 2 to 4 hours between coats for setting-type compounds, or 24 hours for air-dry joint compounds. Drying time depends on humidity (50 to 70 percent ideal), temperature (60 to 75 degrees optimal), ventilation, and layer thickness. Never rush drying with heat.
Do you need to widen hairline cracks before filling?
You need to widen hairline cracks before filling to create space for compound to grip properly. Use a utility knife to open the crack to about 1/4 inch depth in a V-shaped groove, which seems counterintuitive but prevents the repair from popping back out immediately.
Should old plaster be primed before painting?
Old plaster should be primed before painting, especially repaired areas, to prevent flat spots caused by differential absorption. Use PVA primer formulated for porous plaster surfaces, feather primer 2 to 3 inches beyond the repair area, and allow full dry time before applying finish paint.
When does plaster repair require a professional?
Plaster repair requires a professional when cracks exceed 1/2 inch width, ceilings sag more than 1/4 inch, water damage needs mold remediation coordination, ornamental features need replication, historic preservation standards apply, or structural issues like foundation movement are suspected rather than simple settling.
Can you repair plaster over active moisture problems?
You cannot repair plaster over active moisture problems because the repair will fail and mold may grow. Find and fix the moisture source first, whether roof leaks, failed gutters, plumbing leaks, or poor ventilation, then allow walls to dry 2 to 4 weeks before attempting repair.
What grit sandpaper for plaster repair?
What grit sandpaper for plaster repair starts with 120-grit for removing high spots and ridges, progresses to 150-grit for smoothing, and finishes with 220-grit for final blending. Use a sanding block for flat surfaces and folded paper for inside corners, checking progress frequently with your hand.
How do you match texture on old plaster walls?
You match texture on old plaster walls by examining the surrounding surface under raking light, taking reference photos, testing your technique on cardboard first, then using tools like natural sponges, stipple brushes, or trowels to recreate the original pattern before the final coat dries.
Why do plaster cracks keep coming back?
Plaster cracks keep coming back when repairs are made over active moisture problems, cracks aren’t widened before filling, bonding agent is skipped, compound is applied too thick in one coat, or structural movement continues. Test for active movement with dated painter’s tape before assuming repairs failed.