


Ever notice how ceiling holes stare down at you every single day until you finally fix them? They’re impossible to ignore, and every overhead glance reminds you they’re there. Patching a ceiling hole isn’t harder than patching a wall, but gravity works against you, dust falls straight into your face, and rushed work shows up under every light angle. The good news is the right approach, proper drying time between coats, and a little patience produce repairs you won’t be able to find a month later.
Tools and Materials Required for Ceiling Hole Repairs

Get everything ready before you start. Nothing’s worse than mid-project hardware store runs while joint compound dries on your ceiling. Set up a staging area you can reach from your ladder where tools stay clean and organized.
Basic Supplies for All Repairs:
- Joint compound or spackle (5 pound container for small repairs, go bigger for extensive work)
- 2 inch putty knife for application
- 6 inch drywall knife for spreading and feathering
- Fine grit sandpaper (150 to 220 grit) or sanding sponge
- Primer matched to your application
- Ceiling paint matched to existing color and sheen
- Clean rags or paper towels
- Drop cloth to protect floors and furniture
Additional Items for Medium Holes (1 to 4 Inches):
- Self adhesive mesh or aluminum patch (aluminum works better on ceilings)
- 8 inch or wider drywall knife for broader feathering
- Utility knife for cleaning hole edges
- Damp sponge for final smoothing
- Work light to check surface smoothness
Additional Items for Large Holes (4+ Inches):
- Replacement drywall piece (verify 0.5 inch thickness matches your ceiling)
- Drywall saw for cutting clean openings
- Measuring tape
- Wood backing boards (1×3 or 1×4 lumber)
- Drywall screws (1.25 inch length)
- Power drill with Phillips bit
- Mesh or paper drywall tape (paper tape’s more flexible for ceiling seams)
Safety glasses protect your eyes from falling debris. A dust mask rated N95 or higher is essential when sanding overhead since the dust falls directly toward your face. Use a sturdy step ladder tall enough that your head stays at least 3 feet below the ceiling when you’re standing on it. Gloves protect your hands from rough drywall edges. Keep the ladder on level ground and don’t overreach.
Repairing Small Ceiling Holes (Under 1 Inch)
Holes under 1 inch from nails, small screws, picture hooks, or minor impact damage are the simplest ceiling repairs. They require minimal materials and can usually be completed with spackle alone.
Start by removing any loose debris around the hole. Use the tip of a utility knife or light sandpaper to gently clean the hole edges, creating a smooth surface for the filler to grip. Wipe away dust with a slightly damp cloth and let the area dry completely before you apply anything.
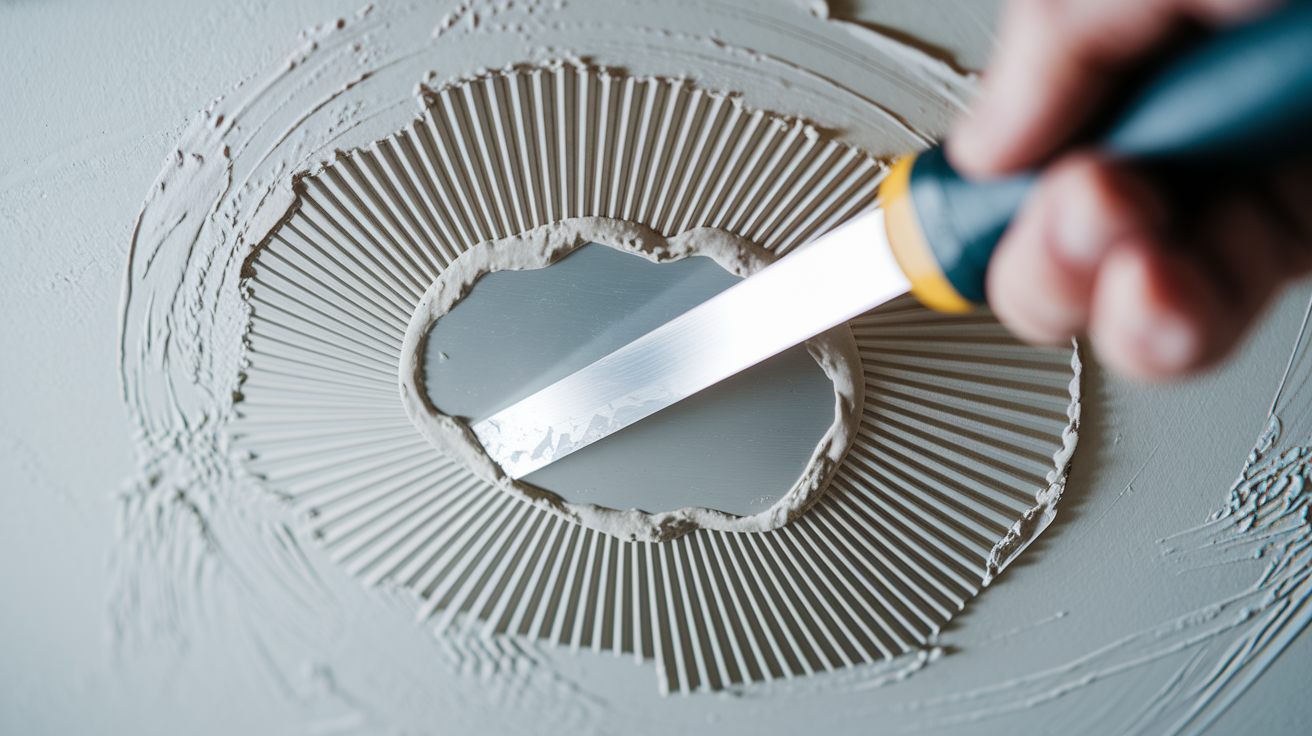
Load a small putty knife (2 to 3 inches wide) with spackle or lightweight joint compound. Press the material firmly into the hole, filling it completely. Hold the knife at about a 45 degree angle and scrape across the surface to remove excess, leaving the repair flush with the ceiling.
Let the first application dry for a minimum of 2 to 4 hours, but overnight’s better. Check that it’s completely dry before moving forward. Dry spackle looks white and bright. If it’s still gray or has dark spots, it needs more time. Check whether the hole needs a second coat. Spackle shrinks slightly as it dries, sometimes leaving a small depression.
If you need a second coat, apply a thin layer and feather it 2 to 3 inches beyond the repair area. This means pressing harder on the outer edges so the compound blends gradually into the surrounding ceiling. Let it dry overnight again.
Sand the dried repair lightly with fine grit sandpaper (150 to 220 grit) using gentle circular motions. You want the patched area perfectly flush with the ceiling. Wipe away the sanding dust with a clean, slightly damp cloth.
Apply primer to the patched area and about 2 to 3 inches around it. Let the primer dry according to the manufacturer’s directions on the can. Apply two thin coats of ceiling paint that matches your existing finish. Feather the paint edges by using less pressure as you move away from the repair. This helps the new paint blend invisibly into the old.
Total project time spans 1 to 2 days when you count drying periods. Your actual hands on work takes only 15 to 30 minutes. The key is allowing proper drying between steps rather than rushing the process.
Repairing Medium Ceiling Holes (1 to 4 Inches)
Holes between 1 and 4 inches from large screws, doorknob impacts, small electrical fixture removals, or similar damage need backing support because there’s no drywall behind the opening to hold filler material. Aluminum backed patches work better than soft mesh patches on ceilings because gravity pulls down on the repair.
Inspect the hole edges and remove any loose or crumbled drywall paper and gypsum. Use a utility knife to clean away ragged edges. Create a slightly concave surface around the hole perimeter by gently sanding or scraping. This gives the compound something to grip. Wipe everything clean with a damp cloth and let it dry.
Choose a patch that extends at least 2 inches beyond your hole in all directions. Peel the adhesive backing from the mesh or aluminum patch. Press it firmly onto the ceiling, centered over the hole. Make sure all edges stick completely to the ceiling surface. Press hard. The patch needs solid contact or it’ll work loose under the weight of joint compound.
Load a 2 to 3 inch putty knife with joint compound. Spread compound over the entire patch, working from the center outward. Cover the mesh completely so you can’t see it through the compound. Switch to a 6 inch or larger knife and spread the compound 4 to 6 inches beyond the patch edges. Feather those outer edges thin by pressing harder as you move away from the patch. Scrape off excess to keep the surface as smooth as possible.
Allow overnight drying at minimum, preferably a full 24 hours. Check that the compound’s completely dry. It should be bright white with no gray or dark areas. Lightly sand any ridges or tool marks with fine grit sandpaper, then wipe away the dust.
Apply a second thin coat that extends 2 to 3 inches wider than your first coat. Continue feathering the edges so they blend progressively thinner toward the outer perimeter. Keep your 6 to 8 inch knife meticulously clean. Wipe it frequently with rags. Even small dried compound chunks will create grooves as you work.
Most patches need a third coat, and larger ones sometimes need a fourth. Each coat should extend slightly wider and feather thinner at the edges. Allow full overnight drying between every application. This is where patience matters.
For the final sanding, work carefully with fine grit sandpaper (150 to 220 grit) using light circular motions. Focus on the feathered edges and transition areas where the patch meets the original ceiling. For an extra smooth finish, dampen a sponge slightly and run it gently over the repair after sanding to eliminate the finest dust and imperfections. Test smoothness by running your hand over the surface and using an angled work light to reveal any remaining irregularities.
Apply primer covering the repair area plus several inches beyond in all directions. Let it dry completely. Apply two coats of ceiling paint matched to your existing finish (usually flat sheen). Feather the paint edges. If the patch is slightly visible after two coats, you may need to paint the entire ceiling section between breaks or borders.
Total project time spans 2 to 3 days with about 1 to 2 hours of actual work. Multiple thin coats produce professional results that are worth the patience.
Repairing Large Ceiling Holes (4+ Inches)
Holes larger than 4 inches from fixture removals, water damage sections, or impact damage require cutting out the damaged area and installing a new piece of drywall with backing support. Simple patches won’t bridge an opening this size.
Use a measuring tape to verify your ceiling thickness. Most ceilings are 0.5 inches thick, but check before buying replacement drywall. Mark a square or rectangle around the damaged area with a pencil and straightedge. Extend the lines toward ceiling joists if you can see them, which makes backing attachment easier. Keep edges straight. Squares and rectangles are much simpler to cut and fit than irregular shapes.
Use a drywall saw or utility knife to cut along your marked lines. Create a clean opening with straight edges. Remove the damaged drywall piece and clear away any loose debris.
Cut wood backing boards from 1×3 or 1×4 lumber. Make them several inches longer than your opening dimensions. Insert the boards behind the drywall around the opening perimeter. If you can access ceiling joists, secure the backing to them with drywall screws. If not, attach the backing boards to the back side of the existing ceiling drywall on all four sides of your opening using screws driven from the front. The backing needs to provide a solid mounting surface for your patch piece. You want at least 1 to 2 inches of backing board on each side of the opening edges.
Measure the opening dimensions carefully. Cut a replacement drywall piece (0.5 inch thickness matching your ceiling) that’s slightly smaller than the opening, about 1/8 inch less in each direction. This makes fitting easier. Use a utility knife to score deeply, then snap the piece, or use a drywall saw for cutting.
Position the replacement piece into the opening. Secure it to the backing boards with drywall screws placed every 6 to 8 inches around the perimeter. Drive screws slightly below the surface without breaking through the paper face. You want a small dimple. Make sure the patch sits flush with the surrounding ceiling, not raised or recessed.
You have two taping options. For self adhesive mesh tape, press it directly over all four seams before applying any compound. For paper tape (which is more flexible and recommended for ceiling patch borders), spread a thin layer of joint compound along each seam first, then embed the paper tape into the wet compound, smoothing out bubbles with your putty knife. Apply another thin coat over the tape.
Apply joint compound over the taped seams using a 6 inch knife. Fill the screw dimples at the same time. Cover all tape completely. Feather the edges 4 to 6 inches beyond the seams on all sides to create smooth transitions between the patch and the existing ceiling.
Allow overnight drying, minimum. A full 24 hours is better. Check that everything’s completely dry, then lightly sand any ridges and tool marks. Apply a second compound coat extending 2 to 3 inches wider than the first coat. Feather it progressively thinner at the edges.
Apply a third coat, and possibly a fourth for very large patches. Each coat should widen slightly and feather thinner at the edges. Allow full drying between coats. Keep your knives clean by wiping them frequently. Dried compound chunks will create grooves in your smooth surface.
Sand the completely dried final surface carefully with fine grit sandpaper (150 to 220 grit). Focus on the feathered seam edges and transition areas where the patch meets the existing ceiling. Use a damp sponge for final smoothing to reduce the dust falling from overhead work. Test smoothness with your hand and an angled work light that will reveal imperfections.
If your ceiling has texture, you’ll need to replicate it before priming. Smooth ceilings just need perfect sanding. Orange peel or light texture requires spray texture applied in light coats. Knockdown texture requires applying material, then partially flattening it after a few minutes. Popcorn requires specialized spray products. Practice your texture technique on scrap material before applying it to the patch. Let texture dry completely.
Apply primer covering the entire patch area plus several inches beyond all edges. Use stain blocking primer if any water damage was involved. Let it dry fully. Apply two coats of ceiling paint matched to your existing finish. Feather the edges by using lighter pressure as you move away from the repair. If the patch remains visible, consider painting the entire ceiling or the full ceiling section between breaks to ensure uniform appearance.
Total project time spans 3 to 5 days with about 3 to 4 hours of actual work. Proper backing support and multiple thin compound coats ensure a durable, professional looking repair that will hold up over time.
Repairing Water Damaged Ceiling Drywall

Water damaged ceiling drywall loses structural integrity and can harbor mold growth. You need to remove and replace the damaged material completely rather than patching over it. Painting over water stains without addressing the compromised drywall underneath leads to recurring problems.
The first critical step is identifying and completely fixing the leak source before touching the ceiling. Inspect roofing, plumbing connections, HVAC condensation lines, or whatever caused the water intrusion. Make certain the issue is resolved. Repairing ceiling damage before fixing the leak source means you’ll be doing this repair again soon.
Inspect the full extent of water intrusion. Check for soft spots, discoloration beyond what’s visible, and sagging areas. Probe gently with a screwdriver to identify all compromised drywall. The damaged area’s usually larger than the visible stain. Mark everything that needs removal.
Cut out all water compromised drywall back to solid, dry material using a drywall saw. Create a square or rectangular opening. Remove any wet insulation above the ceiling. Check the ceiling joists for moisture or damage. Wet framing needs attention before you close anything up.
Allow the cavity to dry completely. This may take several days to over a week depending on how much water was involved. Use fans or a dehumidifier to speed the drying process. Verify that joists and the edges of remaining drywall are completely dry before proceeding. Check the framing for mold growth. Surface mold on framing can usually be cleaned with appropriate solutions, but extensive mold growth may require professional remediation.
Follow the same backing board and replacement drywall installation process described in the large hole repair section. Cut backing boards, insert them behind the opening perimeter, secure to joists or existing drywall, then install your replacement drywall piece. Ensure all materials are bone dry before closing the cavity.
Apply tape to all seams. Apply the first two coats of joint compound following the same techniques as large hole repairs. Allow proper overnight drying between coats. Don’t rush this even though you’re eager to finish.
Apply a third coat if needed. Sand the final surface carefully to create a perfectly smooth finish. Prepare for the most important step specific to water damage repairs.
You must use oil based or shellac based stain blocking primer specifically designed to seal water stains. Regular primer won’t prevent yellowing or brown bleed through after painting. Water stains will show through even multiple coats of regular paint. Apply the stain blocking primer to the entire repair area. Let it dry completely according to manufacturer specifications, which is usually 1 to 2 hours.
Match the existing ceiling texture if applicable following the techniques in the texture matching section. Apply two coats of ceiling paint matched to your existing finish. Feather the edges for an invisible repair.
Know when to call a professional. Extensive damage affecting multiple ceiling joists, visible mold growth, concerns about structural integrity, recurring moisture problems indicating an unresolved leak, or electrical components in the affected area all warrant professional help. For complex water damage scenarios, consider professional Water Damage Repair assessment to identify hidden moisture or structural issues that aren’t visible.
Total project time spans 5 to 10 days including necessary drying time, with actual work time of 4 to 6 hours. Complete drying and stain blocking primer are non negotiable steps. Skipping or rushing either one means your repair will fail.
Repairing Ceiling Cracks Versus Holes
Cracks need assessment before repair to determine whether they’re cosmetic settling cracks or signs of structural movement. New construction settling cracks should stabilize for 6 to 12 months before you make permanent repairs. Repairing active cracks that are still moving just means you’ll be repairing them again.
Hairline and Thin Crack Repair (Under 1/8 Inch)
Use the tip of a utility knife to slightly widen the crack, creating a V shaped groove. This gives compound something to grip inside the crack rather than just sitting on the surface. Remove any loose debris. Wipe clean with a damp cloth.
Load your putty knife with spackle or thin joint compound. Press firmly into the crack, working the material in. Scrape excess flush with the ceiling surface using the knife held at an angle.
Allow overnight drying. Check whether the crack needs a second coat. Thin cracks sometimes require only one application. If you see any depression or if the compound has shrunk, apply a thin second coat. Let it dry fully.
Sand lightly with fine grit sandpaper (150 to 220 grit) to create a smooth surface. Wipe away dust. Apply primer to the repaired area. Paint two coats matched to your ceiling finish.
Wider Crack Repair (1/8 Inch or Larger)
Clean the crack edges and remove any loose material. You need clean surfaces for tape to adhere properly.
You have two tape options. For self adhesive mesh tape, simply press it directly over the crack, keeping it centered. For paper tape, apply a thin layer of joint compound along the crack first, then embed the paper tape into the wet compound. Smooth out any bubbles with your putty knife. Apply another thin coat of compound over the paper tape.
Apply 2 to 3 coats of joint compound over the taped crack. Feather the edges 6 to 8 inches on both sides of the crack so the repair blends gradually into the surrounding ceiling. Allow overnight drying between each coat. This typically means the repair spans 2 to 3 days.
Sand the feathered edges carefully with fine grit sandpaper. You want smooth transitions. Apply primer, then paint with two coats of ceiling paint for an invisible repair.
Pay attention to stress crack warning signs. Recurring cracks that reappear after proper repair, cracks at corners where walls meet the ceiling, cracks that follow drywall seams precisely, or cracks that widen noticeably over time all indicate structural movement. These situations require professional evaluation before cosmetic repair. Foundation settling, inadequate framing, or other structural issues must be addressed first. Repairing the surface crack without fixing the underlying cause means the crack will simply reappear.
Matching Ceiling Texture After Repairs

A perfectly smooth patch will look obvious against a textured ceiling. Texture matching is the final critical step before priming and painting. Apply texture after your final sanding but before applying primer.
Smooth Ceilings
Achieve a perfectly smooth finish through careful final sanding. Use fine grit sandpaper (220 grit) with light circular motions. Check the surface by running your hand over the repair and using an angled work light to reveal any remaining imperfections. The light will cast shadows on even slight irregularities. Apply an optional thin skim coat of joint compound if you find any low spots. Sand again until the repair’s completely smooth and flush with the surrounding ceiling.
Orange Peel and Light Spray Texture
Shake the aerosol texture can thoroughly for at least 2 minutes. Practice your spray pattern and density on cardboard or scrap drywall first. Position it next to your repair area so you can compare directly. Hold the can 18 to 24 inches from the ceiling. Apply light coats using sweeping motions. Build texture gradually with multiple passes rather than trying to achieve full coverage in one heavy application. Each pass should be light. Let each pass partially dry before adding more. Match the surrounding texture density and pattern by practicing until your test piece looks right.
Knockdown Texture
This is a two step process. First, apply heavier spray texture or hand applied joint compound in a random pattern. The texture should be slightly higher than your surrounding knockdown texture. Let it sit for 5 to 15 minutes. The material should be firm but not completely dry. Test by touching it lightly. Then partially flatten the raised peaks using a clean drywall knife held flat. Drag it lightly across the surface, creating the characteristic knockdown appearance where peaks are flattened but the base texture remains. Match the pressure and flattening degree of your existing ceiling. This takes practice.
Popcorn (Acoustic) Ceilings
Use aerosol cans specifically designed for acoustic ceiling texture, available at hardware stores. Shake the can vigorously for several minutes. Practice application on cardboard to understand the coverage and texture particle size. Hold the can 2 to 3 feet from the ceiling. Apply in overlapping passes. Build up texture gradually to match the surrounding density. Exact matching is difficult. Large or obvious repairs may require professional texture equipment that sprays more uniformly. Consider painting the entire ceiling if the patch remains visible after texturing and painting.
Stipple and Hand Applied Textures
Examine your existing pattern closely before starting. Identify what tool was used: brush, sponge, texturing comb, or roller. Use the matching tool with joint compound or texture material. Practice the technique on scrap material positioned where you can compare it directly to your ceiling. Apply the pattern to match your surrounding ceiling, working quickly before the material begins setting up. Hand applied textures show variation in the original application, which actually helps new repairs blend in.
Strongly recommend practicing your texture technique on a scrap piece of drywall or large cardboard positioned directly next to your repair area. You need to see your practice texture beside the actual ceiling texture for accurate comparison. Texture replication improves with each attempt. Let all texture dry completely (several hours minimum, often overnight) before applying primer and paint.
Common Mistakes That Cause Failed Ceiling Repairs
Most DIY ceiling repair failures result from rushing the process or skipping critical steps. The work itself isn’t complicated, but patience makes the difference between invisible repairs and obvious patches.
Learning from common mistakes saves you time and materials compared to having to redo repairs. A failed patch means removing what you just applied, starting over, and waiting through the drying times again.
1. Using old or moldy joint compound. Discard any compound stored for over 2 years. Old compound can develop mold, loses adhesion, and becomes harder to work smoothly. Open the container and smell it before use. Musty odor means throw it out.
2. Applying compound too thick in single coats. Thick application causes cracking as the compound dries and dramatically extends drying time. Multiple thin coats always produce better results than one thick coat.
3. Not allowing adequate drying time between coats. Each coat needs minimum several hours, preferably overnight. Compound should be bright white and completely dry before adding another layer. Applying wet compound over partially dry compound causes problems.
4. Skipping primer before painting. Paint applied directly over joint compound creates visible flashing where the patched area shows different sheen than the surrounding ceiling. Primer seals the compound and ensures uniform paint appearance.
5. Insufficient feathering at edges. If you don’t gradually thin the compound edges, you’ll create visible ridge lines where the repair meets the original ceiling. Feather each coat several inches beyond the previous coat.
6. Using wall patches instead of aluminum backed patches for ceilings. Soft mesh patches designed for walls don’t provide enough support on ceilings. Gravity pulls down on ceiling patches. Aluminum backed patches hold up better.
7. Not installing proper backing support for holes larger than 4 inches. Large holes need solid backing behind the patch. Compound and mesh alone won’t bridge large openings on a ceiling that must support its own weight.
8. Painting before joint compound is completely dry. Wet or partially dry compound shows as gray or dark areas. Completely dry compound is bright white. Painting over partially dry compound traps moisture and causes problems later.
9. Attempting to match texture without practicing first. Texture mistakes are hard to fix. Practice on scrap material positioned where you can compare it directly to your ceiling. Get it right on scrap before applying it to your repair.
Patience and multiple thin layers consistently produce professional results. The extra day or two of drying time is worth avoiding visible repairs or having to start over.
Safety Precautions for Overhead Ceiling Repair Work
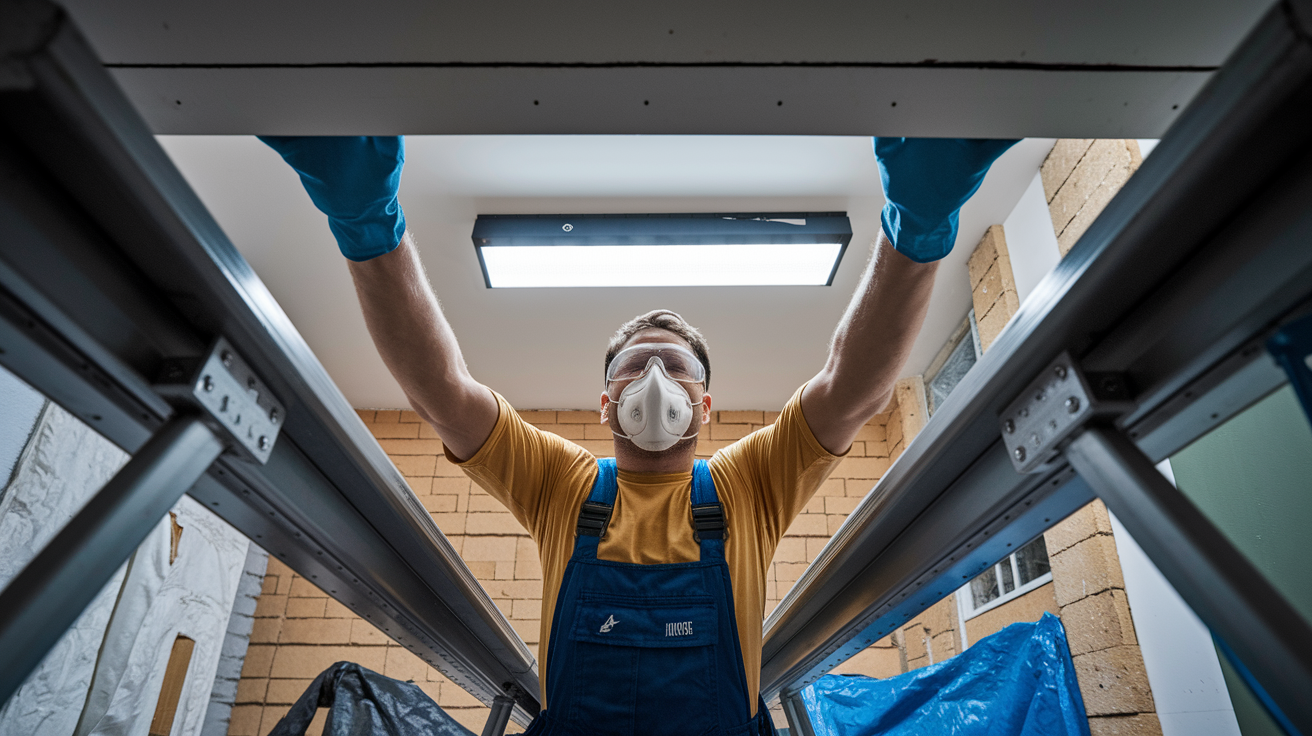
Ceiling repair presents unique safety challenges because you’re working overhead where debris falls directly toward your face, and because you’re working from a ladder.
Essential safety measures for overhead work:
- Safety glasses or goggles to protect from falling dust, dried compound chunks, and drywall debris
- Dust mask or respirator rated N95 or higher for joint compound dust and ceiling material particles that fall as you sand
- Sturdy step ladder that’s the appropriate height so the top of your head stays at least 3 feet below the ceiling when you’re standing on it (typically 6 foot ladder for 8 foot ceilings)
- Stable ladder positioning on level, solid surface with someone nearby when possible, especially for work sessions over 30 minutes
- Drop cloths covering all furniture and flooring below your work area
- Work gloves for handling rough drywall edges and materials
- Adequate ventilation when using primers and paints, opening windows and using fans to move air through the space
Take frequent breaks during overhead work. Your neck and arms will fatigue faster than you expect from holding tools above your head. Tired muscles lead to accidents. Don’t overreach while on the ladder. Move the ladder frequently rather than stretching to work areas beyond comfortable reach.
Know when to call a professional. Extensive repairs covering large areas, repairs near electrical fixtures or visible wiring, repairs in areas you cannot safely access with standard ladders, or situations where you’re uncomfortable with the overhead work all warrant professional help.
Time Requirements and Cost Estimates for Ceiling Hole Repairs
While actual hands on work time is relatively short, drying time between joint compound coats means ceiling repairs typically span multiple days. Set realistic expectations before starting.
| Repair Size | Active Work Time | Total Project Time (with drying) | Material Cost Estimate |
|---|---|---|---|
| Small holes under 1 inch | 15 to 30 minutes | 1 to 2 days | $10 to $20 |
| Medium holes 1 to 4 inches | 1 to 2 hours | 2 to 3 days | $20 to $40 |
| Large holes 4+ inches | 3 to 4 hours | 3 to 5 days | $30 to $60 |
| Water damage repair | 4 to 6 hours | 5 to 10 days (includes drying time) | $50 to $100+ |
These timelines assume 2 to 3 coats of joint compound with overnight drying between each coat. Rushing the process by applying coats before the previous layer fully dries results in cracking, longer sanding work, and potentially needing to scrape everything off and start over. The time you “save” by rushing gets lost when you have to redo the repair.
Material costs shown are approximate for DIY repairs and include compound, patches or replacement drywall, tape, primer, and paint. Hiring a professional typically costs $150 to $400 depending on repair complexity and your location. Professional repair eliminates the multi day waiting periods and ensures first time success with workmanship guarantees.
When to Call a Professional for Ceiling Drywall Repair

While many ceiling holes can be repaired successfully by homeowners, certain situations warrant professional help for safety reasons, quality concerns, or simple efficiency.
Situations requiring professional assessment or work:
- Holes larger than 12 inches or multiple large damaged areas across the ceiling
- Water damage with suspected mold growth or extensive moisture intrusion affecting large sections
- Sagging ceiling sections indicating structural damage or ceiling joist problems
- Repairs involving electrical fixtures, recessed lighting, or ceiling fans where wiring must be moved or protected
- Popcorn or complex textured ceilings requiring specialized matching equipment that produces more uniform results than aerosol cans
- Recurring cracks that suggest foundation settling or framing issues requiring structural evaluation before cosmetic repair
- Very high ceilings (10+ feet) requiring scaffolding rather than simple ladders
- Lack of confidence, tools, or physical ability for overhead work from ladders
Professional repair offers several benefits beyond just completing the work. You get workmanship guarantees, proper equipment and 10+ years of experience for perfect texture matching, completion in a single visit instead of spread over multiple days, identification of structural issues you might miss, and ability to address underlying problems like hidden moisture or inadequate framing.
Professional ceiling repair typically includes damage assessment, all materials, labor, texture matching, priming, and painting. You get a finished result without managing a multi day project, purchasing specialty tools you’ll rarely use again, or dealing with the physical strain of extended overhead work. For professional assistance with ceiling damage, Professional Drywall Repair Services provide complete solutions for situations beyond typical DIY capabilities.
Final Words
Learning how to patch drywall ceiling holes successfully comes down to matching your repair method to the damage size and not rushing the drying process.
Small holes need spackle and patience. Medium holes rely on solid backing patches. Large holes require cutting clean edges and installing proper support.
Water damage means removing all compromised material and letting everything dry completely before closing it back up.
The work itself doesn’t take long. It’s the waiting between coats that adds days to the timeline.
If you gather your materials first, follow the steps, and let each layer dry fully, your ceiling repair will blend in and hold up for years.
FAQ
How do you patch a hole in a drywall ceiling?
You patch a hole in a drywall ceiling by first determining the hole size, then either applying spackle for small holes under 1 inch, using a self-adhesive patch for medium holes 1-4 inches, or installing backing boards with replacement drywall for large holes over 4 inches, followed by joint compound, sanding, and painting.
What is the best ceiling patching compound?
The best ceiling patching compound depends on the repair size. Lightweight spackle works well for small nail holes, pre-mixed joint compound handles medium repairs with patches, and setting-type joint compound provides stronger adhesion for large drywall replacement patches. Always choose fresh compound less than two years old to prevent mold issues.
What are common ceiling repair mistakes?
Common ceiling repair mistakes include applying joint compound too thick in one coat, not allowing adequate overnight drying between coats, skipping primer before painting, using wall patches instead of aluminum-backed patches for ceilings, insufficient edge feathering, and painting before compound fully dries to bright white.
What do you use to fill holes in a ceiling?
You use spackle or lightweight joint compound for small holes under 1 inch, self-adhesive mesh or aluminum patches with joint compound for medium holes 1-4 inches, and replacement drywall pieces secured to backing boards with joint compound and tape for large holes over 4 inches. The filler must fully dry before sanding.