

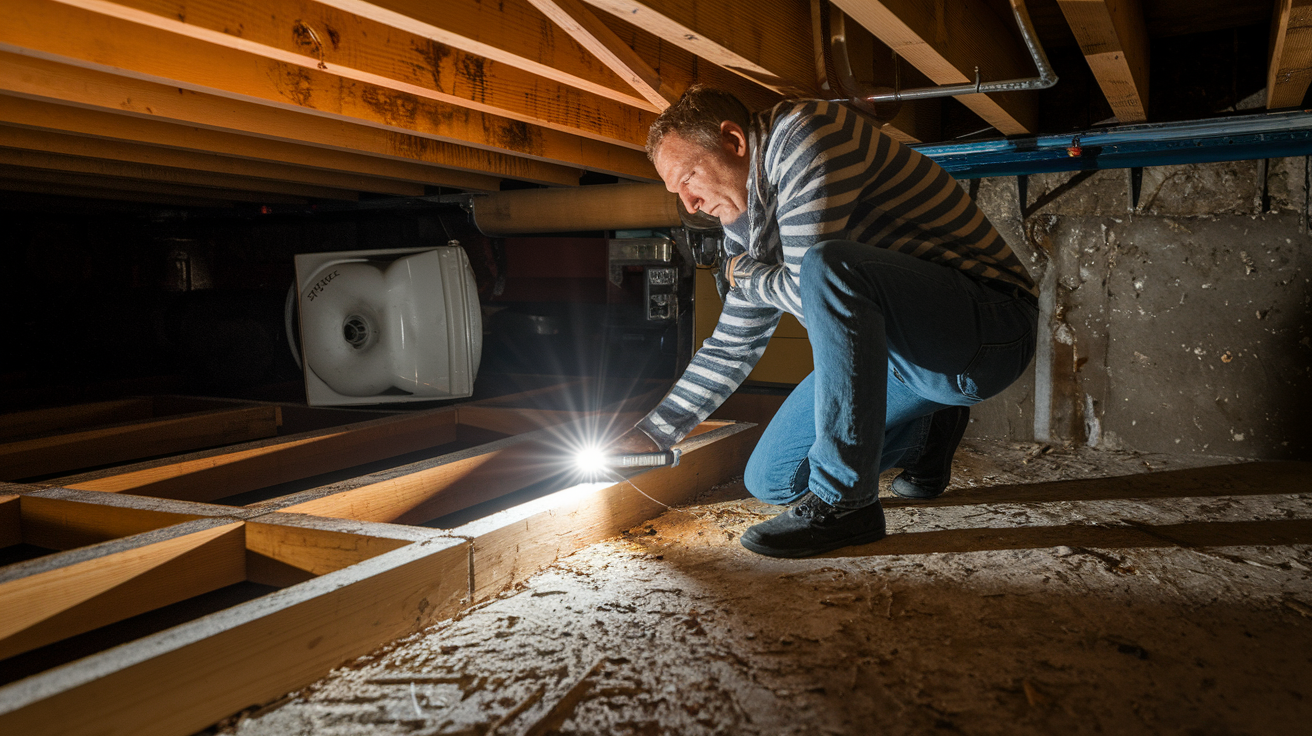

Ever notice how a bouncy floor feels more like a diving board than solid ground? That springy feeling means your floor joists are sagging, and ignoring it turns a manageable repair into a gut job. Sagging joists happen for real reasons: moisture rot, termite damage, inadequate support, or just aging wood that’s done its time. This guide walks you through diagnosing what caused the sag, choosing between sistering, replacement, or adding support posts, and doing the work safely so it holds up for the long run.
Diagnosing the Cause of Your Sagging Floor Joists

Before you start tearing things apart, you need to know what’s actually broken. Fixing sagging floor joists without understanding what caused them to sag is like slapping a bandage on a wound without cleaning out the infection first. You’ll burn through cash and time on repairs that fall apart in a year or two.
Spotting trouble early keeps repairs simple. Catch things fast and you’re looking at manageable fixes instead of gut jobs.
7 warning signs of sagging floor joists:
- Uneven floors with visible slopes: Rooms develop dips, usually toward the center. Drop a marble and watch where it rolls.
- Bouncy or spongy floor movement when walking: The floor gives under your feet. Walking across it feels more like a diving board than solid ground.
- Gaps appearing between floor and baseboards: Joists sag, the floor drops away from walls. Sometimes you can see light coming through or feel air moving.
- Squeaky floors indicating loosened connections: New squeaks in spots that used to be quiet mean fasteners have backed out or wood connections are coming loose.
- Cracked drywall on walls and ceilings below affected areas: Look for diagonal cracks near corners or running along seams. That’s the structure shifting above.
- Doors that stick or won’t close properly due to shifted frames: When frames go out of square, doors drag on the jamb or won’t latch anymore.
- Sloping floor noticeable by rolling objects: Set a golf ball or soda can down. If it takes off on its own, your floor isn’t level.
When you’re seeing two or three of these at once, you’ve got real structural trouble that needs a pro’s eyes on it now. What caused the damage tells you which fix will actually hold.
6 primary causes of sagging floor joists:
- Moisture damage from high humidity or standing water: Vented crawl spaces suck in humid air during warm weather. That moisture hits cool wood and soaks right in. Standing water from drainage problems does even worse.
- Mold growth that eats away at wood: Moisture gets in the wood, mold shows up next. It literally feeds on the fibers that make joists strong.
- Termite damage and insect infestation from carpenter ants: They hollow out joists from inside. By the time you see surface damage, they’ve already destroyed a lot of what holds things up.
- Insufficient or failing structural support beams: Maybe the original builder used too few posts, spaced them wrong, or went with undersized beams. Settlement can shift existing supports too.
- Aging construction or poor DIY repairs: Older places sometimes got built with smaller joists than codes require now. Homeowners cut notches for pipes or pulled out blocking without realizing they were weakening the whole system.
- Plumbing leaks creating unnoticed water damage: A slow drip from a supply line or drain saturates wood so gradually you won’t see stains until rot’s already deep in there.
Crawl space conditions create most moisture problems with joists. Bad drainage around the foundation makes it worse. You’ll often find multiple things working together, especially moisture plus inadequate support or bugs.
Here’s what really matters. Temporary patches that ignore root causes will fail. You can sister a joist all day long, but if moisture keeps rotting the wood, you’ll be crawling back under there doing it again in two years. That’s wasted money and continued risk.
Primary Methods for Repairing Sagging Floor Joists
Three approaches handle most sagging joist problems: sistering, full replacement, and adding support structures. Which one works depends on what caused the damage and how far gone things are. Match your fix to what you found when you checked things out.
Sistering means bolting new lumber alongside the damaged piece. You fasten the new joist to the old one with structural screws and construction adhesive. This works when damage is moderate, the joist hasn’t rotted clear through, and most of the original wood still has some strength left. It’s cheaper because you’re reinforcing instead of ripping everything out. The new joist shares the load with what’s left of the old one.
Joist replacement means pulling the damaged piece completely and installing a new one. You need this when the joist has serious rot, deep cracks running across the grain, or termite damage that’s hollowed out too much material. When sistering won’t give you adequate support because the original joist is too far gone, replacement is your only safe move.
Adding support beams and jack posts fixes insufficient support instead of damaged wood. You install adjustable steel posts or permanent columns under existing joists to spread out weight and lift sagging sections. This method works when joists are solid but didn’t have enough support from day one, when renovations added loads the original structure wasn’t built for, or when you need to fix excessive sag across a long span.
Essential Tools and Materials for Floor Joist Repair

Get everything lined up before you start. Stopping halfway through to hunt for a missing tool wastes time and creates danger when you’ve got loads sitting on temporary jacks.
| Category | Items | Purpose |
|---|---|---|
| Support Equipment | Hydraulic jacks, adjustable steel posts, 4×4 temporary support posts, concrete blocks or solid bearing plates | Hold floor loads safely while you work and give you lifting power for leveling |
| Fasteners & Hardware | Structural screws (3″ minimum), joist hangers (sized to match joists), galvanized nails, construction adhesive, lag bolts with washers | Make strong connections that meet code and resist moisture |
| Lumber & Wood Products | Dimensional lumber matching existing joist size, pressure-treated lumber for moisture-prone areas, solid blocking material, shims | Replace or beef up damaged pieces with material that matches or beats original specs |
| Measuring & Leveling Tools | Laser level or 4-foot level, tape measure, carpenter’s square, chalk line, moisture meter | Make sure repairs are level, positioned right, and moisture levels are acceptable before you seal things up |
| Safety Equipment | Hard hat, safety glasses, work gloves, dust mask or respirator, knee pads, adequate lighting | Keep you safe from falling junk, dust, mold, and injuries in tight crawl space conditions |
Lumber choice matters more than you’d think. Match existing joist dimensions exactly. A 2×8 for a 2×8, a 2×10 for a 2×10. Dimensional lumber handles most jobs. Engineered products like LVL beams give you more strength across longer distances but cost more. In damp areas, pressure-treated lumber fights off rot and bugs better than regular wood. Everything needs to meet current codes for your area.
Step-by-Step Process for Sistering Floor Joists
Sistering is the most practical fix for homeowners with decent carpentry chops when damage justifies reinforcement instead of full replacement.
8 steps for sistering floor joists:
-
Install temporary supports and hydraulic jacks: Set jacks on solid surfaces (concrete blocks work) about 2 feet on each side of the damaged spot. Raise them until they’re snug against the subfloor but not lifting yet.
-
Clean the damaged joist surface: Knock off loose stuff, dirt, old insulation, and surface mold. You want clean, solid wood contact between old and new joists.
-
Cut new joist to exact length matching existing member: Measure carefully. The new joist should run from the same bearing points as the original, usually foundation sill on one end and carrying beam on the other.
-
Apply construction adhesive to contact surfaces: Run a continuous bead along the side of the damaged joist where the new one will attach. This fills small gaps and gives you more bonding surface.
-
Position new joist flush against damaged member: Work it into place so it sits tight against the original along its full length. You might need to lift slightly with the hydraulic jacks to get it in there.
-
Secure with structural screws every 12 inches in staggered pattern: Drive 3-inch structural screws through the new joist into the old one. Stagger them top to bottom so you’re not lining up screws that’ll split the wood. Work from both ends toward the middle.
-
Add blocking between joists for lateral stability: Cut blocks from 2x material to fit between joists. Install them every 4 to 6 feet along the run. This keeps joists from twisting or rolling under load.
-
Remove temporary supports gradually after adhesive cures: Wait at least 24 hours for adhesive to set up. Lower jacks slowly, watching that the repair holds without sagging.
Your sistered joist needs to extend at least 3 feet past the damaged section on each side. That gives enough overlap for proper load transfer from old joist to new.
Installing Support Beams and Jack Posts: Jacking Techniques and Procedures
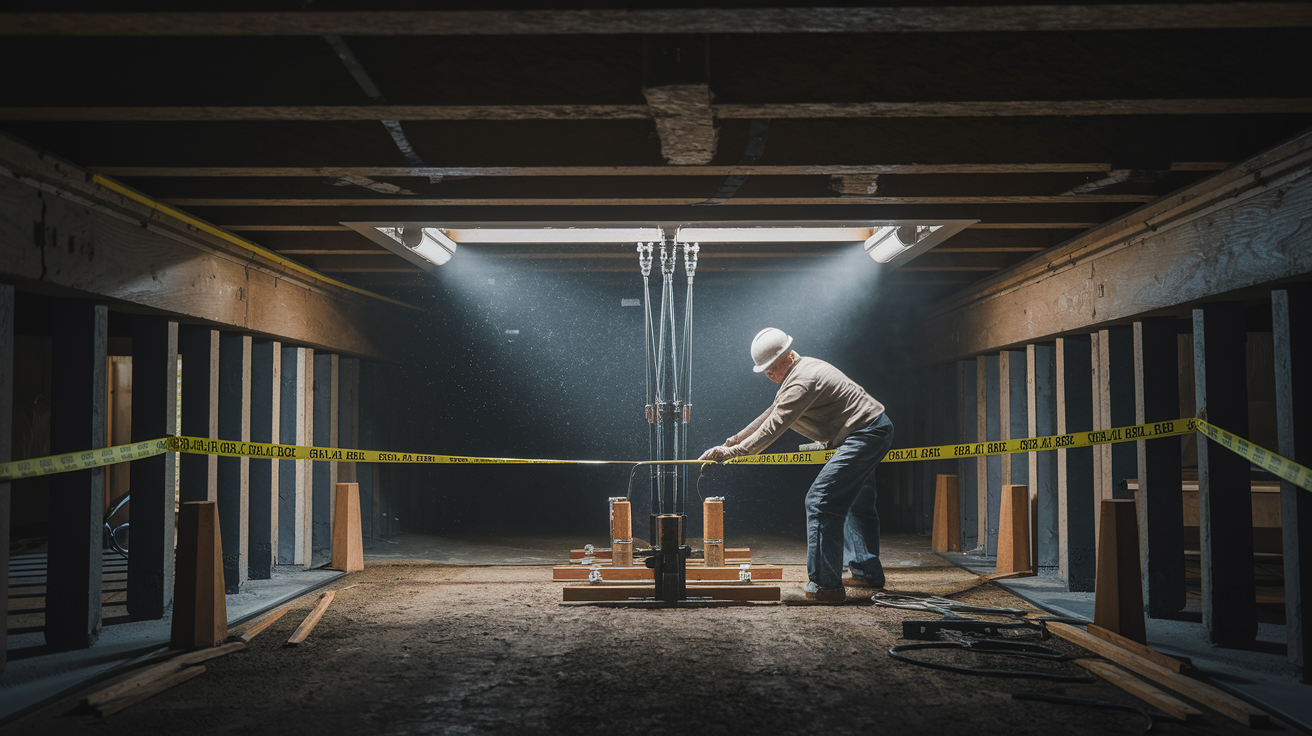
Adding support under existing joists fixes structural problems and needs proper lifting technique. Rush this and you’ll crack drywall, break plumbing connections, or overstress the joists you’re trying to save.
Support beam installation is right for specific situations. Use it when original construction had inadequate support or posts spaced too far. It works when renovations added loads like granite counters or tile floors that exceed the original design. You’ll need it to shift loads when you’ve pulled a support wall or need to carry weight around an opening.
Prep and initial setup need careful planning. Use span tables and load calculations to figure out where bearing points go. You can’t just eyeball it. Prep the surface where posts will sit. On dirt crawl space floors, pour concrete footings at least 12 inches square and 8 inches deep. On existing concrete, check that it’s solid and level. Set adjustable steel posts or permanent columns at calculated spots. Install support beams perpendicular to joists, running across multiple bays to spread the load.
Proper jacking keeps you from breaking things during the lift. Set hydraulic jacks on solid bearing surfaces with steel plates or thick plywood to spread the load. Start with jacks positioned to support but not lift. Snug them up so they’re just touching the beam or subfloor. Now the critical part: raise the floor no more than 1/8 inch per day. This gradual approach lets the structure adjust. Go faster and you’ll crack drywall, break rigid plumbing, or overstress joists that have been curved for decades.
5 critical safety warnings:
- Never work under unsupported loads: Keep temporary supports in place until permanent structure is secured and checked.
- Inspect jacks daily for hydraulic leaks or instability: Jacks fail. Check them every single day before you keep working.
- Ensure crawl space or basement has adequate lighting and ventilation: You need to see what you’re doing and breathe safely in tight spaces.
- Wear protective equipment including hard hat and safety glasses: Stuff falls. Nails stick out. Protect your head and eyes.
- Have helper available when working with heavy beams: Steel beams and solid lumber weigh more than most people can safely muscle alone. Don’t risk it.
Use a laser level or string line to measure progress and make sure lifting is even across multiple points. Check measurements daily as you adjust jacks. When you hit proper height, the floor should be level or have appropriate slope if that’s part of the design. Gradually lock down all connections with appropriate bolts and hardware as you reach proper height. Tighten fasteners progressively, moving from one to the next instead of cranking one down completely before starting another.
Understand temporary versus permanent installations. Temporary supports hold loads during other repairs. You pull them when that work is done. Permanent support systems become part of the structure. Adjustable steel posts can do both jobs, but permanent installation needs proper concrete footings, not just concrete blocks stacked on dirt.
When Floor Joist Damage Requires Full Replacement
Some damage goes too far for reinforcement. When the structural material is shot, complete replacement is your only safe move.
You need full replacement under these conditions. Wood rot affecting more than 30 percent of the joist’s cross section can’t be reinforced enough. Severe stress cracks running perpendicular to grain mean the joist has failed or is about to. Termite damage that’s hollowed out sections throughout the length has eliminated too much material. Improperly notched joists cut too deep or in wrong spots have compromised strength that sistering won’t fix. Compression damage from overloading has crushed wood fibers in ways that permanently reduce strength. Joists with insufficient original dimensions per span tables need replacement with properly sized members, not just reinforcement.
The replacement process follows logical steps. Install temporary supports on both sides of the damaged joist, at least 2 feet from where you’ll work. Disconnect subfloor from the joist by pulling nails or screws. Cut and remove the damaged member. This usually means cutting it into sections if it’s wedged between subfloor and foundation. Fit the new joist with proper joist hangers at bearing points. Ends need to rest on foundation sill and carrying beam with approved metal connectors, not just sitting on wood. Make sure the new member matches or exceeds original specs, both in size and lumber grade. Reconnect subfloor with appropriate fasteners, then pull temporary supports once everything is locked down. This work usually takes two people and should include professional inspection to verify it meets code.
Comprehensive Moisture Management and Crawl Space Solutions

Fixing joists without controlling moisture is throwing money away. You’ll be back under the house dealing with the same mess in a few years. Real long-term prevention means addressing environmental factors and keeping those controls working, not just making one-time fixes.
Crawl space encapsulation creates conditions that protect your floor system. Start by sealing vents to stop humid outside air from getting in during warm months. Install heavy-duty vapor barrier over soil to block ground moisture from evaporating into the crawl space. Barrier should run up walls and be sealed at all seams and penetrations. Insulate foundation walls to control temperature differences that cause condensation. This creates a controlled environment where humidity stays low and wood stays dry.
Moisture management systems deal with water before it reaches joists. Fix drainage by making sure proper grading slopes away from foundation and gutters send water at least 6 feet from the house. Install sump pumps where standing water collects after rain. Use a dehumidifier to keep humidity below 50 percent year round. Improve ventilation in basement floors and unconditioned spaces, but remember that ventilating a crawl space in humid climates often makes moisture worse, not better. Seal rim joist and sill plate areas where outside air sneaks in. Handling these issues prevents joist damage, mold, and termites all at once. For serious water problems, consider professional water damage repair and remediation coordination to make sure all moisture sources get properly identified and controlled.
Structural monitoring and preventive habits keep repairs working long term. Keep crawl space humidity below 50 percent with continuous dehumidifier operation and periodic checks with a hygrometer. Make sure drainage systems stay functional with seasonal gutter cleaning and checking that grading hasn’t settled near foundation. Schedule annual pest inspection to catch termites and bugs early. Apply wood treatment products to exposed floor joists in high-risk areas where moisture control isn’t perfect. Do annual visual inspections of your floor system from crawl space or basement. Look for new warning signs like floor bounce, uneven floors, or moisture stains. Watch plumbing in rim joist and sill plate areas for leaks that could hit nearby wood. Check that support beams and jack posts stay stable, properly positioned, and show no settling or movement.
6 maintenance tips:
- Annual crawl space inspection: Check for moisture, pests, and any new structural concerns before small problems turn expensive.
- Maintain consistent humidity levels below 50 percent: Use a dehumidifier with a humidistat that runs automatically, not just when you remember it.
- Address plumbing leaks immediately: Even slow drips saturate wood over time. Fix leaks the day you find them.
- Keep gutters and drainage functional: Clean gutters twice a year and check downspouts extend far enough from foundation.
- Schedule professional pest inspection every 2 to 3 years: Termites work quietly. Regular inspections catch them before major damage happens.
- Document all repairs and inspections for property records: Keep receipts, photos, and inspection reports. This documentation helps with insurance claims and adds value when you sell.
Cost Breakdown for Floor Joist Repair Projects
Repair costs swing pretty wide based on how much damage you’re dealing with, which fixes you pick, and whether you do it yourself or bring in pros.
| Repair Method | DIY Cost Range | Professional Cost Range | Timeline |
|---|---|---|---|
| Sistering single joist | $150 – $400 | $600 – $1,200 | 1-2 days DIY, 4-8 hours professional |
| Full joist replacement | $200 – $600 | $800 – $2,000 per joist | 2-3 days DIY, 1-2 days professional |
| Support beam installation | $400 – $1,000 | $2,000 – $5,000 | 3-5 days DIY, 2-3 days professional |
| Comprehensive crawl space repair | $1,500 – $4,000 | $5,000 – $15,000+ | 1-2 weeks DIY, 3-7 days professional |
Several things affect what you’ll actually spend. Crawl space access versus basement floors makes a difference. Working in a 2-foot crawl space costs more than a full-height basement. How much joist damage you’ve got and how many joists need work multiplies costs fast. Material costs vary by lumber choice, especially if you need engineered beams or lots of pressure-treated stuff. Permits and structural engineer involvement add to the total, usually $500 to $2,000 for engineering assessment and another $200 to $500 for permits. Additional moisture control like encapsulation, dehumidifiers, or drainage improvements can double project cost. Where you live changes labor rates, so the same work costs more in some markets.
Put costs in perspective against value. Fixing sagging floors improves overall home value and safety. Properties with documented structural repairs and moisture control are more appealing to buyers than homes with obvious floor problems. You’ll get back much of the repair cost in resale value. More important, you stop ongoing structural deterioration that only gets pricier the longer you wait.
Delaying repairs creates a financial penalty. Costs go up as damage spreads from one joist to multiple joists, as moisture problems cause more mold and rot, and as property value drops from visible and worsening structural issues. The cheapest repair is the one you do before the problem gets worse.
Building Codes and Permit Requirements for Joist Repairs

Code compliance and permits aren’t optional when you’re messing with structural systems. These requirements make sure repairs are legal and safe.
Permits are usually required for structural modifications affecting load-bearing walls or floor systems. Full joist replacement projects need permits in most places. Adding or moving support beams requires approval because you’re changing how loads move through the structure. Work affecting more than three joists usually triggers permit requirements. Requirements vary by jurisdiction, so check with your local building department before starting. Some areas give a pass on minor repairs like sistering a single joist. Others require permits for any structural work.
Building codes spell out specific technical stuff that affects how you do the work. Minimum joist dimensions based on span tables and joist spacing prevent undersized members. You can’t just use whatever lumber is cheapest or fits in your truck. Proper connection methods require approved joist hangers and galvanized fasteners rated for structural loads. Adequate bearing points at foundation and support structures make sure loads transfer right. Notching and boring restrictions protect compression strength and tension forces by limiting where and how deep you can cut into joists. Live load and dead load capacity requirements ensure the floor can handle furniture, people, and expected use. Proper blocking between joists and correct bridging installation spacing prevent twisting and spread loads sideways.
The inspection process checks that your work meets requirements. Pre-repair consultation with a structural engineer makes sense for significant damage affecting multiple joists or main beams. Mid-project inspections happen before you cover the work. The inspector needs to see joist connections and support installations before subfloor goes back. Final inspection confirms code compliance and closes the permit. Keep documentation for future property transactions. Permitted work adds value and avoids headaches during sale. Unpermitted work creates consequences including trouble selling the house when inspections reveal code violations, and liability for structural failures that insurance may not cover if work wasn’t permitted.
DIY Repair Versus Hiring Professional Floor Joist Contractors
Deciding whether to do this yourself or bring in pros depends on the specific conditions you’re facing and honest assessment of your skills.
DIY repair makes sense in certain scenarios. Single joist sistering with clear access from a full-height basement is doable for someone with basic carpentry skills. Moderate damage without rot or termites throughout the area keeps the scope manageable. If you’ve got carpentry experience and proper tools including hydraulic jacks and structural fasteners, you can handle straightforward repairs. No load-bearing walls directly above the repair area simplifies work since you won’t need extensive temporary supports. Good crawl space access with adequate height and safe conditions makes the physical work possible without excessive twisting or risk.
Some situations need professional help, no question. Damage to multiple joists or a main carrying beam affects the entire floor system and requires expertise to sequence repairs safely. Foundation issues or settling house problems need soil stabilization and engineering solutions beyond typical carpentry. Extensive rot or bug damage throughout the floor system means you’re looking at large-scale structural work. Complex pier and beam structures with multiple levels of support require understanding how loads transfer through the system. Work affecting load-bearing walls or needing temporary supports for occupied areas creates risks that pros are better equipped to manage. Uncertainty about how far damage goes means you need professional assessment before attempting repairs. For complex structural fixes and complete restoration solutions, consider professional carpentry and structural wood repairs to make sure work is done safely and meets all code requirements.
Structural engineer involvement provides value beyond basic repair execution. Engineers do accurate load assessment and repair specs based on calculations, not guessing. They make sure chosen repair methods actually meet compression strength and weight distribution requirements for your specific floor system. Engineers spot hidden problems like drainage issues or foundation settlement that caused the joist damage in the first place. They provide documentation for permits and future sale, which protects your investment and gives buyers confidence in the repairs.
Safety considerations often tip the decision toward professional help. Risk of structural collapse during DIY attempts without proper temporary supports is real. People have been seriously hurt when floors shifted during inadequate support. Exposure to mold and moisture damage in poorly ventilated crawl space creates health risks that require proper respiratory protection and containment procedures. Specialized equipment requirements for hydraulic jacks, support beam installation, and material handling exceed what most homeowners own. Liability and insurance implications of improper structural repairs can leave you responsible for damage to your house or injury to others if something fails. Pros carry insurance that covers these risks. Your homeowner’s policy may not.
Final Words
Sagging floor joists won’t fix themselves, and temporary patches just delay bigger problems.
Whether you’re sistering a single damaged joist or installing support beams to level an entire floor, the key is addressing the root cause, not just the symptoms.
Start with an honest assessment of the damage. Match your repair method to what you found during diagnosis. Control moisture in the crawl space so the problem doesn’t come back.
If you’re confident with the tools and the scope is manageable, a DIY approach can work. But when you’re dealing with multiple joists, rot that keeps spreading, or structural questions you can’t answer, bring in a pro.
The goal is a safe, solid floor that holds up over time.
FAQ
How do you fix sagging floor joists?
You fix sagging floor joists by first diagnosing the cause, then choosing one of three methods: sistering new lumber alongside damaged joists, replacing severely damaged members completely, or installing support beams and jack posts beneath existing joists to redistribute weight and lift sagging sections.
How much does it cost to fix sagging joists?
Fixing sagging joists costs between $150-400 for DIY sistering of a single joist, or $800-2,000 when hiring professionals. Full joist replacement runs $300-800 per joist for DIY or $1,500-4,000 professionally, depending on crawl space access and damage extent.
How much floor joist sag is acceptable?
Floor joist sag is generally acceptable up to 1/360th of the span length under normal loads. For a 12-foot span, that’s about 0.4 inches. Anything beyond this creates bouncy floors, indicates structural problems, and requires repair to prevent further damage.
Can you jack up a sagging floor?
You can jack up a sagging floor using hydraulic jacks and support beams, but you must lift slowly, no more than 1/8 inch per day, to let the structure adjust gradually. Rushing causes cracked drywall, broken plumbing connections, and overstressed joists.
What are the warning signs of damaged floor joists?
The warning signs of damaged floor joists include uneven floors with visible slopes, bouncy or spongy movement when walking, gaps between floors and baseboards, squeaky floors, cracked drywall on walls below, and doors that stick or won’t close properly due to shifted frames.
When should I replace floor joists instead of sistering them?
You should replace floor joists instead of sistering when wood rot affects more than 30% of the joist, when severe stress cracks run perpendicular to grain, when termite damage creates hollow sections, or when joists are improperly notched and compromising structural integrity.
How do I prevent floor joist damage from moisture?
You prevent floor joist damage from moisture by encapsulating your crawl space with vapor barriers, maintaining humidity below 50% with dehumidifiers, addressing drainage problems with proper grading and gutters, and scheduling annual pest inspections to catch termite damage early.
Do I need a permit to repair floor joists?
You need a permit to repair floor joists when the work involves structural modifications affecting load-bearing walls, full joist replacement, adding or relocating support beams, or repairing more than three joists. Check with your local building department for specific requirements.
What causes floor joists to sag?
Floor joists sag due to moisture damage from high humidity or standing water, mold growth that eats away at wood, termite damage and carpenter ant infestation, insufficient or failing support beams, aging construction or poor DIY repairs, and unnoticed plumbing leaks creating water damage.
Can I sister floor joists myself or should I hire a contractor?
You can sister floor joists yourself if you’re repairing a single joist with clear access, have carpentry experience and proper tools, and damage doesn’t involve rot or load-bearing walls. Hire a contractor for multiple damaged joists, extensive rot, foundation issues, or when you’re uncertain about damage extent.