


Ever notice how a sagging ceiling makes your whole house feel tired and unstable? That drooping drywall isn’t just an eyesore. It’s usually telling you something went wrong during installation or something’s happening behind the scenes that needs attention. The good news is that most sagging drywall problems have straightforward fixes once you understand what caused the sag in the first place. We’ll walk you through diagnosing the real issue, choosing the right repair method for your situation, and getting your ceiling flat and solid again.
Diagnosing Your Sagging Drywall Problem

Before you grab tools and materials, figure out what’s causing your ceiling to sag. Different causes need different fixes, and trying the wrong approach wastes time and money. Sometimes more than one thing is going wrong at once, which means you’ll need to address each problem to get a repair that actually holds up.
Identifying the Root Cause
Check for these primary causes before you start any repair work:
Undersized drywall thickness: If someone installed 1/2 inch drywall where roof trusses sit 24 inches apart, the drywall can’t handle that span. The proper thickness for that spacing is 5/8 inch.
Water damage from roof leaks or plumbing issues: Accumulated water adds weight and breaks down the drywall material itself. Look for Water Damage Repair and Remediation signs like staining or soft spots.
Structural settling and foundation movement: Your home shifts slightly over time as the ground moves and temperatures change. That movement can pull drywall away from joists.
Thermal expansion cycles: Repeated heating and cooling makes building materials expand and contract, which stresses fasteners and can loosen drywall over time.
Improper original fastening or inadequate screw spacing: If screws were placed too far apart or not driven into joists properly, the drywall never had solid support.
Excessive weight from insulation or added materials: Too much insulation piled on top of the drywall pushes down on panels that weren’t meant to carry that load.
Vibration stress from garage doors or mechanical systems: If the sagging ceiling is near a garage, the repeated vibration from door operation places constant stress on the drywall.
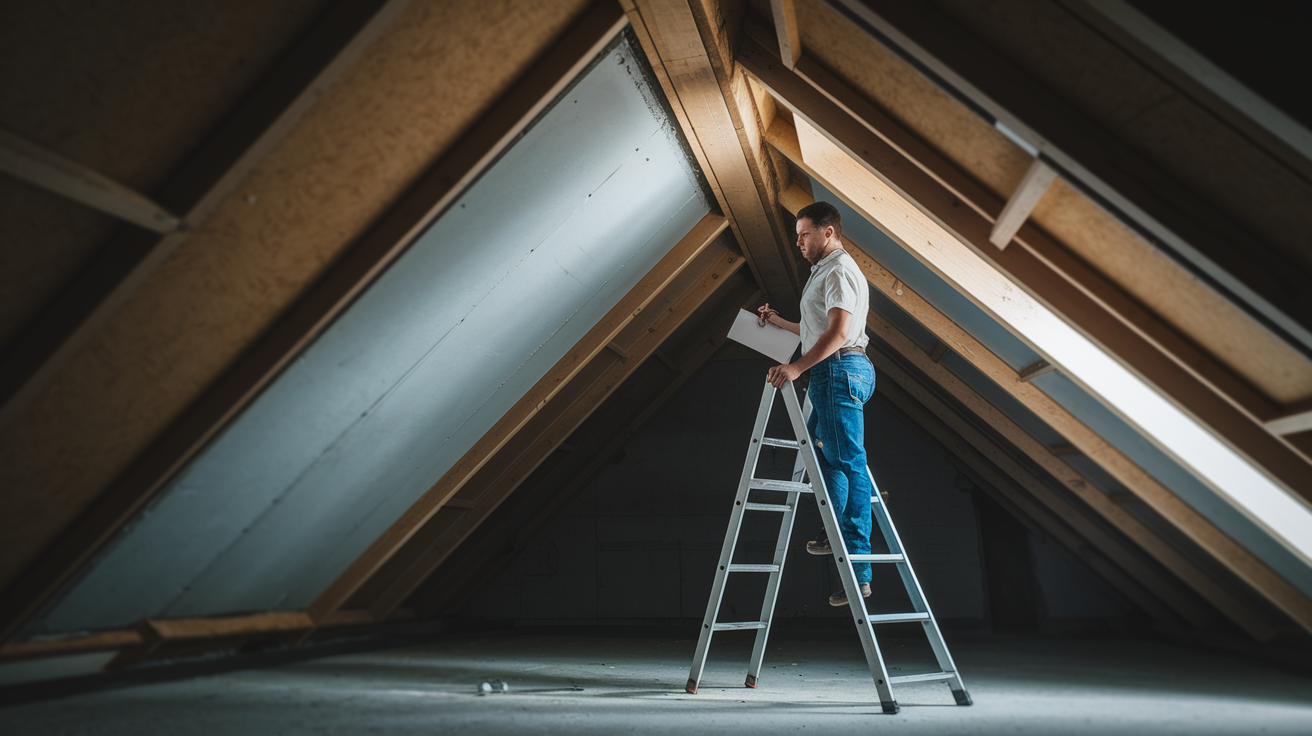
Get into your attic if you can. You’ll need to look at the back side of the drywall, check joist spacing with a tape measure, and see how the insulation sits on the ceiling. A flashlight and a notepad help you document what you find up there.
Assessing Damage Severity and Type
Measure how far the ceiling has dropped by holding a straight board or level against it and checking the gap at the lowest point. Walk around and mark every area where you see sagging, even if it’s slight.
Watch for these critical warning signs:
Discoloration patterns: Brown or yellow rings mean moisture has been sitting there, probably from a leak you’ll need to fix before repairing drywall.
Bubbling or soft texture when pressed: Push gently on the sagging area. If it feels soft or your finger makes a dent, water has damaged the gypsum core.
Musty odors: That smell means mold is growing somewhere, usually because moisture got in and stayed.
Visible cracks in joists or framing members: If the wood itself is cracked or broken, you’ve got a structural problem that’s bigger than a drywall issue.
Areas of separation between drywall and framing: Look along the edges where the ceiling meets the walls. Gaps there mean the fasteners have pulled loose or the drywall is shrinking away.
Widespread sagging across multiple ceiling sections: If half your ceiling is drooping, you’re probably dealing with undersized material or a bigger structural concern, not just a few loose screws.
Take photos and write down measurements. That record helps you figure out whether you can handle this yourself or if you need to bring in someone with more equipment and experience.
Complete Repair Methods for Sagging Drywall
The fix you choose depends on what’s wrong and how bad the sag is. For minor sagging caused by loose fasteners, you can usually add screws and call it done. Moderate sagging from undersized drywall means adding support with furring strips and a new layer. Severe damage from water or structural issues often requires tearing everything out and starting over.
Each method has a place. Simple refastening takes an hour or two. Furring strips drop your ceiling height by an inch or so but save you from the mess of a full tearout. Complete replacement gives you a fresh start but means dealing with falling insulation and a lot more cleanup.
Simple Refastening for Minor Sagging
Run a stud finder across the ceiling to locate joists, marking each one with a pencil so you know exactly where to drive screws. Joists typically run 16 or 24 inches apart.
Drive new drywall screws into the joists where the ceiling sags, spacing them about 12 inches apart along each joist. Use screws long enough to bite into the framing by at least 1 inch.
Set each screw depth so it creates a slight dimple in the drywall surface without tearing through the paper face. That dimple gives you a spot to fill with joint compound later.
Check your work by pressing up on the repaired area to see if the drywall now sits tight against the framing. If it still feels loose or spongy, the problem is bigger than loose fasteners.
Furring Strip Reinforcement Method
Measure the depth of the sag at its worst point using a straight edge and a ruler. If the gap is less than 3/4 inch, 1×3 furring strips will work. Deeper sags need 2×2 boards for enough strength.
Select your furring material. 1×3 boards are easier to work with than 1x2s because they give you a wider surface for driving screws through the new drywall layer. Cut boards to run perpendicular to the joists, spanning the full width of the sagging area.
Install furring strips on 16 inch centers, screwing them firmly to the existing ceiling joists or trusses. This tighter spacing supports the new drywall layer properly, even if your original joists sit 24 inches apart.
Secure each furring strip with 2 1/2 inch drywall screws driven into the joists every 2 feet. Make sure the strips create a level plane below the existing ceiling. Use shims if needed to keep everything flat.
Hang 5/8 inch drywall panels across the furring strips, driving screws into the strips every 12 inches. Work with a helper because ceiling work is awkward, and panels are heavy.
Extend electrical boxes for ceiling fixtures so they sit flush with the new ceiling surface. You’ll need box extenders from the hardware store, and you might want an electrician to handle this part if you’re not comfortable working with wiring.
Complete Tearout and Replacement Method
Remove the old drywall along the edges first, cutting carefully where the ceiling meets the walls so you don’t damage the wall surface. Wear safety glasses and a dust mask because debris will fall.
Extract all old fasteners from the joists before hanging new material. Pull out screws and nails, or they’ll get in your way and create bumps under the new drywall.
Manage falling insulation by laying tarps or plastic sheeting over everything below. Insulation will come down with the old drywall, and it makes a mess. Scoop it back into the attic after the old ceiling is down.
Install proper 5/8 inch drywall if your joists sit 24 inches on center. Space screws 12 inches apart along each joist, and make sure every panel edge lands on solid framing.
Secure panels to joists with screws driven deep enough to dimple the surface but not tear the paper. Stagger the seams between rows so they don’t line up, which makes the ceiling stronger.
Pick the repair method based on how much the ceiling sags, what caused the problem, and whether you can live with a ceiling that’s an inch lower. Simple refastening only works if the original drywall thickness was correct and the joists are fine. Furring strips save time but change your ceiling height. Full replacement costs more in time and mess but gives you a proper fix if the original installation was wrong from the start.
Essential Tools and Materials for Drywall Repair

| Material/Tool | Specification | Purpose |
|---|---|---|
| Furring strips | 1×3 boards (or 2×2 for deep sags) | Create level support grid for new drywall layer |
| Drywall panels | 5/8 inch thickness, 4×8 or 4×12 sheets | Main ceiling surface material for proper span support |
| Drywall screws | 2 1/2 inch for furring, 1 5/8 inch for panels | Fasten furring strips to joists and panels to strips |
| Joint compound | All purpose or lightweight, 5 gallon bucket | Fill screw dimples and seams between panels |
| Paper joint tape | 2 inch width, standard perforated | Reinforce seams to prevent cracking |
| Taping knife | 6 inch and 10 inch widths | Spread and smooth joint compound layers |
| Cordless drill | 18V minimum with adjustable clutch | Drive screws quickly without overdriving |
| Stud finder | Electronic, edge finding model | Locate ceiling joists behind existing drywall |
| Step ladder | 6 or 8 foot, sturdy construction | Reach ceiling safely for fastening and finishing |
| Safety glasses | ANSI rated impact protection | Shield eyes from falling debris and dust |
| Dust mask | N95 or equivalent respirator | Filter drywall dust and insulation particles |
| Drop cloths | Canvas or heavy plastic, multiple sizes | Protect floors and furniture from compound and dust |
Buy materials rated for the job. Cheap drywall screws strip out easily, and thin joint compound cracks as it dries. You’ll use more compound than you think, so get the bigger bucket. A quality taping knife with a stiff blade spreads compound smoother than a flimsy one.
Safety equipment isn’t optional. Drywall dust gets everywhere and irritates your lungs. Falling chunks of old ceiling can catch you in the face if you’re looking up. Work gloves protect your hands from sharp edges and splinters, especially when handling furring strips.
Finishing Steps: Mudding, Taping, and Texturing Drywall
Applying Joint Compound and Tape
Spread a layer of joint compound along each seam where drywall panels meet, using your 6 inch taping knife. Press paper tape into the wet compound, centered over the seam, then run the knife over it firmly to squeeze out excess compound and embed the tape fully. Leave a thin layer covering the tape. Fill screw dimples with compound at the same time, smoothing each one flush.
Second and Third Coat Application
Let the first coat dry completely, usually overnight. Sand any ridges or bumps lightly, then apply a second coat with your 10 inch knife, spreading the compound about 2 inches wider on each side of the seam. This coat should feather out smoothly into the surrounding drywall. After it dries, apply a third coat even wider, maybe 10 to 12 inches total width. Each coat builds up the joint gradually so it blends invisibly into the ceiling.
Sanding for Smooth Finish
Once the final coat dries hard, sand the entire ceiling lightly with fine grit sandpaper on a pole sander. Work in smooth, even strokes and keep the dust down by opening windows and using a fan. Run your hand over the surface to feel for bumps or ridges. A bright work light aimed across the ceiling at an angle shows imperfections you might miss in regular lighting.
Texture Matching and Priming
If your existing ceiling has texture, you’ll need to match it. Knockdown texture, popcorn, and orange peel each require different application methods. Practice on scrap drywall first. After texturing, apply a coat of drywall primer to seal the surface and create a uniform base for paint. Finish with ceiling paint that matches the rest of the room. Two coats usually cover better than one heavy coat.
When Professional Help Becomes Necessary for Sagging Ceilings
Some ceiling problems are bigger than a weekend project, and pushing ahead without the right skills or equipment can make things worse.
Call in a professional when you see:
Widespread sagging across multiple rooms, which usually means a systemic installation problem or structural issue affecting large areas.
Signs of water damage or active leaks that need to be traced to their source and properly repaired before any drywall work makes sense.
Suspected structural framing issues like cracked joists or damaged trusses, which need an engineer’s assessment and specialized repair.
Sagging combined with foundation cracks or doors that won’t close right, pointing to settling that affects the whole house.
High ceilings requiring scaffolding or lifts you don’t own, making the work dangerous without proper equipment.
Lack of attic access for proper assessment, meaning you can’t see what’s actually supporting your ceiling or what’s causing the problem.
A professional evaluation covers more than just the visible sag. They’ll check your attic for water damage, measure joist spacing and condition, assess whether your foundation has moved, and figure out if you need other specialists like roofers or structural engineers before drywall work even starts. That thorough approach costs more up front but prevents the same problem from coming back six months later because the root cause never got fixed. For comprehensive evaluation and repair, House Repair Services can address both the visible damage and underlying issues that DIY approaches often miss.
Cost Estimates and Time Requirements for Drywall Fixes
| Repair Method | DIY Cost Range | DIY Time | Professional Cost Range |
|---|---|---|---|
| Furring strip method | $200 to $400 | 2 to 3 days | $800 to $1,500 |
| Complete replacement | $150 to $300 | 3 to 4 days | $1,200 to $2,500 |
| Small patch repair | $30 to $75 | 4 to 6 hours | $200 to $400 |
Material costs vary based on room size and ceiling height. A 12×14 bedroom needs about three sheets of drywall, while a large living room might need eight or more. Higher ceilings mean longer furring strips and more compound for finishing because you’ve got more surface area to cover. Better materials cost more but work easier and last longer.
Time estimates assume you’ve done some home repair before but aren’t a professional. Your first ceiling project will take longer than your second one. You’ll also need to account for drying time between compound coats, which adds a day between each finishing step even though you’re not actively working. If you’re moving furniture out of the way or can only work evenings and weekends, add time for that. Working alone takes roughly twice as long as working with a helper, especially when hanging drywall overhead.
Prevention Strategies to Avoid Future Drywall Sagging

Control moisture in your home by running bathroom fans during showers and using your range hood when cooking. Keep attic ventilation clear so humid air can escape rather than condensing on the back of your ceiling drywall. A dehumidifier in humid climates helps keep moisture levels down throughout the house.
Inspect your roof twice a year, especially after heavy storms. Look for missing shingles, cracked flashing around vents and chimneys, and signs of water staining in the attic. Catch small leaks early before water accumulates and damages ceiling drywall. Check plumbing fixtures and supply lines in the attic for drips or sweating pipes.
Keep attic insulation evenly distributed and at the proper depth for your climate. Don’t pile it too thick directly on top of ceiling drywall because excessive weight contributes to sagging. Insulation should sit between joists, not heaped on top of them. If you need more insulation for energy efficiency, consider blown in material that distributes weight more evenly.
Walk through your home every few months and look up at ceilings. Notice any new cracks, sagging spots, or discoloration before they get worse. Fixing a small problem costs less than fixing a collapsed ceiling. Pay extra attention to areas below bathrooms, near roof valleys where water concentrates, and in rooms above garages where vibration is constant.
Common Mistakes That Lead to Failed Drywall Repairs
Learning what doesn’t work saves you from having to do the same job twice.
Watch out for these errors:
Skipping cause diagnosis: Fixing visible sagging without figuring out why it happened means you’ll be back up on that ladder in a few months when it sags again.
Using wrong drywall thickness: Installing 1/2 inch drywall where 5/8 inch is needed for your joist spacing guarantees eventual sagging under its own weight.
Inadequate fastener spacing: Driving screws 16 or 24 inches apart doesn’t give enough support. Proper spacing is 12 inches along each joist.
Ignoring moisture sources: Patching water damaged drywall while a slow leak continues just wastes materials and time.
Insufficient drying time between compound coats: Rushing the process leads to cracks and soft spots that show through paint.
Failing to reinforce joists when needed: If the framing is damaged or undersized, new drywall won’t fix the underlying weakness.
Improper seam placement: Running seams parallel to joists without backing or staggering panel seams correctly creates weak spots that crack later.
The biggest mistake is treating symptoms instead of causes. That soft, sagging spot in your ceiling is telling you something went wrong with the structure, the materials, or the moisture control. Rush to cover it up with compound and paint, and you’ll be looking at the same problem again soon. Take the time to figure out what’s actually broken, fix that first, then repair the drywall the right way.
Final Words
Sagging drywall looks intimidating, but knowing how to fix sagging drywall comes down to solid diagnosis and choosing the right method for your situation.
Whether you’re adding furring strips for moderate sag or doing a complete tear-out for severe damage, the key is addressing what caused the problem in the first place.
Moisture issues, undersized materials, and poor fastening won’t fix themselves.
Take your time with each step, don’t skip the prep work, and your ceiling can look clean and solid again. You’ve got this.
FAQ
Can sagging drywall be repaired?
Sagging drywall can be repaired using methods that match the severity of the problem. Minor sagging often responds to simple re-fastening with new screws driven into ceiling joists at proper spacing. Moderate sagging typically requires installing furring strips perpendicular to joists before adding a new layer of 5/8-inch drywall. Severe sagging, especially when caused by water damage or structural issues, may need complete tear-out and replacement with properly sized materials.
Why does my ceiling look like it’s sagging?
Your ceiling looks like it’s sagging because of undersized drywall thickness, water damage, or structural settling. The most common cause is using 1/2-inch drywall on ceiling joists spaced 24 inches apart when 5/8-inch is required for that span. Water from roof leaks or plumbing issues weakens drywall and adds weight. Foundation movement, temperature cycles, improper fastening during installation, excessive insulation weight, and vibration from garage doors also cause visible sagging.
How can you tell when a drywall ceiling is going to collapse?
You can tell a drywall ceiling is going to collapse by checking for discoloration patterns, soft or spongy texture when pressed, visible separation between drywall and framing, and widespread sagging across multiple sections. Additional warning signs include bubbling surfaces, musty odors suggesting hidden mold, and visible cracks in ceiling joists or framing members. If the ceiling sags more than 3/4 inch or shows water damage signs, call a professional immediately to prevent collapse and injury.
Does drywall sag over time?
Drywall does sag over time when installed incorrectly or exposed to ongoing stress. Low-quality drywall materials, undersized thickness for joist spacing, inadequate fastener spacing, and accumulated weight from insulation all contribute to gradual sagging. Water exposure from slow leaks, high humidity levels, and repeated temperature cycles weaken drywall structure over years. Proper installation with correct materials and addressing moisture sources prevents most time-related sagging problems.