


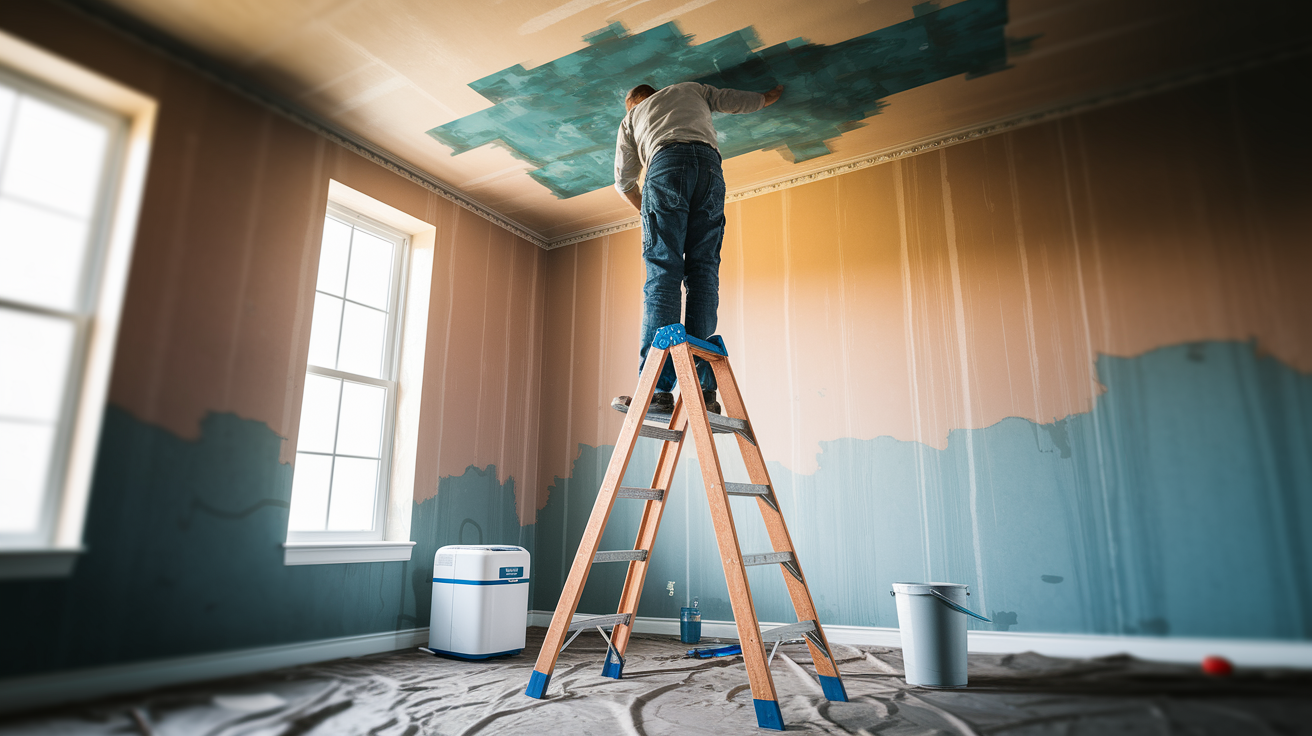
Ever notice how peeling ceiling paint always shows up right after you thought that old leak was done? That’s because the leak was never the end of the problem. Water damage keeps working under the surface long after the drip stops. The good news is you can fix peeling ceiling paint yourself if you follow the right sequence and don’t skip steps. This guide walks you through finding the actual water source, prepping the damaged surface properly, and repairing it so the peeling doesn’t come back in six months.
Complete Repair Guide: Fixing Water-Damaged Ceiling Paint
Getting the repair sequence right matters because paint problems are just symptoms, not the actual issue. You can’t slap fresh paint over damaged spots without dealing with the moisture and prepping the surface properly. If you do, the peeling comes back within months.
You need to fix both things: the water intrusion that caused the damage and the surface damage itself. Skip either one and you’ll be back up on that ladder scraping the same spot next year.
Identify and Eliminate the Water Source
If you repair the paint without fixing the leak, the problem’s coming back. Water doesn’t just drip straight down. It travels along beams, pipes, electrical lines before it shows up on your ceiling. The spot you’re looking at might be nowhere near where the leak actually is.
Common sources include roof damage from storms (missing shingles, cracked flashing around chimneys, damaged valleys), gutters that clog up and overflow behind your exterior walls, plumbing leaks from bathrooms or kitchens on the floor above, dryer vents that condensate and drip back into the ceiling, HVAC drain lines that back up or come loose.
Condensation works differently. In bathrooms without good ventilation, humid air hits the cool ceiling and condenses. Over time that moisture works underneath and pushes paint away from the plaster. You get bubbles and sheets of peeling paint that keep coming back after you patch.
Start at the damage and work backward. Check what’s directly above first, then widen your search. Look for water stains, damp spots, musty smells in attics, crawl spaces, wall cavities. Run water in sinks and showers above the damage while someone watches for active drips. Check roof areas during rain or right after.
Gather Essential Tools and Materials
Get everything before you start. Nothing worse than standing there with drying compound while you realize you need another trip to the hardware store.
Required Tools:
- Paint scraper or drywall knife (4 inch and 6 inch)
- Putty knife (flexible blade for detail work)
- Ryobi Palm Sander or similar lightweight model with dust collection
- Medium grit sandpaper (120 to 150 grit)
- Fine grit sandpaper (220 grit)
- Dust mask and protective glasses
- Particle capture air purifier
- Drop cloths or plastic sheeting
- Tape (painter’s tape and duct tape)
- Disposable mixing container
Essential Materials:
- Powdered spackle or pre-mixed patching compound
- Ronseal Smooth Finish Filler (for deep holes)
- Polycell Finishing Skim (watery filler for final leveling)
- Sugar soap cleaning solution
- Zinsser Peel Stop Primer or Zinsser B.I.N. primer
- Stain blocking sealer
- Ceiling paint (Tikkurila Luja Matt 7 for moisture prone areas, standard flat ceiling paint for dry rooms)
- Paint roller and tray
Powdered spackle costs about half what pre-mixed does. You just add water. A small repair under 10 square feet runs $40 to $60 in materials. Medium repairs, say 10 to 50 square feet, cost $80 to $120. Large projects can hit $150 to $200, but that’s still way less than hiring someone.
Dry the Affected Area Completely
Don’t try repairs on damp surfaces. You’ll get mold behind your fresh paint, adhesion failure within weeks, recurring damage that spreads. Moisture trapped under new compound creates perfect conditions for growth you won’t see until it’s everywhere.
Minor leaks dry on their own in 24 to 48 hours if you get air moving. Open windows, point a fan at it, wait. Major leaks need fans for several days, maybe a dehumidifier if the room feels sticky.
Serious water intrusion might mean removing ceiling sections to get airflow in there and prevent growth behind the drywall. Cut out sagging or heavily stained sections even if they haven’t fallen yet. Wet drywall loses its structure and doesn’t really dry right once it’s been saturated.
Touch the area to check dryness. Should feel cool and dry, not cool and slightly damp. Press on the drywall. It should feel firm, not soft or spongy. When you’re not sure, wait another day. For extensive water damage throughout your home, professional drying equipment works faster and gets into places box fans can’t reach.
Professional moisture assessment with meters makes sense for big damage or when insurance might cover it. A pro can tell you exactly how wet things are and whether hidden areas need attention.
Scrape Away All Loose and Peeling Paint
Use your scraper or drywall knife to get rid of all the peeling and bubbling paint. Nothing cracked or lifting should remain. Start in the center of the damaged spot and work outward. Paint lifts in sheets when adhesion’s totally gone, smaller flakes when it’s partially attached.
Scrape until you hit solid paint edges. Test those edges by pressing hard with your thumb. They should stay down. If they lift even a little, keep scraping. Loose edges under new paint create lines and ridges you’ll see when everything’s dry.
Hold the scraper low, almost flat to the ceiling, so you don’t gouge what’s underneath. If drywall paper starts tearing, you’re cutting too deep.
Working over a sink? Cover the drain with tape so paint flakes don’t go down. Peeling or bulging spots may just need scraping rather than full drywall removal if the structure stays stable when you press on it. Stable drywall with stains only needs surface repair, not replacement.
Sand the Surface Smooth
Sanding feathers the edges between damaged and undamaged areas. Without it, you’ll see and feel that sharp transition after painting. Rough edges, ridges, bumps all show through primer and paint.
Start with medium grit paper (120 to 150). Sand the scraped areas in circles, working outward from the damage. You’re blending that edge where old paint stops and bare surface begins. Goal is a gradual slope, not a cliff.
Switch to fine grain paper (220 grit) for final sanding. This smooths everything and removes scratches from the coarser paper. Run your hand over it. Should feel smooth with no sudden edges.
Lightweight palm sanders work well overhead without killing your arm. Ryobi Palm Sander with dust collection grabs most of the dust before it fills the room. Sanders speed things up, but hand sanding with a block gives you more control in tight spots.
Dust control matters more than you’d think. Wear a dust mask and protective glasses while sanding. Run a particle capture purifier in the room for several days after scraping, even after you’ve cleaned up. Fine dust stays in the air for hours.
Apply Patching Compound and Filler
You can choose between pre-mixed and powdered compounds. Powdered spackle’s cheaper and you just mix it with water. Use a disposable container you can toss when you’re done.
Right consistency should be like hummus, not tahini. Too thin and it shrinks when it dries, leaving dips. Too thick and it won’t spread smooth or level right. Add water slowly, stir well.
Use a joint compound knife to spread spackle flat and level with the existing ceiling. Hold the knife low and pull it across, pressing down to fill voids and scraping away excess in the same motion. Apply thicker layers where paint peeled down to plaster or drywall, thinner everywhere else.
For large peeling areas where the surface is mostly intact, just apply spackle along the edges where paint stops peeling. You don’t need to fill the whole area. This edge application prevents sharp bumps and uneven spots between old and new paint. You’re creating a smooth transition, not filling a hole.
Deep holes need Ronseal Smooth Finish Filler. This thicker stuff handles voids better than standard spackle. Let it dry completely before adding more layers. Trying to build up deep spots in one thick coat causes cracking and takes forever to dry.
After the first patching’s dry, apply Polycell Finishing Skim liberally with a paintbrush in all directions. Brush it on like you’re painting, covering patched areas and blending onto surrounding surfaces. Then smooth it with the plastic scraper they give you, pulling it flat. This watery filler creates a smooth, even surface for primer. Let it dry overnight before sanding.
Sand Patched Areas Again
Once it’s completely dry, sand the compound with fine grain paper (220 grit) for a smooth finish that blends with the existing ceiling. Focus on feathering edges again. The patched area should disappear when you run your hand across it.
Sand lightly. You’re smoothing, not removing material. Too much sanding creates low spots. Check your progress by looking at the area from different angles under good light. Shadows show high and low spots you can’t feel.
Wash the ceiling with sugar soap after final sanding to get rid of surface dust and make sure paint sticks. Mix the sugar soap like the package says, wipe down all the repaired areas plus a foot beyond, let it dry completely. This step matters more than most people realize. Dust under primer causes adhesion problems that show up weeks later.
Apply Stain-Blocking Primer
Stain blocking primers do two things: they prevent water stains from bleeding through new paint, and they seal porous patched areas so paint absorbs evenly. Without primer, patches soak up paint differently than the surrounding ceiling. You get dull spots that stand out no matter how many coats you apply.
Zinsser Peel Stop Primer bonds down old paint edges and seals cracks to stop moisture from getting in. It’s thick, almost rubbery when it dries, and locks everything down. Zinsser B.I.N. primer works across multiple projects and handles most ceiling repairs well.
Apply one generous coat and let it dry overnight before painting. Use a roller for large areas and a brush for edges and tight spots. Load your roller with enough primer to cover, but not so much it drips on your face while you work overhead.
Open all the windows during priming. Primer smell is strong and fumes build up in closed rooms. Point a fan out a window to create airflow.
Watch for areas where primer soaks in and looks dull compared to the rest. Those spots need a second coat before paint goes on. Stains bleeding through the first coat also need another layer.
Repaint with Appropriate Ceiling Paint
Pick ceiling paint based on the room. Flat finish works for most ceilings because it hides minor imperfections and doesn’t create glare. For bathrooms and kitchens, use moisture resistant formulations.
Tikkurila Luja Matt 7 anti-mould paint won’t soften when it gets wet. It’s designed for high humidity places like swimming pools, distilleries, hospitals. You can find it at local trade decorators merchants or paint specialists. Costs more but makes sense in bathrooms where condensation caused the original damage.
Decide whether to touch up just the fixed areas or repaint the whole ceiling for uniform appearance. Touch ups usually show because ceiling paint ages and changes color slightly over time. If your ceiling’s older than a few years, expect touch ups to look a bit different even when you use the same paint. Painting the entire ceiling guarantees even color.
Apply three coats over primer. First coat seals everything and often looks terrible with patches showing through. That’s normal. Second coat covers better. Third coat creates even color and finish.
Keep wet edges by working in sections and rolling back into areas you just painted before they dry. Apply multiple thin coats rather than one thick one. Thick paint sags and drips, especially on ceilings. Thin coats dry faster and build up to better coverage.
Wait for each coat to dry completely before the next one. Paint that feels dry isn’t fully cured. Follow the can’s recoat time.
After the final coat, check the ceiling from different angles under good light. Look for missed spots, thin areas, places where texture doesn’t match. Touch up as needed.
Typical timeline spans 3 to 5 days depending on how bad the damage is. Count on overnight drying after compound, overnight after primer, several hours between paint coats. Everything must dry completely between each step. Rush it and you get adhesion failures, uneven finish, wasted effort. A patient repair done right lasts for years.
Essential Tools and Materials for Peeling Ceiling Paint Repair
Getting all supplies before you start prevents problems when you’re standing on a ladder with wet compound on your knife and nothing to wipe it on. Right tools make overhead work less tiring and get you better results.
Required Tools:
- Paint scraper (4 inch blade, stiff)
- Drywall knife (6 inch flexible blade)
- Putty knife (2 inch for detail work)
- Ryobi Palm Sander with dust collection box
- Medium grit sandpaper (120 to 150)
- Fine grit sandpaper (220)
- Dust mask (N95 or better)
- Protective glasses with side shields
- Particle capture air purifier
- Drop cloths or plastic sheeting (at least 9×12 feet)
- Painter’s tape and duct tape
- Disposable mixing container (old yogurt container works)
- Paint roller frame and covers
- Roller tray
- 2 inch angled brush for edges
Essential Materials:
- Powdered spackle (one pound handles most small repairs)
- Ronseal Smooth Finish Filler for deep holes
- Polycell Finishing Skim
- Sugar soap concentrate (one bottle goes far when diluted)
- Zinsser Peel Stop Primer or Zinsser B.I.N. primer (quart or gallon depending on area size)
- Stain blocking sealer
- Ceiling paint in flat finish (Tikkurila Luja Matt 7 for bathrooms, standard ceiling paint elsewhere)
- Clean rags and sponges
Powdered spackle versus pre-mixed saves you about half the cost with almost no extra effort. Mix what you need when you need it, and the rest stays good in the container for next time. Pre-mixed dries out in the tub even when it’s sealed tight. Total material costs run $40 to $60 for repairs under 10 square feet, assuming you already own basic tools like scrapers and rollers.
Identifying Mold and Mildew During Ceiling Water Damage Repair
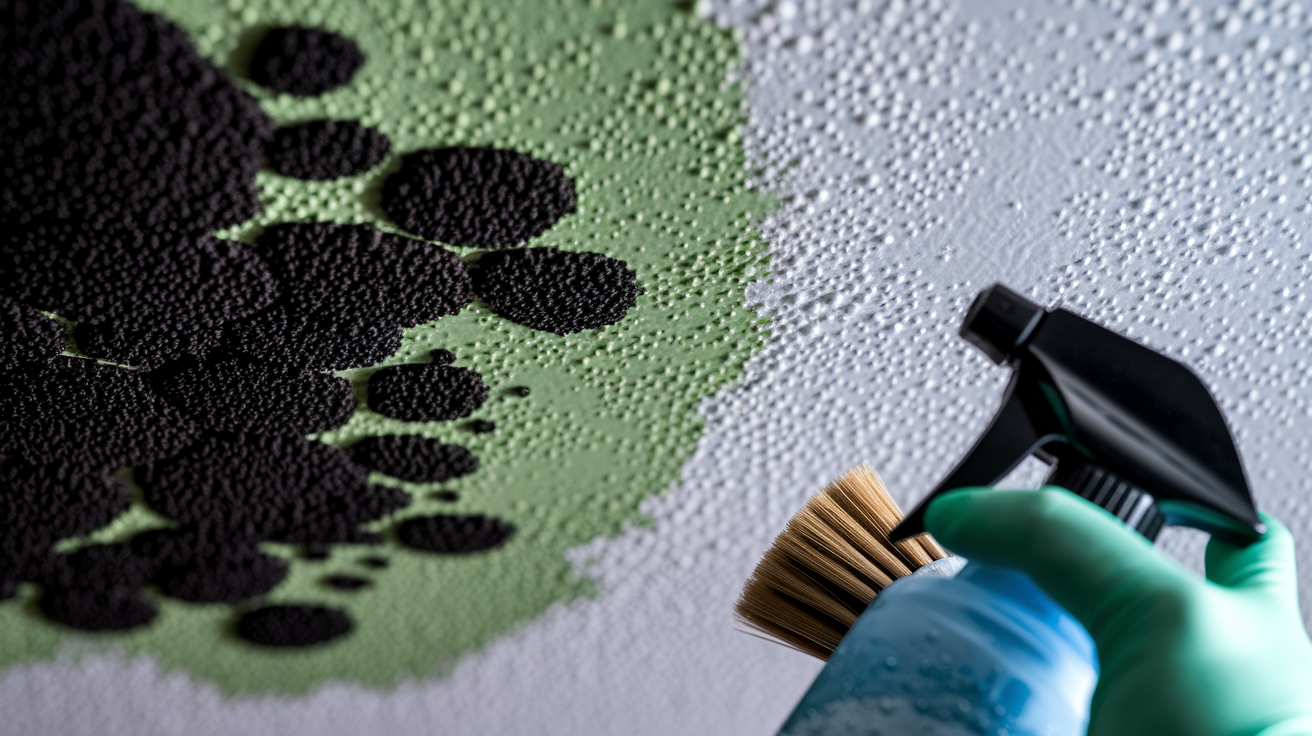
Visual signs of active growth include black, green, or brown spots that look fuzzy or slimy, musty odors that smell like damp basements or old books, surfaces that feel damp or sticky even after visible water has dried. Growth spreads in irregular patterns, not neat circles like water stains.
DIY treatment works for surface growth on non-porous materials like painted drywall, and small areas under 10 square feet where you can see all the affected material. You need professional remediation for extensive growth covering large areas, anything behind walls or above ceilings where you can’t see the full extent, contamination of porous materials like insulation or ceiling tiles, situations involving anyone in the household with respiratory issues or compromised immune systems.
DIY treatment methods include antimicrobial sprays designed for building materials, bleach solutions using 1 cup bleach per gallon of water applied with a sponge or spray bottle, white vinegar sprayed undiluted for light surface growth. Always wear a dust mask, gloves, eye protection. Scrub treated areas with a stiff brush, let the solution sit 10 to 15 minutes, then wipe clean with water. Don’t mix bleach and vinegar or other cleaners. Ventilate the room well during and after treatment.
Test hidden areas before you assume damage is only surface level. Remove a small section of ceiling to check above the visible damage. Replacing heavily contaminated materials costs less than trying to clean them, and it’s the only way to be certain the growth is gone.
Common Mistakes When Fixing Peeling Ceiling Paint from Water Damage
Failed repairs usually come from rushing the process or skipping steps that seem optional but actually determine whether the repair holds up. Each shortcut saves a few hours now and costs you days of rework later.
Common Mistakes That Cause Repair Failures:
Painting over damp surfaces traps moisture under new paint, creates bubbles, peeling, growth within weeks. Not fixing the water source first guarantees the problem returns exactly where you patched it. Skipping primer lets stains bleed through, makes patched areas look different, kills paint adhesion on raw compound. Insufficient surface prep and cleaning means dust, loose paint, or grease under new paint prevents proper bonding.
Applying compound too thick in a single coat causes cracking as it dries and it never fully cures in the center. Not feathering edges of the repair area creates sharp transitions between patched and original surface that show through every coat of paint. Mismatching paint sheen to the existing ceiling makes touch up areas stand out because flat and eggshell reflect light differently. Not enough drying time between steps means each layer can’t cure completely and the entire repair fails from the bottom up.
Recognizing when a repair’s failing helps you correct problems before they get worse. Bubbling that returns after repainting means either moisture is still there or you painted over loose material. Paint that doesn’t stick or rubs off easily signals poor surface prep, contamination, or incompatible products. Stains bleeding through multiple coats mean you need stain blocking primer, not more paint. Catch these issues during the first coat when fixing them is easy, not after you’ve finished the whole ceiling.
Cost Estimation and Timeline for Ceiling Paint Repair Projects

Material costs for small repairs under 10 square feet typically run $40 to $60. That covers basic spackle, primer, paint, sandpaper if you already own tools like scrapers and rollers. Medium repairs from 10 to 50 square feet cost $80 to $120 in materials. You need more patching compound, larger primer and paint quantities, possibly a new roller and brushes. Large projects over 50 square feet can reach $150 to $200, especially if you’re buying specialty products like Tikkurila anti-mould paint or upgrading tools like adding a palm sander with dust collection.
Time investment includes active work hours and mandatory waiting periods for drying and curing between steps. Small repairs take 6 to 8 hours of active work spread across 3 to 5 days total time. Medium repairs require 10 to 14 hours of work over 4 to 6 days. Large projects consume 20 to 30 hours stretched across one to two weeks when you account for drying time between coats and proper surface prep for extensive damage.
| Project Size | Material Cost | DIY Time Required | Professional Cost Range |
|---|---|---|---|
| Small (under 10 sq ft) | $40–$60 | 6–8 hours over 3–5 days | $200–$400 |
| Medium (10–50 sq ft) | $80–$120 | 10–14 hours over 4–6 days | $400–$800 |
| Large (over 50 sq ft) | $150–$200 | 20–30 hours over 7–14 days | $800–$1,500 |
When to Hire a Professional for Ceiling Water Damage Repair
Clear indicators that you need professional help include sagging or bulging ceiling sections that feel soft when you press on them, extensive damage covering more than 50 square feet or spanning multiple rooms, signs of structural compromise like cracks in the ceiling running along joists, active leaks you can’t identify after checking common sources. Water dripping from light fixtures is an emergency requiring immediate professional attention.
Situations involving electrical fixtures in or near the damaged area, textured ceilings requiring matching like popcorn or knockdown patterns, repairs in multi-story buildings where access above the ceiling is difficult or impossible all benefit from professional expertise. Structural concerns and extensive damage beyond simple paint peeling often hide problems you can’t see from below.
Insurance claim considerations make professional documentation valuable even if you could handle the repair yourself. Adjusters want detailed estimates, moisture readings, photo documentation of hidden damage. A pro provides that paperwork and stands behind the numbers. Their report strengthens your claim.
Professionals assess hidden damage using moisture meters that measure water content inside materials and thermal imaging that reveals temperature differences caused by wet spots behind surfaces. These tools identify problems in areas that look fine to the eye. A homeowner poking at the ceiling with a screwdriver misses damage that shows up clearly on a moisture meter reading.
Long-Term Prevention Strategies for Ceiling Paint Peeling
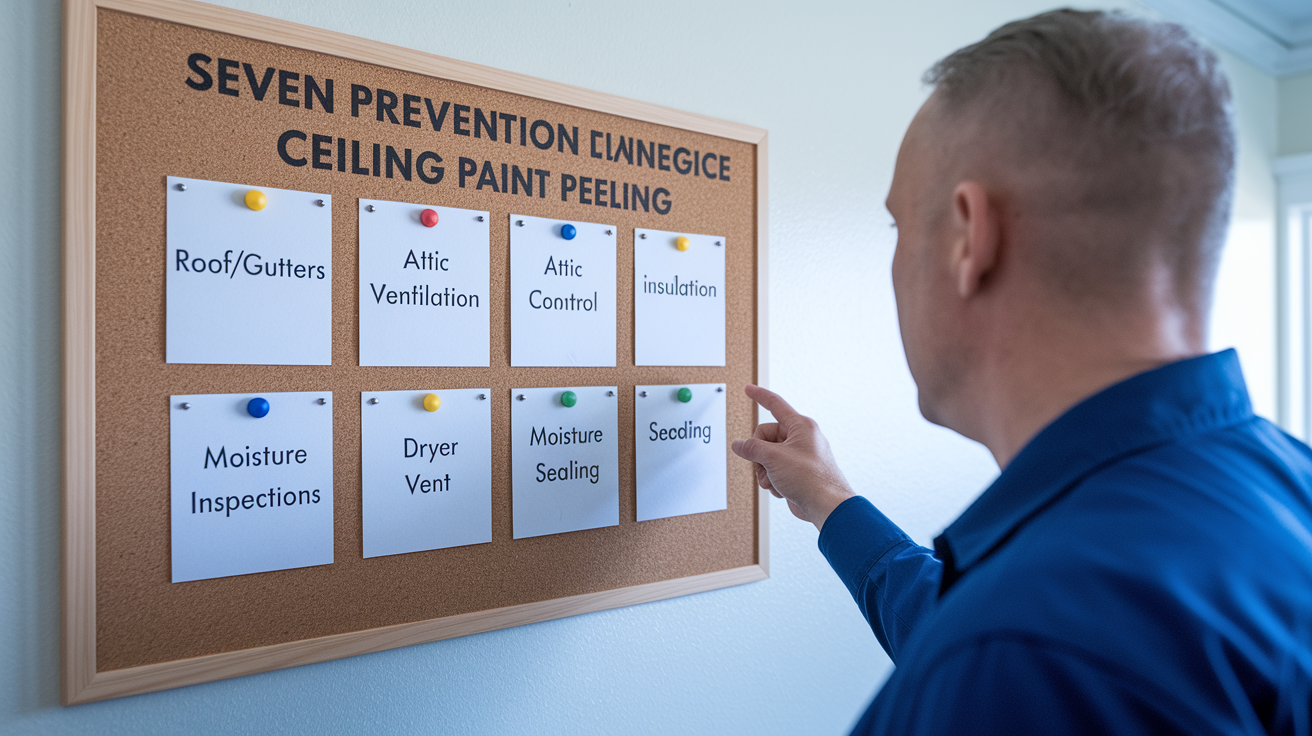
Successful repairs must be paired with prevention or you’ll repeat this project in a few years. Water damage rarely happens once and then never again unless you change what caused it the first time.
Seven Prevention Strategies:
Regular roof and gutter maintenance means inspecting and cleaning gutters twice yearly, checking the roof after major storms, replacing damaged shingles promptly before leaks start. Bathroom exhaust fan usage and maintenance includes running the fan during showers and for 20 minutes after, cleaning the cover and fan blades twice a year, replacing fans that don’t move air well.
Proper attic ventilation and insulation requires making sure vents aren’t blocked, adding insulation if condensation appears on rafters in winter, maintaining airflow that prevents moisture buildup. Address condensation sources by redirecting dryer vents outside not into attics, insulating cold water pipes that sweat, fixing leaking faucets before drips cause damage.
Control indoor humidity levels using dehumidifiers in damp climates, cracking windows occasionally even in winter, not drying clothes indoors without ventilation. Seasonal home inspections for early leak detection mean checking ceilings, walls, attics every spring and fall for new stains, musty smells, soft spots. Use moisture resistant materials in high risk areas by installing cement board instead of drywall behind tub surrounds, using mold resistant drywall in bathrooms, applying Tikkurila or similar moisture proof paint in rooms with high humidity.
Create a home maintenance schedule and stick to it. Check your roof twice a year. Clean gutters in spring and fall. Look at your ceilings monthly while you’re changing light bulbs or smoke detector batteries. Recognize early warning signs like small stains, slight discoloration, occasional musty smells before damage becomes extensive. Catching problems early turns a $50 touch up into a weekend project instead of a $1,500 restoration job.
Final Words
Peeling ceiling paint from water damage needs proper diagnosis, patient prep work, and moisture-resistant materials to fix it right.
Stop the leak first. Then dry, scrape, sand, patch, prime, and paint in that order.
Each drying step matters. Rush it, and the peeling comes back.
Follow the sequence, give each layer time to cure, and your ceiling will look clean and stay stable for years.
FAQ
How to fix peeling ceiling from water damage?
To fix peeling ceiling from water damage, first locate and stop the water source, then dry the area completely for 24 to 48 hours. Scrape all loose paint, sand smooth, apply patching compound, prime with stain-blocking sealer, and repaint with ceiling paint.
Can you paint over peeling ceiling paint?
You cannot paint over peeling ceiling paint without proper surface preparation. The loose paint must be scraped away, the area sanded smooth, holes filled with patching compound, and a stain-blocking primer applied before repainting.
How to fix flaking ceiling paint?
To fix flaking ceiling paint, scrape away all loose and flaking material using a paint scraper or drywall knife until you reach solid paint edges. Sand the surface smooth, fill any holes with spackle, apply stain-blocking primer, and repaint the ceiling.
What paint to use on a water damaged ceiling?
For a water damaged ceiling, use moisture-resistant ceiling paint designed for high humidity environments after applying stain-blocking primer. In bathrooms and kitchens, use anti-mould paint formulations that won’t soften when exposed to moisture, applied in multiple thin coats.