


Ever notice a floor warp right back after you’ve tried to fix it? That happens when you pick the repair method before you know what kind of damage you’re actually dealing with. Warped hardwood from water shows up in three distinct patterns: cupping, crowning, or buckling. Each one points to a different moisture problem and needs its own fix. The good news is that not all warped floors need replacement. If you assess the damage correctly, dry things out completely, and match the repair to what the wood is telling you, many warped boards will flatten or respond to sanding. This guide walks you through the assessment, drying, and repair sequence so you fix it once and it holds up.
Repairing Water-Warped Hardwood Floors: Complete Assessment and Repair Process
How you fix water-warped hardwood depends on the damage severity and warping type you’re dealing with. Once you know what you’re looking at, you can pick the right fix and skip methods that won’t work.
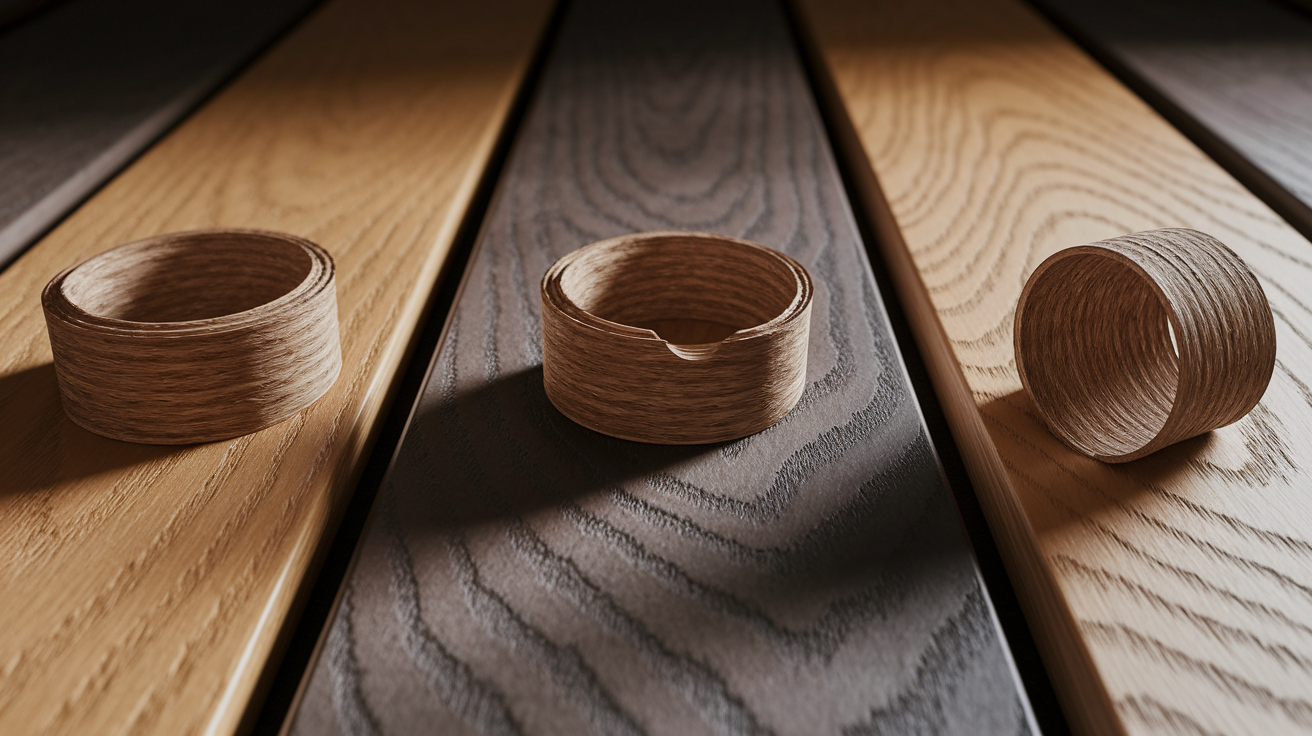
Hardwood warps in three ways. Cupping is when board edges rise higher than centers, creating a shallow bowl shape along each plank. Crowning does the opposite. The centers push up while edges stay lower. Buckling is worst: boards lift completely off the subfloor, sometimes hard enough to create gaps or breaks. Each type tells you where moisture came from and what needs to happen next.
The repair sequence is straightforward: stop the water source first, dry out the floor and subfloor, assess damage, test moisture levels with a meter, then decide if you’re drying, sanding, or replacing boards.
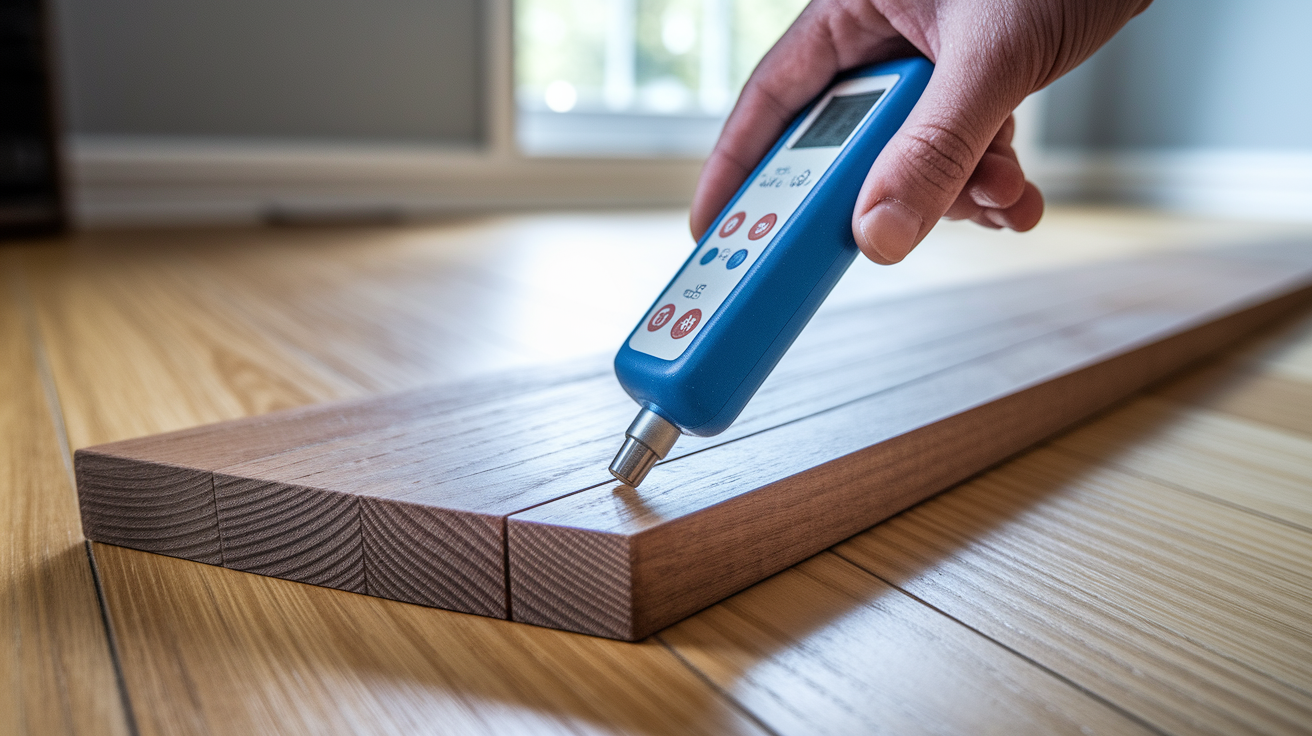
Moisture meter readings tell you when it’s safe to start repairs. Pin meters have two small metal probes you push into wood. Pinless meters scan beneath the surface without leaving marks. Take readings in at least five to six spots across the damaged area, not just the worst board. Most hardwood should read between six and nine percent moisture before you do repair work. Room air needs to stay between 40 and 60 percent humidity. Let the floor sit at stable levels for at least five to seven days before deciding on sanding or replacing boards. If readings keep dropping day by day, the floor’s still drying.
Timeline matters when deciding what to do. Minor warping from a small spill might flatten on its own in one to two days once the floor dries and room humidity stays steady. Moderate damage needs five to seven days of drying, plus intervention like weighting or light sanding. Severe cases (deep cupping, pronounced crowning, or any buckling) usually mean replacement is the only fix that holds up.
Check these things right away:
- Look for warping patterns (cupping, crowning, or buckling across multiple boards)
- Check for staining or discoloration (dark brown patches from water that soaked in, white cloudy spots from surface moisture)
- Test for soft spots or swelling (press on boards with your hand, feel for sponginess or raised sections)
- Smell for mold or mildew (musty odor even after surface looks dry)
- Examine subfloor if you can access it (lift a heat register or check basement ceiling below for stains or sagging)
| Damage Severity | Visual Signs | Moisture Level | Recommended Action |
|---|---|---|---|
| Minor | Slight edge lift under 1/8 inch, white surface cloudiness, no buckling | 10-14% moisture content, localized to a few boards | Dry thoroughly, monitor for self-correction, weight if needed after 5-7 days |
| Moderate | Cupping or crowning 1/8 to 1/4 inch, dark staining, boards feel firm but uneven | 15-20% moisture content, affecting a section of floor | Extended drying (7-10 days), followed by sanding and refinishing once stable |
| Severe | Buckling, warping over 1/4 inch, boards lifting from subfloor, visible gaps or splits | 20%+ moisture content, or subfloor also wet | Remove and replace damaged boards, inspect and repair subfloor, address water source completely |
Emergency Water Extraction and Drying Techniques for Hardwood Floors
The first 24 hours after water hits your hardwood determine whether you’re dealing with a fixable problem or permanent damage needing replacement. Mold spores start growing within 24 to 48 hours in damp wood. The longer water sits, the deeper it goes into boards and subfloor. Speed matters more than perfection at this stage.
Start with a wet/dry shop vacuum to pull up standing water. Work in overlapping passes and go over the same spots multiple times. Microfiber cloths soak up what the vacuum misses. Press them into seams and edges where water pools. Set up fans within the first few hours. You want cross-ventilation, so position at least two fans on opposite sides of the room pointing across the wet area, not straight down at it. Place a dehumidifier within three to five feet of the wettest section and run it continuously. The dehumidifier pulls moisture out of air, which lets wood release more moisture instead of reabsorbing it.
Lift furniture off the wet area using sliders or wooden blocks. Even small furniture like nightstands or chairs traps moisture underneath. If water soaked a large area, pull up a floor register or lift one board at the room’s edge to check subfloor. A wet subfloor means drying takes longer, and you might need to increase airflow under the floor if you have crawl space or basement access below.
For early surface mold prevention, mix one quarter cup white vinegar with one gallon water in a bucket. Dampen a microfiber cloth with the solution and wipe down any areas where you see fuzzy spots starting to form or smell mustiness. Dry those spots immediately with a clean towel. Keep fans running and windows open (if outdoor humidity is lower than indoors) to prevent spores from settling. If you close up the room or turn off airflow, moisture gets trapped and mold spreads faster.
| Damage Level | Drying Equipment Needed | Expected Drying Time |
|---|---|---|
| Minor spills (under 10 square feet, surface only) | Wet/dry vacuum, towels, 1-2 fans, open windows for ventilation | 1-2 days with consistent airflow |
| Moderate water exposure (10-50 square feet, some subfloor dampness) | Wet/dry vacuum, 2-3 fans, 1 dehumidifier, moisture meter to track progress | 5-7 days with equipment running continuously |
| Major flooding/soaking (50+ square feet, subfloor saturated) | Commercial extraction equipment, 3+ fans, 1-2 dehumidifiers, possible subfloor access, mold prevention measures | 7-14 days, professional assessment recommended after 3 days if readings stay high |
DIY Repair Methods for Minor Hardwood Floor Cupping and Warping
Shallow cupping measuring less than one eighth inch at the highest edge, slight crowning from surface moisture that didn’t go deep, and minor edge lifting all respond to DIY methods if you catch them early and the wood hasn’t been damaged structurally. Once moisture levels in the floor return to normal (six to nine percent on a moisture meter), you can try reversing the warp before moving to sanding or replacement.
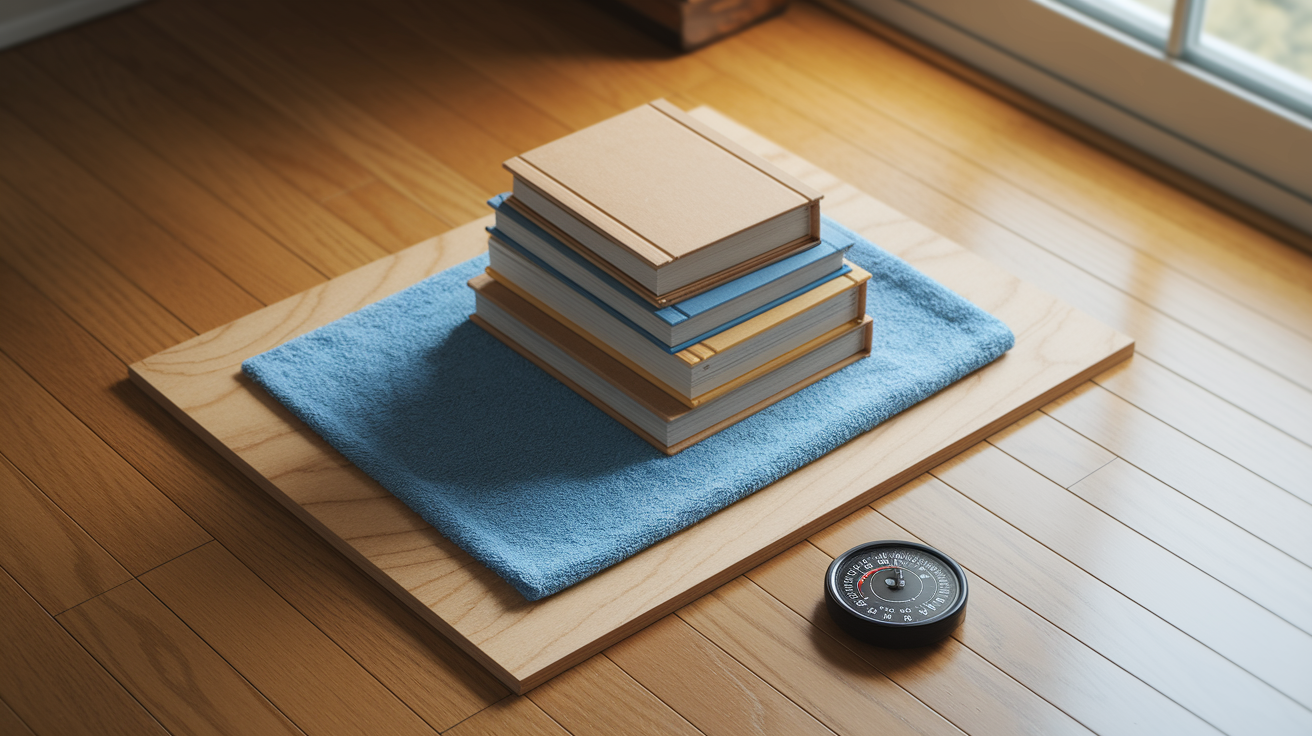
The weighting and conditioning technique works by applying pressure to the side of the board that needs to flatten while adding slight moisture to help wood fibers relax. This method takes several days and requires patience, but it can save you from sanding or replacing boards that would otherwise flatten with a little help.
Here’s how to use weight to correct minor cupping or slight edge lift:
- Confirm moisture levels are normalized (test with moisture meter, readings should be steady for at least three days at 6-9%)
- Place a slightly damp towel on the concave side (the side that’s cupped inward or lower than the rest)
- Lay a piece of plywood or flat board over the damp towel to distribute pressure evenly
- Stack 50 to 100 pounds of weight evenly across the plywood (use boxes of books, bags of concrete mix, or weight plates)
- Leave the setup in place for three to five days, checking daily to make sure the towel stays slightly damp but not wet
- Remove the weight gradually, then monitor the boards for 48 hours to see if they stay flat or spring back up
This works when wood hasn’t been stressed beyond its natural flexibility and the moisture imbalance wasn’t extreme. If you remove weight and boards go right back to being cupped or crowned, or if there’s no improvement after five days, the warping is likely permanent and you’ll need to move to sanding or board replacement. It’s also not effective for buckling, which means boards have separated from the subfloor and lost their structural bond.
Sanding and Refinishing Water-Damaged Hardwood Floors
Sanding becomes the right solution after the floor has fully dried and moisture readings have stayed stable for at least a week, but boards still show crowning, minor cupping that won’t flatten, or water stains that won’t come out with cleaning. This method removes the damaged surface layer and levels out uneven spots, then you refinish the wood to seal and protect it.
Selecting the Right Sanding Equipment and Grit Sequence
Renting a drum sander or orbital sander makes more sense than buying for most homeowners since you’ll use it once and rental cost is $40 to $75 per day depending on the machine. A drum sander works faster on large open floor areas and removes more material with each pass, but it’s aggressive and requires steady hands to avoid gouging. An orbital sander is gentler and easier to control, better for smaller rooms or floors that only need light leveling. You’ll also need an edge sander for the perimeter and corners where the big sander can’t reach.
Start with 60 grit coarse sandpaper if you’re removing significant high spots or deep stains. Move to 80 grit medium sandpaper for general leveling, then finish with 120 grit fine sandpaper to smooth out scratches from coarser grits. Always work along the grain direction of wood. Sanding across grain leaves visible scratches that show up even after you apply finish.
Sanding Technique for Warped Hardwood Boards
Crowned boards need the high centers sanded down to match lower edges. Start your first pass with the drum sander moving slowly and steadily, letting the machine do the work without pressing down hard. Make overlapping passes, each covering about half the width of the previous pass. For cupped boards where edges are higher, focus your sanding on the raised edges, making a few extra passes on those sections while being careful not to create a dip in the middle. The goal is creating a level surface, not sanding down the entire floor to match the lowest point.
Check progress every few passes by running your hand across boards. You should feel the transition between high and low spots getting smoother. If you’re creating new low spots or the floor feels wavy, you’re pressing too hard or staying in one place too long.
Removing Water Stains During the Refinishing Process
White stains happen when moisture gets trapped in the finish layer but doesn’t penetrate wood itself. These look like cloudy white patches or rings. Dark stains mean water soaked into wood and caused a chemical reaction with tannins, leaving a brown or grayish mark.
For white stains, try mineral spirits or denatured alcohol before sanding. Pour a small amount onto a soft cloth and rub the stained area in a circular motion. The solvent breaks down trapped moisture in the finish. If that doesn’t work, make a paste with baking soda and a few drops of water, then gently buff the stain with a damp cloth dipped in the paste. This method works without scratching if you keep pressure light.
Dark stains that penetrated wood require sanding. Use 220 grit fine sandpaper and sand just the stained area, feathering out edges so you don’t create a visible dip. Once you’ve sanded down to clean wood, you’ll need to apply matching wood stain to blend the repair with surrounding floor color. Test the stain in a closet or under a floor register first to make sure color matches after it dries. Apply stain with a clean cloth, wipe off excess, and let it dry completely before sealing.
Applying Finish to Sanded Hardwood Floors
After your final sanding pass with 120 grit paper, vacuum the entire floor thoroughly, then wipe it down with a tack cloth to pick up fine dust. Any dust left on wood will create bumps or cloudiness in the finish.
If you’re staining the floor to match surrounding areas or change color, apply stain now with a lambswool applicator or clean cloths, working in the direction of grain. Let stain penetrate for 5 to 10 minutes, then wipe off excess. Let it dry completely (usually overnight) before applying polyurethane.
Polyurethane finish seals wood and protects it from future water damage. Water-based polyurethane dries faster, has fewer fumes, and stays clear without yellowing, which makes it a good choice for lighter wood tones. Oil-based polyurethane takes longer to dry and has a stronger smell, but it’s more durable and adds a warm amber tone many people prefer for traditional hardwood floors. Apply two to three coats, letting each coat dry for four to six hours (water-based) or overnight (oil-based) before adding the next. Lightly scuff each dried coat with 220 grit sandpaper or a fine sanding screen before applying the next coat to help it bond properly.
After the final coat dries, wait at least 24 hours before walking on the floor in socks, and three to five days before moving furniture back in. The finish continues to cure and harden during this time.
Replacing Individual Warped Hardwood Floor Boards
Board replacement is necessary when buckling has lifted boards completely off subfloor, when severe cupping or crowning measures over one quarter inch and won’t respond to weighting or sanding, when boards have split or cracked structurally, or when wood stayed wet long enough to cause permanent fiber damage that leaves it soft or spongy even after drying. These situations mean wood has been stressed beyond what it can recover from.
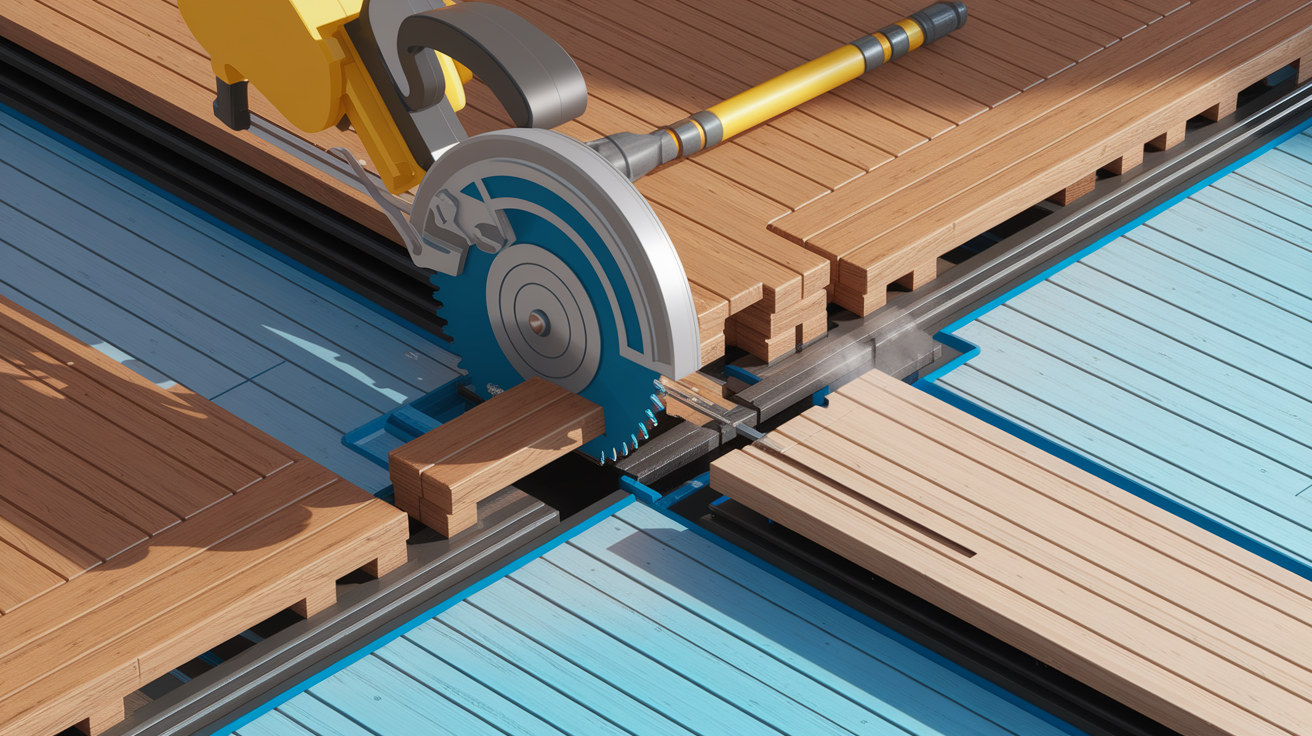
Removing a damaged board starts with scoring the finish on all four edges with a sharp utility knife to prevent tear-out on surrounding boards. Set a circular saw blade depth to exactly match your flooring thickness (usually three quarters inch for solid hardwood, but measure yours to be sure). Cut along both long edges of the damaged board, staying about one quarter inch inside the seam line so you don’t hit the tongue or groove of adjacent boards. Use a chisel and hammer to split the board down the middle lengthwise, then pry out both halves with a flat pry bar. Work carefully near the ends to avoid damaging the tongue or groove on boards that are staying in place.
Installing a replacement board requires finding wood that matches your existing floor in species, width, and finish. If you can’t find a match at a flooring supplier, check inside closets, under built-in cabinets, or in other low-visibility areas where you can pull a board to use for the repair, then put a mismatched board in the hidden spot. Let the new board acclimate in the room for at least 72 hours before installation. This lets it adjust to the same temperature and humidity as your existing floor and prevents it from warping after you install it.
Cut the replacement board to length, then remove the lower lip of the groove on the side that will fit against the existing board (this lets you drop it into place from above instead of sliding it in from the end). Apply a thin bead of wood adhesive along edges and subfloor where the board will sit. Press the board into place, fitting the tongue into the groove of the adjacent board. Secure it with a finish nailer, angling nails through the tongue on one side and straight down near the groove on the other (pre-drill if wood is prone to splitting). Fill nail holes with color-matched wood filler, let it dry, then lightly sand smooth. Apply matching stain and finish to blend with surrounding floor, feathering out edges so the transition isn’t visible.
Tools and materials needed for board replacement:
- Circular saw or oscillating multi-tool (for cutting damaged boards)
- Wood chisel set (for splitting and removing pieces)
- Pry bar (for lifting boards without damaging adjacent ones)
- Replacement boards that match species, width, and thickness (acclimated 72 hours minimum)
- Finish nailer or construction adhesive (for securing new boards)
- Wood filler in matching color (for filling nail holes and small gaps)
- Stain and polyurethane that match existing floor finish (test in a hidden spot first)
Addressing Subfloor Moisture and Structural Damage Under Hardwood
Signs of subfloor problems include moisture meter readings that stay high even after hardwood surface feels dry, floors that feel bouncy or soft when you walk on them, visible gaps appearing between hardwood and subfloor when you look through a heat register, and a musty smell that doesn’t go away even after cleaning and drying the surface. These symptoms mean water got underneath hardwood and damaged the plywood or OSB subfloor.
To inspect subfloor, remove a few boards at the edge of the damaged area or near a wall where repair will be less visible. Look for dark staining on subfloor, soft or crumbly areas where plywood has started to delaminate, and any visible mold growth on the underside of hardwood or top of subfloor. Take moisture readings directly on subfloor surface. Readings over 16 percent mean subfloor is still releasing moisture and needs more drying time. Readings over 20 percent with visible damage mean that section of subfloor likely needs replacement.
Subfloor repair requires cutting out the damaged section and installing new plywood or OSB that matches the thickness of your existing subfloor. Mark cut lines that land on the center of floor joists below (you need solid backing to screw the new piece into). Use a circular saw set to subfloor depth and cut along your marked lines, stopping before corners, then finish corners with a jab saw to avoid cutting into joists. Pry out the damaged section, then check joists underneath for rot or mold. If joists are damaged, that’s when you need a contractor to assess structural integrity.
Before installing new hardwood over a repaired subfloor, address the water source completely, whether that’s a leaking pipe, poor drainage outside, or condensation from a humidity problem. If you’ve had repeated moisture problems in the same area, consider adding a vapor barrier between subfloor and hardwood, or running a dehumidifier in that part of the house during humid seasons. A clean, dry, and level subfloor prevents hardwood from warping again after you’ve finished the repair.
Treating Extensive Mold Growth on Water-Damaged Hardwood Floors
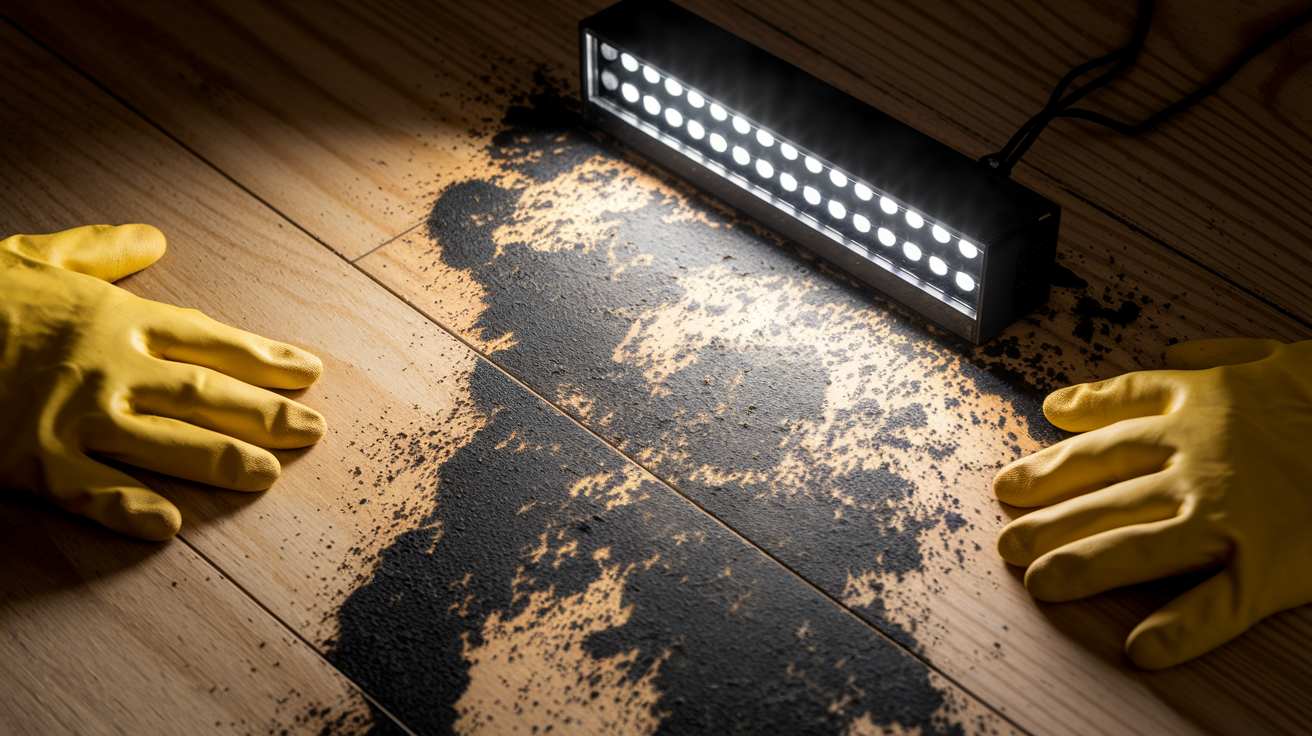
Surface mold you can wipe off with a vinegar solution is one thing. Extensive mold growth that develops after wood stays wet for 48 hours or longer is another. This type penetrates into wood grain, creates dark discoloration that won’t sand out, and often spreads to subfloor underneath. The mold isn’t just on the surface anymore. It’s inside the wood structure.
Professional mold remediation becomes mandatory when mold covers more than 10 square feet of floor area, when you see black mold (which can be toxic), when mold has penetrated deep enough that you can see it on the bottom of boards or on subfloor, or when anyone in the house develops respiratory symptoms like coughing, wheezing, or sinus irritation that starts after the water damage. At that point, mold has become a health issue and DIY cleaning won’t remove it safely or completely.
Professional remediation companies follow a specific process: they seal off the affected area with plastic sheeting to contain spores, use HEPA-filtered vacuums and air scrubbers to remove airborne spores, then treat or remove contaminated materials. For hardwood floors, they’ll determine whether wood can be treated and saved or whether it needs to be removed and replaced. Treatment involves applying antimicrobial solutions that kill mold at the root level, then sealing the wood if it hasn’t been structurally weakened. Removal and replacement is necessary when mold has compromised wood’s integrity or when it’s grown through to subfloor.
Safety precautions when dealing with extensive mold growth:
- Wear an N95 mask or respirator rated for mold spores (regular dust masks don’t filter small enough)
- Use rubber gloves that cover your forearms to prevent skin contact with mold and cleaning solutions
- Ventilate the area with fans pointing outward through windows or doors to push spores outside instead of into other rooms
- Dispose of all cleaning materials, cloths, and protective gear in sealed plastic bags immediately after use
- Never sand moldy wood (sanding breaks mold into smaller particles and spreads millions of spores into the air where they can be inhaled or settle on other surfaces)
Preventing Future Water Damage and Warping in Hardwood Floors
Keeping your home’s humidity between 40 and 60 percent year-round prevents most warping problems before they start. Wood expands when humidity is too high and contracts when it’s too low. These constant shifts stress boards and make them more likely to warp when water hits them. Use a hygrometer (costs about $10 to $20) to monitor humidity in rooms with hardwood floors. Run a dehumidifier in summer or in naturally damp areas like basements. Run a humidifier in winter when heating systems dry out indoor air.
Regular inspection routines catch small leaks before they cause big problems. Once a month, check under all sinks, around toilets, behind washing machines, under dishwashers, and around refrigerators with ice makers or water dispensers. Look for water stains, damp spots, or that musty smell that indicates slow moisture. Once a year, have a plumber inspect supply lines, drain connections, and hose bibs for wear. Replace washing machine hoses every five years even if they look fine (they fail without warning). Clean up any spills on hardwood immediately with a soft absorbent cloth, even if it’s just a small amount. Water left sitting for even 30 minutes can leave a mark or start to penetrate the finish.
| Prevention Strategy | Frequency | Purpose |
|---|---|---|
| Monitor indoor humidity levels with hygrometer | Check weekly, adjust equipment as needed | Keep humidity 40-60% to prevent expansion and contraction cycles |
| Inspect under sinks and around appliances | Monthly | Catch small leaks before they spread to flooring |
| Sweep and damp-mop with pH-neutral cleaner | Sweep daily, damp-mop weekly | Remove dirt and grit that scratch finish, keep wood clean without over-wetting |
| Install and replace felt pads under furniture legs | Check every 6 months, replace when worn | Prevent scratches and dents that compromise finish and let moisture in |
| Place doormats at all entrances | Replace when worn or matted | Catch water, snow, and dirt before it reaches hardwood |
| Clean gutters and check downspouts | Twice yearly (spring and fall) | Prevent water from pooling near foundation and seeping under floors |
| Change HVAC filters | Every 1-3 months depending on system | Maintain proper air circulation and humidity control |
| Reapply floor finish or polish | Every 1-2 years in high-traffic areas | Seal and protect wood from moisture penetration |
Cost Breakdown for Hardwood Floor Water Damage Repairs
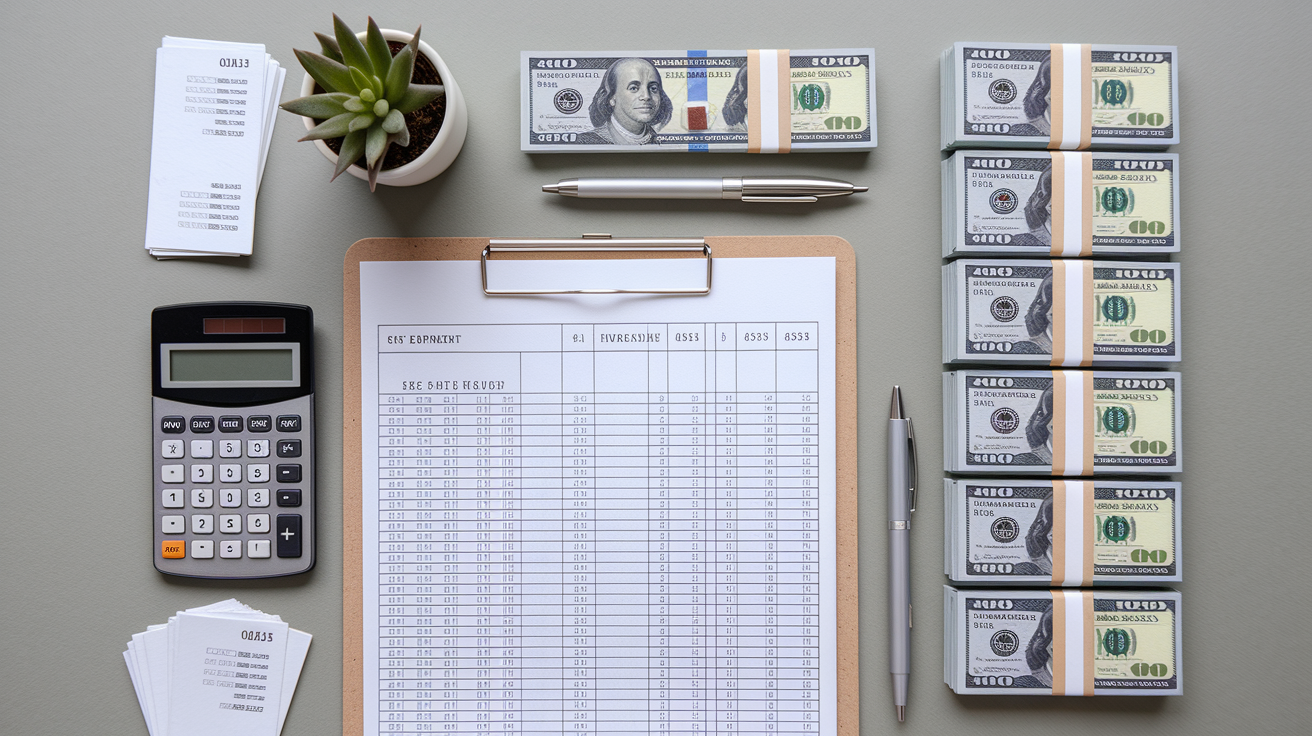
Damage extent has the biggest impact on cost, both how many square feet are affected and how deep moisture went. Drying and cleaning a 100 square foot area where a pipe leaked for a few hours costs far less than replacing boards and refinishing after a major flood. The repair method drives the next cost variable: drying equipment and cleaning materials cost less than sanding equipment and finish, which cost less than buying replacement boards and hiring someone to install them. Labor costs for professional work typically run two to three times what you’d pay for materials and equipment rental on a DIY project, but professionals finish faster and guarantee the results.
For DIY repairs, expect to spend $30 to $50 per day to rent a commercial dehumidifier, $40 to $75 per day for a drum or orbital floor sander, and $50 to $100 for sandpaper in multiple grits, tack cloths, and brushes. Wood stain runs $15 to $30 per quart, and polyurethane finish costs $25 to $50 per gallon depending on whether you choose water-based or oil-based. Replacement boards cost $3 to $12 per square foot for common species like oak or maple, more for exotic woods or wide-plank flooring.
Professional services include everything: assessment, equipment, materials, labor, and cleanup. Restoration companies bring commercial grade extraction and drying equipment that works faster than homeowner rentals. Floor contractors have the experience to match wood species and finish perfectly, refinish large areas in a day or two instead of a week of evenings, and they warranty their work. If you’re filing an insurance claim, professional documentation and itemized invoices often make the difference in getting the claim approved.
| Repair Type | DIY Cost Range | Professional Cost Range | Timeline |
|---|---|---|---|
| Drying and extraction only (minor water exposure) | $50-$150 (equipment rental 1-3 days, cleaning supplies) | $300-$800 (water extraction service with moisture monitoring) | 1-3 days (DIY), 1-2 days (professional with commercial equipment) |
| Sanding and refinishing per 100 square feet | $150-$300 (sander rental, sandpaper, stain, finish) | $400-$900 (labor, materials, equipment included) | 3-5 days (DIY with drying time between coats), 2-3 days (professional) |
| Individual board replacement (per board installed) | $15-$40 (replacement board, adhesive, finish materials) | $75-$150 (includes matching, cutting, installation, finish) | 1 day prep and install, 1-2 days for finish to cure |
| Full room replacement (150-200 square feet) | $900-$2,400 (new flooring, underlayment, finish, tool rental) | $2,500-$6,000 (tearout, subfloor repair if needed, installation, finish) | 1 week+ (DIY), 3-5 days (professional) |
| Mold remediation (10+ square feet affected) | Not recommended for DIY at this scale | $500-$3,000 depending on severity and containment needed | 2-5 days (inspection, containment, treatment, clearance testing) |
When to Call Professional Hardwood Floor Restoration Services
Professional assessment brings tools and experience most homeowners don’t have. Moisture mapping equipment shows exactly where water spread, how deep it went, and whether it reached subfloor or wall cavities. Thermal imaging cameras detect moisture behind walls or under flooring without pulling up boards. Professionals have seen hundreds of water damage situations and can tell you within the first 15 minutes whether your floor is salvageable with drying and minor repairs or whether boards need to come up.
Insurance claims almost always require professional documentation to get approved. Adjusters want itemized estimates, moisture readings taken with calibrated equipment, photos that show damage extent, and a scope of work that explains what needs to happen and why. A restoration company or flooring contractor provides all of that as part of their initial assessment, usually for a reasonable inspection fee that gets credited toward the work if you hire them.
Specialized situations need expert hands. Antique floors, exotic wood species, herringbone or parquet patterns, and floors that are original to historic homes require someone who knows how to source matching materials and replicate old installation methods. Structural concerns (sagging between joists, subfloor rot, foundation settling) go beyond flooring repair and need evaluation by someone who understands how buildings are framed and what’s safe versus what needs immediate attention. Water damage from sewage backups or flooding involves contamination risks that require specialized cleaning protocols and equipment.
Seven situations when you need professional help rather than DIY:
- Water damage affecting more than 100 square feet (too much area for homeowner equipment to dry effectively in the critical first 48 hours)
- Visible subfloor damage or sagging (indicates structural problems that need assessment and potentially permits)
- Mold growth exceeding 10 square feet (EPA and most state guidelines say this requires professional remediation)
- Antique or rare wood species requiring matching (professionals have access to specialty suppliers and reclaimed materials)
- Structural concerns or foundation issues (water may be a symptom of a bigger problem that a flooring contractor can’t fix)
- Insurance claims requiring documentation (professional estimates and photos carry more weight with adjusters)
- Previous DIY repair attempts failed (if you already tried and the problem came back or got worse, get expert eyes on it before spending more time and money. According to RestoreSafeHome’s Water Damage Repair and Remediation service, addressing water damage quickly with experienced contractors prevents secondary issues like mold and structural deterioration)
Tools and Materials Checklist for Hardwood Floor Water Damage Repair
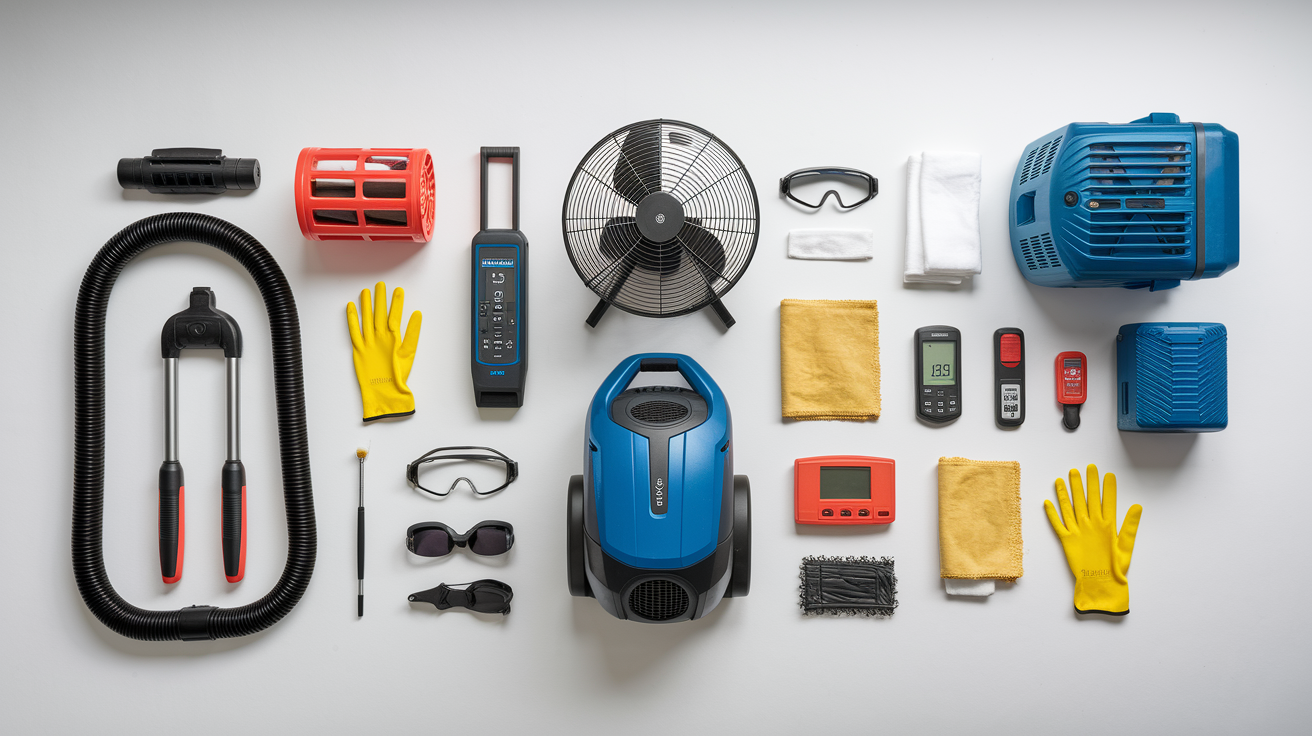
What you need depends on the repair scope. Minor water cleanup and drying requires basic equipment you might already own or can rent inexpensively. Sanding and refinishing needs power tools and finishing materials. Board replacement adds cutting and installation tools to the list. Safety equipment stays the same regardless of project size: protect your lungs, eyes, and hands every time.
| Category | Item | Purpose | Rent or Buy |
|---|---|---|---|
| Extraction Equipment | Wet/dry shop vacuum (6+ gallon capacity) | Remove standing water quickly before it spreads | Buy ($60-$120) or rent ($25-$40/day) |
| Extraction Equipment | Microfiber cloths and towels | Soak up water in seams and tight spots vacuum can’t reach | Buy ($15-$30 for pack) |
| Drying Equipment | High-velocity fans (2-3 units) | Create airflow for evaporation and prevent mold | Buy ($30-$60 each) or rent ($15-$25/day each) |
| Drying Equipment | Dehumidifier (50-pint or larger) | Remove moisture from air so wood can release more | Buy ($200-$350) or rent ($30-$50/day) |
| Testing Tools | Moisture meter (pin-type or pinless) | Measure moisture content in wood and determine when it’s safe to proceed | Buy ($30-$150 depending on accuracy) |
| Testing Tools | Hygrometer | Monitor room humidity levels during drying | Buy ($10-$25) |
Final Words
Water-warped hardwood floors look overwhelming at first, but most damage responds well once you understand the type of warping and follow the right sequence.
Start by stopping the water source, drying everything completely, and testing moisture levels before you make any repair decisions.
Minor cupping often corrects itself. Moderate warping might need sanding. Severe buckling usually means replacement.
The key is patience during the drying phase and honest assessment of what you can handle versus when to bring in help.
When you know how to fix warped hardwood floors from water, you protect your investment and keep your home safe and solid underfoot.
FAQ
How to fix a water damaged warped wood floor?
To fix a water damaged warped wood floor, start by stopping the water source and extracting all moisture using a wet/dry vacuum and fans. Once the floor is completely dry (5-7 days with moisture readings at 6-9%), assess the warping type. Minor cupping often self-corrects with proper drying. Moderate warping may need sanding once moisture normalizes. Severe buckling or warping over 1/4 inch requires board replacement.
How to flatten a wood floor after water damage?
To flatten a wood floor after water damage, first ensure moisture content returns to normal (6-9% on moisture meter). For shallow cupping under 1/8 inch, place a damp towel on the concave side, cover with plywood, and stack 50-100 pounds of weight evenly for 3-5 days. Check progress daily and remove weight gradually. This works for reversible warping only, not structural buckling.
Is there a way to flatten warped hardwood floors?
There is a way to flatten warped hardwood floors if the damage is minor and caught early. After drying the floor completely, shallow cupping may self-correct as humidity normalizes to 40-60%. For slight crowning, controlled sanding with proper grit progression (60 to 120) can level high spots. Severe warping or boards lifting from the subfloor require replacement rather than flattening.
Can hardwood floors recover from water damage?
Hardwood floors can recover from water damage if addressed within the first 24-48 hours and moisture is completely removed. Minor warping often reverses once the wood dries and humidity stabilizes. Floors with moderate damage may need sanding and refinishing after drying. Severe cases with buckling, structural splitting, or prolonged moisture exposure require board replacement and cannot fully recover.