


Ever notice how a tiny crack in your trim turns into a crumbling mess faster than you’d expect? That’s wood rot doing what it does best: spreading quietly until something that looked like a small fix becomes a bigger problem. The good news is you can stop it and repair the damage if you catch it before it takes over the whole board. We’ll walk you through how to tell if your trim needs patching or replacing, what materials actually hold up outside, and the step-by-step process to get it solid again.
Assessing Wood Rot Damage Extent on Exterior Trim

Proper assessment saves you from starting a repair only to find out the damage runs deeper than you thought. Take the time to check thoroughly before you commit to a plan.
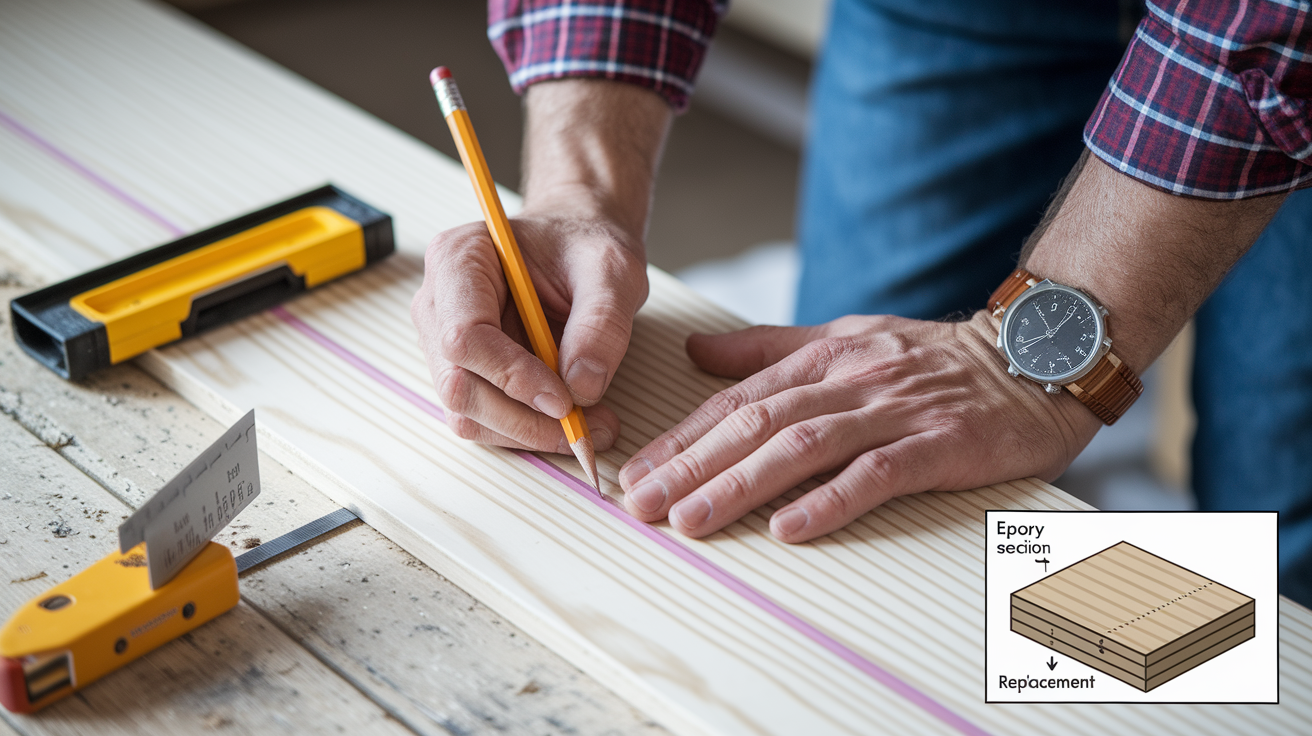
Start with a physical test using a flat-head screwdriver or an awl. Push the tip into areas that look questionable. Sound wood will resist the probe and feel firm. Rotted wood gives way easily, sometimes letting the screwdriver sink in a half inch or more with almost no pressure. Work your way along the trim board, testing every few inches to map out how far the damage extends. Press the wood with your fingers too. Healthy wood feels solid. Rotted sections feel soft or spongy, and sometimes you’ll feel the surface flex under light pressure. Check the back side of the trim if you can reach it, because rot often spreads from hidden moisture sources. If the board feels structurally weak or moves when you press it, the damage has compromised its ability to support itself or adjacent materials.
Look closely at the surface for visual clues. Dark streaks, water rings, or yellow stains mark spots where water’s been getting in repeatedly. Crumbling or splitting edges mean decay has spread through the board from prolonged exposure. Paint that bubbles, cracks, or peels away in sheets indicates moisture trapped underneath, pushing the coating off as it tries to escape. Check end grain sections carefully, especially on horizontal trim like window sills and door thresholds, because these areas soak up water faster than face grain. Visible mold, mildew patches, or fuzzy fungal growth on the surface signals that the wood’s stayed wet long enough for decay to take hold.
Watch for these specific rot indicators:
- Soft or spongy texture when pressed with a screwdriver or finger
- Crumbling edges that break apart with light pressure
- Bubbling or peeling paint that won’t stay adhered
- Water stains showing active moisture penetration
- Visible mold or fungal growth on the surface
When more than 50% of a trim board’s cross section has rotted, or when the board no longer provides solid attachment points for fasteners, full replacement makes more sense than patching. If rot extends into the framing behind the trim, or if you find multiple boards damaged along the same wall, that points to a larger moisture problem that needs professional assessment before you proceed. For guidance on evaluating moisture damage severity, see our Water Damage Repair Services.
Essential Tools and Materials for Exterior Trim Rot Repair
Gather everything before you start so you’re not making trips to the store with half finished repairs exposed to weather.
| Category | Item | Purpose |
|---|---|---|
| Safety Gear | Gloves, safety glasses, dust mask | Protect hands, eyes, and lungs from dust and chemicals |
| Removal Tools | Hammer and chisel | Cut out small rotted sections by hand |
| Removal Tools | Screwdriver or awl | Probe and test wood for soft spots |
| Removal Tools | Small hand saw or reciprocating saw | Cut away damaged board sections cleanly |
| Removal Tools | Die grinder with router bit | Remove rotted material from larger areas efficiently |
| Treatment Products | Wood hardener or fungicidal solution | Strengthen remaining wood and prevent hidden rot spread |
| Treatment Products | Two part epoxy primer | Seal and prepare exposed wood for filler adhesion |
| Filling Materials | Two part epoxy resin and hardener | Rebuild rotted sections with durable, moisture resistant material |
| Filling Materials | Epoxy wood filler or cellulose filler | Fill smaller voids and shape repairs to match trim profile |
| Finishing Supplies | Sandpaper: 80 grit, 100 grit, 220 grit | Smooth repair in stages from shaping to final finish |
| Finishing Supplies | Plastic putty knife | Mix and apply epoxy, sculpt to shape during working time |
| Finishing Supplies | Acrylic primer and 100% acrylic exterior paint | Seal and protect repaired wood from moisture and UV damage |
Epoxy systems work best for exterior trim repairs because they bond to damp wood better than other fillers and resist moisture once cured. Look for marine grade or exterior rated two part epoxy products designed specifically for wood repair. Popular brands include System Three, West System, and Abatron. These come as separate resin and hardener containers that you mix in equal parts right before use. The epoxy primer is a thinner liquid version that soaks into the wood fibers to create a solid foundation before you apply the thicker filler. Some products include fillers or thickening agents you mix into the epoxy to adjust viscosity for vertical surfaces. Read the working time specifications. They vary by brand and temperature but typically give you 30 to 45 minutes to apply and shape the material.
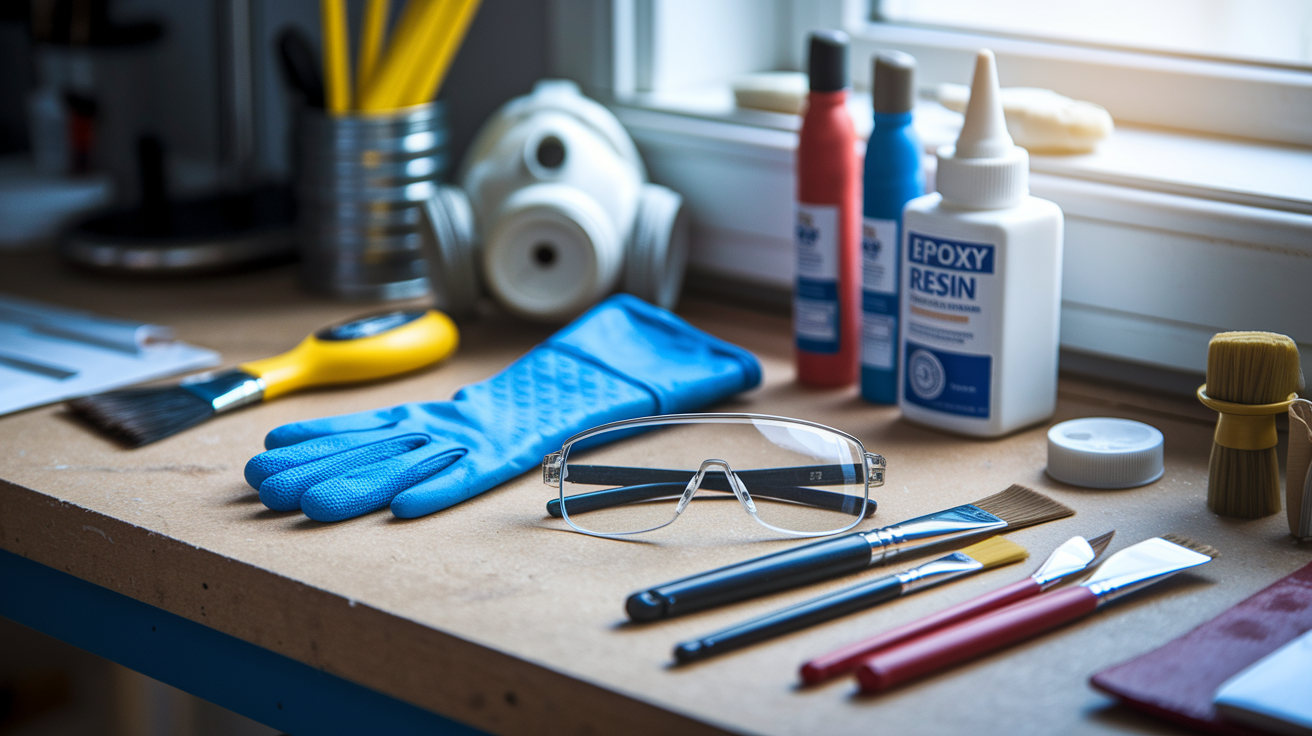
Safety gear isn’t optional when you’re cutting into rotted wood or working with chemical compounds. Gloves protect your skin from epoxy resin, which can cause irritation and is difficult to wash off once it starts to cure. Safety glasses keep wood chips and dust out of your eyes during cutting and sanding. A dust mask or respirator prevents you from breathing in fungal spores from the rotted material and fine particles during sanding, which can trigger respiratory problems or allergic reactions even if you feel fine at the time.
Step by Step Repair Process for Rotted Exterior Trim
The choice between patching with epoxy or replacing the damaged section depends on how much of the board is compromised and whether it still provides solid attachment points.
-
Assess damage thoroughly by probing the entire trim board with a screwdriver, working several inches beyond the visible rot to find where sound wood begins. Press along the length and check the back side if accessible. If less than 40% of the board’s thickness is rotted and the board still feels structurally solid, epoxy repair makes sense. If more than half the board is soft, or if rot has spread along most of the board’s length, plan for partial or full board replacement instead.
-
Mark removal boundaries on sound wood, at least one inch beyond where your screwdriver probe meets firm resistance. Use a pencil or chalk line to define clean cut lines that follow the trim’s profile. This gives you a margin to ensure you’ve removed all compromised material.
-
Remove all rotted material using a sharp chisel for small pockets or a die grinder fitted with a core box router bit for larger areas. Work carefully to avoid gouging into sound wood. As you cut, keep probing the edges with your screwdriver to confirm you’ve reached solid material. If you’re replacing an entire section, use a small hand saw or reciprocating saw to make square cuts at your marked lines, cutting through to remove the damaged portion completely. For full board replacement, carefully pry the entire trim board away from the wall, watching for hidden nails or screws.
-
Clean all debris and dust from the cavity or cut area using a brush or vacuum. Rotted wood crumbles into loose material that prevents good adhesion if left behind. Wipe the area with a dry cloth to remove fine dust.
-
Check wood moisture content and wait if necessary. Wood needs to be below 18% moisture for epoxy to bond properly. If the area feels damp or if you’ve just had rain, give it several days of dry weather to dry out. You can use a moisture meter if you have one, but pressing with your hand gives a rough sense. The wood should feel dry to the touch, not cool or clammy.
-
Apply two part epoxy primer to all exposed wood surfaces in the repair cavity, brushing it on liberally so it soaks in. Wait about 15 minutes for it to penetrate the wood fibers, then wipe away any excess pooling on the surface with a paper towel. This step strengthens the remaining wood and creates a bonding surface for the filler. If you’re replacing a board section instead, skip the primer and move to installation. Cut your replacement piece from rot resistant material like cedar, pressure treated pine, or PVC trim board, matching the profile and dimensions of the original trim. For partial replacements, cut scarf joints at 45 degree angles where new wood meets old, which creates more gluing surface and hides the seam better than a square butt joint.
-
For epoxy repairs: Mix the two part epoxy resin and hardener on a plastic board or disposable surface using a plastic putty knife, following the manufacturer’s ratio instructions exactly (usually 1:1 by volume). Stir thoroughly for at least two minutes until the color is uniform with no streaks. Scoop the mixed epoxy into the cavity, pressing it firmly with the putty knife to eliminate air pockets. Build it up in layers if the void is deeper than an inch, letting each layer set partially before adding more. Overfill slightly, sculpting the material to roughly match the trim’s profile while it’s still workable. You have 30 to 45 minutes in moderate weather (longer when cool, shorter when hot over 80°F) before the epoxy becomes too stiff to shape. Work steadily but don’t rush. For board replacements instead: Fit the new section into place, checking that joints are tight and the profile aligns with adjacent trim. Apply exterior wood glue to scarf joint surfaces if using partial replacement. Secure the new trim with galvanized finish nails or screws, setting fasteners just below the surface. Pre drill holes to prevent splitting, especially near board ends.
-
Allow epoxy repairs to cure fully, which takes 24 hours at moderate temperatures before you can sand or paint. Don’t apply paint the same day, even if the surface feels hard after a few hours. For board replacements, make sure all fasteners are set and joints are tight, then fill nail holes with exterior wood filler.
-
Sand the repair area using a three stage progression. Start with 80 grit sandpaper to remove high spots and shape the repair to match the surrounding trim profile. Switch to 100 grit to smooth out scratches from the coarse paper. Finish with 220 grit to create a surface that feels smooth to your hand and blends visually with the existing trim. For board replacements, sand the new wood lightly with 100 grit to smooth any rough spots, then finish with 220 grit. Feather the edges where new wood meets old so you don’t feel a lip when you run your hand across it.
-
Prime all bare wood and epoxy surfaces within 24 hours of completing the repair, because epoxy degrades in sunlight if left unprotected. Use an acrylic exterior primer, applying it to all exposed wood and filled areas plus an inch or two onto the surrounding painted trim to ensure good coverage. Let the primer dry according to label directions, usually two to four hours. Apply two coats of 100% acrylic exterior paint, matching the color of your existing trim. Let the first coat dry completely before applying the second, typically four hours in good conditions.
The repair process spans multiple days when you account for drying time between epoxy curing, priming, and painting. You also need dry weather for each outdoor step, which means checking forecasts and planning around rain. If you rush the stages, the repair won’t hold up. A properly executed repair that respects drying and curing times will last as long as the surrounding trim.
Sanding and Surface Preparation for Repaired Trim
Proper sanding makes the difference between a repair that stands out and one that disappears into the surrounding trim.
Start with 80 grit sandpaper to knock down the high spots and shape the cured epoxy to match the trim’s profile. This coarse grit removes material quickly, which is what you need when epoxy has hardened into a lump that sits proud of the surface. Sand until the repair feels close to flush when you run your hand across it, but don’t obsess over perfection at this stage. You’re shaping, not finishing. Switch to 100 grit to smooth out the scratches left by the coarse paper. This middle step removes the visible marks and starts to blend the repair edges into the surrounding wood. Work in the same direction as the wood grain on the trim to avoid cross grain scratches that show through paint. Finish with 220 grit sandpaper for the final surface. This fine grit creates a smooth texture that matches painted wood and allows primer to adhere evenly. Run your hand over the area when you think you’re done. It should feel smooth with no noticeable transition between repaired and original material.
Use these sanding techniques for professional results:
- Use a sanding block on flat trim surfaces to keep the repair level and avoid creating low spots
- Feather the edges where repair meets original trim by sanding gradually outward to eliminate hard transitions
- Avoid over sanding the epoxy, which can create a depression below the surrounding surface
- Remove all sanding dust with a damp cloth or tack cloth before priming, because dust prevents good adhesion
After final sanding, inspect the surface in good light, looking along the trim at a low angle to spot high or low areas. Run your fingers slowly across the repair to feel for bumps or edges you missed visually. The area should look and feel ready for primer, with no obvious repair outline or texture difference.
Painting and Sealing Repaired Exterior Trim
Epoxy breaks down in direct sunlight, which means you need to get paint on it within 24 hours of the repair hardening or UV exposure will weaken the surface.
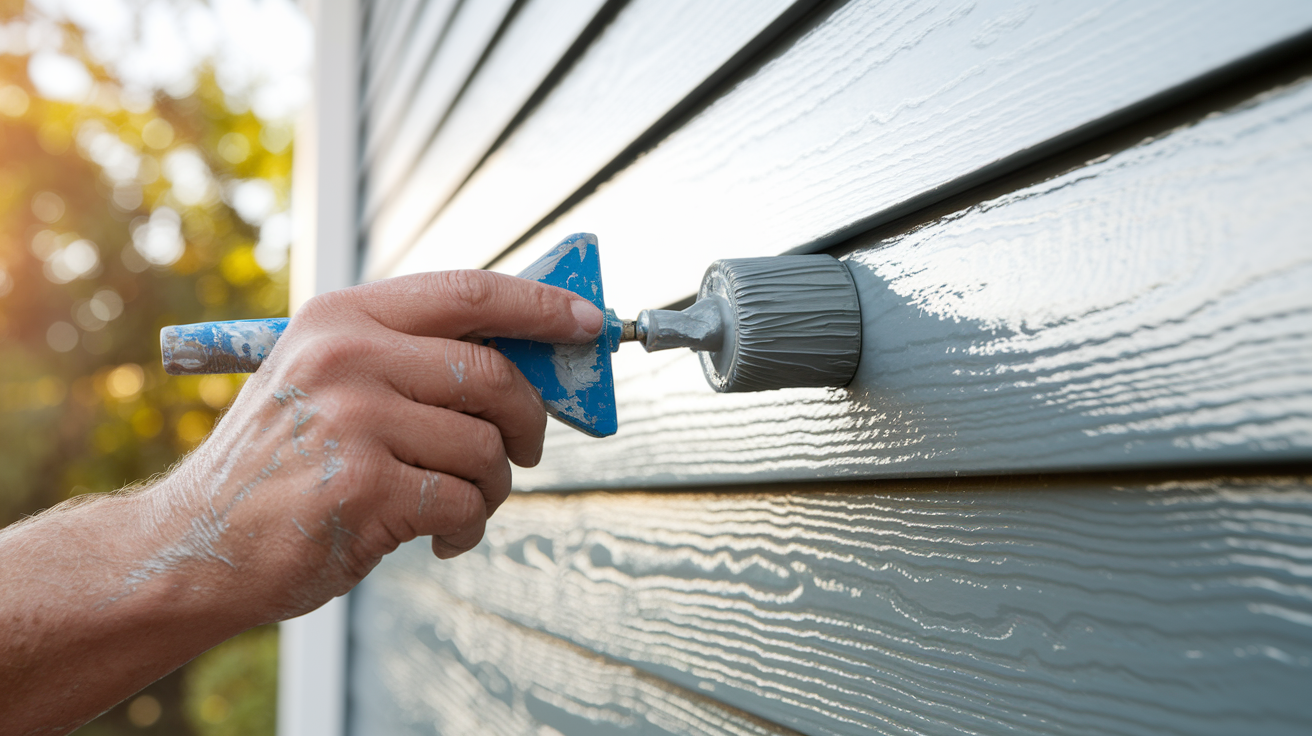
Apply acrylic primer to all bare wood and epoxy surfaces as soon as the final sanding is complete and dust is removed. Acrylic primer works on both materials without the adhesion problems you get with oil based products. Brush it on evenly, covering the repair and overlapping an inch onto the surrounding painted trim to ensure no gaps. Watch for thin spots or missed edges, especially where the repair meets original material. Let the primer dry to the touch, usually two to four hours depending on temperature and humidity. Don’t rush this. Wet primer that gets top coated too soon won’t seal properly.
Choose 100% acrylic exterior paint for the top coats because it flexes with temperature changes and resists moisture better than oil based or latex blends. Match the color and sheen to your existing trim by taking a paint chip or photo to the paint store for color matching. Stir the paint thoroughly before using it, and keep stirring occasionally if the job takes more than 30 minutes. Apply the first coat with a good quality brush, working the paint into all the details and keeping a wet edge as you go. Let it dry completely, typically four hours in good weather. Apply the second coat the same way, making sure you’ve covered all the primer and achieved even color across the repair. Two coats provide the protection level that exterior trim needs to shed water and resist UV damage.
Follow these application guidelines for durable results:
- Check the weather forecast and plan for at least 24 hours of dry weather with no rain predicted
- Apply when temperatures are between 50°F and 85°F, avoiding extreme cold or heat
- Don’t paint in direct sun during application, which causes paint to dry too fast and prevents proper leveling
- Allow proper drying time between primer and paint coats as specified on product labels
- Caulk all joints and seams around the repaired area before applying the final paint coat, using paintable exterior caulk
After the final coat dries, run a bead of paintable exterior caulk along any seams where the trim meets siding, window frames, or other trim boards. Smooth the caulk with a wet finger or tool, creating a neat seal that blocks water from getting behind the trim. Let the caulk skin over for about 30 minutes, then apply a thin coat of paint over it to seal and blend it visually with the surrounding finish.
Common Problem Areas: Window Sills, Fascia, and Door Frames
Certain trim locations take more water exposure than others, which makes them rot first and require attention during inspections.
Window sills catch the worst of it because they’re horizontal surfaces that collect water during rain, snow, and from condensation running down the glass. The end grain on the outer edge soaks up moisture faster than the face, and if the sill doesn’t slope properly to shed water, it pools instead of draining. Failed caulk at the back edge where the sill meets the wall lets water run underneath, trapping it against wood that never fully dries. Check sills for soft spots along the front edge, especially at the corners where two pieces of trim meet. Look for peeling paint on top and water stains underneath.
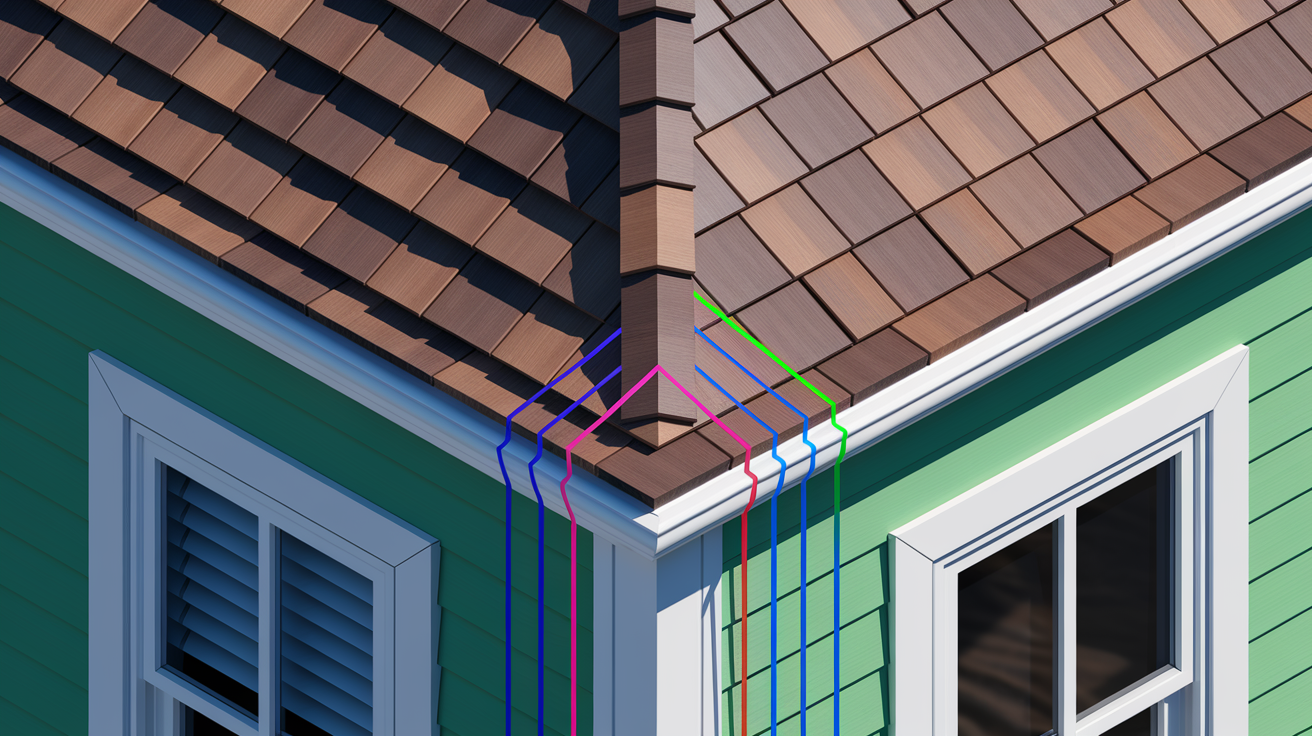
Fascia boards and soffit trim get hit by gutter overflow and roof edge runoff when gutters clog or the drip edge fails to direct water clear of the board. Fascia runs horizontally, which means any water that gets on top sits there until it soaks in. The back side stays in shadow and rarely gets sun to dry it out. Soffit pieces trap moisture in the space between the board and the wall if ventilation is poor. Look for rot starting where fascia meets corner boards, at joints between fascia sections, and anywhere gutters have overflowed repeatedly. Dark staining on the face of the fascia board marks the water path.
Door frames take constant exposure at the threshold and along the bottom of the side casings where they meet the door sill. The end grain on the bottom of vertical trim pieces acts like a wick, pulling water up from the sill if drainage is poor or if the drip cap above the door is missing or damaged. Foot traffic and weather exposure hit this area from both sides. Check for soft wood at the bottom corners of the door frame and along the threshold where water stands after rain. Rot often starts under the paint at the very bottom, hidden until you probe it.
High risk trim locations that need regular inspection:
- Window sills, especially outer edge and corners
- Door thresholds and bottom of side casings
- Fascia boards along the roof edge
- Corner boards where two wall planes meet
- Horizontal trim pieces below windows or between siding courses
- Trim areas directly below roof valleys or gutter seams
During your spring and fall maintenance walks, spend extra time on these locations. Press a screwdriver into suspected areas and look for paint failure or staining. Catching rot early in these spots saves you from larger repairs later.
Preventing Future Wood Rot on Exterior Trim

Prevention costs less than repairs, and most trim rot develops from fixable problems you can address during routine maintenance.
-
Inspect all exterior trim twice yearly, once in spring after winter moisture and freeze thaw cycles, and once in fall before wet weather returns. Walk around the house with a screwdriver, probing questionable areas and looking for paint failure, caulk gaps, or water stains.
-
Clean gutters and downspouts at least twice a year, more often if you have trees nearby that drop leaves and debris. Clogged gutters overflow and pour water directly onto fascia and the trim below. Make sure downspouts extend at least four feet from the foundation and direct water away from the house.
-
Maintain all caulk around joints, window frames, door frames, and anywhere trim pieces meet. Check every joint during inspections and recaulk immediately when you see cracks or gaps. Use paintable exterior caulk that flexes with temperature changes.
-
Ensure proper flashing installation at all roof to wall intersections, above doors and windows, and behind corner boards. Flashing is the metal or membrane that directs water away from vulnerable areas. If trim keeps rotting in the same spot, missing or damaged flashing is often the reason.
-
Trim vegetation at least 18 inches away from all trim boards to allow air circulation and let surfaces dry after rain. Bushes and plants trap moisture against the house and keep trim damp longer than it should be.
-
Seal all end grain during trim installation or replacement. End grain soaks up 10 to 15 times more water than face grain, so it needs extra protection. Apply wood preservative or several coats of primer before installing new trim.
-
Repaint exterior trim every 5 to 7 years using quality 100% acrylic paint over a proper primer. Paint is your primary defense against moisture penetration. When it fails, water gets in and rot follows.
Proper drainage prevents most trim rot problems. Walk your property during a heavy rain and watch where water goes. If it’s running toward the foundation or pooling near the house, extend downspouts, add splash blocks, or regrade soil to slope away from the building. Fix these drainage patterns and you’ll stop the water before it reaches the trim. Check gutters for proper pitch toward downspouts. No standing water should remain after rain stops.
Ventilation matters behind trim boards and in soffits. If you’re installing new trim or rebuilding damaged sections, leave small gaps for air movement or use spacers to keep the back of the trim slightly off the wall surface. This lets moisture escape instead of getting trapped. In soffit areas, make sure ventilation openings aren’t blocked by insulation or debris.
Repair Costs, Time Requirements, and DIY Considerations
Understanding the real investment helps you decide between tackling it yourself or calling for help.
| Repair Type | DIY Cost | Time Required | Difficulty |
|---|---|---|---|
| Small epoxy repair (under 6 inches) | $30-60 | 4-6 hours | Beginner |
| Medium epoxy repair (6-24 inches) | $60-120 | 6-10 hours | Intermediate |
| Partial board replacement (one section) | $80-150 | 8-12 hours | Intermediate |
| Full trim board replacement (one board) | $150-400 | 12-16 hours | Advanced |
| Professional repair service | $200-800 | Varies | N/A |
Material costs for DIY repairs include the epoxy system ($25 to $50), primer and paint ($20 to $40), sandpaper and disposables ($10 to $15), and replacement board material if needed ($30 to $150 depending on length and type). If you don’t already own basic tools like chisels, saws, and sanders, add another $50 to $150 for decent quality versions that’ll last through multiple projects. Safety gear (gloves, glasses, dust mask) runs about $15 to $25 if you’re starting from scratch. These costs add up quickly, especially for your first repair, but the tools and leftover materials serve you for future maintenance.
Time requirements span multiple days because of drying and curing stages, not just active work hours. A small repair might only need 4 hours of hands on time, but those hours spread across three or four days waiting for epoxy to cure, primer to dry, and paint to set between coats. Weather delays add more time if rain interrupts your schedule or if temperatures drop below the range where products cure properly. Be realistic about how long you have access to ladders, how much physical work you can do at height, and whether you can commit to checking weather forecasts and adjusting your schedule around drying times.
Consider calling a professional when damage extends beyond simple trim rot into the wall framing or sheathing behind it, which signals a larger moisture problem that needs diagnosis and structural repair. High or difficult access areas, especially second story trim or steep roof edges, require proper scaffolding or lift equipment that most homeowners don’t have. If you lack the tools for the job or aren’t confident using power saws and sanders safely, the risk of injury or botched work outweighs the cost savings. When you’re uncertain about how far rot has spread or what’s causing it, a professional assessment prevents you from repairing symptoms while missing the underlying problem. For extensive trim rot or situations requiring structural evaluation, consider contacting Professional Home Repair Services for an expert assessment.
Identifying Underlying Causes of Exterior Trim Rot
Fixing the visible rot without addressing why it happened sets you up to repeat the repair in a year or two.
Moisture exposure from rain, snow, and roof runoff is the primary cause. Rot doesn’t develop from occasional wetting. It needs sustained moisture that keeps wood damp for days or weeks at a time. Look for patterns in where rot appears. It usually points directly to the water source. Gutters that overflow or leak at seams dump water repeatedly on the same trim sections below. Missing or damaged flashing at roof edges, above windows, or at wall intersections lets water run behind trim instead of shedding clear. Failed caulk joints create gaps where water gets past the protective paint layer and into end grain or the space behind the board. Poor site drainage that slopes toward the foundation keeps soil damp near the house, and that moisture wicks into trim near ground level or splashes up during rain.
Secondary factors compound the moisture problem. Inadequate ventilation between trim boards and wall surfaces traps moisture that would normally evaporate within hours. The back side of the trim stays damp, especially in shaded areas that don’t get direct sun. Improper paint application, whether from skipped primer, insufficient coats, or letting bare wood sit exposed too long before painting, creates weak points where water penetrates the finish. Untreated end grain soaks up water rapidly. Rot often starts at cut ends of boards before spreading along the length. Seasonal freeze thaw cycles in cold climates crack paint and open wood fibers, giving water more entry points each winter. Sprinkler systems aimed too high or positioned too close to the house wet trim regularly, and even though the spray dries quickly, repeated wetting and drying cycles break down paint and let moisture in.
Common causes to check during your inspection:
- Overflowing or leaking gutters that dump water on trim below
- Missing flashing at roof to wall intersections or above windows
- Cracked or missing caulk at trim joints and seams
- Poor site drainage that slopes toward the house
- Sprinklers hitting trim boards or soffit areas
- Paint failure exposing bare wood to weather
Walk around the house during or right after a heavy rain to see where water goes. Watch for streams running off the roof edge, gutter overflow, water pooling near the foundation, or sprinkler patterns that hit the house. These are the active moisture sources causing your rot problems. Fix them before or during your trim repair, otherwise you’re just patching damage that’ll recur as soon as conditions get wet again.
Alternative Materials and Long Term Solutions for Trim Rot
If you’re tired of repairing rotted wood trim every few years, replacement with more durable materials ends the cycle.
| Material | Rot Resistance | Cost | Maintenance | Appearance |
|---|---|---|---|---|
| Natural pine or fir | Low | $ | High | Excellent |
| Cedar | Medium | $$ | Medium | Excellent |
| Pressure treated lumber | High | $$ | Low | Good |
| PVC/vinyl trim | Very high | $$$ | Very low | Good |
| Fiber cement | Very high | $$$ | Low | Excellent |
Natural pine and fir provide excellent workability and a traditional look, but require consistent maintenance including caulking, painting every 5 to 7 years, and immediate attention to any paint failure. They’re the least expensive option initially, but long term costs add up through repeated maintenance and eventual replacement. Cedar offers better natural rot resistance thanks to oils in the wood that repel moisture and insects. It still needs paint or stain for UV protection, but it tolerates occasional moisture exposure better than pine. The cost runs about double that of pine, and availability varies by region.
Pressure treated lumber lasts significantly longer in high moisture areas because the chemical treatment penetrates deep into the wood fibers. It’s ideal for locations that stay damp or get wet frequently, like near ground level, under roof valleys, or below deck areas. The treatment gives the wood a greenish tint initially, but it accepts paint well after it dries for a few weeks. You can’t use pressure treated for intricate profiles or detailed trim because the chemicals make it harder to work with precision tools. PVC and vinyl trim products won’t rot, period. They’re extruded from plastic that’s impervious to moisture, insects, and fungal decay. They install like wood using similar cutting and fastening methods, but they expand and contract more with temperature swings, so proper installation techniques matter. The appearance is clean and consistent, though they lack the natural grain texture of real wood. They cost more up front and come in limited profile options compared to wood.
Fiber cement trim combines the look of wood with the durability of masonry. It’s made from cement, sand, and cellulose fibers, which makes it heavy but extremely stable and rot proof. It holds paint better than wood and resists insect damage, warping, and moisture related problems. The material requires carbide saw blades for cutting and creates silica dust, so proper safety equipment is essential during installation. It’s the most expensive option per linear foot but requires the least long term maintenance.
Material choice depends on your budget, how much maintenance you’re willing to do, the architectural style of your house, and how severe moisture exposure is at the damaged location. If you’ve repaired the same trim board twice already, upgrading to cedar, pressure treated, or synthetic material makes sense for that specific high risk area even if you keep wood elsewhere. If the entire house needs trim work and you’re planning to stay long term, the higher initial cost of PVC or fiber cement pays back in eliminated maintenance.
Safety Precautions for Exterior Trim Rot Repair
Rotted wood contains fungal spores, and repair work creates dust and exposes you to chemicals that require protective measures.
Safety glasses protect your eyes during all cutting, chiseling, and sanding operations. Wood chips fly when you’re pounding a chisel, and dust swirls during sanding even if you think you’re being careful. A single wood chip or paint flake in your eye stops work immediately and risks injury. Wear glasses that wrap around the sides, not just reading glasses pushed up on your forehead. Use a dust mask or respirator rated for fine particles whenever you’re sanding rotted wood or cutting into painted surfaces. Fungal spores from rot can trigger allergic reactions or respiratory problems, and old paint may contain lead that becomes dangerous when it’s turned into dust. A basic N95 mask provides adequate protection for most exterior trim work. If you’re sensitive to dust or working on extensive rot, upgrade to a half face respirator with P100 cartridges.
Wear chemical resistant gloves when mixing and applying epoxy products. The resin and hardener can irritate skin and cause allergic sensitization that makes future exposure worse. Once epoxy starts to cure on your skin, it’s hard to remove and may require solvents that cause further irritation. Nitrile or vinyl gloves work fine and cost little. Keep several pairs on hand. Work in well ventilated areas when using epoxy, primers, or paints. Most modern products produce minimal fumes at normal temperatures, but working in still air or enclosed spaces concentrates vapors that can cause headaches or dizziness. If you’re working on a covered porch or in a tight corner, set up a fan to move air. Use proper ladder safety practices for any trim work above shoulder height. Make sure the ladder is on stable, level ground with all four legs in contact. Don’t lean or reach beyond your center of balance. Move the ladder rather than stretching to reach another foot of trim.
Additional safety requirements:
- Avoid breathing fungal spores from rotted wood by wearing a mask during removal
- Dispose of rotted wood properly, bagging it to contain spores and dust rather than leaving piles around your work area
- Wash hands thoroughly after handling epoxy, wood hardener, or rotted materials
- Keep epoxy and solvent products away from open flames or pilot lights
- Read and follow all product label warnings and first aid instructions
- Store unused epoxy components in sealed containers away from heat
- Work during daylight hours or with adequate lighting to see what you’re cutting
- Keep children and pets away from the work area and chemical products
For repairs above the first story or in locations requiring extension ladders, scaffolding, or roof access, assess your comfort level and experience honestly. Height work combines physical risk with the need for steady hands and clear thinking. If the repair location makes you nervous or
Final Words
Knowing how to repair wood rot on exterior trim comes down to thorough assessment, proper material removal, and methodical rebuilding with the right products.
The epoxy method works well for moderate damage. Full board replacement makes sense when rot has spread too far.
Either way, sealing the repair and fixing the moisture source keeps the problem from coming back.
Take your time with each phase. Let products cure fully. Prime and paint within the recommended window.
Done right, a solid trim repair protects your home and looks clean for years.
FAQ
How can you repair rotting wood without replacing it on outdoor trim?
You can repair rotting wood without replacing it by removing all soft material, treating the remaining solid wood with hardener, and filling the void with two-part epoxy filler. This method works when damage is shallow and structural integrity remains intact. Always ensure wood moisture content is below 18% before applying epoxy for proper adhesion and lasting results.
How do you repair rotted exterior wood trim?
You repair rotted exterior wood trim by cutting out all deteriorated material back to sound wood, treating exposed surfaces with wood hardener, filling with epoxy compound, sanding smooth, and sealing with primer and paint. The repair must address the moisture source causing the rot, or damage will return. Most repairs require 2-3 days to complete due to drying and curing time.
How do professionals treat wood rot on exterior trim?
Professionals treat wood rot by first probing to assess damage extent, removing all compromised material with chisels or die grinders, applying penetrating wood hardener to remaining sound wood, and rebuilding the profile with two-part epoxy. They ensure moisture content is appropriate before treatment and always identify the water source causing rot. Professional repairs include proper flashing, caulking, and protective coatings to prevent recurrence.
What liquid hardens rotted wood on exterior surfaces?
Wood hardener liquid hardens rotted wood by penetrating deep into soft, compromised fibers and solidifying them through chemical bonding. Two-part epoxy primer serves a similar function, soaking into exposed wood and creating a stable base for filler application. Both products require dry wood (below 18% moisture) and proper ventilation during application for effective results.
When is exterior trim rot too extensive to repair with epoxy?
Exterior trim rot is too extensive for epoxy repair when damage affects more than 50% of the board depth, when structural integrity is compromised, or when rot has spread beyond isolated areas. Complete board replacement using rot-resistant materials like cedar, pressure-treated lumber, or PVC becomes necessary for extensive decay. Repairs in these situations require proper installation with flashing and caulking to prevent future moisture intrusion.
What causes exterior wood trim to rot repeatedly?
Exterior wood trim rots repeatedly when the underlying moisture source remains unaddressed after cosmetic repairs. Common causes include overflowing gutters, missing or damaged flashing, failed caulk joints, poor site drainage, and sprinkler overspray hitting the trim. Poor ventilation between siding and trim also traps moisture, creating ideal conditions for fungal decay to return.
How long does epoxy wood filler take to cure on exterior trim?
Epoxy wood filler takes approximately 24 hours to cure fully on exterior trim, though working time is only 30 to 45 minutes after mixing. Cool weather extends working time while hot temperatures shorten it significantly. The repaired surface must be primed and painted within 24 hours of curing because epoxy breaks down when exposed to direct sunlight.
What grit sandpaper progression creates smooth trim repairs?
A smooth trim repair requires sanding progression starting with 80-grit to remove high spots and shape the repair, followed by 100-grit for smoothing, and finishing with 220-grit for final surface preparation. This three-stage approach blends epoxy edges into surrounding wood and creates a paint-ready surface. Always use a sanding block on flat surfaces and feather edges carefully for invisible repairs.
Which exterior trim locations are most vulnerable to wood rot?
The most vulnerable exterior trim locations include window sills where water pools, door thresholds exposed to weather, fascia boards near roof edges, and corner boards catching runoff. Horizontal trim pieces and areas below roof valleys also experience frequent rot from prolonged moisture exposure. End-grain sections absorb water readily and deteriorate faster than other trim areas.
How often should you inspect exterior trim for early rot signs?
You should inspect exterior trim at least twice yearly, ideally in spring and fall seasons when temperature changes reveal paint failure and moisture damage. Early detection allows simple repairs before structural damage develops and requires expensive replacement. Check high-risk areas like window sills, door frames, fascia, and horizontal trim pieces during each inspection.
What safety equipment is essential for wood rot repair work?
Essential safety equipment for wood rot repair includes safety glasses for eye protection during cutting and chiseling, a dust mask or respirator when sanding rotted material, and chemical-resistant gloves for handling epoxy and hardener. Work in well-ventilated areas to avoid breathing fungal spores from deteriorated wood. Ladder safety practices are critical when accessing high trim locations.
How much does DIY exterior trim rot repair typically cost?
DIY exterior trim rot repair typically costs $30-60 for small epoxy repairs, $60-120 for medium repairs, and $80-150 for partial board replacement including materials. Professional repairs range from $200-800 depending on damage extent and access difficulty. Hidden costs include specialty tools, safety gear, and multiple product purchases that can add significantly to initial estimates.
What rot-resistant materials work best for exterior trim replacement?
The best rot-resistant materials for exterior trim replacement include cedar and redwood for natural appearance with moderate resistance, pressure-treated lumber for high durability, PVC for very high rot resistance, and fiber cement for maximum longevity. Material selection depends on budget, maintenance willingness, architectural style, and exposure severity. PVC and fiber cement require the least maintenance but cost more upfront than wood options.