


You’ve probably walked past that crumbling corner in the hallway a hundred times, telling yourself you’ll deal with it later. But here’s the thing. Ignoring damaged plaster doesn’t make it go away. It spreads, pulling away from the wall, creating wider cracks, and turning a small fix into a much bigger job. The good news is that repairing crumbling plaster yourself is completely doable if you follow the right steps and don’t rush the process. We’ll walk you through exactly what to do, from removing loose material to getting a smooth, paint-ready finish.
Complete Step-by-Step Repair Process for Crumbling Plaster
Repairing crumbling plaster isn’t magic. It’s a process that works if you follow it and fails if you rush it. Each stage depends on what came before, and the difference between a repair that lasts and one that cracks within months comes down to patience and doing things right.
Work in thin layers. Let each coat dry completely before adding the next. That means waiting a full 24 hours minimum between coats. Slapping on thick layers to save time creates weak spots that show through the finish or fail completely inside a year.
Step 1: Prepare the Workspace and Safety Equipment
Set up matters more than you’d think. Plaster dust travels farther than you expect, so cover floors and furniture within six feet of the work area with drop cloths. Open windows for ventilation and set up a fan if you’re working in a small room. The dust from mixing, applying, and sanding gets everywhere.
Wear safety goggles and a dust mask through the entire job, not just when sanding. Even mixing compound puts fine particles in the air that’ll irritate your eyes and lungs. Get all your tools and materials ready before you start. You don’t want to hunt for a trowel with wet plaster on your hands or realize halfway through a coat that you’re short on compound.
Step 2: Remove All Loose and Damaged Plaster
Use a putty knife or wire brush to scrape away everything that’s crumbling, loose, or damaged until you hit solid edges that don’t flex when you press them. For hairline cracks, widen them with a utility knife into V-shaped grooves, wider at the surface and narrower deeper in. This gives the compound something to lock into instead of just sitting on top.
Don’t leave questionable sections. That soft spot you skip because it seems “almost okay” will fail six months after you paint, creating a depression or crack that ruins the finish. Tap surrounding areas with your knuckle. Solid plaster sounds tight and firm. Loose sections sound hollow or drum-like. Remove anything that sounds off.
Step 3: Clean and Prepare the Surface Thoroughly
Vacuum everything. All the dust and debris from the repair area and around it. A shop vacuum works better than a household one, which clogs fast with plaster dust. Wipe the repair area with a damp cloth to get the fine dust vacuuming leaves behind, but don’t soak it.
Make sure the surface is completely dry before moving forward. You can tell by touch. Damp plaster feels cool and slightly soft. Check that the edges of existing plaster are solid by running a putty knife along the perimeter and testing for any give or movement.
Step 4: Reattach Any Loose but Intact Plaster (When Applicable)
If sections sound hollow when tapped but the plaster itself isn’t crumbling, you can reattach them instead of removing them. Drill 3/16 inch holes through the plaster into the lath underneath at 3-inch intervals in a grid pattern. Insert screws with plaster washers, those wide perforated metal discs that spread the load without crushing the plaster.
Tighten carefully. You’ll feel resistance increase as the plaster makes contact with the lath. Stop when the washer starts to dimple the surface. For delicate areas or ornamental plaster, try the injection adhesive method. Drill small angled holes into the void space behind the plaster and inject specialized adhesive, using temporary bracing to hold sections in place while it cures overnight.
Step 5: Apply Bonding Agent to Prepared Surfaces
Pick the right bonding agent. PVA primer for general repairs, acrylic bonding agent for high moisture areas, contact adhesive for particularly dense plaster. Brush or roll it onto all exposed plaster edges and any visible lath. Cover everything in the repair area without letting it puddle.
The bonding agent seals the porous old plaster so it doesn’t suck moisture from your new compound too quickly, which weakens the bond. Wait for proper tack time per manufacturer specs, typically 15 to 30 minutes, until the surface feels slightly tacky but not wet. This step prevents delamination, where new plaster separates cleanly from old along the boundary. Many DIY repairs fail right here because the bonding agent got skipped or didn’t get proper tack time.
Step 6: Install Reinforcement Mesh for Larger Repairs
Repairs larger than 2 inches across, areas over joints, or sections that get vibration or movement need reinforcement. Embed fiberglass mesh tape into the first layer of base coat compound over cracks and holes. Press it into the wet compound with your trowel so it lies flat without bubbles or wrinkles. Overlap edges by 2 inches where pieces meet.
For extensive repairs covering multiple square feet, apply 36-inch-wide fiberglass mesh over the entire damaged section before base coating. Staple or tack edges to solid plaster if needed to hold position. Cover the mesh completely with additional compound. Exposed mesh prevents proper adhesion of the next coats and creates texture that shows through the finish.
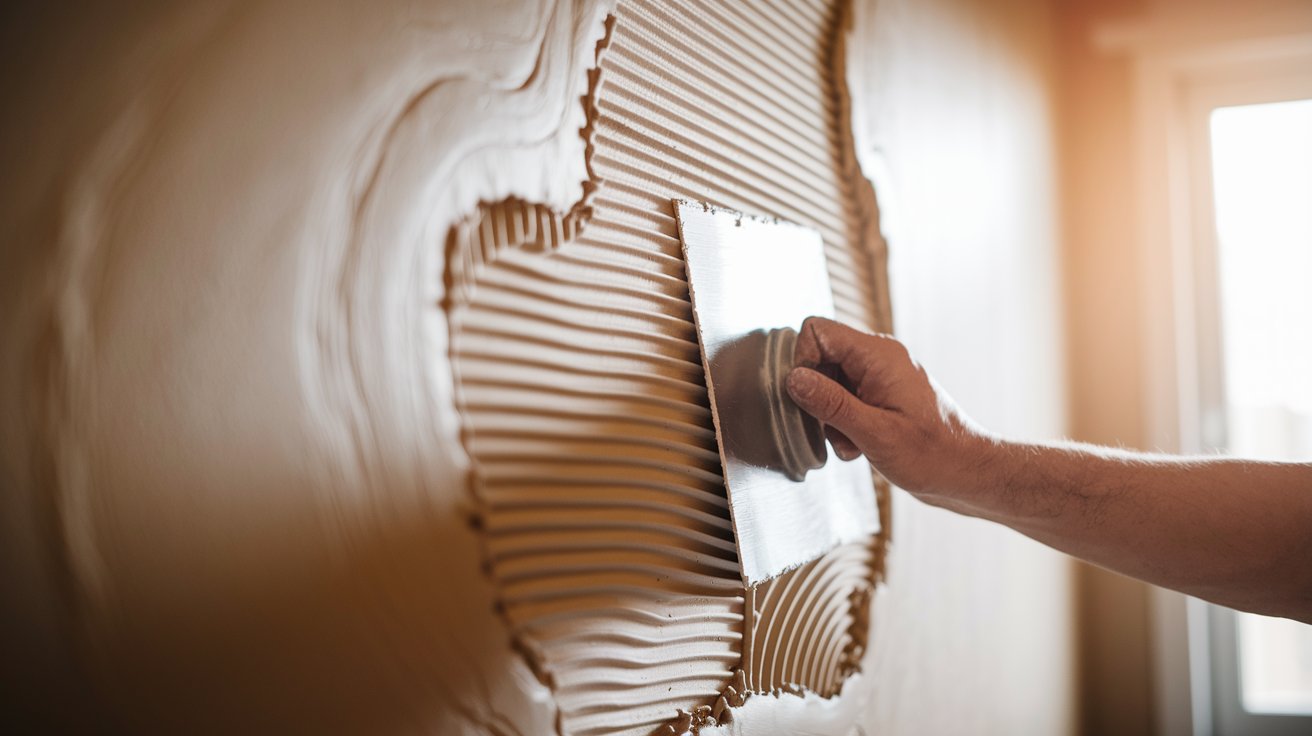
Step 7: Apply Base Coat in Thin Layers
Mix plaster compound or joint compound in small batches following manufacturer water-to-plaster ratios. You want smooth, creamy consistency, about the thickness of peanut butter. Thick enough to hold shape on the trowel but fluid enough to spread smoothly.
Apply the first base coat layer at 1/4 inch thickness maximum. Press compound firmly into recesses and undercuts with your trowel to eliminate voids or air pockets. Use a straight spreading motion, holding the trowel at a 30 to 45 degree angle with even pressure.
Create a mechanical key by lightly scoring the surface with the trowel edge before it fully hardens. Drag shallow parallel lines or a crosshatch pattern to give the next coat something to grip. Wait for complete drying, minimum 24 hours in normal humidity, longer in damp or cold conditions, before applying the next layer. You’ll know it’s dry when the color lightens uniformly and feels room temperature to touch.
Build up depth gradually with multiple thin coats instead of thick single applications. Typically you’ll need 2 to 3 base coats for repairs deeper than 1/2 inch. Each thin layer dries more uniformly with less internal stress, reducing shrinkage cracks.
Step 8: Apply Skim Coats for Smooth Finish
After base coats are completely dry and the repair is built up nearly flush with the surrounding surface, apply finishing layers using a wider trowel. Ten or 12 inches gives better control for feathering edges. Hold the trowel at a 15 to 20 degree angle to the wall, applying even pressure in smooth, sweeping strokes.
Feather edges outward to blend with existing plaster. Avoid ridges and buildup at transitions where new meets old. Apply multiple thin finish coats, typically 2 to 3 layers, waiting 24 hours between each. Check level with the surrounding surface using a straightedge or long level, looking for depressions or high spots that need attention.
Match existing wall texture if present by replicating patterns with trowel, sponge, or brush techniques during the final coat while the compound is still workable. For orange peel texture, stipple with a damp sponge. For knockdown texture, apply slightly raised peaks with the trowel then lightly flatten them.
Step 9: Sand Progressively for Paint-Ready Surface
Wait for the final coat to dry completely, minimum 24 to 48 hours depending on thickness and humidity, before sanding. Start with 120-grit sandpaper for high spots and major imperfections, using light to moderate pressure in circular motions. Heavy pressure creates depressions instead of smoothing the surface.
Move to 150-grit for general smoothing and blending repair edges into surrounding plaster, then finish with 220-grit sandpaper for final smoothness and a paint-ready surface.
Wipe the surface with a damp cloth between grits to remove dust and see your progress. Dust masks imperfections, so you need a clean surface to see what still needs work. Check the surface by running your hand over the repair with eyes closed. Touch detects irregularities better than sight. View at an angle under light to spot remaining imperfections that cast shadows.
Step 10: Prime and Prepare for Painting
After final sanding and dust removal with a damp cloth, apply primer designed for plaster use. PVA primer seals the surface and ensures even paint absorption, while high-build primer can fill minor remaining imperfections. Use a roller for even coverage, working in sections and maintaining a wet edge to avoid lap marks. Wait for complete drying per manufacturer specs, typically 2 to 4 hours for most primers.
Lightly sand the primed surface with 220-grit sandpaper to smooth any raised grain or texture the primer creates, then wipe away sanding dust with a damp cloth. Consider priming the entire wall instead of spot-priming just the repair. New plaster absorbs paint differently than aged plaster. The repaired area may show as a darker or lighter patch even after multiple paint coats. Whole wall priming ensures uniform absorption and appearance.
Each repair varies based on damage extent, plaster condition, and environmental factors. Patience with drying times at each stage prevents future cracking and ensures results that last and maintain your home’s value.
Identifying Damage Types and Underlying Causes of Plaster Deterioration
Plaster damage shows up in patterns that tell you what’s happening behind the surface. Hairline cracks, thin fissures you can barely slide a business card into, typically appear at stress points like corners, around door frames, and where walls meet ceilings. Large cracks wider than 1/4 inch and holes from impact or deterioration expose the lath structure underneath. Bulging or sagging sections feel soft when pressed and sound hollow when tapped, meaning the plaster has separated from its backing.
Water damage appears as dark staining, soft or crumbling areas, and sometimes white crusty deposits where mineral salts have leached through. Crumbling areas flake or powder when touched, with chunks falling away from even gentle pressure.
The underlying causes often began years before the damage became visible. Age-related wear affects all plaster eventually. The binders break down, the bond to lath weakens, the material becomes brittle. Foundation settling creates stress that radiates through walls as diagonal cracks, typically running from upper corners of door and window openings.
Temperature and humidity fluctuations cause expansion and contraction cycles that fatigue the material, especially in homes without climate control or in exterior walls subject to seasonal extremes. Vibrations from nearby traffic, construction, or even heavy foot traffic in multi-story homes create cumulative stress that shows up as cracks.
Water leaks from plumbing behind walls, roof damage above ceilings, or exterior water intrusion saturate the plaster and destroy the bond to lath, causing the most severe damage patterns. Improper original installation, too thin, wrong mix ratios, inadequate keying to lath, creates weak points that fail early.
Address root causes, especially moisture sources, before repairing surface damage or the problem returns within months. That repaired ceiling crack that reappears means water is still coming from somewhere. Cracks that widen over time or new cracks appearing near old repairs indicate ongoing foundation movement or structural issues requiring professional assessment before cosmetic repairs make sense.
Sagging ceilings pose collapse risk and need immediate professional evaluation. The weight of separated plaster can bring down large sections without warning.
Essential Tools and Materials for Plaster Repair
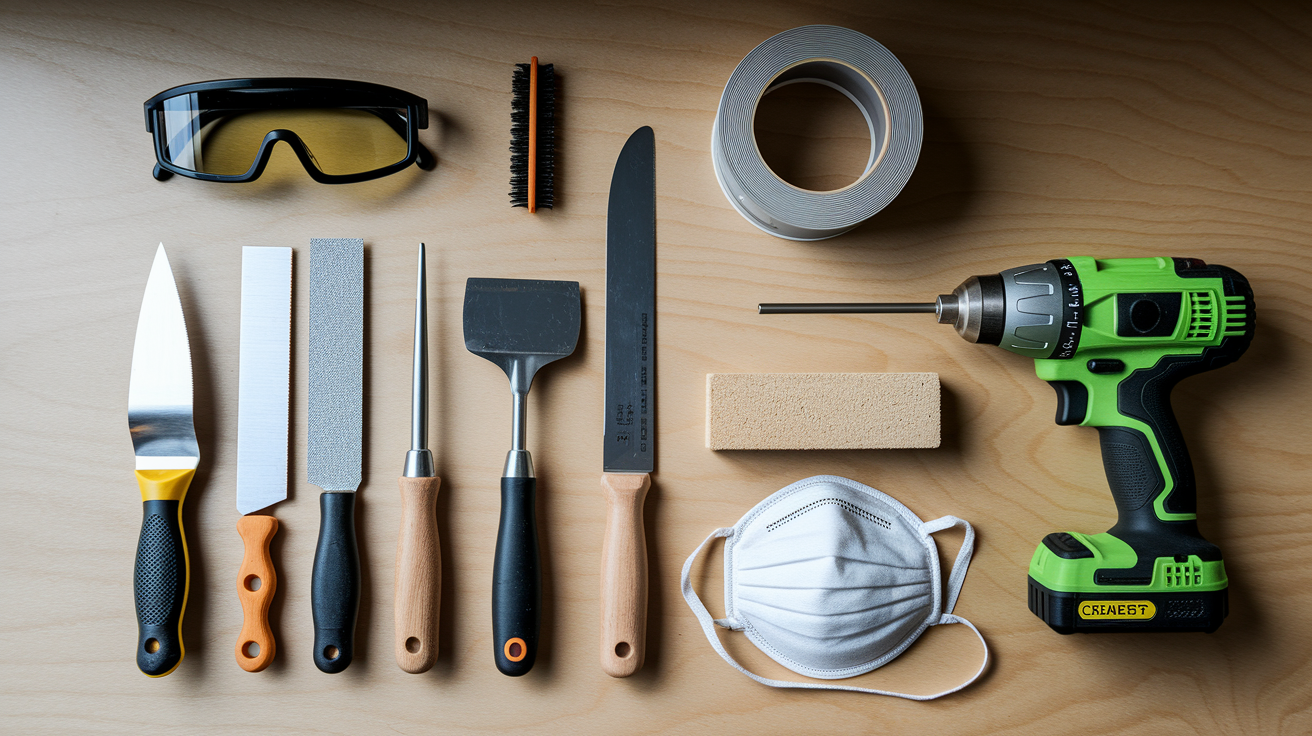
Having the right tools and materials prepared before starting saves time, prevents mid-project trips to the hardware store, and ensures better results since you can work without interruption once you mix the first batch of compound.
| Tool/Material | Purpose |
|---|---|
| Putty knife (3-4 inch) | Removing loose plaster, applying compound in tight spaces, feathering edges |
| Trowel (6-10 inch) | Spreading compound over larger areas, smoothing finish coats, creating texture |
| Hawk | Holding working supply of plaster compound while applying, reduces trips to bucket |
| Utility knife | Cutting fiberglass mesh, widening hairline cracks, trimming excess material |
| Drill with masonry bit (3/16 inch) | Drilling holes for plaster washers, creating injection points for adhesive |
| Wire brush | Removing loose material from cracks, cleaning debris from lath, surface preparation |
| Vacuum cleaner | Removing dust and debris from repair area, cleaning between coats |
| Sanding block and sandpaper | Smoothing dried compound, feathering edges, preparing surface for primer |
| Safety goggles | Protecting eyes from dust and debris during removal, mixing, and sanding |
| Dust mask or respirator | Preventing inhalation of fine plaster dust during all stages of work |
| Joint compound or plaster mix | Primary repair material for filling, building up, and finishing surfaces |
| Bonding agent (PVA primer) | Sealing old plaster, ensuring proper adhesion between old and new material |
| Fiberglass mesh tape | Reinforcing cracks and joints, preventing future cracking in repair areas |
| Primer for plaster | Sealing repaired areas, ensuring uniform paint absorption and appearance |
Mix plaster compound in small batches, only what you can use in 20 to 30 minutes for setting compounds or 45 to 60 minutes for standard joint compound. Follow manufacturer water-to-plaster ratios for smooth, creamy consistency. Most compounds mix at roughly 2 parts powder to 1 part water by volume, but check the bag since ratios vary.
Add powder to water rather than water to powder to prevent lumps. Mix thoroughly until you reach a consistency that holds shape on the trowel but spreads smoothly without dragging or tearing. Too thick and it’s hard to work, creating ridges and pulling away from edges. Too thin and it sags, shrinks excessively as it dries, and takes forever to build up thickness.
Mix in a clean bucket using a margin trowel or paddle attachment on a drill. Keep mixing tools clean between batches to prevent dried chunks that create lumps in fresh compound.
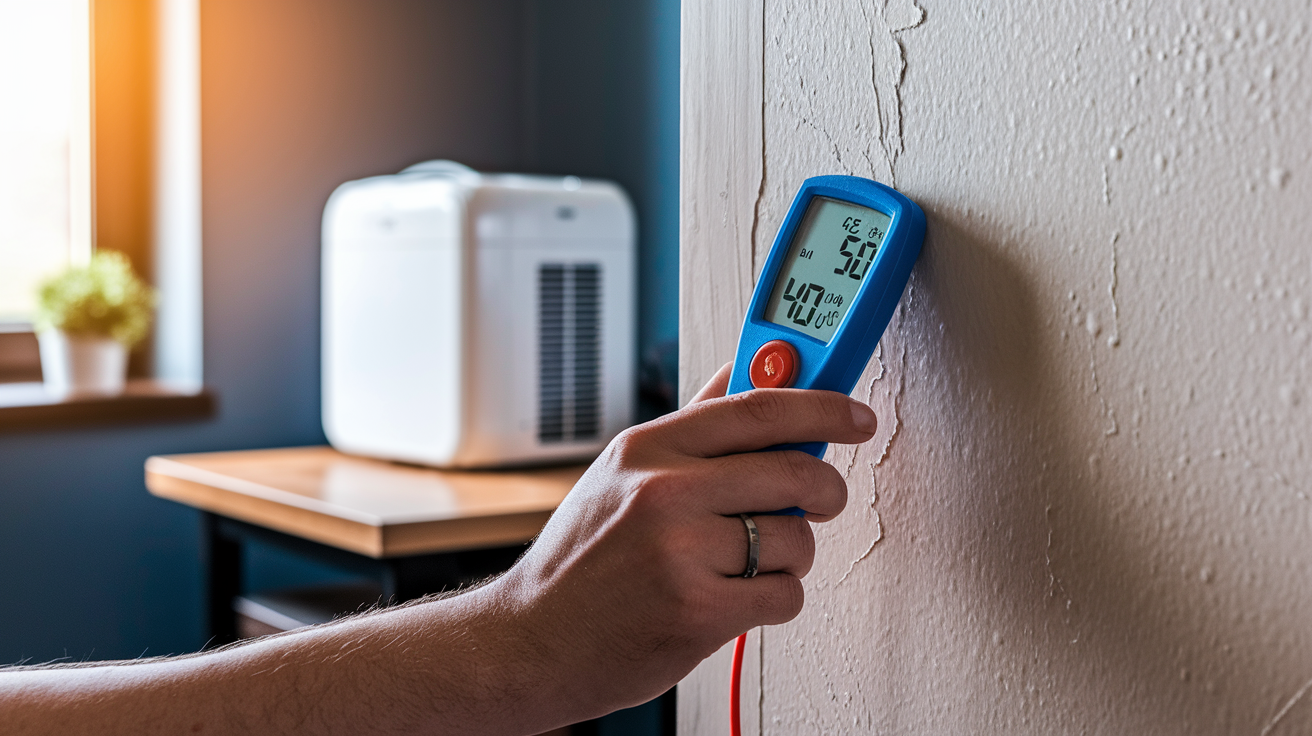
Addressing Moisture Problems and Water Damage in Plaster Walls
Moisture is the leading cause of plaster failure. Repairs over active moisture sources fail within months as the cycle of saturation and drying continues. Water penetrates the plaster, dissolves the binders, saturates the lath, and creates conditions for mold growth and rot that destroys the substrate your repair depends on.
Common moisture sources and solutions:
Roof leaks: Inspect and repair missing shingles, damaged flashing around chimneys and vents, and failed roof valleys where water concentrates. Even small roof leaks create major ceiling damage over time.
Plumbing leaks: Fix dripping pipes, toilet wax ring seals, supply line connections, and slow drain leaks behind walls before they rot the framing and destroy plaster from behind.
Poor ventilation: Install exhaust fans in bathrooms and kitchens that vent to the exterior, not into attics or wall cavities where moisture condenses and damages plaster.
Rising damp: Address foundation drainage problems, regrade soil away from the foundation, and consider foundation waterproofing or exterior drainage systems for chronic basement moisture.
Condensation: Control indoor humidity with dehumidifiers in damp areas, especially basements, and maintain consistent temperatures to prevent condensation on cold surfaces.
Exterior water intrusion: Repair cracks in exterior walls, maintain gutters and downspouts to direct water away from the foundation, and check that exterior caulking around windows and doors is intact.
Moisture damage shows specific indicators that warn you to address the source before repairing. Dark staining appears where water penetrates regularly, creating brown, yellow, or gray discoloration that spreads outward from the source. Soft or crumbling plaster feels spongy when pressed and often crumbles at the edges when probed with a putty knife.
Efflorescence, white powdery salt deposits on the surface, appears as moisture evaporates through the plaster, leaving dissolved minerals behind. Musty odors indicate mold growth within wall cavities or behind the plaster. Visible mold growth on plaster surfaces means moisture levels have been high for extended periods.
Professional water damage remediation may be necessary for extensive moisture problems, especially when mold is present or when the moisture source is difficult to diagnose.
Special Considerations for Historic and Horsehair Plaster

Historic plaster, typically installed before the 1950s, has characteristics that differ fundamentally from modern materials. Horsehair or animal fiber provided tensile strength in place of modern mesh reinforcement. You’ll see these brown or black fibers in crumbled sections or at repair edges.
Lime-based binders rather than gypsum created a slower-curing, more flexible material that could accommodate seasonal movement and moisture cycling. The traditional three-coat system construction layered a scratch coat pressed through the lath and keyed on the back side, a brown coat built up for thickness and straightness, and a finish coat troweled smooth for painting.
Thickness varies considerably, 1/2 inch to over an inch depending on the structure and era. The plaster attaches to wood lath strips with gaps between rather than modern metal lath or backing board.
Material compatibility matters critically in historic plaster repair because modern products can cause more problems than they solve. Modern gypsum-based joint compounds are often too hard compared to lime plaster, creating a rigid patch in a flexible wall that cracks at the boundaries as the wall moves seasonally.
Non-breathable repairs trap moisture behind them rather than allowing it to escape through the wall system as lime plaster does naturally, concentrating moisture damage around repair edges. Lime plaster allows walls to breathe and manage moisture naturally, absorbing humidity when levels rise and releasing it when conditions dry. This vapor permeability kept walls healthy before mechanical climate control.
Historic preservation standards for designated properties often require traditional materials and methods to maintain authenticity and ensure the building functions as designed.
Appropriate repair approaches for historic plaster use lime-based plaster mixes that match the original composition in hardness, flexibility, and breathability. Natural hydraulic lime (NHL) plaster mixes are widely available and formulated for repair work, or you can mix traditional lime putty with sand for complete authenticity.
Match the original aggregate type and size when possible. Most historic plaster used local sand with specific grain characteristics. Traditional three-coat application methods may be required for large repairs, with each coat applied to specific thickness, keyed or scored for the next coat, and allowed to cure for days or weeks.
Extended curing times for lime plaster, measured in weeks versus days for gypsum products, require patience but produce repairs that last generations.
Consult professionals for extensive historic plaster restoration, especially in formal rooms with decorative plasterwork or when large sections need rebuilding. Designated historic properties with preservation requirements often need documentation and approval for repair materials and methods.
Unfamiliarity with traditional lime plaster techniques creates frustration since the material behaves differently than modern compounds. Wetter mixes, longer working times, different trowel techniques. Structural concerns in older buildings may be hidden behind plaster damage, and professionals can assess whether foundation settlement, structural deterioration, or other issues need addressing before cosmetic repairs make sense.
Selecting the Right Plaster Mix and Patching Materials
Traditional plaster materials each serve specific purposes and have distinct working properties. Lime plaster, made from lime putty or hydraulic lime mixed with sand, cures slowly through carbonation over weeks, remains flexible, and allows vapor transmission. Ideal for historic repairs and solid masonry walls.
Gypsum plaster sets quickly through a chemical reaction, typically within 20 to 40 minutes depending on formulation, creates a harder finish than lime, and works well for modern repairs where fast turnaround matters. Plaster of Paris is a fine gypsum product that sets very quickly, often within 10 minutes. Used for small repairs, casting, and ornamental work but too fast-setting for most wall repairs.
Modern alternatives offer convenience and consistent results. Setting-type joint compound, available in 20-minute, 45-minute, and 90-minute formulations, provides controlled working time and sets hard like plaster but with less shrinkage, making it excellent for base coats and repairs that need strength.
Ready-mixed joint compound comes in buckets, needs no mixing, stays workable for extended periods if kept sealed, and works well for skim coats and finish work, though it’s softer than setting compounds and plaster.
For historic homes and old plaster, lime plaster maintains the breathable properties and compatibility with original materials that ensures successful repairs. The longer working time, hours versus minutes, allows careful application without rushing, and the slow cure develops strength gradually without shrinkage stress.
Modern joint compound options provide convenience for small to medium repairs in non-historic homes. Ready-mixed products eliminate mixing errors and stay workable for weeks if kept sealed, letting you work at your own pace across multiple sessions.
Fortifying base coats with mason’s sand, fine uniform grain without pebbles, adds strength and reduces shrinkage in thick applications. Setting compounds work well when you need faster turnaround or when building up significant thickness, since they set hard enough to receive the next coat within an hour or two rather than waiting overnight.
Match existing plaster composition when possible, especially in historic preservation projects where material compatibility affects long-term performance and authenticity. A simple scratch test helps identify old plaster type. Lime plaster scratches easily with a fingernail, while harder gypsum plaster resists scratching.
Compatible materials that allow proper breathability and movement prevent the common failure pattern where rigid modern repairs crack and separate from flexible old plaster as the wall moves seasonally.
Understanding Repair Costs and DIY vs Professional Services
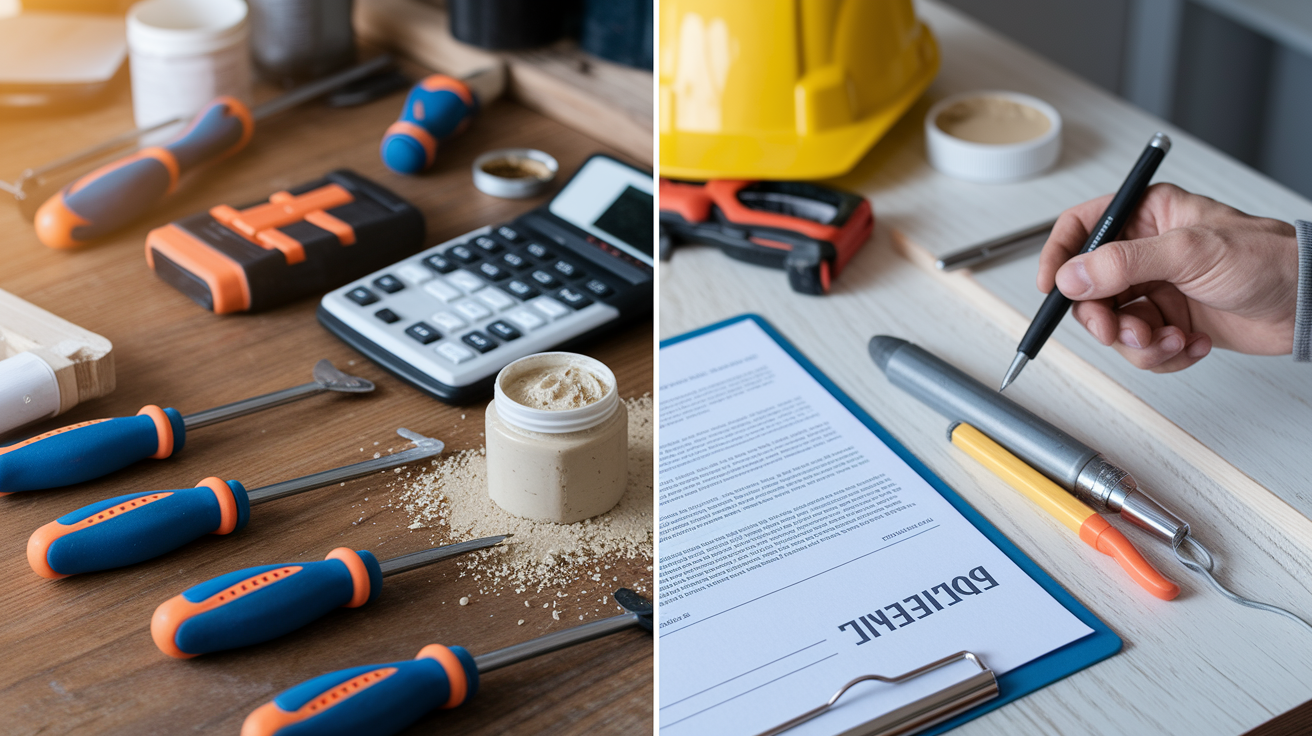
Cost is a major factor in repair decisions, but improper DIY repairs often cost more to fix later when the work fails and you need to remove failed materials before starting over.
| Repair Scope | DIY Cost Range | Professional Cost Range |
|---|---|---|
| Small patch under 1 sq ft | $5 – $15 | $75 – $150 |
| Medium repair 1-5 sq ft | $25 – $50 | $275 – $600 |
| Large repair 5-20 sq ft | $100 – $200 | $1,100 – $2,400 |
| Extensive/whole room | $300 – $800 | $3,000 – $8,000+ |
DIY costs break down into materials and tools. Materials typically run $5 to 10 per square foot for joint compound, mesh tape, bonding agent, primer, and sandpaper. More if using traditional lime plaster for historic repairs. Tools may require initial investment of $50 to 150 for a basic kit including trowels, putty knives, mixing bucket, sanding block, and safety equipment, though most homeowners already own some of these items.
Time investment is considerable for learning proper technique and executing repairs. Plan on multiple sessions spread across several days for proper drying between coats. DIY makes sense for small to medium repairs in non-historic homes where mistakes create manageable learning experiences rather than expensive disasters.
Professional costs include labor rates typically ranging from $55 to 120 per square foot depending on region, repair complexity, and contractor experience. This includes expertise in surface preparation, material selection, application technique, and finishing that produces results matching original plaster.
Efficiency saves time. Professionals complete in days what takes DIY weekends or weeks, minimizing disruption. Professional services are necessary for structural concerns that need engineering assessment, historic preservation projects requiring authentic materials and methods, ceiling repairs where working overhead is difficult and safety critical, and extensive damage where improper technique multiplies across large areas.
When DIY attempts have failed, professionals often charge more because they must remove failed repairs before starting fresh. Professional results last longer through proper material selection and technique, maintain home value through quality workmanship, and often include warranties on labor and materials that provide peace of mind.
Common Mistakes and Troubleshooting Plaster Repairs
Most plaster repair failures result from a few common mistakes that are easily avoided with proper knowledge and patience.
Common mistakes and solutions:
Applying thick layers: Causes cracking from uneven drying and shrinkage stress through the thickness. Always use thin coats of 1/4 inch maximum, building up depth gradually.
Insufficient drying time: Creates weak bond between coats and traps moisture that causes delamination. Wait full 24 hours between coats, longer in humid or cold conditions.
Skipping bonding agent: Results in delamination where new plaster separates cleanly from old. Always prime bare plaster edges and exposed lath with appropriate bonding agent.
Wrong material consistency: Too thick makes application difficult and creates ridges, too thin sags and shrinks excessively. Follow mixing ratios carefully and test consistency before starting.
Not addressing moisture: Repairs fail quickly as water continues damaging the wall from behind. Eliminate water sources first, then wait for complete drying before repairing.
Inadequate surface preparation: Prevents proper adhesion when dust or loose material remains. Remove all loose plaster, vacuum thoroughly, and wipe clean before starting.
Rushing the process: Compromises quality at every stage from mixing to finishing. Allow proper curing time, work methodically, accept that quality repairs take days.
Ignoring underlying damage: Surface repair over structural problems or hidden rot fails as the substrate continues deteriorating. Investigate causes of damage before patching symptoms.
Troubleshooting existing problems helps identify what went wrong and how to fix it. Cracking repairs indicate insufficient drying between coats, material shrinkage from improper consistency, or ongoing structural movement causing stress.
Delamination where repair separates from surrounding plaster means poor surface preparation, skipped bonding agent, or moisture trapped behind the repair. Rough finish results from improper trowel technique, wrong material consistency, or insufficient sanding and smoothing.
Uneven paint absorption where repairs show as darker or lighter patches indicates inadequate priming. New plaster is more porous than old and needs thorough sealing before painting.
Preventing Future Plaster Damage Through Maintenance
Proactive maintenance prevents most plaster problems and costs far less than repairs, catching small issues before they become large failures.
Prevention strategies:
Conduct visual inspections quarterly for new cracks, discoloration, or soft spots, paying attention to areas near plumbing, under windows, and around roof edges where problems start.
Maintain consistent indoor humidity levels at 40 to 50% relative humidity year-round using humidifiers in dry winter conditions and dehumidifiers during humid summer months to minimize expansion and contraction cycles.
Address plumbing and roof leaks immediately upon discovery, even small drips, since water damage accelerates rapidly and a minor leak becomes major damage within months.
Ensure adequate ventilation in moisture-prone areas like bathrooms and kitchens with properly functioning exhaust fans that vent to the exterior, running fans during and after showers.
Avoid hanging heavy items without proper wall anchors that distribute weight, since concentrated loads can crack or pull sections of plaster away from lath.
Monitor for signs of foundation movement or settling including new diagonal cracks, doors and windows that bind, and cracks that widen over time. These indicate problems needing professional assessment.
Seasonal considerations affect maintenance timing and priority. Increased heating in winter creates dry indoor conditions that cause shrinkage cracks as plaster loses moisture, especially around heat registers and radiators. Summer humidity may soften old lime plaster in areas without climate control, making it vulnerable to impact damage.
Spring thaw reveals ice dam damage on ceilings and exterior walls as trapped water from winter storms penetrates plaster. Fall inspections before heating season help catch summer moisture damage early, repair it while conditions are moderate, and prevent problems from worsening through winter freeze-thaw cycles.
When to Call a Professional for Plaster Restoration
Some plaster situations exceed DIY capabilities and require professional assessment and repair for safety, quality, and long-term success.
Scenarios requiring professionals:
Sagging or bulging ceilings posing collapse risk from separated plaster that could fall without warning, potentially causing injury or property damage.
Extensive damage covering more than 20 square feet where improper technique multiplies across large areas and material costs approach professional labor costs.
Historic plaster requiring traditional lime-based restoration with authentic materials and methods that demand specialized knowledge and experience.
Cracks indicating structural or foundation problems including diagonal cracks from corners, widening cracks, and damage accompanied by stuck doors or floor slopes.
Damage to load-bearing walls requiring building code compliance, proper support during repair, and inspection approval for structural integrity.
Failed previous DIY repair attempts where removal and proper repair costs more but produces lasting results versus repeated DIY failures.
Water damage requiring mold remediation coordination when moisture problems have created health hazards needing containment and specialized cleaning.
Whole-room or whole-house plaster restoration projects where scope and complexity demand professional efficiency and consistent quality.
Professional diagnosis provides value even for potential DIY repairs. Experts identify underlying structural issues that surface damage symptoms point to but don’t reveal. They assess whether repair or replacement is more cost-effective, especially when extensive damage might justify installing drywall rather than rebuilding large plaster areas.
Professionals ensure work meets building codes, particularly important for load-bearing walls, fire-rated assemblies, and historic preservation projects. Warranties on workmanship protect your investment if problems develop, providing recourse beyond DIY risks.
Professional services like RestoreSafeHome.com offer comprehensive plaster repair solutions from assessment through finishing, with experienced crews who understand both modern and traditional techniques, ensuring repairs that last and maintain your home’s character.
Final Words
Crumbling plaster looks overwhelming at first glance, but the repair process is manageable when you work methodically through each stage.
Take your time with surface prep. Let each layer dry completely. Use thin coats instead of rushing with thick applications.
Most repair failures happen when people skip steps or don’t wait long enough between coats.
If you address the root cause of the damage (especially moisture) and follow the proper sequence, your repair will hold up for years. That’s how to repair crumbling plaster that actually lasts.
FAQ
What is crumbling plaster?
Crumbling plaster is deteriorated wall or ceiling material that has lost its strength and breaks apart when touched. It appears as soft, chalky, or powdery sections that shed dust, often caused by moisture damage, age-related wear, or loss of bond with the underlying lath.
Can you plaster over crumbling plaster?
You cannot plaster over crumbling plaster successfully without proper preparation. All loose, damaged, and unstable material must be removed completely until you reach solid, well-adhered edges. Attempting to patch over compromised plaster results in new material delaminating and failing quickly.
How do you stop crumbling plaster?
Crumbling plaster stops when you remove all deteriorated material back to stable surfaces, eliminate moisture sources causing the damage, and apply proper bonding agent before rebuilding with fresh plaster compound. Addressing root causes like leaks or poor ventilation prevents the problem from recurring after repair.
How do you fix chalky plaster?
Chalky plaster fixes by first removing the deteriorated layer with a wire brush or putty knife until reaching firm material. Clean the surface thoroughly, apply bonding agent to improve adhesion, then rebuild with thin coats of plaster compound, allowing complete drying between layers.
How long should plaster dry between coats?
Plaster should dry a minimum of 24 hours between coats to prevent cracking and ensure proper adhesion. Rushing the process by applying new layers over damp material creates weak bonds that fail. Thicker base coats may require 48 hours before accepting the next application.
What causes plaster to crumble in old houses?
Plaster crumbles in old houses due to age-related wear, moisture infiltration from roof or plumbing leaks, foundation settling that creates stress cracks, and humidity fluctuations over decades. Lime-based historic plaster may also deteriorate when incompatible modern repairs trap moisture behind the surface.
Do you need to prime plaster before repairing?
You need to prime existing plaster edges with bonding agent before repairing to ensure proper adhesion of new material. PVA primer or acrylic bonding agent applied to bare plaster and exposed lath prevents delamination. After completing repairs, prime the entire patched area before painting.
When should you replace plaster instead of repairing?
You should replace plaster instead of repairing when damage covers most of a wall, sagging indicates lath failure, extensive moisture has compromised structural integrity, or multiple failed repair attempts show underlying problems. Professional assessment helps determine if replacement is more cost-effective than restoration.