


Ever notice how a room feels slightly off, even when you can’t put your finger on why? That odd sensation is often an uneven floor. Maybe a marble rolls across the kitchen on its own, or a door that used to close fine now drags on the floor. These aren’t small annoyances you ignore. They’re clues pointing to real problems underneath, from simple surface dips you can fix yourself to foundation issues that need professional help. Here’s how to figure out what’s going on and what actually works to level things out.
Inspecting Your Uneven Floors: Step-by-Step Assessment

The first step in fixing uneven floors is understanding what you’re actually dealing with. Walk through your home and pay attention to what your body tells you. That slight off balance feeling, the way your knee twitches when you step into a particular room, or how the refrigerator door swings closed on its own. These small clues point to specific problems, and the right inspection process helps you figure out whether you’re looking at a quick fix or a foundation issue that needs professional attention.
Clear the furniture from one room at a time so you can move freely and see the entire floor surface. Start your inspection with the marble roll test. Set a marble or small ball on the floor in different spots throughout the room and watch where it goes. If it rolls toward one wall consistently, you’ve got a slope in that direction. A marble that picks up speed as it rolls suggests a steeper slope, typically more than the 1/4 inch over 10 feet that most people start to notice. If the marble moves in different directions depending on where you place it, you might be dealing with a dip or sag rather than an overall tilt. Document where the marble rolls and how fast. This creates a pattern that tells you whether the problem is localized to one area or affects the whole room.
Next, grab a long straightedge. A 6 foot level works well, or a laser level if you have one. Place the straightedge across the floor in multiple directions: side to side, front to back, and at diagonals. Slide a ruler or tape measure under the gap between the straightedge and the floor at the lowest point. Anything less than 1/4 inch over 10 feet is considered acceptable in most building standards and usually isn’t noticeable. Between 1/4 inch and 1/2 inch, you’ll feel the unevenness, especially if you’re installing new flooring. A gap of 1 inch or more over a short distance signals a serious structural problem. Check the same spot from different angles because floors can sag in one direction while remaining level in another.
Walk across the floor normally, then try walking with a bit more weight in your step, and finally do a small jump test in the center of the room. Pay attention to how much the floor moves under your weight. A little bit of flex is normal in wood framed floors, but if you feel like you’re on a trampoline, or if you can see objects on shelves shake when you walk by, the floor joists underneath aren’t providing enough support. That bounce means the joists are either undersized for the span, damaged from moisture or insects, or spaced too far apart. While you’re walking, listen for squeaks and creaks. A few noises are normal in any home, but loud popping sounds or new squeaks that get worse over time often mean the subfloor is separating from the joists or the joists themselves are shifting.
Look at where the floor meets the walls. Run your hand along the baseboards in each room, checking for gaps between the baseboard and the floor. These gaps appear when floors sag or settle unevenly. Check door frames too. If there’s a growing gap at the top corner on one side, that whole section of floor has likely dropped. Open and close every door and window in the affected area. Doors that suddenly stick, won’t latch, or have gaps at the top were probably fine when installed, which means the floor (or the whole structure) has shifted since then. Windows that won’t open smoothly or show cracks in the corners of the frame point to the same kind of movement. Examine the walls and ceilings for cracks, especially diagonal cracks that run from the corners of doors or windows, or stair step cracks in brick or block foundations. These are red flags for foundation settlement.
If you can access the crawl space or basement beneath the uneven floor, go down there with a good flashlight. Look up at the floor joists and check for visible sag, cracks, splits, or dark staining that suggests water damage. Press a screwdriver into the wood in a few spots. If it sinks in easily, you’ve got rot that needs replacing. Look for standing water, damp soil, or that musty smell that means moisture is a chronic problem. Check the support posts and beams that hold up the joists. Are the posts sitting on concrete pads, or are they resting directly on dirt? Posts on dirt will sink over time. Look for posts that are leaning, rusted, or sitting on deteriorated wood plates. Count how many support posts you see. If the joists span a long distance with no middle support, that explains the bounce and sag.
Take photos of everything you find: the gaps at baseboards, any cracks in walls or foundations, the view looking up at the joists, and measurements from your straightedge test. Write down which rooms are affected and how severe the problem appears in each one. Note when you first noticed the issue and whether it’s stayed the same or gotten worse. This documentation helps when you talk to contractors, and it creates a baseline if you decide to monitor the problem for a while before taking action.
Now you’ve got enough information to make a decision. If your inspection found minor unevenness (less than 1/4 inch dip, limited to one small area, solid subfloor with no bounce, no cracks or moisture), you can handle that yourself with surface leveling methods. If you found sagging floors, excessive bounce, foundation cracks, multiple affected rooms, moisture damage, or a slope of more than 1 inch, the problem is structural. That requires a professional assessment before any work starts. Trying to patch over structural damage with cosmetic fixes just hides the problem temporarily and often makes it worse. Foundation settlement, inadequate support posts, rotted joists, and water intrusion all need proper repairs that address the root cause, not the symptom.
Surface Level Floor Leveling with Self Leveling Compound
Self leveling compound fixes minor surface irregularities on concrete slabs and stable plywood subfloors. This works for shallow dips less than 1 inch deep, small low spots where concrete settled slightly, or preparing an old floor for new tile or laminate. It does not fix structural sag, weak subfloors, or foundation settlement. If the floor bounces when you walk on it, do not use self leveling compound. Adding more weight to a weak floor makes the problem worse.
Before pouring anything, the surface needs proper preparation. Sweep and vacuum thoroughly to remove all dust, debris, and loose material. Fill any cracks wider than 1/8 inch with concrete crack filler and let it cure according to the product instructions. If the concrete is flaking or has loose sections, grind those down until you reach solid material. Apply a primer designed for self leveling compound using a paint roller, covering the entire area plus about 6 inches beyond the edges. The primer helps the compound bond to the old surface and controls how fast moisture gets absorbed, which affects how the compound flows and levels. While the primer is still slightly tacky (timing varies by product, usually 1 to 3 hours), install a perimeter dam along doorways and room edges using wood strips or foam barriers. This keeps the compound from flowing into adjoining rooms.
Mix the self leveling compound exactly according to the bag instructions. Use a heavy duty drill with a paddle mixer attachment and work the mix for the full recommended time to break up all lumps. Most products require a specific water to powder ratio. Too much water weakens the compound, and too little makes it thick and less self leveling. Pour the mixed compound starting at the farthest corner from the door and work backward toward your exit. The compound will begin to flow and seek its own level, but you’ll speed the process and eliminate bubbles by spreading it with a gauge rake or smoothing tool. Work quickly because most compounds start to set within 10 to 20 minutes. Have a helper mix the next batch while you pour so you can keep the process moving without gaps or seams. Typical coverage runs about 50 square feet per 50 pound bag at 1/4 inch thickness, with costs around $30 to $40 per bag.
Plan for 24 to 48 hours before walking on the floor, and follow the manufacturer’s cure time before installing finished flooring, usually 3 to 7 days depending on thickness and humidity. The surface might feel dry after a day, but the compound needs that full cure time to reach maximum strength. Installing flooring too early can cause adhesive failure or cracking.
Never use self leveling compound over bouncy wood subfloors, on floors with active foundation settling, or as a way to avoid structural repairs. The compound adds weight without adding strength. Pouring it over a weak subfloor increases the load on already failing joists and speeds up the deterioration. If your inspection revealed foundation cracks, sagging joists, or moisture damage, address those problems first. Trying to level a settling foundation with floor compound is like painting over a leak. It looks better for a few weeks, then fails in a worse way than before.
Repairing and Replacing Damaged Wood Subfloors
Soft spots, dark staining, a spongy feeling underfoot, or that sour rot smell all point to subfloor damage. Walk across the suspected area slowly. If the floor gives more than it should or if the finished flooring has cracks directly above a soft spot, you’ve probably got water damaged plywood underneath. Go to the crawl space or basement and look up at that section. Press a screwdriver into the bottom of the subfloor. If it penetrates easily or if you see dark stains, flaking wood, or actual holes, those sections need replacing.
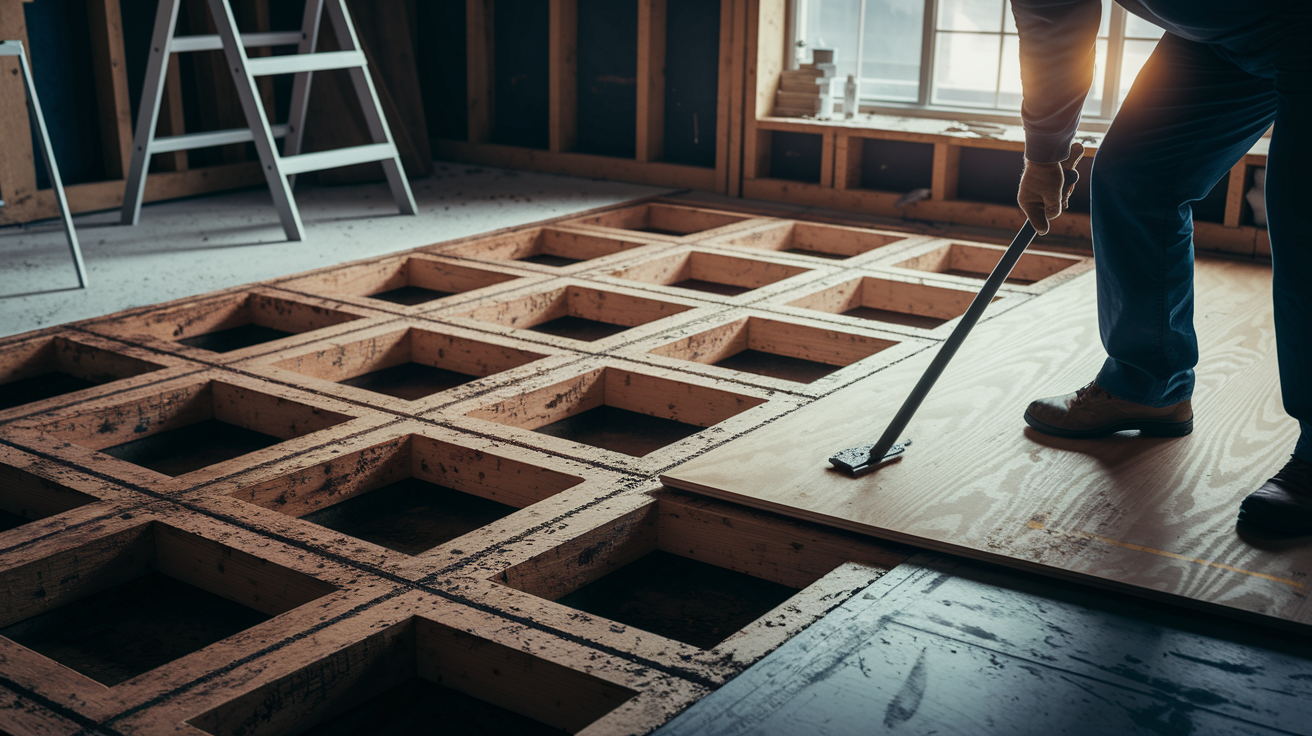
Pull up the finished flooring in the damaged area. Remove enough to give yourself clear working space around the damage plus at least one floor joist on each side. Once the subfloor is exposed, mark the boundaries of the damaged section. Use a chalk line to snap straight cut lines, making sure each cut line falls on the center of a floor joist so the new plywood will have solid support on all edges. Set your circular saw to cut just the depth of the subfloor (usually 3/4 inch) without cutting into the joists below. Make your cuts, then pry out the damaged section. You’ll probably need a pry bar and some persuasion. Old construction adhesive and decades old nails don’t let go easily. Pull all the old nails and clean the joist tops so the new plywood sits flat.
Measure the hole carefully and cut new plywood to fit. Match the thickness exactly. If you pull out 3/4 inch plywood, replace it with 3/4 inch material, usually CDX grade or better. Apply a bead of construction adhesive along the top of each joist where the new plywood will rest. Set the new section into place, making sure the edges land on joist centers with good support. Fasten it down with 2 inch coated deck screws or ring shank nails every 6 to 8 inches along each joist, and add screws every 6 inches around the perimeter. Stagger the seams if you’re replacing multiple sections. Don’t line up all the joints in one straight row. This creates a stronger, more stable subfloor. The new plywood should sit flush with the old subfloor or slightly below, not raised above it.
This entire repair fails if you don’t find and fix the water source first. Subfloors rot because water reached them, usually from roof leaks, plumbing leaks, poor exterior drainage, or crawl space moisture. If you just replace the rotted wood without stopping the water, the new plywood will rot too. Check gutters, downspouts, under sink plumbing, toilet seals, and crawl space moisture before you do the subfloor work. If the damage covers more than a few square feet, or if multiple areas in different rooms show rot, the moisture problem is bigger than a DIY fix. Call a professional to trace the water intrusion and deal with it correctly before you spend time and money replacing subfloors that will just rot again.
Fixing Structural Issues: Floor Joists and Support Problems
Excessive bounce, visible sag when you look across the room, or a floor that feels like it’s sinking in the middle all point to joist problems. Go underneath and look up. You’re checking for joists that sag between supports, joists with cracks or splits, undersized joists that were never strong enough for the span, or joists with big notches or holes cut through them for plumbing or wiring. If you see any of those, the floor structure itself needs repair, not just the surface.
Sistering Damaged or Undersized Joists
Sistering means attaching new lumber directly alongside the old joist to add strength and support. This works when the existing joist is cracked, split, undersized, or damaged on one side but still has some structural integrity left. Buy lumber that matches the existing joist dimensions. If you’re looking at 2×8 joists, sister them with new 2x8s (actual dimensions are 1.5 inches by 7.25 inches). Cut the new joist to the same length as the old one, or run it full length from bearing wall to bearing wall if you have access. Apply a heavy bead of construction adhesive along the entire length of the new joist where it will contact the old one. Press it firmly against the old joist and fasten it with 3 inch structural screws or 16d nails every 12 to 16 inches in a staggered pattern. Three rows is better than two. Make sure the sister joist sits fully on the same bearing points (the sill plate or beam) as the original. If the old joist has sagged, you might need to jack it up to level before sistering. Use a hydraulic jack or screw jack under the joist midspan, place a beam across several joists to spread the load, and raise slowly over several days to avoid cracking drywall or finishes above.
Installing Support Posts and Beams
When floor joists span too far without support, adding permanent posts and beams underneath stops the sag and bounce. This works in crawl spaces or basements where you have headroom to work. Start by determining where support is needed, usually at the midpoint of the joist span. You’ll install a beam that runs perpendicular to the joists, then support that beam with posts every 6 to 8 feet. For the beam, use either a steel I beam or a built up wood beam made from three 2x8s or 2x10s nailed together. Set the beam into joist hangers attached to the rim joists at each end, or rest it on pockets in the foundation wall if you’re lucky enough to have them. Under each post location, pour a concrete footing pad at least 12 inches square and 8 inches thick, set below the frost line if you’re in a cold climate. This keeps the posts from sinking into the soil. Let the concrete cure for at least 3 days before loading it. Install adjustable steel jack posts on the footings, positioning them plumb and adjusting the height so the beam just touches the joists above. Slowly raise the posts over days or weeks, making small adjustments each time, until the floor above returns to level. Replace temporary adjustable posts with permanent posts (steel columns or 6×6 treated wood) once the floor is level and stable.
When Professional Structural Assessment Is Required
Some floor problems are beyond DIY capability, and trying to fix them yourself risks making things worse or creating dangerous conditions. If the joists you need to repair run under a load bearing wall, call a structural engineer before you touch anything. Modifying or removing support under a load bearing wall can cause that wall to sag or the roof to drop. If joists span more than 16 feet, code usually requires an engineer’s stamp on the repair plan, and most building departments won’t issue a permit without it. If your home has multiple levels and the floor problem affects the lower one, the loads above multiply the complexity. If previous foundation work or structural repairs were done, any new work needs to integrate correctly with what’s already there. A structural engineer charges $500 to $1,500 for a consultation and stamped drawings, but that engineering prevents catastrophic mistakes that cost tens of thousands to fix.
Addressing Foundation Settlement and Major Leveling Issues

When floor problems show up in multiple rooms, when the slope gets progressively worse over months or years, when you see cracks in the foundation walls or in the drywall at corners of doors and windows, or when doors won’t close because the frames have shifted, you’re not dealing with just a floor problem. The foundation itself is settling unevenly. That marble you rolled during inspection probably picked up speed as it headed toward one side of the house. Look outside at the foundation perimeter. Stair step cracks in brick veneer or horizontal cracks in concrete block are confirmation. This is differential settlement, meaning one part of the house is sinking while another stays put.
Foundation settlement happens when the soil underneath loses the ability to support the weight above it. Water intrusion is the most common cause. When soil gets saturated from poor drainage, leaking gutters, or a high water table, it softens and can’t hold the load. As the water drains away, the soil compacts, leaving voids or less dense areas that allow the foundation to sink. Expansive clay soils (common across much of the country) swell when wet and shrink when they dry out. That cycle lifts the foundation when it rains, drops it during drought, and over time creates permanent settlement as the soil compaction never fully recovers. Erosion under the foundation happens when water flows underneath, carrying soil particles away and leaving gaps. Old tree roots that decay or removal of large trees can also cause soil voids. Whatever the specific cause, the result is the same: the foundation loses support and drops, and everything above it follows.
Push piers and helical piers are permanent solutions for settled foundations. Both systems transfer the foundation load to deeper, stable soil or bedrock that isn’t subject to the same moisture and compaction problems. A foundation contractor excavates next to the foundation at intervals (typically 6 to 8 feet apart, depending on the load and soil conditions), then drives steel piers into the ground. Push piers are driven straight down using the weight of the house itself as resistance. The pier pushes against the foundation and the foundation’s weight pushes back until the pier reaches load bearing strata. Helical piers look like giant screws. They twist into the soil until they reach stable depth, usually 15 to 30 feet down but sometimes much deeper depending on soil conditions. Once the piers are at depth, heavy duty brackets attach them to the foundation and hydraulic jacks apply lift, raising the foundation back toward its original level as much as practical. The goal isn’t always perfectly level. Sometimes that’s not structurally possible after years of settlement, but to stabilize the foundation and stop further movement. Once the foundation is lifted, the piers hold it there permanently.
For concrete slab foundations, mudjacking and foam injection are common repair methods when the slab has settled. Mudjacking pumps a cement based slurry through holes drilled in the slab. The slurry fills voids underneath and then lifts the slab from below. Foam injection (also called polyurethane foam leveling) uses expanding foam instead. The foam weighs much less than concrete slurry, expands to fill voids, and cures quickly. Both methods work well for slabs that have dropped because soil underneath settled or eroded, but they don’t work if the slab is cracked all the way through or if ongoing soil problems will cause re settling.
Foundation work isn’t cheap. Expect $1,500 to $3,000 per pier installed, and a typical home might need 6 to 12 piers depending on how many areas have settled. Total foundation stabilization projects run $5,000 to $15,000 or more for serious settlement affecting multiple walls. Slab lifting with mudjacking or foam injection typically costs $3,000 to $7,000 depending on square footage and how much lift is needed. These numbers vary by region, soil conditions, and how much access contractors have to work areas. This is not DIY work. Foundation repairs require licensed contractors with specialized equipment, engineering analysis to determine pier placement and depth, permits from the building department, and inspections during and after the work. Most reputable foundation contractors provide warranties (often transferable to future buyers) that guarantee the piers will hold and the foundation won’t settle further. That warranty adds real value to your home. Ignoring foundation settlement doesn’t save money. The damage accelerates, repair costs increase, and your property value drops as buyers walk away from homes with obvious structural problems.
Preparing Uneven Subfloors for New Flooring Installation
Most flooring manufacturers void the warranty if you install their product over a subfloor that doesn’t meet flatness specifications. That’s because uneven subfloors cause finished flooring to fail. Tile cracks when it bridges a dip instead of resting on solid support. Hardwood and laminate develop gaps between planks or snap at the tongue and groove joints when the floor flexes over low spots. Vinyl plank telegraphs every bump and dip in the subfloor, showing through the surface. Even carpet wears unevenly when padding compresses differently over high and low spots.
Check your flooring manufacturer’s installation instructions for the specific flatness requirement before you start work. Most call for no more than 3/16 inch variance over a 10 foot span, and some tile installations require even tighter tolerance, 1/8 inch over 10 feet. Test with a straightedge in multiple directions, measuring the gap underneath as described in the inspection section. If the floor is outside tolerance, you need to level it before the new flooring goes down. For high spots, rent a floor sander or grinder and knock them down until they’re within spec. For low spots, you have choices depending on the size and depth. Small shallow dips can be filled with floor leveling compound or floor patch applied in thin layers and feathered out at the edges. Deeper dips or whole room leveling work better with self leveling compound (if the subfloor is solid) or by installing a new plywood underlayment layer across the entire floor.
A plywood underlayment layer solves multiple problems at once. It creates a smooth, flat surface over an old subfloor that has too many imperfections to patch individually. It adds stiffness to floors that feel slightly bouncy but don’t have serious structural problems. And it provides a clean nail free surface for glue down or floating floors. Use 1/4 inch to 1/2 inch plywood (1/2 inch adds more stiffness), attach it with construction adhesive and screws or staples every 6 inches, and stagger the seams so they don’t line up with the subfloor seams below. Fill any gaps or seams with floor patch, then sand smooth. The result is a flat, stable base that meets the tolerance requirements for any flooring type.
| Flooring Type | Flatness Requirement | Underlayment Notes |
|---|---|---|
| Ceramic or Porcelain Tile | 1/8 inch over 10 feet | Requires stiffest subfloor; deflection must not exceed L/360; cement board often required |
| Solid Hardwood | 3/16 inch over 10 feet | Install over plywood or OSB subfloor; requires 3/4 inch total thickness minimum |
| Engineered Wood | 3/16 inch over 10 feet | Can install over concrete with moisture barrier or over plywood with underlayment pad |
| Laminate Flooring | 3/16 inch over 10 feet | Foam underlayment cushions minor imperfections but won’t fix out of level subfloors |
| Luxury Vinyl Plank | 3/16 inch over 10 feet | Shows every subfloor imperfection; requires smooth substrate; self leveling compound often needed |
| Carpet | 1/4 inch over 10 feet | Most forgiving option; padding hides minor unevenness but won’t fix structural sag or major slopes |
Quick Fixes and Temporary Solutions for Minor Floor Unevenness
These are not structural repairs. They address symptoms and provide temporary relief while you save for proper repairs or while you decide whether the problem is worth fixing at all. Understand that temporary solutions don’t stop a problem from getting worse. They just make living with it more tolerable for a while. If the underlying issue is foundation settlement or structural deterioration, these measures buy you time but not a cure.
If you’ve got a slope across the kitchen or living room, furniture and appliances sitting on that slope will lean or wobble. Adjustable furniture levelers (screw on feet available at hardware stores) let you compensate for the tilt and keep tables, chairs, and cabinets sitting stable. For appliances like refrigerators and stoves, rubber shims or plastic leveling shims under the low side bring them back to plumb. Make sure the refrigerator is level side to side so the door seals properly and the compressor oil flows correctly. Adjustable legs on most appliances handle up to an inch of floor slope before you need additional shims.
Transition strips and thresholds manage height differences where floors in adjacent rooms don’t line up. If you’ve repaired one room and leveled the floor but didn’t do the same to the next room, the height difference at the doorway creates a tripping hazard and an awkward visual break. T molding transitions cover the joint between floors of the same height. Reducer strips slope down to accommodate a height difference of up to 1/2 inch. Threshold strips with a gradual ramp work for differences up to 3/4 inch. These strips come in wood, metal, vinyl, and composite materials to match your flooring. They don’t fix the unevenness, but they make the transition safer and cleaner looking than a raw edge.
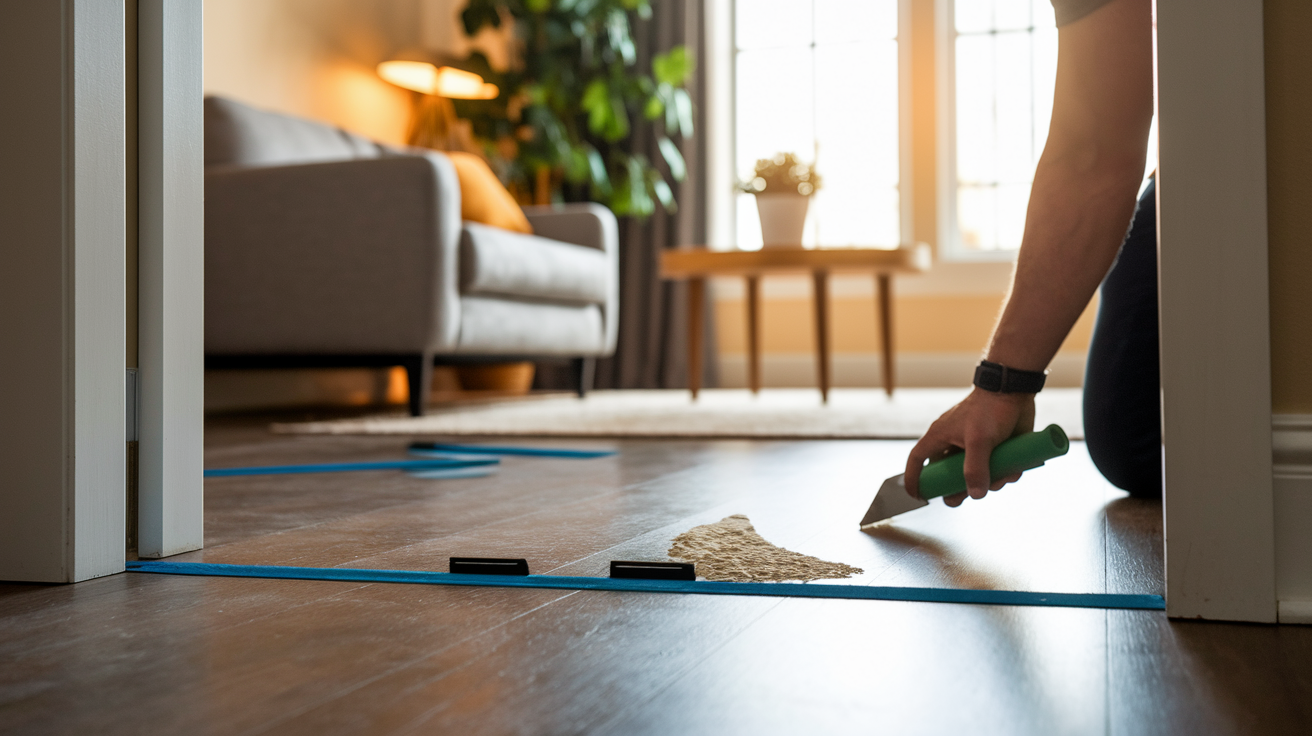
For very small dips and depressions in concrete or wood subfloors (places where something heavy sat for years and compressed the surface, or spots where old flooring adhesive left a low area), feathering technique works as a quick patch. Use floor patch compound (not self leveling compound) mixed slightly thicker than the package directions suggest. Trowel it into the low spot, then feather the edges out thin so there’s no sudden ridge. Let it dry, sand smooth if needed, and repeat if the dip is still visible. This works for depressions 1/8 inch deep or less over a small area, not for sagging floors or wide dips. It’s a cosmetic fix that makes the surface feel smoother underfoot or prepares a small section for new flooring, but it doesn’t add structural support.
While you’re saving money for the real fix, these small interventions make the space more livable. Just don’t mistake them for actual repairs, and don’t delay structural work thinking that a shimmed appliance or a patched dip has solved the underlying problem. The foundation is still settling, the joist is still rotting, or the subfloor is still deteriorating, just out of sight.
Cost Breakdown: Budgeting for Uneven Floor Repairs
What you spend depends on what’s actually wrong. A minor surface leveling project in one small room costs very different money than foundation stabilization under half the house. Square footage matters. Bigger areas cost more in materials and labor. The severity drives the price too. Surface work is cheap compared to structural work. And your local market affects labor rates. Urban areas and high cost of living regions run significantly higher than rural areas.
DIY repairs save on labor but come with risk. You might spend $200 on self leveling compound and tools, do the work yourself, and get a good result if the problem really was just minor surface unevenness. Or you might spend $200, do the work, and three months later realize the floor is still sinking because you didn’t address the foundation issue underneath. Professional contractors charge diagnostic fees ($150 to $500 depending on what inspection involves), but that money buys you an accurate assessment of what’s wrong and what it will actually take to fix it. A foundation specialist or structural engineer can tell you whether your floor problem needs a $1,000 repair or a $15,000 repair. Knowing that before you start work is worth the inspection cost.
Early fixes cost less than delayed fixes. A rotted subfloor section caught early might cost $800 to repair. Wait two years, and the rot spreads to the joists underneath and costs $3,500 to fix because now you’re sistering joists and replacing more subfloor. Foundation cracks that get ignored don’t heal themselves. They get longer and wider, and the foundation drops further. A $6,000 pier installation today beats a $20,000 foundation reconstruction five years from now. Temporary fixes don’t eliminate the need for real repairs. They just postpone them while the damage compounds.
| Repair Type | DIY Cost Range | Professional Cost Range | Typical Timeline |
|---|---|---|---|
| Self Leveling Compound (one room) | $150 to $400 | $600 to $1,200 | 1 to 2 days (plus cure time) |
| Subfloor Replacement (small area) | $200 to $600 | $800 to $2,000 | 1 to 3 days |
| Joist Sistering (2 to 4 joists) | $300 to $800 | $1,500 to $3,500 | 2 to 4 days |
| Crawl Space Support Posts (2 to 4 posts with footings) | $400 to $1,000 | $2,000 to $4,500 | 3 to 5 days |
| Whole Room Leveling (200 to 300 sq ft) | $500 to $1,200 | $1,800 to $4,000 | 2 to 4 days |
| Foundation Pier Installation (per pier) | Not DIY suitable | $1,500 to $3,000 each | 1 to 2 weeks for full project |
| Comprehensive Structural Repair (foundation, joists, subfloor) | Not DIY suitable | $8,000 to $25,000+ | 2 to 4 weeks |
Safety Considerations and Protective Measures During Floor Repair
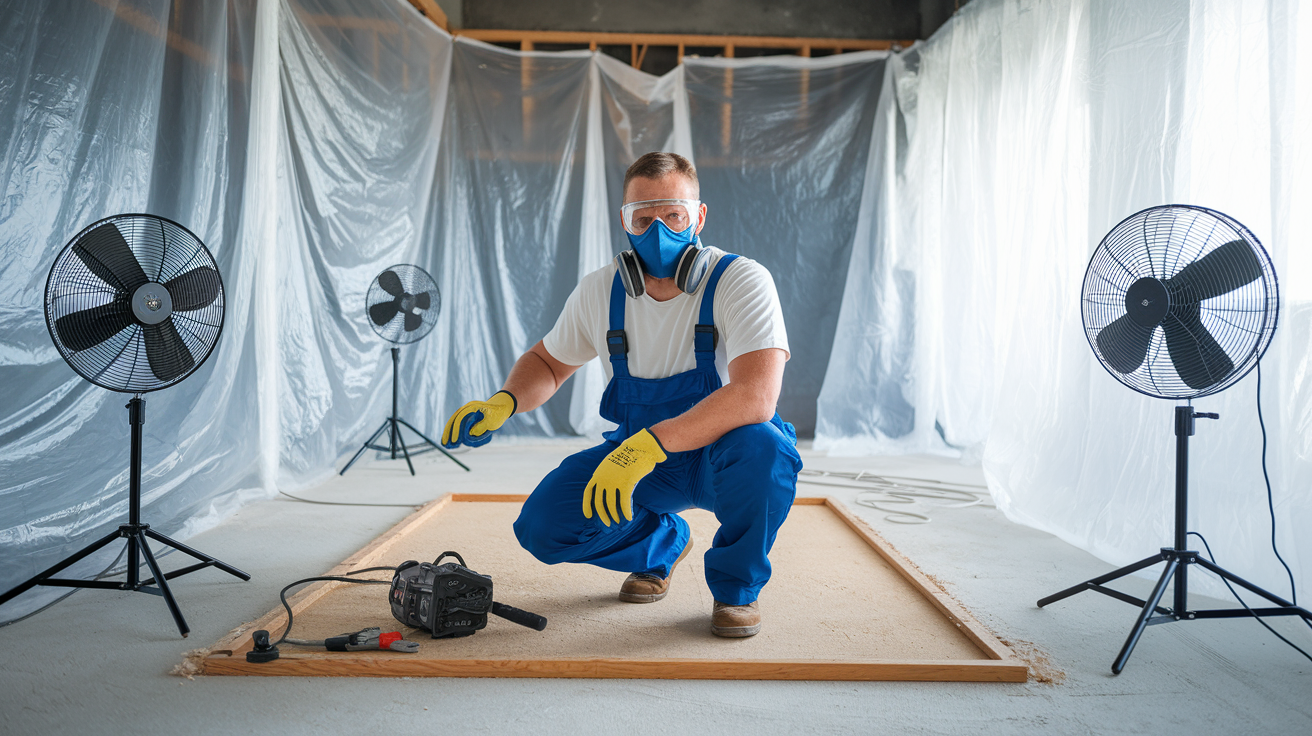
Floor repair means tearing into your home’s structure, and that brings risks for both the people doing the work and the people living there. If you’re doing DIY work, plan to move family members and pets out of the work area entirely. Dust, noise, fumes from adhesives and compounds, and exposed subfloor openings all create hazards. Even professional contractors need you to clear spaces, cover belongings, and sometimes relocate to another part of the house during heavy demo or foundation work. Set up temporary barriers (plastic sheeting on lightweight frames) between the work zone and occupied areas to control dust migration. Schedule major work during times when vulnerable household members (infants, elderly, anyone with respiratory issues) can stay elsewhere.
Worker safety comes first when cutting into floors. Before you make any cuts through a subfloor, locate electrical wiring, plumbing lines, and HVAC ducts that might run underneath. A metal detector or stud finder with wire detection mode helps avoid electrical cables, but the safest approach is to turn off power to that area at the breaker panel while cutting. When removing sections of subfloor or joists, install temporary supports before cutting anything load bearing. Never remove structural elements without providing alternative support first. Use proper lifting techniques when handling full sheets of plywood, and get help for anything over 50 pounds. Crawl spaces and basements add hazards: low headroom, poor lighting, slippery surfaces, potential mold exposure, and limited ventilation. Work with a partner when you’re under the house so someone can get help if you’re injured.
Wear N95 respirators or better when sanding, cutting pressure treated wood, or working in musty crawl spaces. Dust masks don’t provide adequate protection. Eye protection and hearing protection are non negotiable when operating saws, grinders, or pneumatic tools. Set up cross ventilation with fans when using adhesives, primers, or self leveling compounds that release VOCs. Hang plastic sheeting to contain dust. Tape it at the top and weight the bottom so it doesn’t blow around. Install temporary supports (sister boards clamped or screwed alongside existing joists) before cutting or removing any structural members. Turn off electrical circuits in the work area and test outlets with a non contact voltage tester before cutting into walls or floors. Check local codes for asbestos and lead paint testing requirements if the home was built before 1980. Disturbing these materials requires specialized handling. Use fall protection (harness and lanyard) when working on floor openings, especially if the repair involves a second story floor over a lower level. Keep fire extinguisher nearby when using heat guns, soldering copper pipes, or working around sawdust and flammable materials.
After the structural repairs are complete, add protective measures that reduce the chance of future damage. Install a 6 mil polyethylene vapor barrier over bare soil in crawl spaces to control moisture rising from the ground. If your repair involved moisture damage, consider upgrading crawl space ventilation or adding a dehumidifier set to maintain humidity below 55 percent. These investments extend the life of your repairs and protect the new materials you just installed. Safe access matters too. If crawl space access was difficult during the repair, improve it now. Install better lighting, a solid ladder, and clear pathways so future inspections are easier and safer.
Preventing Future Floor Problems: Maintenance and Monitoring
Fixing a floor problem once is expensive and disruptive. Fixing it again because you didn’t address the cause is worse. Most floor issues trace back to water in places it doesn’t belong. Control moisture, and you
Final Words
Uneven floors rarely fix themselves, and waiting usually makes them worse and more expensive.
Start with a clear inspection to separate the surface issues from the structural problems. Self-leveling compound and subfloor patches work well for minor dips and cosmetic fixes, but they won’t solve foundation settlement or joist damage.
When you’re dealing with serious slope, bounce, or foundation cracks, call a licensed contractor who specializes in structural work. Those repairs protect your home’s value and keep your family safe.
Learning how to fix uneven flooring means knowing when to grab a trowel and when to step back and make the call.
Get the cause right, and the repair will hold.
FAQ
Can an uneven floor be fixed?
An uneven floor can be fixed through several methods depending on the cause and severity. Minor surface irregularities respond well to self-leveling compound, while structural problems like foundation settlement or damaged joists require professional repairs including pier installation, joist sistering, or subfloor replacement to restore a level surface.
Can uneven floors cause vertigo?
Uneven floors can cause dizziness or balance issues, particularly when the slope is gradual enough that your eyes don’t register it but your inner ear detects the imbalance. Walking across sloped surfaces forces your body to constantly adjust, which can trigger feelings of vertigo or unsteadiness, especially in elderly individuals or those with existing balance problems.
Is it normal for a 100 year old house to have uneven floors?
Uneven floors in a 100-year-old house are common due to foundation settlement, joist shrinkage, and decades of soil movement beneath the foundation. While some minor settling is typical in older homes, progressive sloping, new cracks, or floors that continue getting worse indicate active structural problems that need assessment regardless of the house’s age.
How to straighten an uneven floor?
Straightening an uneven floor depends on the cause. Surface irregularities under 1 inch work with self-leveling compound. Damaged subfloors need plywood replacement. Sagging joists require sistering new lumber alongside existing joists or adding support posts beneath them. Foundation settlement demands professional pier installation to stabilize the structure before leveling floors above.
What tools do I need to measure floor unevenness?
Measuring floor unevenness requires a straightedge or laser level to check deviation across the floor surface, a marble or ball to test for rolling and identify slope direction, and a tape measure to quantify height differences. Measurements exceeding 1/4 inch over 10 feet indicate noticeable unevenness, while 1 inch or more signals serious structural problems.
When should I use self-leveling compound on floors?
Self-leveling compound works for minor surface irregularities less than 1 inch on stable concrete slabs or solid subfloors when preparing for new flooring installation. This method addresses cosmetic unevenness only. Avoid using it on bouncy subfloors, over foundation settlement, or where structural sagging exists, as adding weight to weak floors worsens underlying problems.
How do I know if my subfloor is damaged?
Damaged subfloors show soft spots when you walk across them, visible discoloration or water stains, musty odors indicating rot, and excessive bounce or deflection. Probe suspect areas with a screwdriver to check for punky wood that indicates moisture damage. Damaged sections need complete replacement after eliminating the moisture source causing the deterioration.
What is sistering a floor joist?
Sistering a floor joist means attaching new lumber alongside an existing damaged or undersized joist to add strength and eliminate sagging. The new board runs the full length, fastened with construction adhesive and screws or nails every 12 inches. This technique works when joists are weak but not completely failed or rotted through.
How much does foundation repair for uneven floors cost?
Foundation repair costs typically range from $1,500 to $3,000 per pier, with complete projects running $3,000 to $10,000 or more depending on severity and home size. Simpler repairs like subfloor replacement cost $500 to $2,000 for a room, while whole-room leveling runs $2,000 to $5,000. Foundation work requires licensed professionals and proper permits.
Can I install new flooring over an uneven subfloor?
Installing new flooring over an uneven subfloor leads to premature failure, cracked tiles, warped hardwood, and voided warranties. Most flooring manufacturers require subfloors level within 1/4 inch over 10 feet. Tile needs the flatest surface while carpet tolerates minor unevenness. Proper subfloor preparation prevents expensive flooring damage and ensures warranty coverage.
What causes foundation settlement under floors?
Foundation settlement occurs when soil beneath the foundation compresses unevenly from water intrusion weakening the ground, expansive clay soils swelling and shrinking with moisture changes, or erosion washing away supporting soil. Poor drainage, plumbing leaks, and inadequate original foundation depth contribute to differential settlement that creates sloped, uneven floors throughout the home.
How do I prevent moisture damage to subfloors?
Preventing moisture damage requires fixing the source first: repair roof leaks, extend downspouts away from the foundation, improve yard grading for drainage, install gutters, and seal crawl spaces with vapor barriers. Use dehumidifiers in damp areas, fix plumbing leaks immediately, and ensure proper crawl space ventilation to keep subfloors dry and structurally sound.