


Ever notice how water damage always shows up right after you ignore that tiny ceiling stain for six months? Fixing water damaged drywall isn’t about slapping on some spackle and calling it done. It’s about stopping the leak, drying everything completely, cutting out what’s actually ruined, and rebuilding the wall properly so it doesn’t fail again in three months. Rush the drying phase or skip the stain blocking primer, and you’ll be staring at brown spots bleeding through your fresh paint before summer’s over.
Quick-Reference Repair Overview and Process Phases

Fixing water damaged drywall isn’t complicated, but it does require you to follow a specific order. Skip a step or rush through drying, and you’re setting yourself up for mold or a repair that fails in a few months.
Phase 1: Assessment and Preparation starts with figuring out how bad the damage actually is. Use moisture readings if you’ve got a meter, or just press on the wall and look for soft spots. Stop the water source completely. Then wait for everything to dry out, which could take a few days or stretch into weeks depending on how soaked things got (more on this in Sections 2 and 3).
Phase 2: Material Removal and Support means cutting out the bad drywall at least 6 to 12 inches past what looks damaged. You’ll need backing support where framing isn’t accessible, and you’ve got to prep the opening so the new piece actually has something solid to attach to (covered in Sections 6 and 7). Clean cuts make everything easier later.
Phase 3: Patching and Finishing is where you install the replacement drywall, making sure it matches the original thickness. Tape all your seams with mesh or paper tape, then apply joint compound in multiple coats. Start with a 4 to 6 inch knife for the first coat, move up to 8 to 10 inches for the second, and finish with a 12 inch knife. Each coat needs at least 24 hours to dry before you touch it again (Sections 7 through 9 walk you through this).
Phase 4: Surface Preparation and Painting comes after your final coat dries. Match whatever texture is on the rest of the wall, then use stain blocking primer. Not regular primer, the shellac based or oil based kind that actually locks in water stains. Finish with color matched paint in the right sheen (Sections 10 and 11 cover this). If you use standard latex primer, those stains will bleed right through.
Before you grab any tools, understand that successful repairs start with proper damage assessment (Section 2) and completely stopping wherever the water’s coming from (Section 3). You can’t skip these steps or rush them. Starting repairs while moisture is still getting into the wall leads to repeat damage, mold growth, and wasted effort.
Take time to assess what you’re actually dealing with and gather everything you need (Sections 4 and 5) before you start cutting into the wall. Nothing’s worse than having the wall open and realizing you’re missing something critical.
Identifying Water Damage Signs and Assessing Severity Before Repair
Proper assessment tells you whether this is something you can handle yourself or if you need to call someone. The difference between minor surface damage and actual structural problems isn’t always obvious just by looking.
Look for these visible signs:
- Brown stains or discoloration spreading across the surface
- Bubbling or peeling paint that’s loose and flaking
- Sagging sections where the drywall is pulling away from the framing
- Soft spots that feel spongy when you press gently
- Watermarks that keep spreading even after the water source stops
- Visible mold showing up as dark spots or fuzzy patches
Press gently on stained areas to evaluate what’s going on underneath. Repairable damage shows some bubbling, staining, or sagging with noticeable softness, but the drywall basically holds its shape. Damage that needs replacement includes significant browning, sections that have fallen, mold growth, or spreading watermarks that tell you saturation goes deeper than just the surface.
Use a moisture meter if you’ve got one to check readings in the affected area and the framing around it. Wood framing above 15 to 17% moisture means you absolutely need more drying time before starting any repair work. Without a moisture meter, wait until the wall feels completely dry and any musty smell has disappeared.
Document everything with photos and videos before you start. Get wide shots showing the full affected area and close ups of specific damage points. This supports insurance claims and helps you track progress, but more importantly, it creates a record if additional damage shows up later during the repair.
Stopping the Leak Source and Drying Out Water Damaged Areas

Repairing drywall without fixing the leak is pointless. Water will keep entering the wall cavity, saturating new materials and creating perfect conditions for mold. Finding and stopping the moisture source isn’t optional prep work, it’s the foundation that determines whether your repair lasts years or fails quickly.
Common water sources include missing roof shingles that let rain in, burst pipes or slow plumbing leaks inside walls, clogged gutters that overflow and soak exterior walls, condensation from poorly insulated pipes, and appliance leaks from washing machines or water heaters. Stop the water immediately by turning off local shut off valves under sinks or behind toilets, or shut off the main water supply if you can’t isolate the specific line. For roof leaks, temporary tarps prevent additional water entry until you can get permanent repairs done.
Once the water source is eliminated, the affected area must dry completely before you close it back up. Point fans directly at the damaged area and run a dehumidifier to pull moisture from the air. Open windows if weather permits to increase ventilation. Drying time ranges from 3 days to several weeks depending on how saturated things are and ambient humidity. Thicker walls, insulation that absorbed water, and humid climates all extend how long this takes.
After you remove damaged drywall sections (Section 6 covers this), inspect the wall cavity for wet studs and insulation. Press on exposed wood framing to check for soft spots or visible moisture. Everything must be completely dry before you install the patch. Wet studs feel cool to the touch and may show visible moisture or darkening. If you’re uncertain, wait another three to five days with fans running. Installing new drywall over damp framing traps moisture inside the wall, where it promotes mold and causes the new patch to fail.
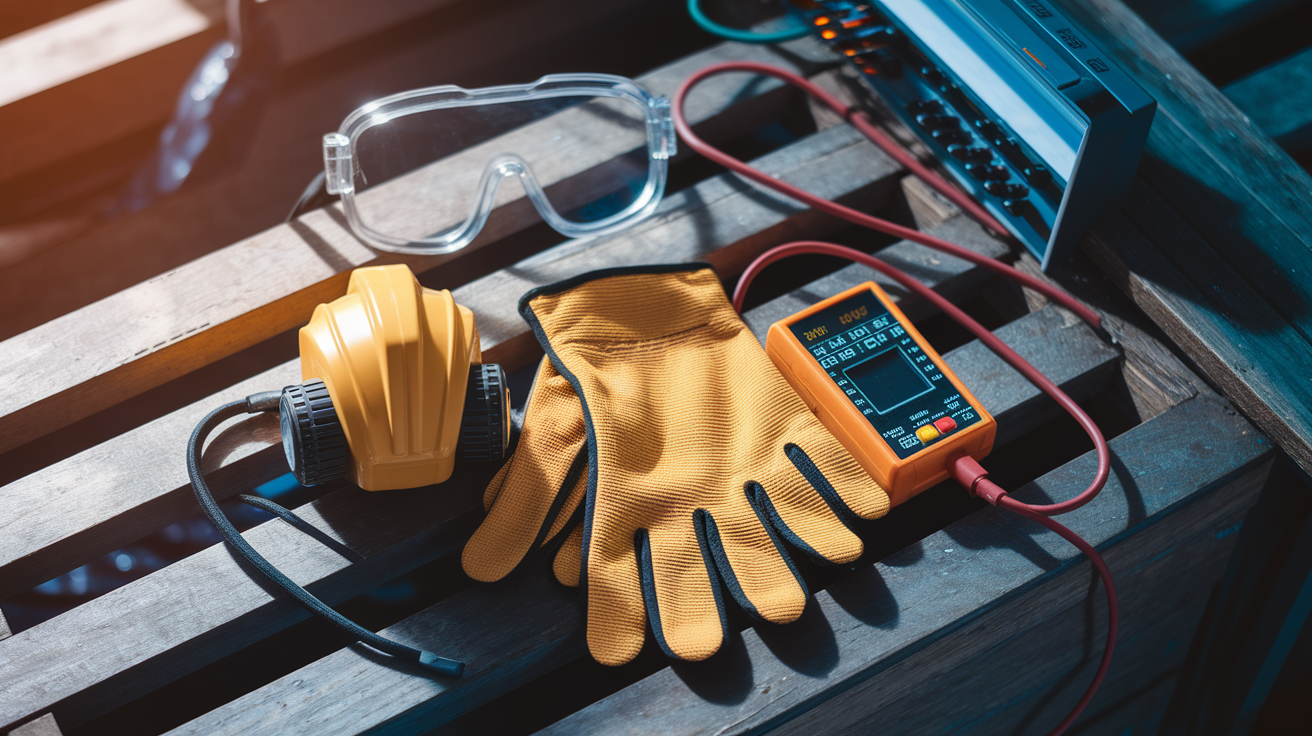
Essential Tools and Materials for Drywall Water Damage Repair
Having everything ready before you start prevents frustrating delays once you’ve opened the wall and discovered you’re missing something critical.
| Item | Purpose | Specifications |
|---|---|---|
| Utility knife | Scoring and cutting drywall | Sharp retractable blade with extra blades |
| Drywall saw | Removing damaged sections | Dedicated saw with sharp point for plunging |
| Putty knives (set of 3) | Applying joint compound | 4 to 6 inch for first coat, 8 to 10 inch for second coat, 12 inch for final coat |
| Joint compound | Filling seams and creating smooth surface | Premixed all purpose compound |
| Drywall tape | Reinforcing seams | Paper tape for flat seams, mesh tape for patches |
| Replacement drywall | Patching damaged area | 1/2 inch or 5/8 inch matching original thickness |
| Drywall screws | Securing patch to framing | 1 1/4 inch for 1/2 inch drywall, 1 5/8 inch for 5/8 inch |
| Screw gun or drill | Fastening drywall | Variable speed with drywall bit |
| Sandpaper | Smoothing compound between coats | 80 to 150 grit for hand sanding, 180+ grit for power sanders |
| Stain blocking primer | Sealing water stains | Shellac based or oil based formula |
| Paint | Final finish | Color matched to existing wall |
| Protective equipment | Personal safety | Dust mask, safety glasses, work gloves |
Premixed all purpose joint compound costs under $5 for a small container that’ll handle repairs up to a few square feet. Matching drywall thickness is critical for getting a flush finish without piling on excessive joint compound. Standard residential drywall comes in 1/2 inch and 5/8 inch thicknesses. Bring a small piece of your damaged drywall to the lumberyard to ensure you’re getting the exact thickness and type match.
Paper tape creates stronger, crisper joints that are less prone to cracking for flat seams and inside corners. Mesh tape works well for patches and is easier to apply since it’s self adhesive, though it produces a slightly thicker joint. Having progressively wider putty knives (4 to 6 inch, 8 to 10 inch, and 12 inch) lets you do proper feathering technique that makes repairs invisible.
Safety Precautions and Protective Measures for Water Damage Work
Shut off power at the breaker if the leak is near light fixtures or electrical wiring before you start. Water and electricity create serious shock hazards, and moisture inside walls can travel along wiring to outlets and switches. Even if the drywall appears dry on the surface, water may have saturated insulation around electrical boxes.
Wiring that’s been submerged for more than 24 hours or exposed to significant standing water needs a professional electrician inspection before you start restoration. Wiring insulation can degrade when saturated, and connections inside junction boxes may have corrosion you won’t see until the system fails. An electrician can test circuits and replace compromised components before you close the wall.
Mold can grow in dark, damp wall cavities in as little as 24 to 48 hours after water exposure. Once you open the wall, look for visible mold on studs, insulation, or the back of the drywall. Small spots may appear dark green, black, or brown with fuzzy texture. If you see extensive mold growth or smell persistent musty odors, stop and consult a mold remediation professional. Disturbing large mold colonies releases spores into the air, creating health risks.
Wear personal protective equipment throughout the repair. A dust mask protects your lungs from drywall dust during cutting and sanding. Safety glasses prevent debris from getting in your eyes when cutting overhead or using power tools. Work gloves protect your hands from sharp drywall edges and reduce skin contact with joint compound.
Seal HVAC vents with plastic and painter’s tape to prevent drywall dust from circulating through your home. Hang plastic sheeting over doorways to contain dust in the work area. Use heavy duty plastic or rosin paper with painter’s tape to protect floors from water, joint compound, and construction debris. These containment measures make cleanup significantly easier and protect the rest of your home.
Cutting Out and Removing Damaged Drywall Sections
Surgical removal of damaged material is critical for successful repair. Leaving compromised drywall in place, even if it only looks slightly affected, allows hidden moisture and deterioration to keep spreading.
-
Mark cutting lines 6 to 12 inches beyond visible damage or high moisture readings, creating a square or rectangular opening. Extending the cut ensures you reach completely dry, undamaged material with clean edges that accept joint compound properly.
-
Score the drywall paper face multiple times with a sharp utility knife along the marked lines. Make three to four passes to cut through the paper surface completely without trying to cut through the gypsum core in one motion.
-
Use a drywall saw with a sharp point to plunge through the scored lines and cut the gypsum core. The saw’s pointed tip punctures the drywall, then you cut along the scored line using smooth, controlled strokes.
-
Cut back to the center of studs or ceiling joists for a solid fastening surface. Locate framing members by tapping the wall and listening for solid sounds instead of hollow ones, or use a stud finder. Cutting to stud centers provides backing for both the existing drywall edge and the new patch.
-
Remove the damaged section and clear away loose debris, flaking paint, and any soft or crumbling gypsum along the edges. Use a paint scraper to remove loose material and create smooth edges.
Inspect the exposed wall cavity for wet studs, damp insulation, or additional hidden damage. Press on wood framing to check for soft spots that indicate rot. Pull out any wet insulation and let the cavity dry completely with fans and dehumidifiers running. Everything inside the wall must be completely dry before you install the patch, or moisture trapped inside promotes mold and causes the repair to fail.
Squaring the opening rather than cutting irregular shapes makes patch installation significantly easier. Straight edges align cleanly, and rectangular patches fit precisely without complicated cutting.
Installing Replacement Drywall Patches and Backing Support
Measure the opening carefully and cut a replacement patch to fit precisely. Drywall cuts cleanly when you score the paper face with a utility knife, then snap the piece along the scored line. For the cleanest edges, score both sides before snapping.
Bring a small piece of the damaged drywall to the lumberyard to match exact thickness and type. Standard residential drywall comes in 1/2 inch and 5/8 inch thicknesses. Using mismatched thickness creates an uneven surface that requires excessive joint compound buildup to level. The difference between 1/2 inch and 5/8 inch is noticeable enough to show through the finished surface.
If studs or ceiling joists aren’t accessible at the edges of your cut, install backing support before placing the patch. Cut 2×4 boards or manufactured drywall backing strips that extend at least 3 inches behind the existing drywall edges on all sides. Slide these backing pieces into the cavity and fasten them to the back of the existing drywall with screws, creating a solid surface for attaching the patch perimeter.
Position the patch in the opening and check the fit. The patch should sit flush with the surrounding drywall surface without gaps wider than 1/8 inch. Small gaps fill easily with joint compound, but larger gaps require shimming the backing or cutting a new patch.
Drive drywall screws evenly around the patch perimeter, spacing them roughly 6 to 8 inches apart. Screw heads should sit slightly recessed in shallow dimples without breaking through the paper face. Breaking the paper compromises the drywall’s strength and creates depressions that require extra compound. If you break the paper, remove that screw and drive a new one an inch away.
Matching drywall thickness is the most critical factor in achieving a flush surface that requires only thin compound layers. Even perfect taping and mudding technique can’t fully disguise thickness mismatches larger than 1/16 inch.
Applying Drywall Tape and Joint Compound to Patches
Taping and mudding creates the smooth, invisible transition between your patch and the existing wall. This multi step process requires patience and proper technique, but the systematic approach produces professional results.
Embedding Tape Over Seams
Apply fiberglass mesh tape or paper tape over all seams where the patch meets existing drywall. Paper tape creates stronger, crisper joints less prone to cracking, making it the preferred choice for flat seams and inside corners. Mesh tape offers easier application since it’s self adhesive and sticks directly to the drywall surface.
For paper tape, spread a thin layer of joint compound along the seam first, then press the tape into the wet compound. Run your putty knife along the tape to embed it fully and get rid of air bubbles. Air pockets under the tape create weak spots that crack or separate. For mesh tape, stick it directly to the seam, then cover with joint compound.
Embedding tape properly means the tape sits flat against the drywall surface without ripples or raised sections. Press firmly with the putty knife, but don’t press so hard that you squeeze all the compound out from under the tape.
Applying Multiple Compound Coats With Progressive Feathering
The three coat system with progressively wider knives creates invisible repairs. Use a 4 inch or 6 inch putty knife for the first mud coat, covering the tape and filling the seam. This coat doesn’t need to look perfect because you’ll sand and add more layers.
Allow at least 24 hours drying time between coats. Applying the next coat over damp compound prevents proper curing and causes finishing problems like cracking or poor adhesion. Joint compound changes from dark gray to white as it dries, giving you a visual indicator it’s ready.
Apply the second coat with an 8 inch or 10 inch knife, extending the compound a few inches beyond the edges of the first coat. This wider application begins the feathering process, where each coat tapers gradually to blend with the existing surface. Apply thin, controlled layers rather than thick coats. Thick applications take longer to dry, are more prone to cracking, and create excessive buildup that requires heavy sanding.
After another 24 hour drying period, apply the final coat with a 12 inch knife. Extend this coat a few inches beyond the second coat’s edges. The feathering technique involves extending compound in gradually thinner layers away from the repair area, creating subtle transitions that disappear once painted. Hold the knife at a low angle and use light pressure on the outer edges to spread the compound into paper thin layers.
Each successive coat should be thinner than the previous one. You’re building up the repair area to match the surrounding wall height while simultaneously creating tapered edges that blend invisibly.
Sanding and Smoothing Drywall Repairs for Seamless Results

Use 120 grit sandpaper to lightly knock down high spots and ridges between coats. This intermediate sanding removes raised areas left by knife edges and prepares the surface for the next compound layer. You’re not trying to achieve perfect smoothness between coats, just removing obvious irregularities.
After the final coat dries completely, sand with fine grit sandpaper in the 150 to 180 range to smooth transitions. Hand sanding with 80 to 150 grit works well for small areas and gives you precise control. For larger sections, power palm sanders with 180+ grit sandpaper speed things up while producing smooth results.
Sand with just enough pressure to get rid of raised areas and knife marks. Over sanding can expose the tape beneath the compound or create visible low spots that require additional compound coats. Run your hand lightly over the repair area to feel for high spots, bumps, or ridges that need more attention.
You’re trying to create an undetectable transition from the old drywall to the new patch. When you run your hand across the repair with eyes closed, you shouldn’t feel where the patch begins or ends. Shine a work light at a low angle across the wall to highlight any remaining imperfections. Shadows reveal high and low spots that smooth sanding or additional thin compound coats can correct.
Wipe away all sanding dust with a damp cloth before applying the next coat or moving to priming. Dust on the surface prevents proper adhesion of primers and paints. Use a slightly damp sponge or cloth, not dripping wet, to pick up dust without rewetting the joint compound.
Sandpaper can correct many errors made during the compound application. Small ridges, knife marks, and slightly uneven areas disappear with patient sanding. Multiple thin coats with light sanding between each produces better results than thick coats that require aggressive sanding.
Matching Texture on Repaired Drywall Surfaces
Matching existing texture is essential for invisible repairs. Even perfectly smooth and level repairs stand out visually when surrounding surfaces have texture that the patch lacks.
Common texture types and application methods:
Smooth finish is achieved through careful sanding alone with no added texture. Most newer construction and contemporary homes use smooth walls.
Orange peel gets applied with aerosol spray texture cans that have adjustable nozzles. Multiple light passes from 18 to 24 inches away build up the characteristic subtle bumpy surface that resembles citrus peel.
Knockdown starts by spraying thicker texture than orange peel, then gently flattening the raised portions with a wide taping knife after partial setting (about 10 to 15 minutes). The result is flattened peaks with subtle texture variation.
Roller texture uses a small paint roller with the same nap thickness as the original application to mimic paint texture patterns. Rolling technique (direction, pressure, and paint thickness) affects the final appearance.
Practice your texture technique on cardboard scraps or in an inconspicuous area before applying to the visible repair. Getting texture right requires feel and timing that develop through practice. Test different spray distances, nozzle settings, or roller techniques until you match the existing surface.
Apply texture sparingly after the final joint compound coat dries completely. Start in the center of the repair and blend outward into the existing texture. Adding too much texture is harder to correct than building it up gradually. Aerosol texture can be sanded lightly after drying if you overapply, but heavy texture requires recoating with joint compound and starting over.
Priming and Painting Water Damaged Drywall Repairs
Proper priming and painting completes the invisible repair by sealing stains and matching the surrounding color and finish.
Applying Stain Blocking Primer to Seal Water Damage
Use stain blocking primer that’s shellac based or oil based to permanently lock in water stains. Standard latex primer allows water stains to bleed through to the finish paint, sometimes immediately and sometimes weeks or months later as moisture continues migrating from deeper in the wall. The yellow brown stains reappear as ghostly shadows that show exactly where the repair occurred.
Apply stain blocking primer to the entire repair area plus a few inches beyond onto the existing painted surface. This overlap ensures complete coverage without visible primer edges. Shellac based primers dry quickly (usually 45 minutes to an hour) and provide the most effective stain blocking. Oil based primers take longer to dry (2 to 4 hours) but also seal stains reliably.
Let the primer dry completely before proceeding to paint. The surface should feel dry to the touch with no tackiness.
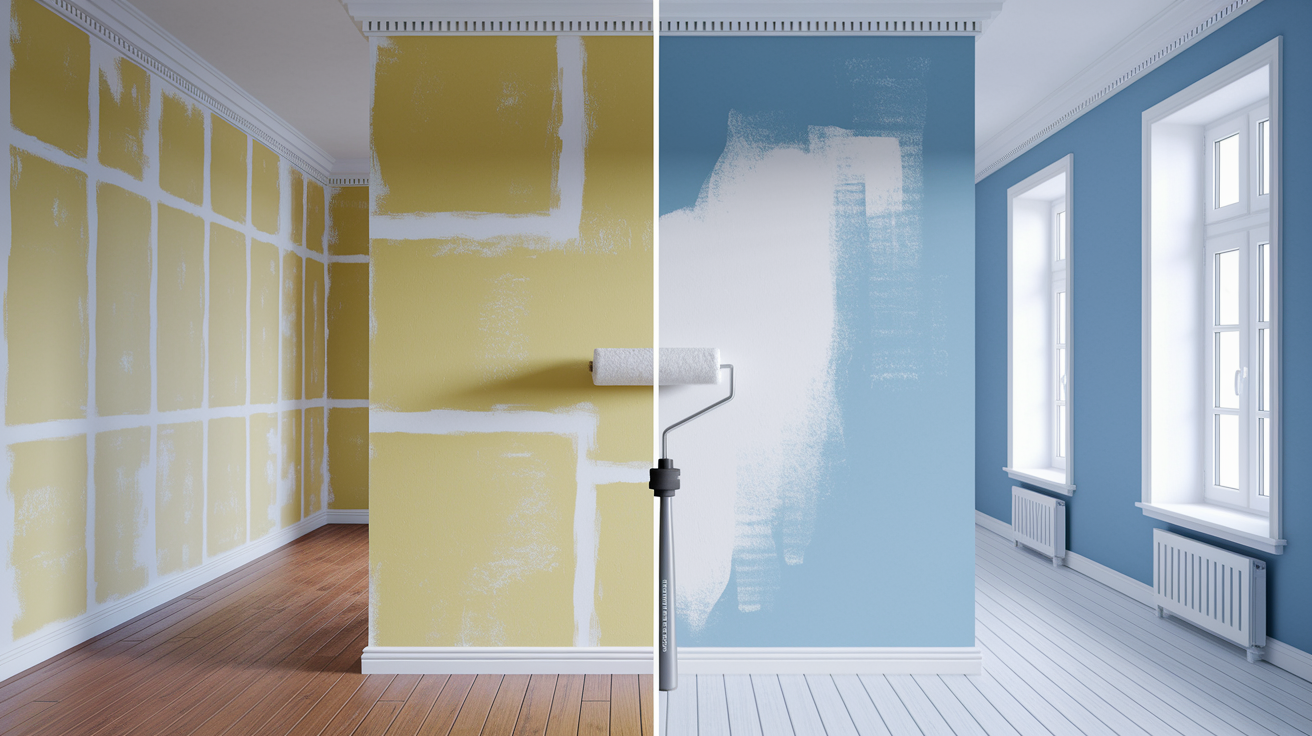
Color Matching and Final Paint Application
Cut a 1 inch square sample from an inconspicuous spot like inside a closet or behind a door for computer color matching at a paint store. Bring this sample to the paint counter where staff scan it with a spectrophotometer that analyzes the exact color formula. This technology produces far more accurate matches than trying to eyeball color from paint chips.
Match both color and sheen when purchasing paint. Common sheens include matte (flat), eggshell, satin, and semi gloss. Sheen mismatches are obvious even when color is perfect. Matte paint on a wall with eggshell finish creates a dull spot, while glossier paint creates a shiny patch.
Apply two thin coats of color matched paint, allowing the first coat to dry completely before applying the second. Thin coats produce smoother finishes than single thick applications. Use a small roller to mimic the original paint texture and application pattern. Brush marks stand out on roller textured walls, and roller texture differs from brushed surfaces.
Repainting the entire wall or ceiling from corner to corner typically gives the best results, especially on older surfaces where the existing paint has faded or aged. Paint color shifts slightly over years of exposure to light and air. Even perfectly matched new paint looks slightly different next to aged paint. Painting the full surface eliminates visible patch boundaries and color variations.
Recognizing Mold Risks and When Antimicrobial Treatment Is Needed
Mold can develop in dark, damp wall cavities in as little as 24 to 48 hours after water exposure. By the time you open a water damaged wall, conditions may have been ideal for mold growth for days or weeks. Understanding mold risks helps you recognize when professional remediation is necessary.
Visible mold signs include dark spots ranging from black to dark green or brown, fuzzy or slimy growth on studs or insulation, and persistent musty odors even after the area appears dry. Musty smell indicates active mold growth, often hidden inside wall cavities or beneath surface layers.
Small surface mold areas covering less than 10 square feet may be treated during DIY repairs. After removing damaged drywall, spray exposed mold on framing with a bleach solution (one cup bleach per gallon of water) or commercial antimicrobial treatment. Wear a respirator mask rated for mold spores, not just a dust mask. Let the treated area dry completely before installing the patch. Antimicrobial treatment may be applied to framing before closing up the wall to prevent future growth.
Extensive mold growth covering more than 10 square feet, mold deep inside wall cavities that extends beyond the visible damage area, or persistent musty odors that don’t resolve after removing damaged materials all require professional mold remediation. Professionals have equipment to contain work areas, HEPA filtration to capture spores, and training to identify mold species and hidden growth.
Contaminated water from sewage backups or flooding (Category 2 or 3 water) always requires professional help regardless of visible mold. These water sources contain bacteria and pathogens beyond mold concerns. Professionals use specialized cleaning protocols and antimicrobial treatments appropriate for contaminated materials.
Hidden mold inside wall cavities poses health risks when disturbed. DIY removal of small visible patches is reasonable, but spreading mold contamination throughout your home by attempting remediation beyond your capability creates larger problems. Mold remediation professionals complete the work with proper containment and disposal.
Understanding When to Call a Professional for Water Damage Restoration
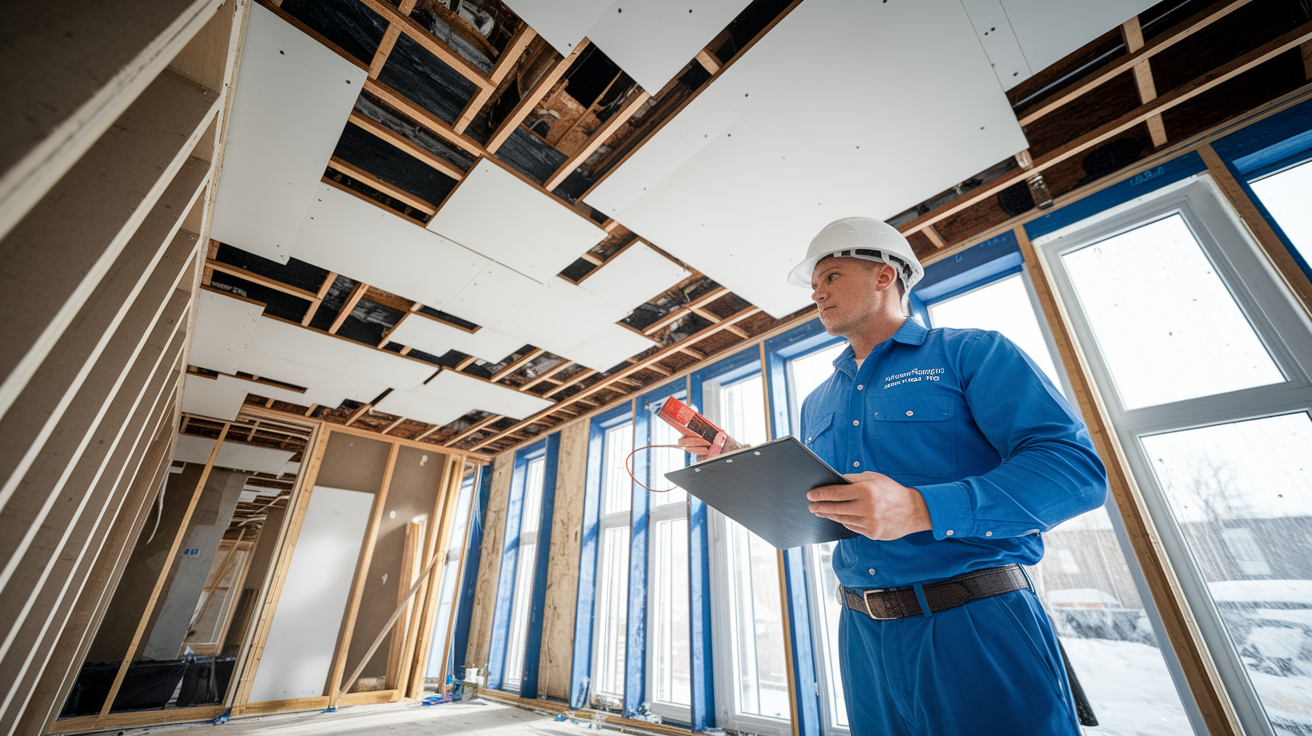
Some water damage exceeds DIY capabilities and requires professional expertise for safe, lasting repairs.
Red flags requiring professional help:
Ceiling bowing or sagging significantly indicates potential structural compromise where drywall is pulling away from framing or framing itself is damaged.
Walls feeling spongy or structurally compromised means saturated framing may be rotting or damaged beyond surface drywall issues.
Persistent musty odors indicating hidden mold are smells that don’t resolve after removing visible damage, suggesting mold growth in inaccessible areas.
Contaminated water from sewage or floods (Category 2 or 3) requires specialized cleaning, antimicrobial treatment, and disposal protocols.
Large affected areas like multiple rooms or extensive ceiling damage exceeds practical DIY scope.
Visible mold growth exceeding 10 square feet needs professional remediation to prevent health risks and ensure complete removal.
Professional water damage restoration and drywall repairs typically cost between $300 and $850 depending on extent of damage. Average drywall repairs run $609, though serious water damage jobs with extensive material removal, mold remediation, or structural repairs cost more at $60 to $90 per hour for professional contractors. These rates reflect the specialized equipment, expertise, and liability insurance that professionals provide.
Professionals bring structural assessment capabilities that identify hidden damage not visible from inside the room. They can evaluate whether framing needs reinforcement or replacement, whether insulation requires removal, and whether the building envelope has been compromised. Water Damage Repair and Remediation Coordination services coordinate repairs across multiple trades when water damage affects electrical systems, plumbing, or structural framing beyond just drywall.
Professional repairs include building code compliance for any structural work, proper mold remediation following industry protocols, and warranties on completed work. If repairs fail or additional problems emerge, you have recourse through the contractor’s warranty. Drywall, Plaster, and Interior Wall/Ceiling Repairs completed by professionals meet local building department requirements when permits are necessary.
The global drywall repair services market reached USD 5.1 billion in 2023, driven largely by water damage incidents from aging infrastructure, severe weather events, and plumbing failures. This substantial market reflects both the frequency of water damage and the complexity that often requires professional intervention.
Common Mistakes to Avoid When Repairing Water Damaged Drywall
Avoiding common errors saves time, materials, and ensures repairs last years rather than failing within months.
-
Starting repairs before stopping the water source leads to repeat damage as water continues entering the wall cavity. The new patch fails just like the original drywall, and you’ve wasted time and materials on temporary fixes.
-
Not allowing the area to dry completely traps moisture behind new drywall where it promotes mold growth and causes the repair to fail. Damp framing and insulation can’t support lasting repairs.
-
Applying thick joint compound coats causes cracking as thick compound shrinks during drying and extended drying times that delay project completion. Thick coats are harder to sand smooth and create excessive buildup.
-
Rushing between coats without 24 hour drying time prevents proper curing and causes finishing problems including poor adhesion, cracking, and soft spots that dent easily. Compound that looks dry on the surface may still be damp underneath.
-
Over sanding exposes tape beneath the compound or creates visible low spots that require additional compound coats. Aggressive sanding removes too much material and damages the paper face of surrounding drywall.
-
Using standard latex primer instead of stain blocking allows water stains to bleed through finish paint, creating yellow brown shadows that show exactly where the damage occurred. The stains may appear immediately or emerge weeks later.
-
Failing to match drywall thickness creates uneven surfaces requiring excessive joint compound buildup. Even 1/8 inch thickness differences show through finished surfaces and create visible ridges or valleys.
Patience and proper technique produce professional looking results that last. Each step serves a specific purpose in creating strong, invisible repairs. Shortcuts typically lead to visible repairs that stand out under certain lighting conditions or require complete rework.
Estimated Timeline and Costs for DIY Water Damage Drywall Repair

Total project timeline ranges from one week to over a month depending primarily on initial drying requirements. The area must dry completely before repair work begins, which takes 3 days to several weeks depending on saturation levels and ambient humidity. Once dry, the repair process itself requires 3 to 5 days: one day for removal and patch installation, then 24 hours drying time between each of three joint compound coats, plus additional time for sanding, texture application, priming, and painting.
Small repairs covering a few square feet may complete in 4 to 5 days after initial drying. Larger repairs requiring multiple compound coats across bigger areas, careful texture matching, or complete wall repainting extend the timeline to a full week or more. Extensive damage requiring several weeks of drying before repair work begins extends the total timeline significantly.
| Item | Approximate Cost |
|---|---|
| Joint compound (premixed all purpose) | $5 to $15 |
| Drywall patch material | $8 to $20 |
| Mesh or paper tape | $3 to $8 |
| Sandpaper (multiple grits) | $5 to $10 |
| Putty knives (set of 3 sizes) | $10 to $25 |
| Stain blocking primer | $15 to $30 |
| Paint (color matched) | $25 to $50 |
| Miscellaneous supplies (screws, plastic sheeting, etc.) | $10 to $20 |
DIY material costs typically range from $80 to $180 for a standard repair covering 10 to 20 square feet, compared to $300 to $850 for professional services on the same damage. This significant cost difference makes DIY appealing for homeowners with time and basic skills.
Time investment is a significant factor in the DIY decision beyond just material cost savings. The repair process requires being available multiple days for compound application and inspection between coats. Professional contractors complete repairs faster through experience and can work during business hours while you’re at work.
Final Words
Learning how to repair water damaged drywall breaks down into manageable phases when you follow the right sequence.
Stop the leak first. Let everything dry completely. Cut out damaged sections, install backing, patch with matching material, and finish with multiple thin coats.
The process takes patience, especially the drying time between coats. But careful work produces repairs that blend invisibly with the rest of your wall.
When you address the root cause and take your time with each step, you end up with a safe, solid surface that lasts.
FAQ
Can water damaged drywall be repaired?
Water damaged drywall can be repaired if the damage is minor to moderate, showing slight bubbling, staining, or sagging with some softness when pressed. The repair involves cutting out the damaged section at least 6 to 12 inches beyond visible damage, ensuring all materials are completely dry, then installing a patch and finishing with joint compound. However, severe damage with significant browning, fallen sections, extensive mold growth, or structural compromise requires complete replacement rather than repair.
Will drywall be ruined if it gets wet?
Drywall will be ruined if it gets wet only when the saturation is severe or prolonged, typically resulting in significant browning, structural sagging, or mold growth within 24 to 48 hours. Minor water exposure that’s dried quickly often causes repairable surface damage like bubbling paint or slight discoloration. The outcome depends on how quickly you stop the water source, remove standing moisture, and completely dry the affected area using fans and dehumidifiers.
Can you repair drywall without replacing it?
You can repair drywall without replacing it for minor damage like small cracks, surface bubbling, or limited water staining by applying joint compound, sanding smooth, and repainting. However, repairs still require cutting out the compromised section back to dry, solid edges and patching with new drywall when softness, sagging, or moisture readings above 15-17% indicate structural weakness. The decision depends on damage severity rather than repair preference.
Does ceiling drywall need to be replaced if it gets wet?
Ceiling drywall needs to be replaced if it gets wet and shows significant sagging, browning, structural softness, or fails to dry completely within several weeks. Minor ceiling water stains or slight bubbling can often be repaired by cutting out the damaged section, ensuring the cavity is dry, patching with matching thickness drywall, and finishing with stain-blocking primer. Always address the leak source first, as ceiling repairs without fixing the cause lead to repeat damage.