


Most drywall repair advice tells you to patch it yourself, but let’s be honest. Big holes scare people. The doorknob that went all the way through? The moving accident that punched a basketball-sized crater in your hallway? Those repairs feel different than filling nail pops. Here’s what changes the outcome: backing support, thin coats, and matching your wall texture. Skip any of those three steps and you’ll see the patch forever. This guide walks you through each one so the repair blends into the wall like it was never damaged.
Step 1: Cut and Prepare the Damaged Area
Large holes are anything bigger than doorknob damage, usually 3 inches or more. You’ll need to cut the damaged section into a clean square or rectangle. Jagged openings? They make it nearly impossible to fit a patch securely or finish the repair so it blends into the wall.
Clear the workspace first. Move furniture away from the wall, lay drop cloths on the floor to catch drywall dust, remove any nearby pictures or decorations. This step sounds basic. But drywall dust travels farther than you think.
Mark your cuts at least 1 inch beyond the visible damage on all sides. Use a pencil and ruler or T-square to draw a clean square or rectangle around the damaged area. This extra margin ensures you’re cutting into solid, undamaged drywall that’ll hold screws properly. If the damage extends right to the edge of what looks okay, go wider. Soft, crumbly edges won’t support a repair.
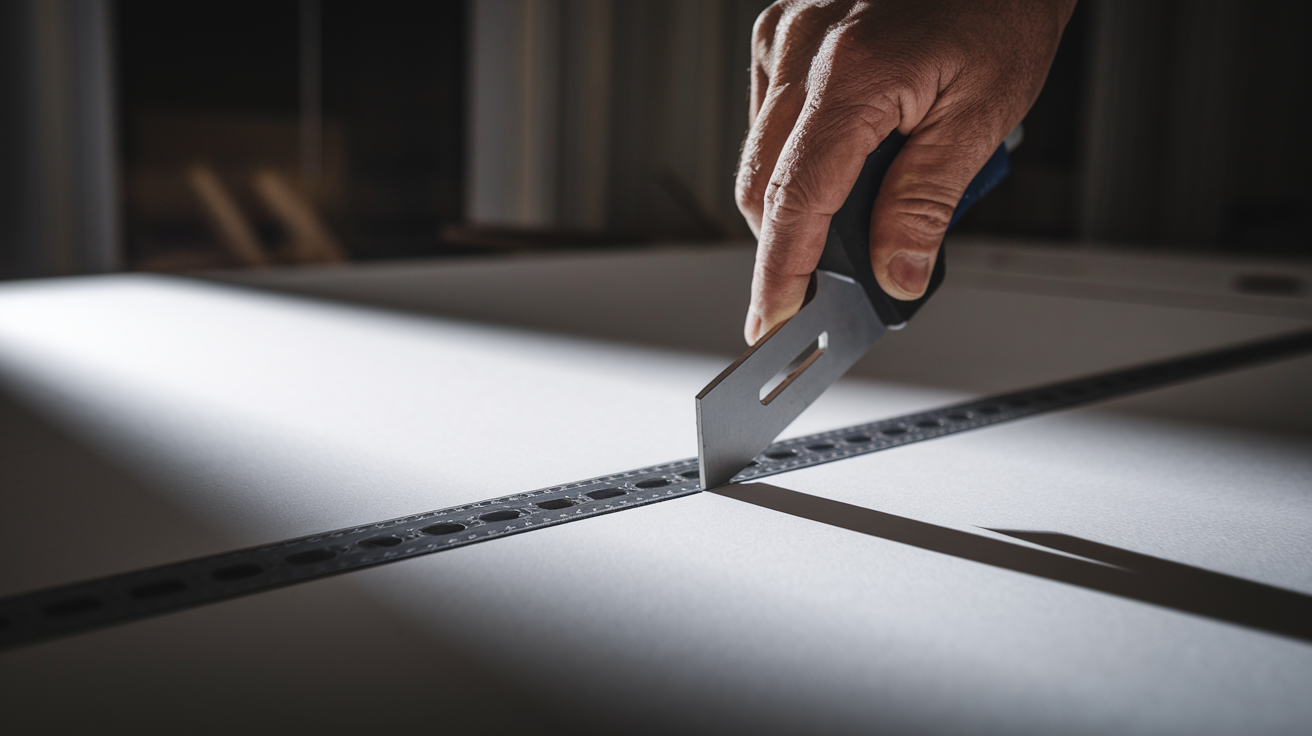
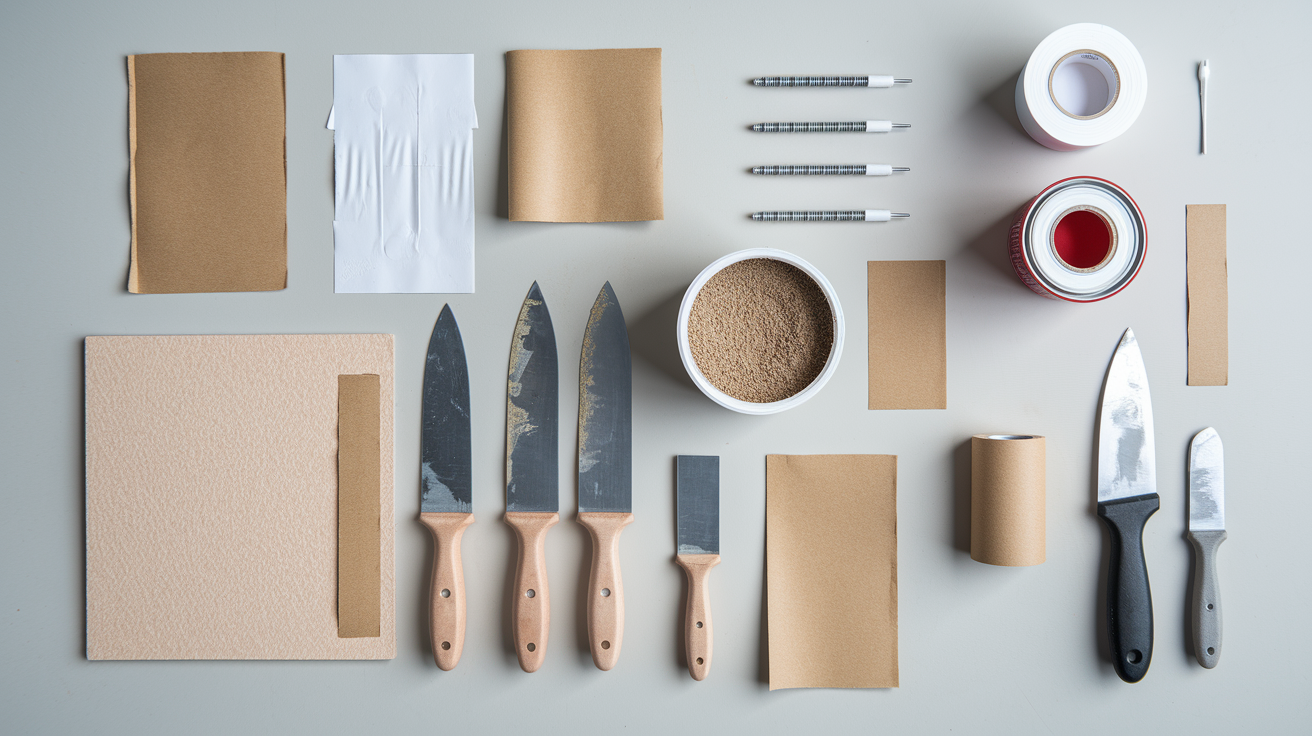
Score the drywall front surface 3 to 4 times with a utility knife, following your marked lines with a ruler or T-square as a guide. Press firmly to cut through the paper facing and into the gypsum core. Once scored, push the drywall from behind to snap it backward along the scored line. Then slice through the backing paper with your utility knife to remove the damaged section completely. Take your time with this. Clean, straight cuts make everything that follows easier.
Before you move on, look inside the opening. Check for electrical wires, plumbing pipes, or wall studs. You don’t want to drill into any of those when installing backing support. If you see wires or pipes, work carefully around them or consider whether you need help from an electrician or plumber.
Step 2: Install Backing Support Behind the Opening
Backing prevents your patch from falling through the wall opening. Without something solid behind the patch to screw into, you’ll be taping and mudding air. That doesn’t hold.
Use 1×3 furring strips or any scrap wood pieces you have that are at least 1 inch by 3 inches. Cut these strips 4 to 6 inches longer than your opening dimensions so they extend at least 2 inches beyond the hole edges on all sides. Position one strip horizontally behind the top edge of the opening and another behind the bottom edge, centering each piece so it overlaps the existing drywall by at least 2 inches. You can add vertical strips on the sides if the hole is especially large or if you want extra support.
Drive 1 and 1/4 inch drywall screws through the existing drywall into the backing strips at a 45 degree angle. Space screws 3 to 4 inches apart along each strip. The angle helps the screws bite into the backing and pull it snug against the back of the wall. Use a power drill with a drywall screw setter bit to prevent driving screws too deep. Once all screws are in, test the backing by pressing firmly with your hand. It should feel solid with no give.
If your hole happens to land near wall studs, you can skip the backing strips. Extend your cut so it ends at the center of the nearest studs on either side, then attach your patch directly to the studs. This method provides the strongest support since you’re screwing into the wall framing itself.
Step 3: Cut and Install the Replacement Patch
Measure the width and height of your opening carefully. Subtract 1/8 inch from each dimension. This small reduction makes the patch easier to insert without forcing, which can crack edges or break corners.
Transfer these measurements to a piece of drywall. Small 2 foot by 2 foot drywall squares are available at home improvement stores for about $5 each, which saves you from buying a full 4 foot by 8 foot sheet. Mark your cutting lines with a pencil and ruler. Score the front surface 3 to 4 times along each line, snap the drywall backward, then cut through the backing paper. For notches around outlets or odd shapes, use a drywall saw or jigsaw after drilling a pilot hole to start the cut. If you’re dealing with obstacles like plumbing in a bathroom, and damage extends beyond simple holes, check Water Damage Repair for when professional assessment might be necessary.
Test fit the patch in the opening before applying any screws. It should slide in with slight clearance on all sides. If it’s too tight, trim the edges with your utility knife. Better to shave a little now than force the piece and crack something.
Position the patch in the opening and drive 1 and 1/4 inch drywall screws through the patch into the backing strips using a power drill with a drywall screw setter bit. Place screws every 6 to 8 inches around the perimeter, about 1/2 inch from the patch edges. The screws should sit slightly below the surface without breaking through the paper facing. Proper screw depth matters because you’ll cover these dimples with joint compound later.
The screw setter bit creates small divots around each screw head. This lets you fill the dimples with compound so the screw heads disappear below the finished surface. Without the setter bit, screws either stick out or go too deep and tear the paper, both of which weaken the repair.
Step 4: Apply Tape and Embed in Base Coat
Mesh tape is self adhesive and easier for beginners to work with. Paper tape is stronger when properly embedded. For bathrooms or areas prone to moisture, use mold resistant tape. All three types work, but choose based on your comfort level and the room location.
Apply tape centered over each seam where the patch edges meet the existing drywall. Press firmly so the tape sticks to the surface. For corners, fold paper tape at a 90 degree angle to maintain strength, or overlap two pieces of mesh tape. The tape should lie flat without wrinkles or air pockets underneath.
Spread a thin layer of joint compound over the tape with a 6 inch putty knife. Hold the knife at a shallow angle and press firmly as you drag it across the tape to embed the tape into the compound and squeeze out air bubbles. This step is about pushing the tape into the compound, not building up layers yet. Scrape off excess compound as you go, leaving just enough to cover the tape.
Proper embedding means the tape should barely be visible beneath a thin layer of compound. If you can clearly see the tape mesh or paper through the compound, that’s correct. If you’ve built up a thick layer trying to hide the tape completely, you’re working too heavy. Thin coats dry faster and reduce the chance of cracking.
Step 5: Apply and Sand Multiple Compound Coats
Thin coats are better than one thick coat because they dry faster, shrink less, and crack less. Each coat needs 24 hours to dry completely in normal conditions before you sand and apply the next layer. Don’t rush this. Compound that looks dry on the surface may still be damp underneath.
First Coat and Initial Sanding
Use your 6 inch putty knife to cover the embedded tape and all screw dimples with joint compound. Feather the edges 4 to 6 inches beyond the patch by gradually thinning the compound as you move outward from the seam. This creates a smooth transition rather than a hard ridge. Let this coat dry for 24 hours.
Wear an N95 mask and eye protection before you start sanding. Drywall dust is fine and travels easily. Sand with 120 to 150 grit sandpaper using light circular motions. Don’t press hard or you’ll gouge the soft compound. Run your hand over the surface to feel for high spots or rough areas. Your hand is more sensitive than your eyes for detecting imperfections.
Second Coat and Intermediate Sanding
Apply the second coat with an 8 or 10 inch knife, widening your coverage to 8 to 10 inches beyond the patch. Focus on filling any low spots or imperfections you felt during the first sanding. Use long, smooth strokes and feather the edges even wider than the first coat. Let it dry for 24 hours.
Sand with 150 grit sandpaper, still using light pressure. Check smoothness by running your hand over the repair and the surrounding wall. The transition should feel continuous, not like you’re touching separate surfaces.
Third Coat and Final Sanding
The final skim coat extends 12 inches or more from the patch, blending into the surrounding wall. Use wide sweeping strokes with your widest knife. Think of this coat as smoothing the entire area into one uniform surface rather than just covering the patch. Let it dry for 24 hours.
Sand with 220 grit fine sandpaper for a smooth finish. Open windows for ventilation during this step. The finer grit creates a surface ready for primer and paint without visible scratches. Stop sanding when the repair feels as smooth as the surrounding wall.
Step 6: Match Wall Texture
Identify your existing wall texture before you prime. Common types are smooth, orange peel, knockdown, and popcorn. If you don’t match the texture, your repair will be obvious even with perfect color matching.
Orange peel texture uses thinned joint compound applied with a texture roller or spray bottle, creating a slightly bumpy surface. Knockdown texture requires spraying or rolling on compound, then lightly flattening the peaks with a taping knife after a few minutes. Smooth walls need only careful feathering during the compound stage and thorough sanding, with no additional texture applied.
| Texture Type | Application Method | Tool Needed |
|---|---|---|
| Smooth | Careful feathering and sanding only | Putty knives and sandpaper |
| Orange Peel | Spray or roll thinned compound | Texture roller or spray bottle |
| Knockdown | Spray compound, flatten peaks after drying briefly | Texture sprayer and taping knife |
| Popcorn | Spray ceiling texture compound | Hopper gun and air compressor |
Practice your texture technique on a piece of cardboard or scrap drywall before applying it to your repair. Hold the cardboard next to the existing wall to compare. Adjust your technique until the practice piece matches what’s already there.
Step 7: Prime and Paint the Repair

Bare joint compound absorbs paint differently than the existing painted wall. Without primer, your patch will show as a dull spot even if you use the exact same paint color. The sheen won’t match.
Use drywall primer or a paint plus primer product. Many modern paints include primer, which lets you skip a separate primer step and go straight to two coats of paint. Before you commit to painting the entire repair, test your paint color on an inconspicuous spot near the floor or behind furniture. Paint looks different when dry, and even “the same” paint can vary slightly between batches.
Apply primer beyond the patch edges onto the existing painted surface, extending 2 to 3 inches past your repair area. This creates a blended transition zone. Roll the paint using the same nap roller that was used on the original wall. Higher nap rollers work for textured walls, low nap for smooth walls. Feather the edges where new paint meets old by rolling lightly at the boundaries rather than stopping abruptly.
Apply a second coat of paint after the first coat dries. Two coats ensure uniform coverage and sheen. Once dry, inspect the repair from multiple angles and in different lighting conditions. Morning light near a window shows imperfections that overhead lights hide. If you see shadows or texture differences, you may need to adjust texture or add another light coat of paint.
Alternative Methods for Patching Large Drywall Holes
Different hole sizes and locations may benefit from different techniques beyond the traditional backing board method covered above. Here are three alternatives that work well in specific situations.
California Patch Method
The California patch technique uses the paper face of the drywall as a tape substitute, eliminating backing boards for holes between 3 and 6 inches. Cut a piece of drywall scrap a few inches larger than your hole. Trace the hole shape reversed onto the back of the scrap. Score the back deeply, snap off the excess gypsum core, but leave about 1.5 inches of paper face extending around all edges. Apply joint compound around the hole, press the patch in with the paper edges acting as built in tape, then mud and finish as normal. This works on both drywall and plaster walls and saves time on medium sized holes where backing would be awkward to install.
Drywall Repair Clips
Metal drywall repair clips attach to the cut edges of your opening, eliminating the need for wood backing entirely. Install clips on the existing drywall edges around your opening, then screw your patch directly to the clips. The clips cost more than wood strips, but they install much faster and work well in tight spaces where positioning backing boards is difficult. These are ideal for holes in hard to reach areas like behind toilets or in closets where you can’t easily get a drill behind the wall.
Stud to Stud Replacement
When your damage is near wall studs or when you want the strongest possible repair, extend your cuts to the center of the nearest studs on each side. This means cutting away more drywall, but your patch attaches directly to the wall framing instead of relying on added backing. This method is strongest and best for very large holes, holes in high traffic areas that might get bumped, or damage that already exposes studs. The tradeoff is more cutting, more waste, and a larger area to finish, but the structural support can’t be beat.
Common Mistakes and How to Avoid Them
Most DIY drywall repair failures come from rushing through steps or skipping preparation work that seems unnecessary until something goes wrong. Even experienced DIYers make errors on complex repairs when they get too confident and stop checking their work.
Forgetting backing support before installing the patch causes the patch to fall through the wall, sometimes days after you think the repair is complete. Driving screws too deep without a setter bit breaks the paper facing and weakens the entire repair by removing the structural layer that holds everything together. Applying compound too thick in a single coat leads to cracking as it dries and extends drying time by days instead of hours.
Insufficient feathering of compound edges leaves visible ridges and hard lines that are obvious even after painting. Sanding before compound is completely dry gums up sandpaper and gouges the surface, forcing you to apply more compound and start over. Skipping the primer step creates blotchy paint appearance and color mismatch no matter how many coats of paint you apply.
Not matching existing wall texture makes repairs obvious from across the room even when the color matches perfectly. Rushing between coats before proper drying causes poor adhesion and cracking that shows up weeks later.
If mistakes start compounding or your repair looks worse after multiple attempts, stop and get guidance from someone with experience or consider calling a professional. Continuing to work on a repair that’s going wrong wastes materials and often makes the problem bigger.
When to Call a Professional for Drywall Repair
Some drywall repairs exceed DIY scope and require professional skills, specialized equipment, or licensing for related work like electrical or plumbing. There’s no shame in recognizing when a job needs expertise you don’t have.
Holes larger than 16 inches or multiple large holes throughout a room require extensive finishing work and texture matching across large areas. Damage near electrical wiring or plumbing that requires moving, protecting, or working around utilities needs licensed trades. Water damage with visible mold growth, persistent moisture, or brown staining suggests ongoing leaks or structural rot.
Ceiling repairs requiring scaffolding, tall ladders, or overhead work for extended periods create fall risks. Cracks indicating structural settling or foundation movement that reappear after repair or branch out in multiple directions need professional assessment. Load bearing wall damage requires structural engineering assessment before any repair work begins. Extensive damage throughout multiple rooms from flooding, fire, or major impact affects structural integrity.
Hidden damage indicators include water stains that keep coming back, drywall that crumbles when you press on it, musty odors that don’t go away, or cracks that widen or reappear after you’ve patched them. These point to underlying issues that fixing the visible damage won’t solve. For situations like these, Professional House Repair Services can assess structural concerns and coordinate necessary repairs.
Even for seemingly simple repairs, a professional inspection can identify problems you can’t see from the front of the wall. That assessment prevents future problems and ensures the work you do actually solves the root cause rather than covering symptoms.
Cost Breakdown for DIY Large Hole Repair
Typical DIY material costs range from $15 to $30 for a single large hole repair. Small 2 foot by 2 foot drywall squares sell for about $5 at most home improvement stores, which eliminates the need to buy full sheets for small projects.
| Material | Quantity | Approximate Cost |
|---|---|---|
| Drywall patch (2×2 foot square) | 1 piece | $5 |
| Backing wood (1×3 furring strips) | 4 feet | $3 |
| Drywall screws (1 1/4 inch) | 1 box | $4 |
| Screw setter bit | 1 | $3 |
| Joint compound (1 quart) | 1 | $5 |
| Drywall tape | 1 roll | $3 |
| Putty knives (6 inch and 10 inch) | 2 | $8 |
| Sandpaper (assorted grits) | 5 sheets | $4 |
| Primer | 1 quart | $8 |
| Paint (matching existing wall) | 1 quart | $12 |
DIY material costs of $20 to $30 compare to professional repair costs of $150 to $300 including labor. Professional service provides a warranty on the work, faster completion (usually same day versus 3 to 4 days with drying time), and better results for complex repairs or multiple holes. For extensive damage, difficult texture matching, or when you need the work done right the first time, Drywall Repair Services may provide better value despite the higher cost.
Final Words
Learning how to patch large holes in drywall takes patience and attention to detail, but the process is manageable when you work through it one step at a time.
The key is proper backing support, multiple thin coats of compound, and careful sanding between each layer.
Take your time with the feathering and blending. That’s what makes the repair disappear into the surrounding wall.
If the damage seems more complicated than expected or you’re seeing signs of water damage or structural issues, it’s worth getting a professional look. Some repairs need diagnosis before patching starts.
FAQ
How big of a hole is too big to patch drywall?
A hole is too big for simple patching methods when it exceeds 6 inches across or when multiple large holes cluster in the same wall section. Holes larger than 6 inches typically require backing support or stud-to-stud replacement rather than quick patch techniques like mesh and compound.
What filler is best for large wall holes?
The best filler for large wall holes is a combination of joint compound and drywall tape over a proper drywall patch piece with backing support. Joint compound alone will crack and sag in openings larger than 3 inches, making a cut drywall patch with backing boards the only reliable method for holes exceeding doorknob size.
How to fix a very big hole in the wall?
To fix a very big hole in the wall, cut the damaged area into a clean square, install wood backing boards behind the opening edges, screw a cut drywall patch to the backing, then apply tape and multiple joint compound coats. Large holes need structural support from backing boards or direct stud attachment to prevent the patch from falling through or sagging over time.
Should I use mesh tape on large wall holes?
You should use mesh tape or paper tape on large wall holes after installing the drywall patch and backing support. Mesh tape is easier for beginners because it’s self-adhesive, while paper tape provides stronger reinforcement when properly embedded in joint compound. Either type works when fully embedded in a thin base coat.
What size drywall patch do I need for a large hole?
The drywall patch size you need for a large hole should measure 1/8 inch smaller than the cut opening dimensions for easier insertion and fitting. Small 2-foot by 2-foot drywall squares cost approximately $5 at home improvement stores, eliminating the need to purchase full 4-foot by 8-foot sheets for single repairs.
How many coats of joint compound do I need for a large drywall patch?
You need three thin coats of joint compound for a large drywall patch to achieve a smooth, invisible repair. Each coat should extend wider than the previous layer, with 24-hour drying time between applications, progressively feathering edges outward to blend seamlessly with the surrounding wall surface.
Can I patch a large drywall hole without backing boards?
You can patch a large drywall hole without traditional backing boards by using alternative methods like drywall repair clips or the California patch technique for holes under 6 inches. However, holes larger than 6 inches or near ceiling areas require proper backing support to prevent the patch from falling through the wall opening.
How long does it take to patch a large drywall hole?
Patching a large drywall hole takes approximately 3 to 4 days from start to finish, accounting for cutting and installing the patch (1-2 hours), applying three coats of joint compound with 24-hour drying between each coat, sanding, and final priming and painting.