


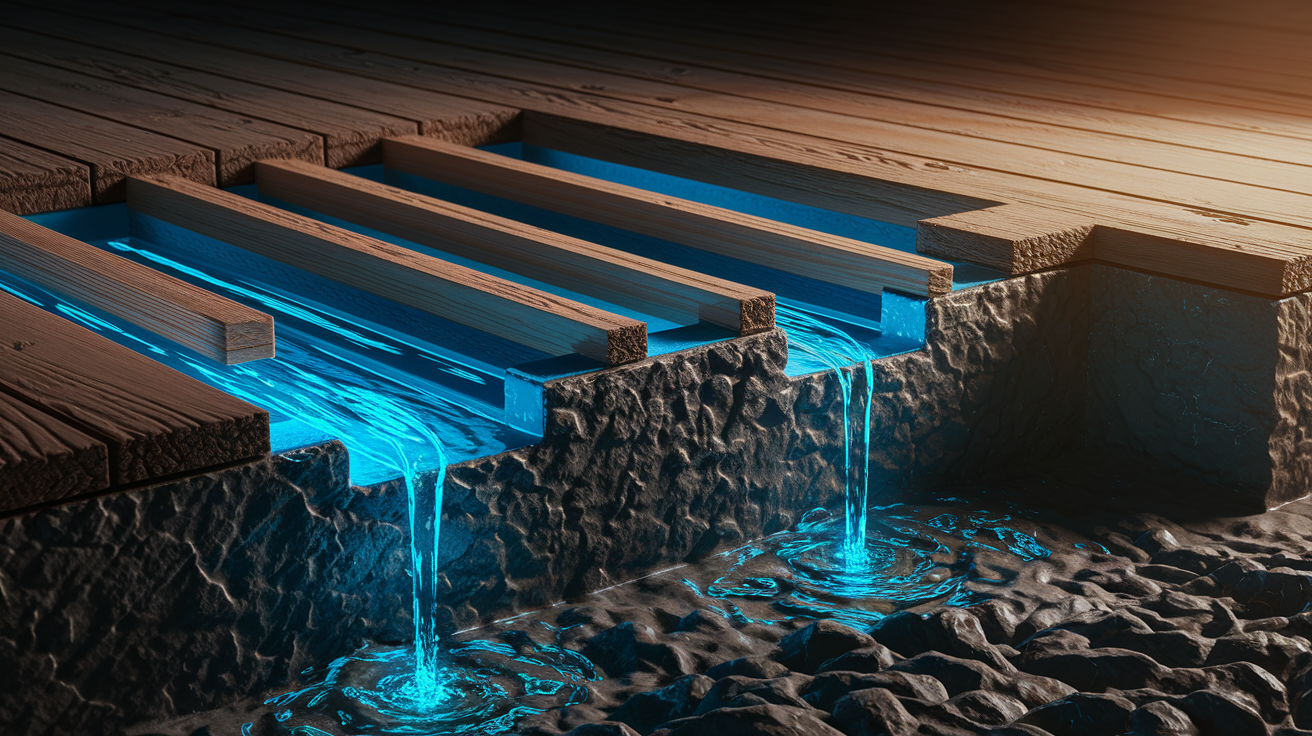
Ever notice how your floor feels solid everywhere except that one spot near the bathroom? That soft, spongy feeling isn’t just annoying. It’s telling you the subfloor underneath is damaged, usually from moisture. Left alone, a small soft spot grows into a bigger structural problem. The good news is you can fix it yourself if you catch it early and address the root cause. This guide walks you through diagnosing the damage, stopping the moisture source, and replacing the damaged subfloor so your floor feels solid again.
Identifying the Problem: Diagnosing Soft Spots in Your Floor

Soft spots are areas where your floor feels less solid than the surrounding surface. They typically signal subfloor damage underneath your finished flooring. Accurate diagnosis matters because it determines whether you’re dealing with a small isolated issue or extensive structural problems that need immediate attention.
Tactile warning signs are often the first clue something’s wrong. The floor feels soft, spongy, or springy when you walk across it. You might notice a bouncing sensation as you step, or the floor gives way slightly under your weight. Try comparing the firmness across different floor areas. Walk slowly and pay attention to how the surface responds. Normal floors feel solid and stable. Damaged areas feel like you’re walking on a thin cushion or stepping on a drum.
Visual and auditory indicators add to the diagnostic picture. Look for visible sagging or dipping in the floor surface. Check for gaps between your flooring and the baseboards. Cracked tiles or grout lines that weren’t there before point to movement underneath. Hardwood boards may be separating or showing gaps. Discoloration or water stains often appear near the soft spot, especially if moisture caused the problem. New squeaking or creaking sounds when you walk indicate the flooring layers are moving independently or fasteners have loosened.
The “walking test” gives you a systematic way to find every problem area. Walk slowly across the entire floor, including areas that seem fine. Press down firmly with your hands in any spot that felt questionable. Note any changes in firmness or sound as you move from room to room. If you can access a crawl space or basement underneath, check for visible moisture, rot, or sagging from below.
Steps for conducting a thorough floor inspection:
- Walk slowly across all floor areas, testing each section with your full weight
- Press down firmly with your hands in suspected spots to confirm soft areas
- Look for visual damage from multiple angles, including gaps, stains, and surface irregularities
- Check underneath in crawl space or basement if accessible, looking for moisture, rot, or structural issues
Repair Overview: The Complete Process for Fixing Soft Spots
Repairs must address the moisture source first. If water keeps entering the floor system, your repair work will fail within months. The soft spot is the symptom. The leak or moisture problem is the disease.
The basic repair sequence follows a logical order. First, you stop the moisture source, whether that’s a leaking pipe, roof issue, or condensation problem. Next, you remove the damaged material layer by layer. This exposes the full extent of damage so you know exactly what you’re dealing with. Then you inspect and reinforce the structural supports underneath. Damaged joists need sistering or replacement before you install new subfloor sections. After the structure is solid, you replace the subfloor sections with proper materials and fastening. Finally, you reinstall the finished flooring to complete the repair.
Each phase accomplishes something specific. Source elimination prevents the problem from happening again. Material removal shows you whether the damage is shallow or deep, isolated or widespread. Structural assessment ensures the floor will be safe to walk on and won’t sag later. Proper installation of replacement materials restores the floor’s integrity and load bearing capacity. Surface finishing brings the floor back to its original appearance and function.
Essential repair phases:
- Source identification and moisture elimination
- Finished flooring removal to expose the subfloor
- Damaged subfloor extraction with proper cutting techniques
- Structural assessment and joist reinforcement where needed
- Subfloor replacement and leveling to match surrounding surface
- Finished floor reinstallation with attention to transitions
Root Causes and Prevention: Understanding and Stopping Soft Spot Development
Water-related causes create most soft spots. Plumbing leaks from toilets, sinks, washing machines, and dishwashers drip or seep into the floor below. These leaks might be small and slow, making them hard to notice until damage appears. Roof leaks allow water to travel down through walls and ceilings before soaking into floors. Foundation moisture wicks up through concrete slabs or crawl spaces. HVAC condensation from air handlers or ductwork drips onto the subfloor. Bathrooms and kitchens are high risk zones because water is constantly present and the potential for leaks is higher.
Structural and pest issues also cause soft spots. Inadequate ventilation in crawl spaces traps moisture against the subfloor from below. Termites eat through floor joists and subfloor material. Wood boring insects create similar damage.
Moisture leads to rot through a fungal decay process. When wood stays wet for extended periods, fungi colonize the material and break down the cell structure. The timeline from initial moisture exposure to structural compromise varies. In warm humid conditions, noticeable rot can develop in a few months. In cooler or drier conditions, it might take a year or more. Certain wood types are more vulnerable. Softwoods like pine rot faster than hardwoods. Particle board and non-treated plywood absorb water quickly and deteriorate rapidly.
Moisture control prevention strategies stop problems before they start. Maintain proper crawl space ventilation with functioning vents and adequate airflow. Install or maintain vapor barriers over exposed soil in crawl spaces. Use dehumidifiers in damp areas of your home, especially basements. Make sure bathroom exhaust fans work properly and vent to the outside, not into the attic. Fix plumbing leaks immediately when you discover them. Maintain proper exterior grading and drainage so water flows away from your foundation. Apply waterproof sealant to subfloor seams and edges during installation or repairs.
Protective measures and inspection routines catch small problems early. Check floors in high risk areas quarterly, especially around toilets and under sinks. Inspect your crawl space or basement annually for moisture, standing water, or early signs of rot. Use rugs or mats in water prone areas to protect the floor surface. Clean up spills promptly, especially if you have hardwood or laminate flooring that water can penetrate. Inspect your roof and gutters seasonally to prevent leaks. Monitor for new squeaks or soft areas that might indicate developing damage.
High risk areas in homes:
- Bathrooms, especially around toilets, tubs, and showers
- Kitchens near sinks, dishwashers, and refrigerators
- Laundry rooms around washing machines and utility sinks
- Entryways where snow and rain get tracked inside
- Areas below windows, especially those that leak during storms
- Rooms above crawl spaces or basements with moisture issues
Prevention practices homeowners should adopt:
- Inspect crawl spaces twice yearly for moisture, ventilation problems, and early rot signs
- Test bathroom plumbing connections for leaks by checking under sinks and around toilet bases
- Clean gutters seasonally to prevent overflow and roof leaks
- Check for roof leaks after major storms by inspecting attic spaces
- Maintain indoor humidity between 30 and 50% to prevent condensation and mold
- Seal around tubs and showers annually with fresh caulk
- Respond to any water intrusion within 24 hours before rot can begin
Essential Tools and Materials for Floor Soft Spot Repairs
Having the right tools prevents delays and ensures quality repairs. You don’t want to be halfway through a repair and realize you need to make a hardware store run. Missing the right tool can also lead to poor results or make the job harder than it needs to be.
Material selection affects how long your repair lasts. Marine grade plywood is the best choice for subfloor replacement because it resists moisture better than standard plywood. Standard plywood works in dry areas where you’re confident moisture won’t return. OSB sheathing costs less but doesn’t handle moisture well and shouldn’t be used in bathrooms, kitchens, or other wet areas. Match the thickness of your existing subfloor exactly so your finished floor sits at the correct height. Tongue and groove subfloor material provides better support across joist spans but costs more. Waterproof adhesives and sealants add another layer of protection. Construction adhesive creates a strong bond between the subfloor and joists. Waterproof sealant around panel edges keeps moisture from wicking into the material.
| Tool/Material | Purpose | Notes |
|---|---|---|
| Circular saw | Cutting out damaged subfloor sections | Set depth to exact subfloor thickness to avoid cutting joists |
| Reciprocating saw | Cutting in tight spaces and near walls | More maneuverable than circular saw for detail work |
| Pry bar | Removing damaged sections and pulling nails | Flat bar style works well for subfloor removal |
| Hammer | Removing nails and fasteners | Standard claw hammer is sufficient |
| Drill/driver | Installing screws to secure new subfloor | Cordless drill with multiple batteries speeds work |
| Measuring tape | Getting precise measurements for cuts | 25 foot tape handles most floor repairs |
| Carpenter’s square | Marking straight, square cutting lines | Ensures replacement pieces fit properly |
| Safety glasses | Eye protection from sawdust and debris | Required any time you’re cutting or drilling |
| Dust mask | Respiratory protection from airborne particles | N95 masks provide good protection from wood dust |
| Work gloves | Hand protection during demolition and installation | Leather gloves protect against splinters and sharp edges |
| Deck screws (2.5 to 3 inches) | Securing new subfloor to joists | Screws hold better than nails and don’t pop loose |
| Construction adhesive | Additional bonding between subfloor and joists | Reduces squeaks and adds strength to the repair |
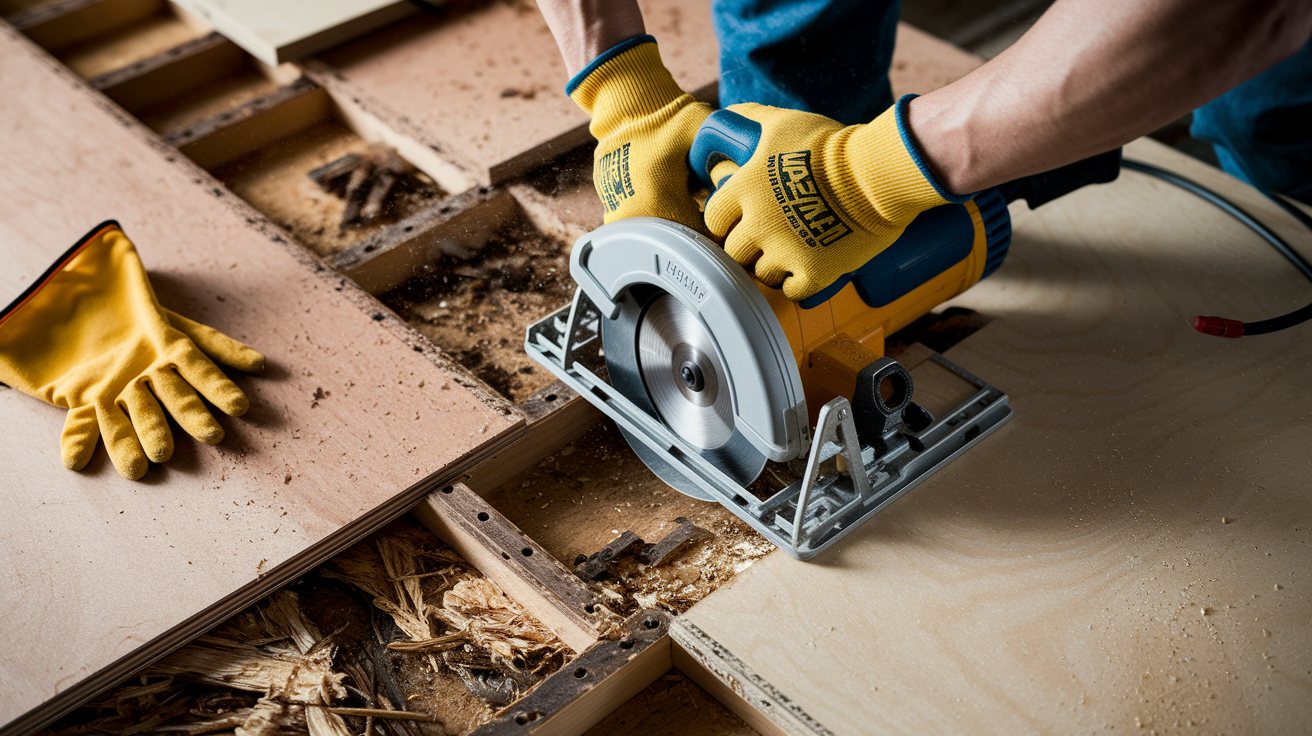
Accessing and Removing Damaged Subfloor Sections
The finished floor must come off first so you can see and access the damaged subfloor underneath. The removal method depends on what type of flooring you have. Look at the edges near walls or in closets to identify whether you have carpet, laminate, hardwood, tile, or vinyl.
Different floor types require specific removal techniques. Carpet pulls up fairly easily once you remove the transition strips at doorways and pry the edges loose from the tack strips. Roll it back past the damaged area. Pull up the padding underneath as well. Laminate planks come apart by lifting them at the joints and unlocking the tongue and groove connections. Start at the nearest wall and work toward the damaged area. Hardwood board extraction requires more care if you want to reuse the boards. You might need to cut the tongues off some boards to get them out without damaging adjacent pieces. Tile and thinset removal involves breaking the tiles with a hammer and chisel, then scraping up the thinset layer underneath. Vinyl sheet or plank removal varies. Some vinyl glues down fully, requiring scraping. Other types float and lift up easily.
Cutting out the damaged subfloor requires precision. Set your circular saw blade depth to match the subfloor thickness exactly. This prevents cutting into the floor joists underneath. Cut a rectangle several inches beyond the soft spot on all sides. You want to remove all compromised material and cut to the center of floor joists so you have solid wood to fasten the replacement piece to. Use a reciprocating saw for edges near walls where the circular saw won’t fit. Pry up the cut section with a flat pry bar. It might come up in pieces if the rot is severe.
Keep the work area clean as you go. Sawdust and wood fragments make the next steps harder and can hide important details you need to see.
Best practices for subfloor removal:
- Extend cuts to the nearest joist centers so replacement pieces have full support
- Mark joist locations before cutting by finding existing fasteners or using a stud finder
- Wear respiratory protection because cutting rotten wood releases mold spores and dust
- Check for plumbing and electrical lines before cutting by inspecting from below if possible
- Keep the work area clean with a shop vacuum to see what you’re working with
Inspecting and Reinforcing Floor Joists and Structural Supports
Once the damaged subfloor is out, inspect the floor joists underneath. This is when you find out if the problem is just the subfloor or if structural damage goes deeper. Look carefully at each joist in the exposed area.
Check joists for rot, cracks, or insect damage. Press a screwdriver into the wood. Solid wood resists. Rotted wood is soft and the screwdriver sinks in. Look for cracks running across the joist, which weaken it. Check for tunnels or channels from termites or carpenter ants. Assess moisture levels by feeling the wood. Damp wood needs to dry before you close up the repair. Determine if damage is surface level or goes deep into the joist. Surface damage might be acceptable. Deep rot requires sistering or joist replacement. Verify proper joist spacing and size. Most residential floors use 2×8, 2×10, or 2×12 joists spaced 16 inches on center.
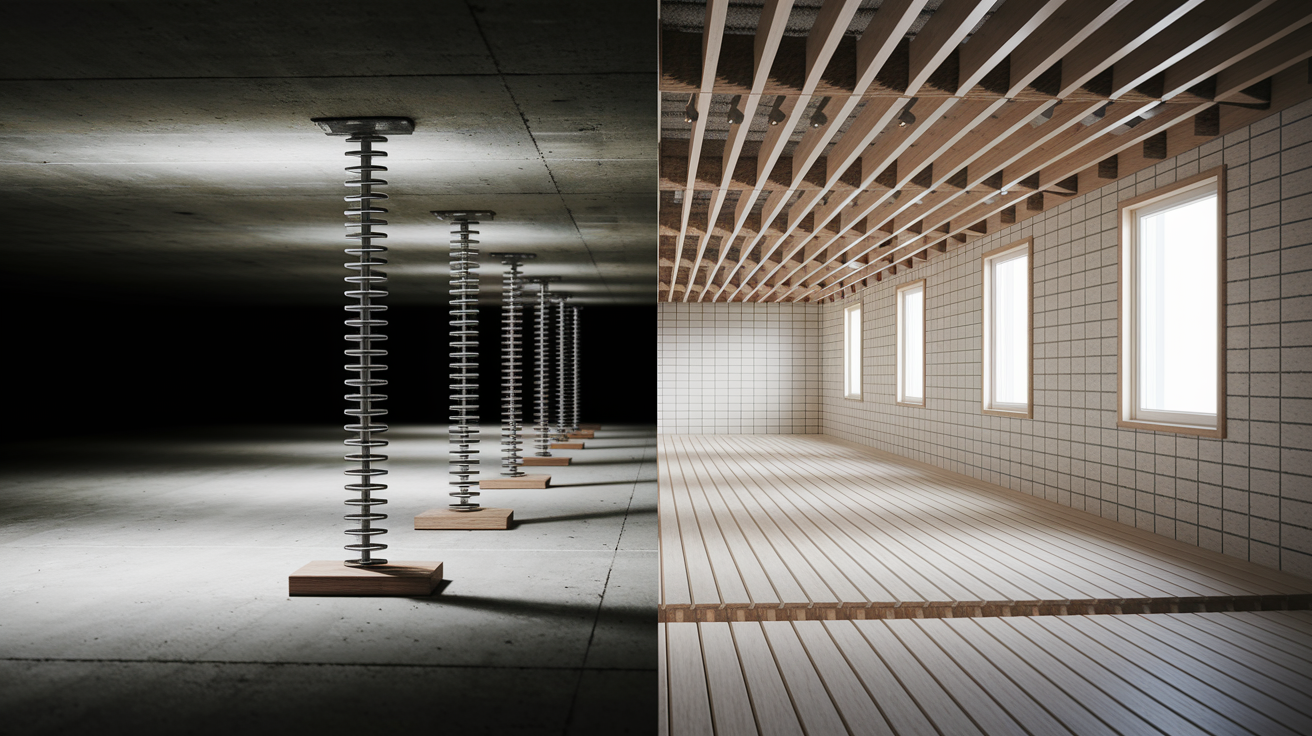
Sister damaged joists when rot or damage compromises their strength. Sistering means attaching a new joist alongside the damaged one. Select lumber that matches the dimensions of the existing joist. Apply construction adhesive to the contact surface of the new joist. This creates a stronger bond than fasteners alone. Secure the new joist with three inch deck screws or lag bolts every 12 to 16 inches, alternating sides. Make sure the new joist sits tight against the damaged one along its full length. Any gaps reduce the effectiveness.
Install support cleats and blocking to support the edges of your replacement subfloor panel. Create cleats from two by four dimensional lumber laid on their side. Tuck these under the existing good plywood at the edges of your cutout. Half the cleat extends under the existing floor, and half supports the replacement piece. Secure cleats with two and a half inch deck screws spaced three inches on center, driven through the existing flooring above into the cleat below. Add blocking between joists at the ends of your repair if the cuts run perpendicular to the joists. This gives you solid backing where the subfloor panels meet.
Steps for sistering a joist:
- Cut a new joist to match the length of the damaged section, or run full span for maximum strength
- Apply construction adhesive to the contact surface that will face the damaged joist
- Clamp or hold the new joist tight against the damaged joist, ensuring full contact and alignment
- Drive three inch screws or lag bolts every 12 inches, alternating sides to avoid splitting
Installing Replacement Subfloor and Leveling the Surface
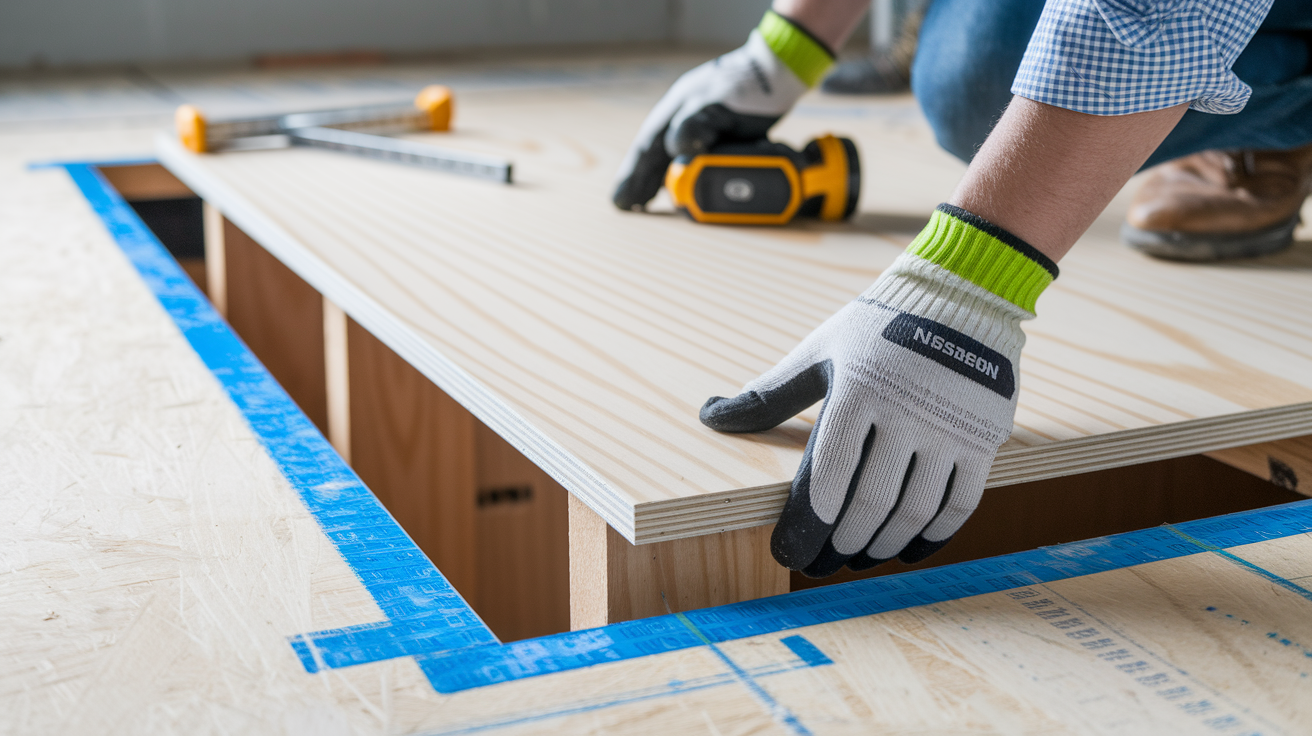
Measuring and cutting the replacement piece correctly ensures a good fit. Measure the opening precisely, accounting for the fact that your cuts probably landed on the centers of floor joists. Cut your subfloor material to fit the opening. Use marine grade plywood or exterior grade plywood for moisture resistance. Test fit the piece before applying any adhesive. It should drop in with about an eighth inch gap around the edges for expansion. Make sure the thickness matches your existing subfloor so the surface ends up level.
Installation techniques matter for a repair that lasts. Apply construction adhesive to the top of all joists and cleats in the opening. This is in addition to screws, not instead of them. Position the replacement panel in the opening. The edges should land on the centers of joists and cleats. Secure it with deck screws every six to eight inches along each joist and cleat. Countersink the screw heads so they sit slightly below the surface. This prevents them from interfering with your finished flooring later.
Address gaps and leveling issues before installing finished flooring. Small gaps at the edges of your patch are normal. Fill them with an appropriate material. Body filler works well for this because it doesn’t crack with minor floor movement. Avoid plaster based floor leveling compounds in areas with any flex or movement because they crack easily. For deeper gaps or voids, apply filler in multiple layers, allowing each to dry before adding the next.
Surface preparation determines how your finished floor looks. Sand filled areas flush with the surrounding subfloor using a belt sander or random orbital sander. Check the level across the transition between old and new subfloor. Run a straight edge across the seam. High spots need sanding. Low spots need additional filler. The surface must be smooth for vinyl flooring because every imperfection telegraphs through. Laminate and carpet are more forgiving. Vacuum thoroughly to remove all dust and debris before moving to the next step.
Installation tips:
- Leave an eighth inch expansion gap at the edges where the new panel meets the old subfloor
- Stagger screw patterns rather than placing them in straight lines to distribute stress
- Predrill near panel edges to prevent splitting the plywood
- Use moisture resistant materials in bathrooms, kitchens, and other wet areas
- Make sure all fasteners are flush or countersunk below the surface
- Vacuum thoroughly before installing floor covering to prevent debris from causing bumps
For more guidance on handling moisture issues that caused the damage, see our Water Damage Repair Guide.
Reinstalling Finished Flooring Over Repaired Soft Spots
Surface preparation requirements vary significantly across flooring types. Vinyl flooring requires a perfectly smooth surface because imperfections show through. Even small ridges or depressions become visible over time. Hardwood needs a level surface but not necessarily perfectly smooth since the thickness of the boards bridges minor irregularities. Tile needs a flat and stable surface to prevent cracking. The tile sits on thinset mortar, which can fill small gaps, but the subfloor can’t flex or the grout will crack. Laminate flooring is moderately forgiving since it floats over underlayment. Small imperfections usually don’t telegraph through. Carpet is the most forgiving option because the padding and carpet thickness hide minor surface variations.
Reinstallation techniques depend on whether you’re reusing the original materials or installing new flooring. Try to reuse original materials when possible if they’re undamaged and you removed them carefully. Match the existing floor direction and pattern so the repair blends in. This matters most with hardwood, laminate, and tile. Install proper transition strips at the edges of the repair area if you’re installing different flooring material. These strips bridge the height difference and create a finished edge. Allow adhesives to cure fully before replacing furniture or allowing heavy traffic. Most construction adhesives need 24 hours. Flooring adhesives vary.
Replacement might be better than reinstallation in certain situations. Damaged original materials can’t go back down. If you broke tiles during removal or damaged hardwood boards, you’ll need replacements. Mismatched appearance bothers some homeowners even if the repair is structurally sound. If you can’t find matching materials or the repair area is very visible, installing new flooring across the entire room gives a uniform look. This is an opportunity to upgrade if your flooring was old or worn anyway. Budget becomes a factor. Extensive repair areas might cost as much to patch with matching materials as they would to refloor completely, especially with budget friendly options like laminate or vinyl plank.
Considerations for flooring decisions:
- Condition of removed flooring materials and whether they’re still usable
- Availability of matching replacement materials in your flooring type and color
- Size and visibility of the repair area within the room
- Budget for new flooring compared to the labor cost of carefully reinstalling original materials
Cost Estimates and Timeline for Soft Spot Floor Repairs

DIY cost ranges for materials are manageable for most homeowners. Small repairs typically run $150 to $400 in materials. This includes plywood for the subfloor replacement, fasteners like deck screws, construction adhesive, waterproof sealant, and filler materials for leveling. Tool rental adds another $50 to $100 if you need to rent a circular saw, reciprocating saw, or flooring tools. Finished flooring replacement varies widely. Vinyl or laminate might run $200 to $500 for a small area. Matching hardwood or tile can cost $500 to $1,000 or more depending on the type and area size.
Professional repair costs reflect the complexity and time required. Small area repair with basic subfloor replacement runs $500 to $1,500. This assumes straightforward access and no major structural work. Medium repairs that include joist sistering or more extensive subfloor damage cost $1,500 to $3,500. Extensive structural repairs with multiple joist replacements, large affected areas, or difficult access run $3,500 to $8,000 or more. Several factors affect the final price. Accessibility matters. Crawl space work costs more than basement access. The extent of damage drives the price up as rot spreads to more joists and larger subfloor areas. Regional labor rates vary significantly. Urban areas typically cost more than rural locations.
Timeline expectations help you plan around the disruption. DIY small repairs take one to two days for most homeowners. Day one involves removal and assessment. Day two covers installation and cleanup. Professional small repairs typically take one to three days. The crew moves faster but scheduling might add time before they start. Major structural work takes three to seven days or longer. Drying and curing time matters. If joists are damp, they need to dry before you close up the repair. Adhesives and fillers need curing time before you can install finished flooring or put furniture back.
For professional assessment and quality repair work, visit our House Repair Services page to learn what to expect.
| Repair Scope | DIY Cost | Professional Cost | Typical Timeline |
|---|---|---|---|
| Small isolated soft spot | $150 to $400 | $500 to $1,500 | 1 to 2 days |
| Medium area with joist sistering | $300 to $700 | $1,500 to $3,500 | 2 to 4 days |
| Large area with multiple soft spots | $600 to $1,200 | $3,000 to $6,000 | 3 to 7 days |
| Extensive structural damage with multiple joist replacement | Not recommended for DIY | $5,000 to $10,000+ | 5 to 10+ days |
DIY Repair vs. Professional Help: Making the Right Decision
Many soft spot repairs are manageable DIY projects with proper preparation and realistic assessment of your skills. If you’ve done basic home repairs before and have carpentry tools, a straightforward soft spot repair is within reach.
Suitable DIY scenarios include single small soft spots in accessible locations. If the damage is limited to one area and you can easily reach it from a basement or crawl space, that’s a good candidate for DIY repair. Confirmed surface level damage works well for DIY. If you’ve verified the rot is only in the subfloor and the joists underneath look solid, you’re dealing with a simpler repair. No structural joist damage keeps the project straightforward. You’re just replacing subfloor material, not dealing with load bearing issues. Basic carpentry skills and tools are enough. If you can measure accurately, cut straight lines, and drive screws, you have what you need.
Professional help becomes necessary when complexity or risk increases. Multiple soft spots in different rooms indicate a systemic problem. You might have a major leak or chronic moisture issue that needs professional diagnosis. Load bearing wall involvement requires structural knowledge. If the soft spot is directly under or near a load bearing wall, you need someone who understands load transfer and proper support during repairs. Extensive joist damage or rot changes the project scope significantly. If multiple joists show rot or you find extensive damage during your initial inspection, the structural engineering involved goes beyond basic DIY. Second story floors require structural assessment because failure could be dangerous. You need to know the repair will safely support the load. Uncertainty about building codes or span requirements should push you toward professional help. Floor framing has code requirements for joist size, spacing, and span that affect safety. Lack of crawl space or basement access makes the repair much harder. If you’d have to cut through finished ceiling below to reach the floor joists, that adds complexity. Presence of mold requiring remediation is a health issue. Mold covering more than a small area needs professional remediation with proper containment and disposal.
Finding qualified contractors involves some research. For major structural issues, start with a structural engineer consultation. They’ll assess the damage and provide recommendations for repairs. Licensed general contractors with floor repair experience can handle the actual work. Request references from previous floor repair jobs. Ask to see photos of completed work. Proof of insurance protects you if something goes wrong during the repair.
Signs you need professional help:
- Damage affecting multiple rooms or widespread areas
- Visible structural sagging in walls, ceilings, or door frames near the soft spot
- Floor joists with more than 25% of their cross section rotted or damaged
- Repairs located near plumbing or electrical systems requiring coordination
- Load bearing concerns involving walls above the damaged area
- Mold growth covering more than 10 square feet, which requires professional remediation
Temporary Fixes vs. Permanent Solutions for Soft Floor Areas
Temporary fixes are appropriate in specific situations where permanent repair must wait. You might need to buy time to save money for the full repair. Structural work and materials cost more than you have available right now. Stabilizing the floor until professional help arrives makes sense if the damage is significant and you’ve scheduled a contractor. Emergency situations where the floor became unsafe suddenly require immediate action to prevent injury. Seasonal considerations matter in some climates. If winter weather makes crawl space work impractical or you need to wait for materials to arrive, temporary stabilization prevents worsening.
Temporary stabilization methods reduce further damage without completing a full repair. Adding adjustable jack posts from below supports the sagging floor and prevents additional stress on the damaged area. Install these on solid blocking or concrete in the crawl space, directly under the soft spot. Installing blocking between joists reduces flex and spreads the load. Cut blocks from the same dimensional lumber as your joists and fit them tightly between joists in the damaged area. Using shims and wedges can level minor dips by driving them between the subfloor and joists from below. Placing plywood sheets over the affected area distributes weight across a larger surface and prevents focused loads on the weak spot. This works as a very short term measure for walked on surfaces.
Temporary measures are insufficient long term for clear reasons. The underlying rot continues to spread while hidden under a cosmetic fix or temporary support. Moisture damage progresses through the wood, weakening more of the subfloor and potentially moving into the joists. Structural integrity continues degrading even if the floor feels temporarily stable. Every day that passes with active rot means more material to replace later. Cosmetic covering creates a false sense of security. If you place something over the soft spot to avoid thinking about it, you’re not solving anything.
Critical points about temporary fixes:
- They do not stop rot or moisture damage progression in the affected wood
- They should only be used while actively planning and preparing for permanent repair within weeks, not months
- They may create additional problems if left too long by hiding spreading damage or creating new stress points
Final Words
Soft spots signal damage that gets worse with time. The repair process starts with finding and stopping the moisture source, then moves through removing damaged material, reinforcing structure, and installing new subfloor sections.
Whether you handle the work yourself or bring in a pro, the goal stays the same: restore a safe, solid floor that holds up.
Small repairs caught early prevent bigger structural problems down the road. Regular checks in bathrooms, kitchens, and other high-risk areas help you spot issues before they spread.
If you’re learning how to fix soft spots in floor areas for the first time, take it one step at a time. The process is straightforward when you follow the sequence and don’t skip the prep work.
FAQ
How to fix a soft spot on a floor?
To fix a soft spot on a floor, you need to first stop the moisture source, then remove the finished flooring, cut out the damaged subfloor section, check and reinforce the floor joists underneath if needed, install a new piece of subfloor material secured with screws and adhesive, and reinstall the finished flooring. This process typically takes one to two days for a small isolated soft spot.
What causes soft spots in the floor?
Soft spots in the floor are caused primarily by moisture seeping into the wood subfloor and causing rot, typically from plumbing leaks under toilets or sinks, roof leaks, foundation moisture, HVAC condensation, bathroom or kitchen water intrusion, or poor crawl space ventilation. Other causes include termite damage, wood-boring insects, or structural issues from inadequate support.
How much does it cost to fix a soft spot in the floor?
Fixing a soft spot in the floor costs between $150 and $400 for a small DIY repair including materials like plywood, fasteners, adhesives, and fillers, or $500 to $1,500 for professional repair of a small isolated area. Costs increase to $1,500 to $3,500 for medium repairs requiring joist work, and $3,500 to $8,000 or more for extensive structural damage affecting multiple areas.
How to stiffen up a subfloor?
To stiffen up a subfloor, you can add blocking between floor joists, install support cleats made from dimensional lumber secured to existing joists, sister damaged joists by attaching new lumber alongside them with construction adhesive and screws, or add adjustable jack posts from below in crawl spaces. These methods work when joists are sagging or inadequately supported but not rotted.
When should I hire a professional for soft floor repairs?
You should hire a professional for soft floor repairs when you have multiple soft spots indicating a systemic problem, damage affecting load-bearing walls, extensive joist rot exceeding 25% of the joist, second-story floors requiring structural assessment, mold covering more than 10 square feet, or uncertainty about building codes and span requirements. Professionals have the expertise to assess hidden damage and ensure structural safety.
Can I use a temporary fix for a soft spot in my floor?
You can use a temporary fix for a soft spot in your floor by adding adjustable jack posts from below, installing blocking between joists, or placing plywood sheets over the area to distribute weight while you save for full repair or wait for professional help. These measures do not stop rot or moisture damage progression and should only be used while planning permanent repair.
What type of plywood should I use for subfloor replacement?
For subfloor replacement, you should use marine-grade plywood or water-resistant OSB sheathing that matches the thickness of your existing subfloor, typically three-quarters of an inch. In moisture-prone areas like bathrooms and kitchens, marine-grade plywood provides better long-term protection against future water exposure compared to standard plywood or OSB.
How do I know if floor joists are damaged?
You know floor joists are damaged by inspecting them after removing the subfloor and looking for wood rot, cracks, insect damage, soft or spongy wood when pressed with a screwdriver, visible sagging or bowing, moisture stains, or musty odors. Joists with more than 25% rot need sistering or replacement to maintain structural integrity and load-bearing capacity.
What tools do I need to repair a soft spot in my floor?
To repair a soft spot in your floor, you need a circular saw for cutting subfloor, reciprocating saw for tight spaces, pry bar for removing damaged sections, drill and driver for installing screws, measuring tape and carpenter’s square for precise cuts, hammer for removing nails, and safety equipment including glasses, dust mask, and work gloves.
How long does it take to repair a soft spot in a floor?
Repairing a soft spot in a floor takes one to two days for a small DIY repair, one to three days for professional repair of a small area, and three to seven days for major structural work involving multiple joists. Additional time is needed for drying and curing of adhesives and fillers before reinstalling finished flooring.
Should I remove all the finished flooring before repairing the subfloor?
You should remove only the finished flooring directly over and extending several inches beyond the soft spot area, not the entire floor. This allows access to the damaged subfloor while minimizing disruption and preserving flooring materials that can be reinstalled after repair.
How far should I extend my subfloor cuts beyond the soft spot?
You should extend your subfloor cuts several inches beyond the visible soft spot to ensure all damaged material is removed and to reach solid joists for proper support of the replacement panel. Always extend cuts to the nearest joist centers so the new subfloor piece has full backing for secure fastening.
What prevents soft spots from coming back after repair?
Preventing soft spots from coming back after repair requires fixing the original moisture source first, maintaining proper crawl space ventilation, installing or repairing vapor barriers, using dehumidifiers in damp areas, fixing plumbing leaks immediately, cleaning up water spills within 24 hours, and conducting quarterly floor checks in high-risk areas like bathrooms and kitchens.
Can I install vinyl flooring over a repaired soft spot?
You can install vinyl flooring over a repaired soft spot only after ensuring the surface is perfectly smooth and level, since vinyl shows every imperfection underneath. Fill all gaps and irregularities with appropriate body filler, sand flush, countersink all screw heads, and cover them with filler before installing vinyl planks or sheets.