


Ever notice how a little peeling paint can hide rot that’s quietly destroying your trim from the inside out? What looks like a simple cosmetic issue often means water’s been soaking into the wood for months. The good news is that you can fix most rotted trim yourself if you catch it early and use the right method. This guide walks you through testing for damage, deciding between filler and epoxy repair, and knowing when full replacement is the smarter move.
Identifying Wood Rot Damage in Exterior Trim
Knowing the difference between surface damage and deep rot determines whether you’ll spend $30 on wood filler or $500 replacing boards. Superficial paint problems can look a lot like structural decay, but they need completely different fixes.
Watch for these five warning signs:
Soft or spongy texture when you press with your finger or a putty knife, especially at joints and end grain sections where water collects. Crumbling or splitting edges that break away easily when touched, meaning the wood fibers have deteriorated past the point of repair. Bubbling or peeling paint that lifts in thick layers, showing moisture is trapped underneath and pushing the coating away. Water stains or discoloration appearing as dark streaks, gray patches, or yellowish marks where water’s gotten in and stayed. Visible mold or fungal growth showing up as black spots, white fuzzy patches, or greenish staining from prolonged wetness.
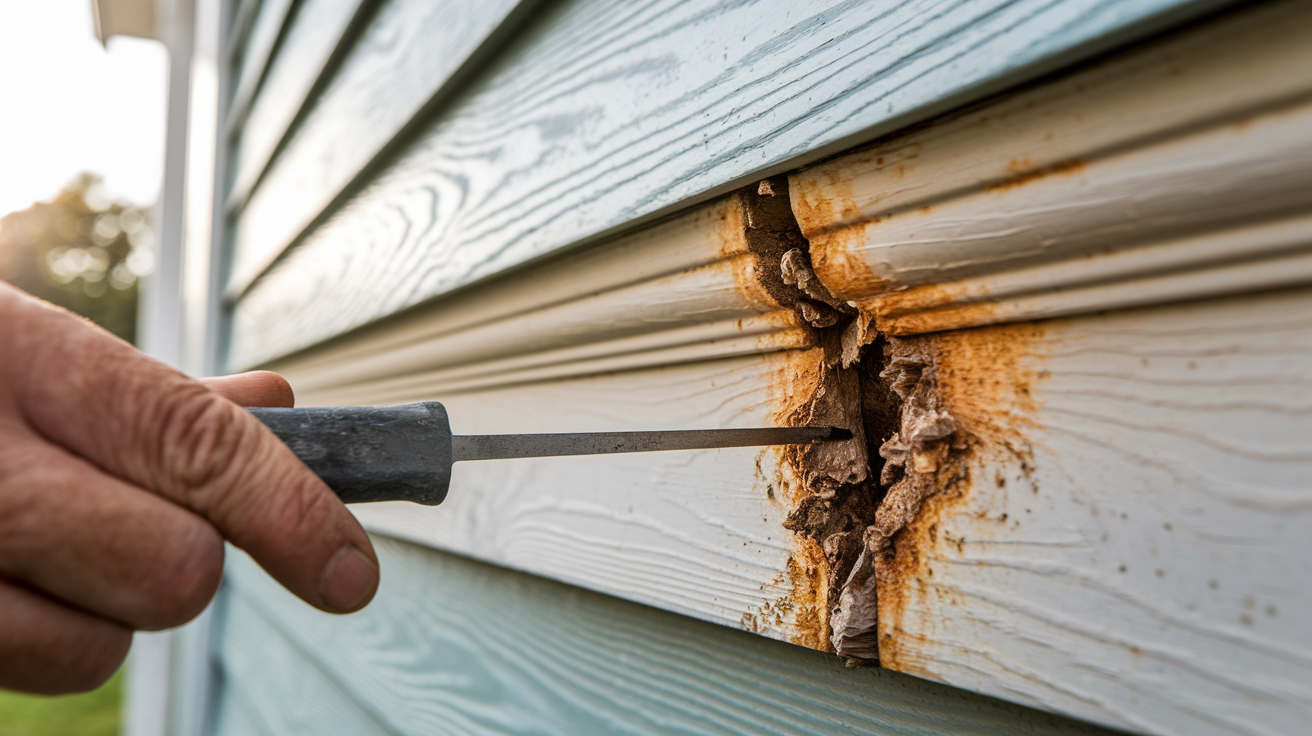
The screwdriver test tells you how far rot goes into the wood. Push the blade tip into suspect areas with moderate pressure. Sound wood resists and feels firm. Rotted wood lets the blade sink in easily, like you’re pushing into cork or soft cheese. Test every few inches along damaged sections. If the screwdriver only penetrates the surface quarter inch, you’re dealing with surface dry rot that wood filler or epoxy can fix. When the blade goes deeper than half an inch, or the wood crumbles around the entry point, the structural integrity is gone and that section needs replacement. Mark where the deep rot extends with a pencil so you know where to cut.
Window sills take the most punishment because water sits on flat surfaces and seeps into end grain. Door frames rot at the bottom corners where splash back from rain hits repeatedly. Fascia boards along the roof edge fail when gutters overflow or back up, sending water behind the board where it stays trapped. Check these three spots first.
Essential Repair Overview: From Assessment to Finishing
Before you start cutting or mixing epoxy, understand the complete sequence:
- Identify and assess damage severity using visual inspection and the screwdriver probe test to determine repair method
- Remove compromised wood sections by cutting or chiseling until only solid, dry material remains
- Apply wood hardener treatment to stabilize remaining wood and create a solid base for filler or replacement
- Fill or replace damaged areas using epoxy consolidant for structural repairs or new boards for extensive damage
- Sand progressively smooth with three grit levels to create paint ready surfaces that blend with existing trim
- Prime and paint for protection using exterior grade products that block moisture and UV breakdown
Each step depends on the one before it. Skip the hardener treatment and your filler pulls loose within months. Rush the sanding and brush marks show through the paint.
Tools and Materials for Rotted Trim Repair

Having the right equipment ready before you start prevents mid project trips to the hardware store and reduces frustration when mixing materials that set on a timer.
Safety and Protection Equipment
Wear a dust mask rated N95 or better when cutting or sanding rotted wood, since fungal spores become airborne and can irritate lungs. Protective eyewear with side shields keeps wood chips and epoxy drips out of your eyes. Work gloves protect your hands from splinters, sharp tools, and chemical irritation from two part epoxy systems. Set up your work area outdoors or in a garage with doors open for ventilation, especially when using epoxy products that release low level fumes even at room temperature.
Hand Tools and Power Equipment
Chisels (half inch and one inch widths) remove rot from tight corners and carved details. Plastic putty knives spread filler without scratching surrounding surfaces, and they clean up easily since epoxy doesn’t stick to hard plastic. A screwdriver or awl works for the probe test. Oscillating tools with wood cutting blades make precise cuts in tight spots without disturbing adjacent good trim. Reciprocating saws cut through nails and remove large damaged sections quickly. Pry bars lift trim away from walls without cracking it. Miter saws create clean angled cuts for corner joints. Nail guns drive finishing nails flush without hammer dents.
| Tool Category | Specific Items | Primary Use |
|---|---|---|
| Safety Gear | N95 dust mask, safety glasses, work gloves | Protect lungs, eyes, and hands from debris and chemicals |
| Removal Tools | Chisel, reciprocating saw, pry bar, oscillating tool | Cut out damaged sections and separate trim from substrate |
| Shaping Tools | Putty knife, sandpaper (80/100/220 grit), wood rasp | Apply filler, smooth surfaces, blend repairs with existing trim |
| Fastening Tools | Nail gun, finishing nails, miter saw, speed square | Cut replacement pieces accurately and secure them properly |
Quality tools produce cleaner cuts and smoother surfaces, which means less sanding and better paint adhesion. A $40 oscillating tool pays for itself by saving hours compared to hand cutting with a coping saw.
Wood Filler vs Epoxy Consolidant Repair Methods
Use wood filler for cosmetic fixes where the wood still has strength. Choose epoxy consolidant when rot has weakened the structure but you want to save the original board instead of replacing it.
Epoxy Consolidant for Structural Repairs
Two part epoxy systems (resin and hardener) penetrate deep into partially rotted wood and harden into a solid mass stronger than the original material. Marine grade formulations resist moisture better than standard epoxy and work well for exterior trim exposed to rain and snow. After removing all soft rot, brush the two part epoxy primer onto the exposed wood. It soaks in for about 15 minutes, then wipe off any excess pooling on the surface. This saturates the porous wood fibers and creates a stable foundation. Next, mix the epoxy resin and hardener on a hard plastic board using a putty knife (a mixing ratio around 50/50, but follow the specific product instructions). Spread the mixed epoxy into voids and over treated areas to rebuild missing sections. The saturation method reinforces wood that’s started to decay but hasn’t completely failed, which is perfect for expensive decorative trim you don’t want to replace.
Wood Filler for Surface Repairs
Cellulose wood fillers, two part wood fillers like Bondo, and exterior wood putty work for shallow damage less than half an inch deep where the underlying wood is still solid. These products fill nail holes, small cracks, and surface rot without the penetrating strength of epoxy. Wood putty stays slightly flexible and works better for trim that expands and contracts with temperature changes. Grain filler smooths porous wood before painting but doesn’t add structural support. Bondo type fillers set hard in 15 to 20 minutes and sand easily, making them good for quick cosmetic repairs. Use these products on non load bearing trim like baseboards, corner boards, and decorative brackets where appearance matters more than strength.
Epoxy costs two to three times more than wood filler (around $30 to $50 per quart versus $10 to $15 for wood filler). Epoxy requires mixing two components and working within a 30 to 45 minute window before it sets too hard to shape. Wood filler applies straight from the container and stays workable longer. For durability on exterior trim, epoxy outlasts filler by years, especially in areas that stay damp.
Complete Trim Replacement Techniques
Replace entire sections when rot extends more than halfway through the board thickness, when multiple areas on the same piece show damage, or when the trim is split, warped, or structurally compromised. Partial replacement works when rot is confined to one end or corner of an otherwise solid board.
Follow these steps for section replacement:
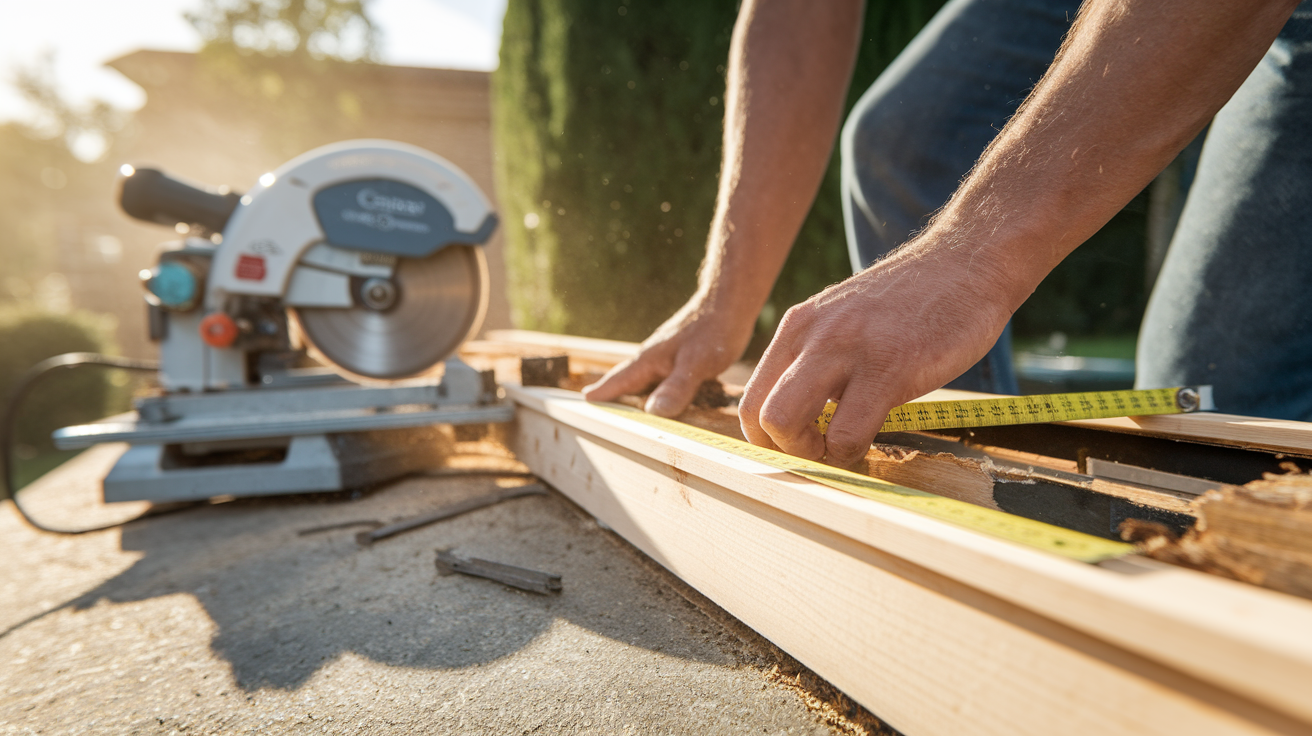
- Mark cut lines beyond damaged area using a speed square to draw straight lines at least two inches past where the rot ends, cutting into solid wood
- Make clean cuts with miter or reciprocating saw depending on access and whether you’re removing a corner section (miter) or mid board section (reciprocating saw with metal cutting blade to cut through nails)
- Measure and cut replacement piece with proper joint type matching the profile of existing trim and cutting miter, butt, or coped joints to match adjacent pieces
- Test fit and adjust for tight seams by holding the new piece in place and checking gap size (should be less than 1/16 inch), then trimming or sanding as needed
- Secure with finishing nails and wood glue by applying exterior wood glue to the back and cut ends, positioning the piece, and driving nails at an angle through the face into solid backing
Cedar, pressure treated lumber, and clear pine each work for exterior trim replacement. Cedar resists rot naturally and holds paint well but costs more (around $3 to $5 per linear foot for common profiles). Pressure treated lumber ($2 to $3 per foot) contains chemical preservatives and works for painted applications, though it splits more easily when nailing. Pine ($1 to $2 per foot) costs least but needs immediate sealing and regular maintenance. Match the existing trim profile by bringing a small piece to the lumberyard or searching online for the specific pattern name (like colonial casing, crown molding, or base cap). Some historic profiles require custom milling, which adds cost and time.
When replacing load bearing trim like porch columns or structural fascia, install a sister board alongside the existing damaged board for temporary support before removal. Add backing support by nailing a pressure treated board behind the trim location if the original substrate has rotted, creating a solid surface for fastening the new trim.
Moisture Source Prevention and Drainage Solutions
Repairs fail when water keeps reaching the wood. Stop the moisture and the trim lasts decades. Keep letting it get wet and you’ll be back out there in two years.
Common moisture problems that cause trim rot:
Failed caulking at joints between trim pieces and at trim to siding connections where gaps let water behind the boards. Poor gutter drainage from clogged downspouts, undersized gutters, or missing gutter sections that overflow onto trim. Missing or damaged flashing around windows, doors, and roof edges that should direct water away from wood. Downspouts aimed at foundations that create splash back soaking lower trim boards and sending water into wall cavities. Sprinkler overspray hitting walls and trim repeatedly, keeping wood damp for hours. Inadequate ventilation in soffits, behind trim, or in enclosed porch ceilings that traps moisture from condensation.
Check caulk lines twice a year. Push your finger along the joints. If the caulk feels hard and brittle instead of slightly flexible, it’s failing. Cracks as thin as a credit card let water in. Remove old caulk by cutting along both edges with a utility knife, then pulling it out. Use acrylic latex caulk for painted trim (it’s paintable after 30 minutes and flexible enough for seasonal movement) or silicone caulk for unpainted trim and areas with heavy water exposure (it lasts longer but won’t accept paint). Apply caulk in temperatures above 40°F. Cut the tube tip at a 45 degree angle to match the joint size, and smooth the bead with a wet finger within two minutes of application.
Gutters need cleaning twice yearly, in late fall after leaves drop and in early spring after winter debris settles. Check that gutters slope at least a quarter inch per 10 feet toward downspouts so water doesn’t pool. Extend downspouts at least six feet from the foundation using flexible extensions or underground drain lines. Inspect flashing where roof meets walls, around chimneys, and above doors and windows. Metal flashing should overlap trim by at least two inches at the top and extend past trim edges by half an inch on sides. Install drip edge along roof eaves so water drops clear of the fascia board instead of running back behind it.
For ongoing moisture issues that keep returning even after repairs, consider Water Damage Restoration assessment to identify hidden sources behind walls or under trim that aren’t visible during standard inspection.
Preparing and Priming Repaired Wood Trim
Surface preparation determines how long your repair lasts before paint starts peeling or moisture works back in. Rush through this part and you’ll see the repair failing within a year.
Complete the finishing sequence in order:
- Scrape loose material and feather edges by using a putty knife or carbide scraper to remove any flaking paint around the repair, then sand the edges at an angle so old paint blends gradually into bare wood instead of creating a hard ridge
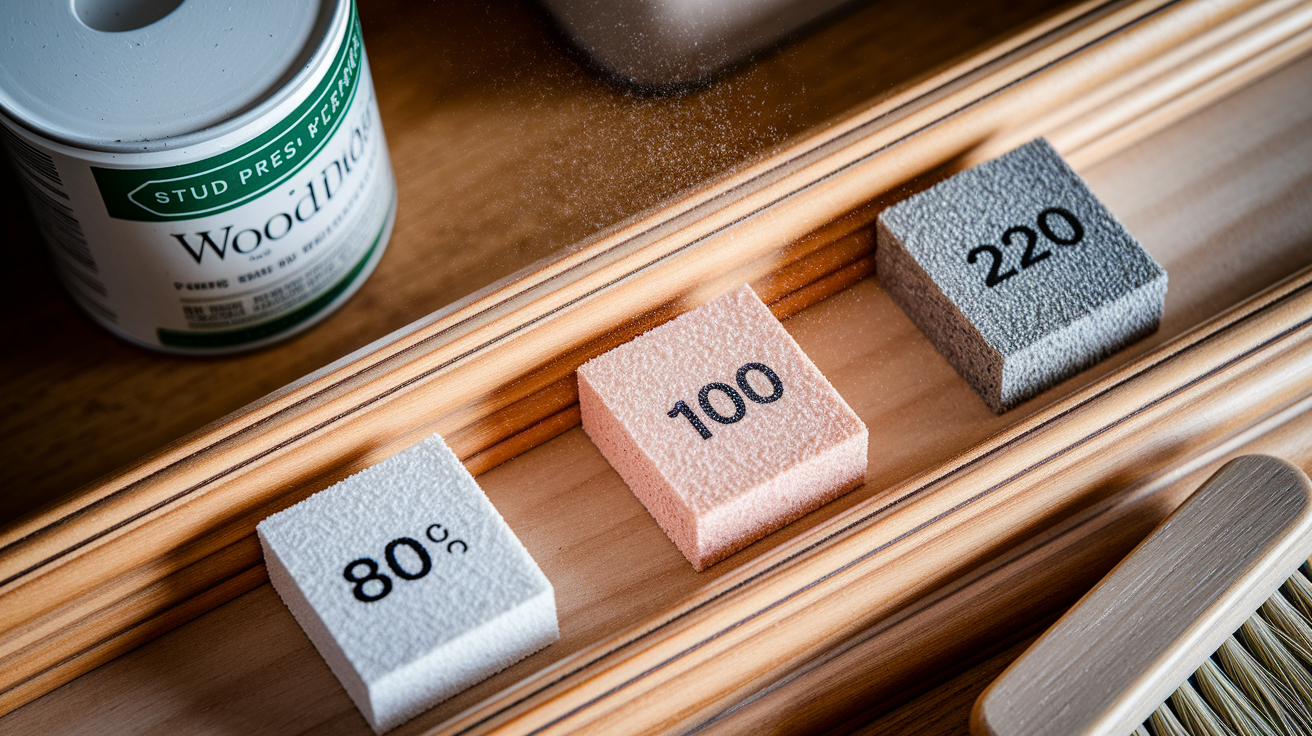
- Progressive sanding with 80/100/220 grit starting with 80 grit to shape epoxy or filler close to the surrounding surface, switching to 100 grit to remove scratches from the coarser paper, finishing with 220 grit to create a smooth surface that won’t show sanding marks through paint
- Apply wood preservative to bare sections by brushing a penetrating preservative (containing copper naphthenate or similar fungicide) onto any exposed wood, particularly end grain, letting it soak in for the time specified on the label (usually 15 to 30 minutes)
- Prime with acrylic primer after the preservative dries completely (usually 4 to 24 hours depending on temperature and product), covering all bare wood and filled areas with a brush or small roller
Drying time between coats varies with temperature and humidity. At 70°F and moderate humidity, primer dries to the touch in one to two hours but needs four to six hours before painting. Below 50°F, double those times. Above 85°F with low humidity, primer dries faster but may not penetrate as well, so watch for dry looking wood that’s still absorbing moisture underneath.
Exterior grade paints contain more binders and pigments than interior paints, creating a thicker, more flexible film that moves with wood expansion. For epoxy repairs, UV protection is critical because sunlight breaks down epoxy over time, turning it chalky and brittle. Apply one coat of acrylic primer (which blocks UV rays better than oil based primer and doesn’t trap moisture) followed by two coats of 100% acrylic latex exterior paint. The first paint coat seals the primer. The second coat provides weather resistant coating and blocks UV penetration. Let each paint coat dry for at least four hours (longer in cool or humid conditions).
After the final paint coat dries fully (usually 24 hours), run a thin bead of acrylic latex caulk along any joints between the repaired section and adjacent trim to seal the seam against water entry.
Cost Estimates and Project Timeline
A small patch repair using epoxy filler takes half a day and costs under $100 in materials. Replacing multiple trim boards can stretch to a full weekend and $500 or more, depending on how much trim needs work and what materials you choose.
| Repair Type | Material Cost Range | Time Required | Difficulty Level |
|---|---|---|---|
| Small epoxy patch | $30 to $80 | 4 to 6 hours (plus overnight cure) | Low to Moderate |
| Section replacement | $75 to $200 | 6 to 10 hours | Moderate |
| Multiple trim boards | $200 to $600 | 2 to 3 days | Moderate to High |
Weather affects every stage of exterior trim work. Temperature needs to stay above 50°F for epoxy, primer, and paint to cure properly. Below that, chemical reactions slow down and products don’t bond correctly. Mixed epoxy stays workable for 30 to 45 minutes in moderate temperatures (60 to 75°F). In cool weather (below 60°F), you get closer to 45 to 60 minutes of work time, which helps when shaping complex repairs. When it’s hot (above 85°F), epoxy sets faster, sometimes in as little as 20 to 30 minutes, so mix smaller batches. High humidity (above 70%) extends drying time for primers and paints by several hours. Rain within 24 hours of applying primer or paint can wash the coating off before it cures, ruining the work.
For DIY repairs, expect to spend $50 to $100 on a basic epoxy repair kit including two part epoxy, primer, putty knives, and sandpaper. Add another $30 to $50 for exterior primer and paint if you don’t already have them. Section replacement materials (replacement trim boards, wood glue, nails, caulk) run $75 to $150 for a typical repair. Most epoxy brands produce minimal gas at room temperature but proper ventilation and protective equipment are still required during mixing and application.
Professional contractors charge $300 to $800 for small repairs (a few linear feet of trim) and $1,500 to $3,000 or more for extensive work involving multiple boards, complex profiles, or hard to reach areas. Their pricing includes labor, materials, and typically a warranty on the work. When damage spreads across several boards or involves structural components, professional expertise often produces better long term results than DIY attempts.
Rot Resistant Materials and Composite Alternatives
When you’re replacing rotted sections, choosing upgraded materials reduces the chance you’ll be doing this repair again in five years. The upfront cost difference often pays back through longer service life and less maintenance.
Natural Rot Resistant Woods
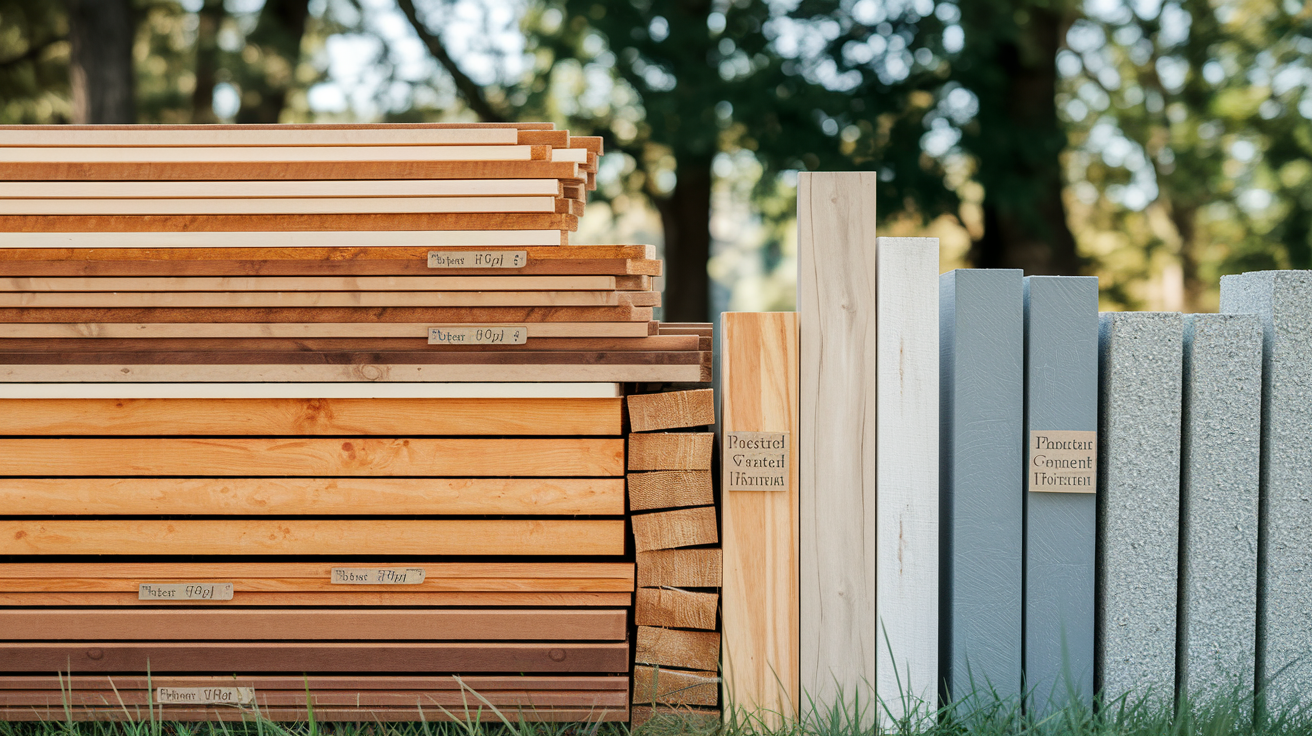
Cedar contains natural oils that repel moisture and resist fungal decay, making it a top choice for exterior trim in wet climates. The wood holds paint well and rarely splits when nailed. Expect to pay $3 to $5 per linear foot for standard cedar trim profiles (more for wider or thicker boards). Redwood offers similar rot resistance with a distinctive red color, though it costs slightly more than cedar and can be harder to find outside western states. Pressure treated lumber is regular pine or fir injected with chemical preservatives that prevent rot and insect damage. It costs less than cedar ($2 to $3 per foot) and works well for painted applications, though the green tint shows through if left unpainted, and the wood tends to split more when fastening near ends. Pressure treated lumber is best for areas that stay damp (like skirting near the ground) or for backing boards behind visible trim.
Modern Composite Options
PVC trim boards are solid plastic that never rots, splits, or needs painting, though most people paint them to match existing wood trim. The material costs $4 to $6 per linear foot, expands and contracts more than wood (requiring special fastening techniques and wider gaps at joints), and feels different when cutting or shaping (it melts if you cut too fast with power tools). PVC works well for water prone locations like shower surrounds brought outdoors, foundation trim, and fascia boards behind gutters. Fiber cement trim (like HardieTrim) is a mix of cement, sand, and cellulose fibers that’s highly durable and paint holds well. It costs $3 to $5 per foot, resists rot and insects completely, but it’s heavy, brittle (can crack if dropped), and creates silica dust when cut (requiring a respirator during installation). Fiber cement suits areas needing maximum durability with a wood like appearance.
Balance your material selection against three factors: structural requirements (load bearing trim needs solid wood or engineered lumber, not hollow PVC), budget constraints (composite materials cost more initially but last longer), and desired appearance (wood grain and texture versus uniform synthetic surface). For a historically accurate look, stick with cedar or redwood. For maximum longevity in harsh conditions, choose PVC or fiber cement.
Annual Maintenance and Inspection Schedule
Trim rot spreads fastest when moisture exposure continues unchecked. A small soft spot at a window corner can grow into a section requiring full replacement within six months if water keeps getting in. Regular inspection catches problems early when repairs cost less and take less time.
Check these items twice per year:
Visual damage assessment by walking around the house looking for paint bubbles, cracks, stains, or obvious soft spots in trim. Screwdriver probe testing at vulnerable areas (window sills, door bottoms, corners, joints) to detect hidden soft wood before visible damage appears. Caulk condition checking by running your finger along all trim joints and looking for cracks, gaps, or hardened sections that need replacement. Paint integrity review noting any bare wood, peeling areas, or spots where the finish has worn through to the substrate. Gutter and downspout function by watching them during rain or running water from a hose to confirm proper flow and no overflow onto trim. Vegetation clearance verification making sure shrubs, vines, and tree branches stay at least 12 inches away from trim so air circulates and surfaces dry after rain. Moisture stain monitoring by comparing current conditions to photos from the previous inspection to track whether stains are growing or new ones appearing.
Spring inspections (March to April in most climates) catch damage from winter freeze thaw cycles, ice dam leaks, and snow accumulation. Check for paint that’s lifted or cracked from moisture expansion. Fall inspections (September to October) happen before wet weather returns and after summer heat has stressed paint and caulk. Look for caulk that’s shrunk or pulled away from joints. Document what you find by taking photos of problem areas from the same spot each time, which helps you track whether damage is getting worse and how fast.
Between inspections, handle maintenance as needed: reapply caulk as soon as you see cracks forming (even hairline cracks let water in), clean gutters after heavy storms or during leaf fall, apply wood preservative to any bare wood within a week of noticing it, and touch up paint whenever scratches or chips expose wood to moisture. Treating small problems immediately prevents them from becoming expensive repairs. Applying wood preservative every two to three years (even over painted surfaces, using a penetrating sealer product) adds an extra layer of rot protection.
Keep a simple log noting inspection dates, what you checked, and what repairs you made. This helps you spot patterns (like one corner that keeps having problems, suggesting a hidden drainage issue) and remember when you last applied caulk or preservative.
When to Call a Professional for Trim Repair

Some situations exceed DIY capabilities because of risk, complexity, or the specialized tools and knowledge required to do the job safely and correctly.
Call for professional help when you encounter:
Structural rot affecting load bearing components like porch posts, beam ends, or roof fascia that supports gutter weight, where mistakes compromise building safety. Pest infestation (carpenter ants or termites) indicating hidden damage that might extend into wall cavities, floor joists, or other areas you can’t see without removing siding or opening walls. Second story or high elevation trim requiring scaffolding or ladder work above 12 feet, where fall risk increases substantially. Damage extending behind siding into sheathing or framing members, requiring removal of multiple building layers and proper reinstallation following building codes. Permit required work per building codes in your area, particularly for structural repairs or extensive trim replacement that changes the building envelope. Projects where you lack confidence or tools to complete the work correctly, especially with expensive materials or in highly visible locations where poor results show.
Professionals bring assessment skills that go beyond visible damage. They probe suspect areas systematically, use moisture meters to find wet spots inside walls, and recognize patterns that suggest hidden problems (like a single rotted window sill that actually points to failed flashing above it). Most reputable contractors provide written warranties covering both materials and labor for one to three years, giving you recourse if the repair fails prematurely. They know local building codes and can pull permits when required, avoiding potential issues during home sales or insurance claims. Their equipment (scaffolding, specialized saws, spray equipment for primers and sealers) produces faster, cleaner results on complex projects.
Compare the cost benefit when facing extensive damage: a full weekend of your time plus $400 in materials and tool rentals versus $1,200 for professional work with warranty coverage. For comprehensive repairs involving multiple issues or unknown damage extent, Professional House Repair Services provide assessment capabilities that identify all problems at once, preventing repeated repairs as new rot appears in areas you didn’t check initially. If the project feels overwhelming, or if initial probe testing reveals more damage than expected, getting a professional opinion makes sense before you’re halfway through a repair that’s beyond your skill level.
Final Words
Rotted trim won’t fix itself, and leaving it untouched only means more expense later. Whether you patch a small section with epoxy or replace an entire board, the real work is finding and stopping the water source. Caulk the gaps, check the gutters, and keep an eye on vulnerable spots like window sills and door frames.
If you stay ahead of it with simple annual checks, you’ll catch rot before it spreads. That’s when how to repair rotted wood trim stays manageable instead of turning into a bigger project.
FAQ
How can you fix rotted wood without replacing it?
You can fix rotted wood without replacing it by removing all soft material, treating remaining solid wood with epoxy consolidant or hardener, then filling voids with two-part epoxy filler. This works when rot is limited to small areas and solid wood remains underneath.
What can you use to harden rotted wood?
You can use two-part epoxy wood consolidant to harden rotted wood by saturating the soft fibers with penetrating resin that bonds and reinforces the damaged structure. Marine-grade epoxy provides the most durable, weather-resistant results for exterior trim applications.
How do professionals treat wood rot?
Professionals treat wood rot by first identifying the moisture source, then removing all compromised wood back to solid material, applying fungicidal wood hardener, and filling or replacing sections based on damage severity. They also address drainage problems and ventilation issues to prevent recurrence.
What liquid hardens rotted wood?
Two-part epoxy consolidant hardens rotted wood by soaking into soft fibers and curing into a solid, reinforced structure in about 15 minutes. Wood hardener solutions containing fungicides also penetrate and stabilize moderately damaged wood while preventing further decay.
When should you replace trim instead of repairing it?
You should replace trim instead of repairing it when rot extends through more than 30 percent of the thickness, affects load-bearing sections, or continues behind the surface into wall sheathing. Complete replacement is also needed when wood crumbles during the screwdriver test.
How long does epoxy wood filler take to cure?
Epoxy wood filler takes overnight to fully cure before you can sand it smooth, though it remains workable for 30 to 45 minutes after mixing depending on temperature. Hot weather shortens work time while cool conditions extend it slightly.
What causes exterior trim to rot?
Exterior trim rots when moisture from failed caulking, poor gutter drainage, missing flashing, or sprinkler overspray stays trapped against the wood long enough for fungal decay to start. Inadequate ventilation and direct ground contact also accelerate rot development.
Can you paint over wood filler on exterior trim?
You can paint over wood filler on exterior trim after it fully cures and you sand it smooth with progressively finer grits ending at 220-grit. Prime bare wood and filler with acrylic primer first, then apply two coats of exterior acrylic paint for weather protection.
How do you test for wood rot in trim?
You test for wood rot in trim by pressing a screwdriver or awl into the surface to check for soft, spongy texture that gives easily under pressure. Solid wood resists penetration while rotted wood crumbles, splits apart, or feels punky when probed.
What materials resist rot better than regular wood trim?
Cedar, redwood, pressure-treated lumber, PVC trim boards, and fiber cement resist rot better than regular pine or fir trim because they either contain natural preservatives or use synthetic materials that moisture cannot penetrate. Composite products eliminate rot entirely but cost more upfront.
How often should you inspect exterior trim for rot?
You should inspect exterior trim for rot twice per year in spring and fall using visual checks and screwdriver probing of vulnerable areas like window sills, door frames, and fascia boards. Early detection catches problems before they spread and become costly.
Does epoxy filler need protection from sunlight?
Epoxy filler needs protection from sunlight because UV rays break down the resin and cause deterioration over time. Apply acrylic primer followed by two coats of 100 percent acrylic exterior paint to shield the repair and maintain its structural integrity.