

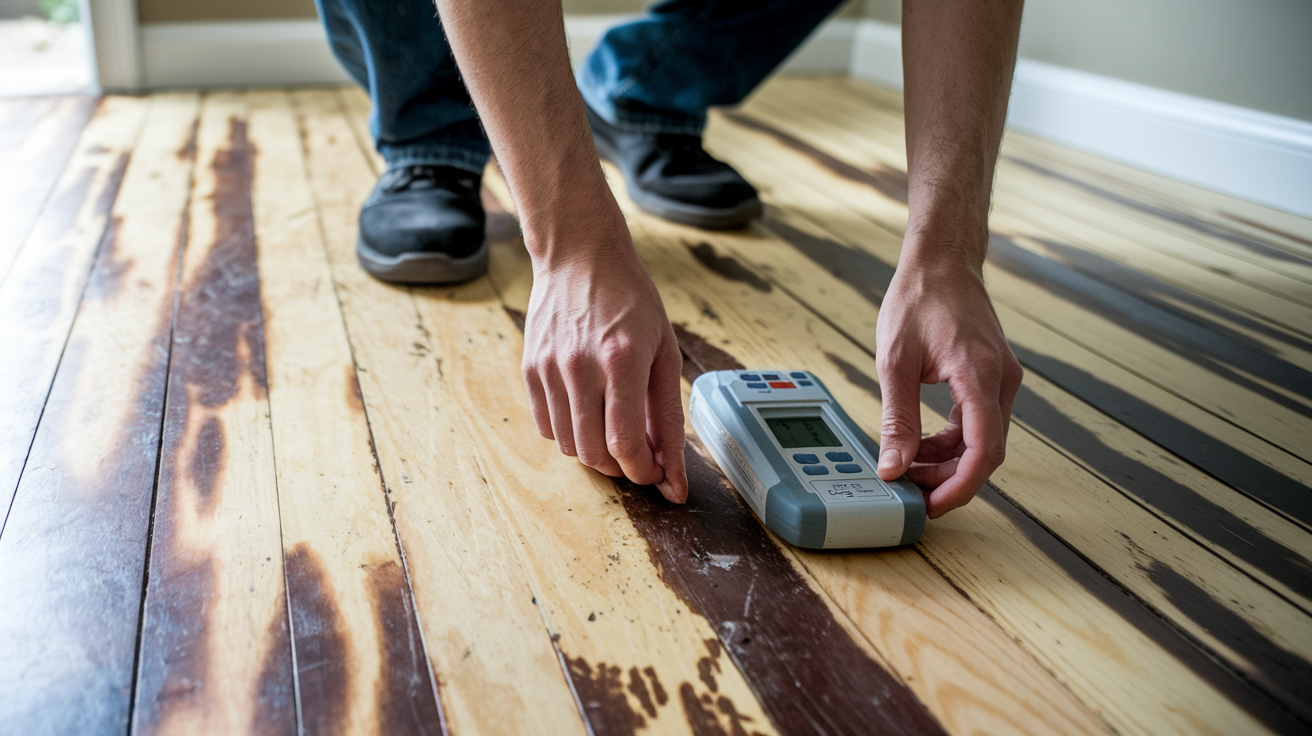

Ever notice how a soft spot in your floor never gets better on its own? That’s because water damaged subfloor doesn’t heal, it just keeps rotting until you deal with the root cause and replace what’s compromised. The good news is that most subfloor repairs follow a clear process once you know what you’re looking at. This guide walks you through identifying damage extent, drying everything completely, removing rotted sections properly, and installing replacement material that’ll hold up for decades.
Step-by-Step Repair Process for Water Damaged Subfloors

Fixing a water damaged subfloor starts with figuring out what you’re actually dealing with. Walk through the affected area and note every soft spot, stain, or warped section. Once you understand the scope, the work follows a specific sequence: dry out the subfloor completely, treat any mold or contamination, remove damaged sections, install proper support framing, and replace the subfloor material. Rush any of these steps and you’ll regret it later.
The biggest decision you’ll make is whether to patch small damaged sections or replace entire sheets. That choice depends on how deep the rot goes, whether the damage affects structural support, and what type of subfloor material you’re working with. Particle board soaks up water like a sponge and typically needs full replacement even with moderate exposure. Plywood and OSB hold up better but still need replacement when the fibers separate or the material crumbles under pressure.
Here’s the complete process from start to finish:
- Identify and fix the water source to prevent continued damage
- Dry the affected area completely using dehumidifiers, fans, and ventilation until moisture readings confirm it’s safe to proceed
- Treat all visible mold growth with antimicrobial solutions appropriate to the contamination level
- Remove damaged subfloor sections by cutting along joist centers for proper support
- Install new plywood or OSB with construction adhesive and mechanical fasteners, maintaining proper expansion gaps
Most straightforward repairs take three to five days when you account for drying time. Complex jobs involving multiple rooms or extensive structural damage can stretch to two weeks or more. If you discover significant joist rot, widespread mold contamination, or damage that compromises load bearing capacity, that’s when you need to bring in a professional contractor.
Identifying Signs of Subfloor Water Damage
Catching subfloor damage early keeps a manageable repair from turning into a major structural problem. The longer water sits beneath your flooring, the more it spreads through the wood fibers and the deeper the rot penetrates. What starts as a small soft spot near a toilet can work its way across an entire bathroom floor if left unchecked.
Common warning signs of subfloor water damage include:
- Soft or spongy spots when you walk across the floor, especially near sinks, tubs, toilets, or appliances
- Visible warping or cupping where the flooring surface rises or dips in sections
- Musty odors that indicate mold growth beneath the surface, often strongest in enclosed spaces
- Squeaking or creaking sounds that weren’t there before, caused by loosened fasteners or separated wood layers
- Discoloration or staining visible on flooring edges, baseboards, or from below in crawl spaces
- Sagging areas where the floor visibly dips or feels unstable underfoot
- Separated or lifting flooring at seams where moisture has broken adhesive bonds
- Water stains on ceilings below if the damaged subfloor is on an upper level
Test suspicious areas by pressing firmly with your hand or applying weight with your foot. Healthy subfloor feels solid and doesn’t give. Damaged subfloor compresses noticeably, feels soft, or even cracks under pressure. Push a screwdriver into questionable spots along the edges. If it sinks in easily, the wood fibers have deteriorated and that section needs replacement.
Don’t assume damage stops where you can see or feel problems. Water travels along joists and through wood grain, often spreading well beyond the obvious wet spot. Check the entire room and adjacent spaces, particularly following the path toward any water source. Pull back flooring at the edges to inspect the subfloor directly when surface signs suggest hidden damage.
Locating the Water Source Before Subfloor Repair
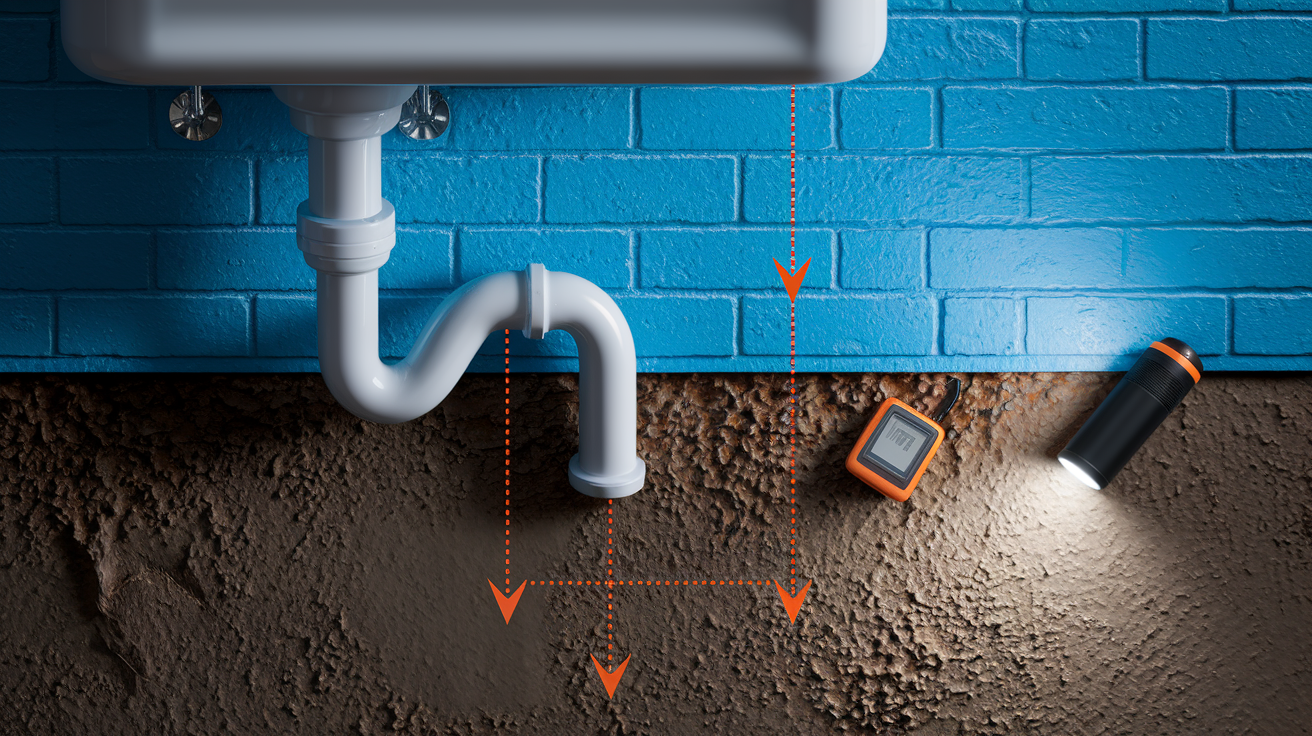
Repairing a water damaged subfloor without fixing what caused it guarantees you’ll be doing the same work again in six months. The water has to come from somewhere, and that source needs to be addressed before you spend time and money on subfloor replacement. Otherwise you’re just putting new wood under an active leak.
Common water intrusion sources include leaking supply lines under sinks, deteriorated wax rings at toilet bases, cracked drain pipes, failed appliance hoses on washing machines and dishwashers, tub and shower pan leaks, and condensation from poorly vented bathrooms. In bathrooms, water damage often comes from tub overflow that runs down the outside of the tub, or repeated sink spillage that seeps through gaps around the fixture rather than obvious toilet leaks. Foundation cracks and poor exterior grading can let groundwater seep into crawl spaces and basements, where it wicks up into subfloor from below.
Follow the staining patterns and damage severity to trace back to the origin point. Water stains typically appear darkest and the rot runs deepest closest to the source. Particle board shows concentric rings of swelling that point toward where water first entered. Check for water marks on joists that indicate which direction moisture traveled. In multi level homes, ceiling stains on the floor below map directly to the leak location above. Don’t overlook condensation issues from inadequate crawl space ventilation or basement humidity, both of which cause widespread subfloor deterioration without any obvious leak.
Using a Moisture Meter to Assess Subfloor Damage Extent
A moisture meter takes the guesswork out of determining whether your subfloor has dried enough to repair and shows you exactly how far the water penetrated. These tools measure moisture content as a percentage, giving you objective data instead of relying on how the wood feels. That difference matters because wood that feels dry to the touch can still hold enough moisture to support mold growth and continued rot.
Pin type moisture meters use two metal probes that you press into the wood surface. The tool measures electrical resistance between the pins, which changes based on moisture content. These work well for spot checking specific areas and penetrating into the wood layers. Pinless meters use electromagnetic sensors that scan below the surface without creating holes. They cover larger areas quickly but don’t penetrate as deeply as pin type models.
For plywood and OSB subfloors, you want readings below 12 percent moisture content before installing new materials. Readings between 12 and 16 percent indicate wood that’s still drying and needs more time. Anything above 16 percent means active moisture problems that require continued drying or point to an ongoing leak. Hardwood typically needs to be below 10 percent. Always take multiple readings across the affected area because moisture levels vary significantly over short distances.
Map your moisture readings systematically:
- Start by testing the obviously damaged section where you first noticed problems
- Take readings every 12 to 18 inches moving outward from the damage center in all directions
- Continue testing until you get three consecutive readings in the acceptable range, confirming you’ve reached the dry perimeter
- Mark the wet/dry boundary with tape or chalk to define your repair area
- Retest every 24 to 48 hours during the drying process to track progress and confirm when it’s safe to proceed
Determining Whether to Repair or Replace Damaged Subfloor Sections
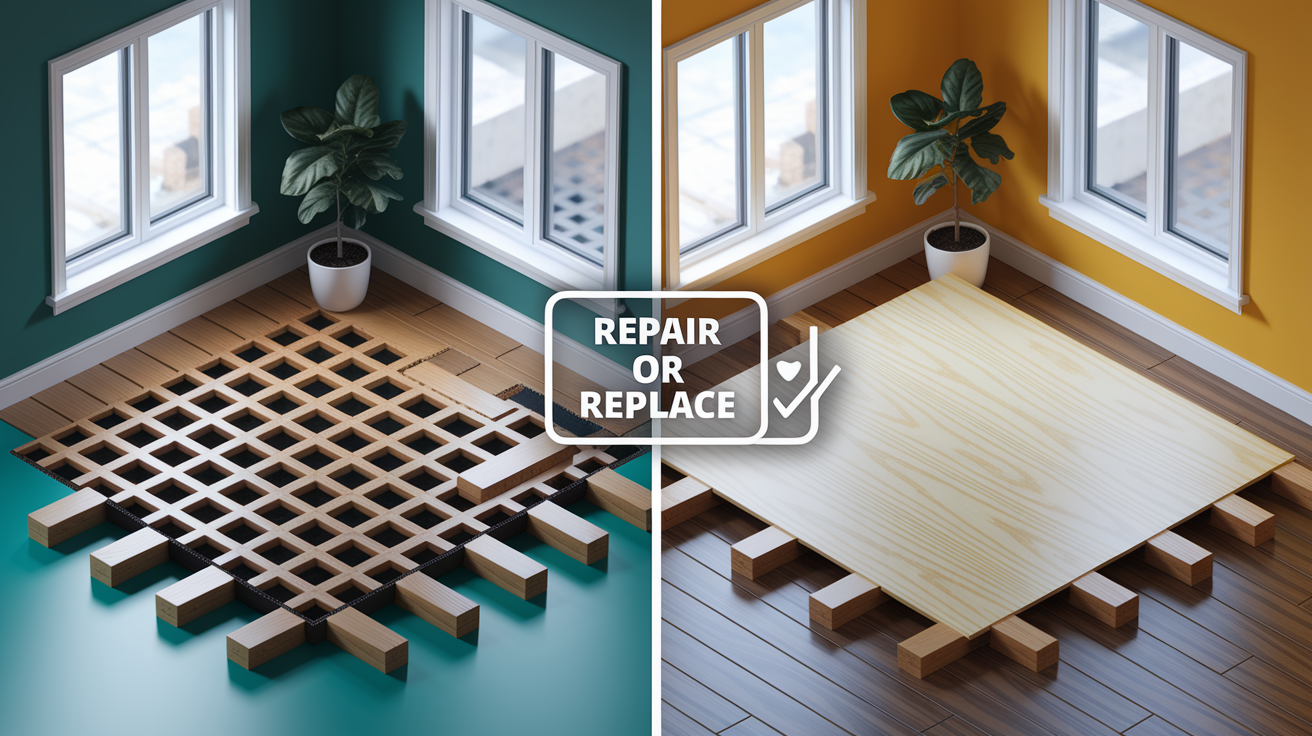
The extent of rot, the material type, and whether the damage affects structural integrity determine if you can patch a section or need to replace entire sheets. Making the right call here prevents callbacks and floor failure down the road.
Cost effectiveness matters too, but not at the expense of structural safety. Sometimes spending a bit more for complete replacement makes more sense than patching extensively damaged areas that will likely fail again.
| Damage Level | Repair or Replace | Criteria |
|---|---|---|
| Minor | Repair/Patch | Surface staining only, no soft spots, moisture content below 12%, structural integrity intact, affects less than 10% of sheet |
| Moderate | Partial Replacement | Soft spots present, wood fibers intact but swollen, isolated to specific section, can cut to nearest joist on both sides, affects 10 to 40% of sheet |
| Severe | Full Sheet Replacement | Crumbling wood fibers, separating layers, extensive soft areas, affects more than 40% of sheet, compromised structural connection to joists |
| Complete | Full Replacement Plus Framing | Joist damage present, complete structural failure, sagging floor, mold penetration into framing, load bearing capacity compromised |
Patching works when damage is truly isolated and you can cut clean edges that land on solid joist support. The replacement piece needs full bearing on joists or added blocking. Never patch by just gluing a piece over damaged subfloor. That creates a weak multilayer situation that will telegraph through your finish floor and likely fail under traffic. Cut out the bad section completely, install proper support for the patch edges, and fasten the new piece as if you were installing a full sheet.
Different materials respond to water damage differently, and that affects your repair decision. Plywood holds up better than particle board or standard OSB because the cross grain construction limits how far moisture travels between layers. When plywood gets wet, you can often dry it successfully if you catch it within 24 to 48 hours. Particle board swells permanently when saturated and almost always needs replacement. Tongue and groove OSB performs better than square edge, but both deteriorate when the wood fibers separate. If you’re working with particle board that’s been wet more than a day or two, plan on full replacement even if it doesn’t look that bad yet.
Tools, Materials, and Safety Equipment for Subfloor Repair
Having everything on site before you start prevents mid project delays and keeps you from tracking through the house to grab forgotten items. This is especially important for subfloor work because once you open up a floor section, you’ve created a safety hazard that needs to be addressed promptly.
| Item Category | Specific Items | Purpose |
|---|---|---|
| Detection Tools | Moisture meter, flashlight, tape measure, chalk line | Assess damage extent, locate joists, mark cut lines |
| Demolition Tools | Circular saw, reciprocating saw (Sawzall), pry bar, hammer, cat’s paw, utility knife | Remove flooring and cut out damaged subfloor sections |
| Installation Tools | Drill/driver, jigsaw, hand saw, level, square, pencil | Cut replacement pieces, install fasteners, ensure level surfaces |
| Subfloor Material | 3/4 inch plywood or OSB sheets | Primary replacement subfloor rated for structural applications |
| Framing Material | 2×4 or 2×6 lumber for blocking and support | Add support at cut edges and between joists |
| Fasteners | 2 inch construction screws, 3 inch screws for framing | Secure subfloor to joists and blocking |
| Adhesives/Sealants | Construction adhesive, polyurethane sealant | Bond subfloor to framing, prevent squeaks, seal edges |
| Drying Equipment | Dehumidifier, air movers/fans, wet dry vacuum | Remove moisture before repair, accelerate drying process |
| Mold Treatment | Antimicrobial spray, bleach solution, spray bottles, scrub brushes | Kill and remove mold growth on salvageable surfaces |
| Respiratory Protection | N95 or N100 respirator masks, replacement cartridges | Protect lungs from mold spores, wood dust, and contaminated particles |
| Hand Protection | Heavy duty work gloves, chemical resistant gloves for mold treatment | Protect hands from splinters, sharp edges, and chemical contact |
| Eye Protection | Safety glasses or goggles with side shields | Protect eyes from sawdust, debris, and chemical splashes |
| Body Protection | Disposable coveralls, knee pads | Prevent contamination exposure, protect knees during floor level work |
| Cleanup Supplies | Heavy duty trash bags, shop vacuum with HEPA filter, tarp | Contain and remove contaminated materials safely |
When selecting replacement subfloor material, match or exceed the thickness and grade of what you’re replacing. Most residential applications use 3/4 inch tongue and groove plywood or OSB rated for subfloor applications, typically marked as “Exposure 1” or “exterior grade.” Plywood costs more but holds fasteners better and resists re wetting better than OSB. If you’re working in a moisture prone area like a bathroom, consider advantech or other moisture resistant OSB products, or upgrade to marine grade plywood for maximum durability. Never use particle board or thin underlayment grade plywood as structural subfloor, even if that’s what you’re removing.
Water damaged subfloors create real health risks that you can’t ignore. Rotting wood releases spores and particles that irritate lungs and airways. Any subfloor that’s been wet for more than 48 hours likely has mold growth, even if you don’t see visible colonies. Disturbing contaminated materials during demolition sends concentrated amounts of these particles into the air. A basic dust mask doesn’t provide adequate protection. Use an N95 respirator as minimum protection for light contamination. If you see visible black mold or the damage covers a large area, upgrade to an N100 respirator or a P100 half face respirator with replaceable cartridges. Wear safety glasses, heavy gloves, and disposable coveralls. This isn’t optional safety theater. Mold exposure causes respiratory problems, allergic reactions, and long term health issues that aren’t worth risking to save a few dollars on protective equipment.
Removing Existing Flooring to Access the Damaged Subfloor
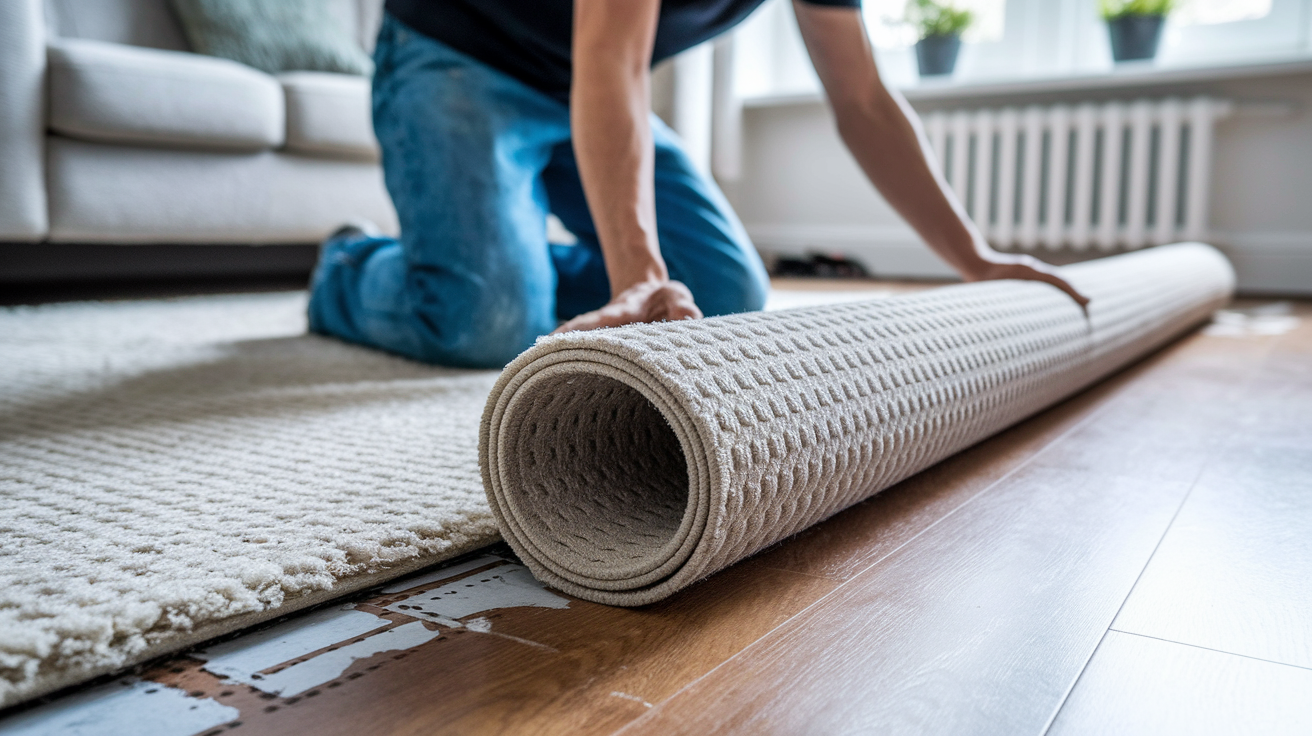
You can’t repair what you can’t see, and that means the finish flooring has to come up first. Take your time with removal to avoid creating additional damage, especially if you’re hoping to reuse materials or if the damage is less extensive than you initially thought.
Removing Carpet and Padding
Start at a corner and peel back the carpet to expose tack strips and padding underneath. The carpet typically isn’t secured except at the edges, so it lifts fairly easily once you get it started. Pull up the padding next, which is usually stapled to the subfloor every 12 inches or so. Use a flat pry bar to pull staples as you go, or plan to remove them all after the padding is up. Dispose of any wet carpet or padding immediately. Once saturated, these materials harbor mold and bacteria, and they’re not worth salvaging.
Removing Hard Surface Flooring
Laminate flooring usually snaps together with locking mechanisms and can be disassembled by reversing the installation process. Start at the wall and work backwards. Vinyl sheet flooring is typically glued down and requires scoring with a utility knife and prying up in sections. Vinyl plank and tile may be floating, glued, or a combination. Ceramic tile needs to be broken out with a hammer and cold chisel. It’s messy, time consuming, and the tile rarely survives removal, so factor replacement cost into your budget.
Removing Hardwood Floors
If the hardwood is nailed down and not directly damaged by water, you might be able to save the boards by carefully prying them up. Work slowly and use a flat pry bar with a block of wood underneath to distribute pressure. Number the boards on the back as you remove them so you can reinstall in the same orientation. Glued down hardwood rarely comes up without damage. Engineered hardwood with a thin wear layer isn’t worth the effort to save since any sanding or refinishing will likely go through the veneer.
Once the finish floor is up, remove any underlayment that’s installed over the subfloor. This thin layer of plywood or hardboard needs to come out to expose the structural subfloor beneath. Bag all contaminated materials immediately and get them out of the living space. The longer wet materials sit around, the more they spread mold spores and create additional contamination.
Drying Out Water Damaged Subfloor Completely
Inadequate drying is the number one reason subfloor repairs fail and mold problems return. Wood that feels dry on the surface can still hold enough moisture deep in the fibers to support rot and mold growth. You can’t see internal moisture, which is why you need a moisture meter to confirm actual dryness before moving forward.
For effective drying, you need both air movement and humidity control. Set up air movers or box fans to create circulation across the exposed subfloor surface. Position them at different angles so you get cross flow rather than just blowing in one direction. Open windows if outside humidity is lower than inside. Otherwise keep the space closed and run a dehumidifier to pull moisture from the air. The dehumidifier is often more important than the fans because it actually removes water from the environment rather than just moving humid air around.
The most effective drying methods ranked by performance:
Commercial grade dehumidifier plus air movers removes moisture fastest and works even in sealed spaces. High volume floor fans plus dehumidifier works nearly as well at lower cost for smaller areas. Box fans with open windows are effective only when outdoor humidity is significantly lower than indoors. Heat plus ventilation accelerates evaporation but needs low ambient humidity to work. Passive ventilation alone is too slow for anything beyond minor surface moisture.
Drying time depends on how saturated the subfloor is and your environmental conditions. Light surface wetting might dry in two to three days with proper equipment. Heavily saturated wood can take seven to ten days or longer. Wood that’s been wet for weeks before you discovered it takes even longer because water has penetrated deep into the material and potentially into the joists below. Test with your moisture meter every 24 hours. When you get consistent readings below 12 percent across the entire affected area for two consecutive days, it’s dry enough to proceed. Don’t rush this. Installing new materials over damp wood traps moisture and creates perfect conditions for continued rot and mold growth beneath your repair.
Treating Mold Growth on Water Damaged Subfloor
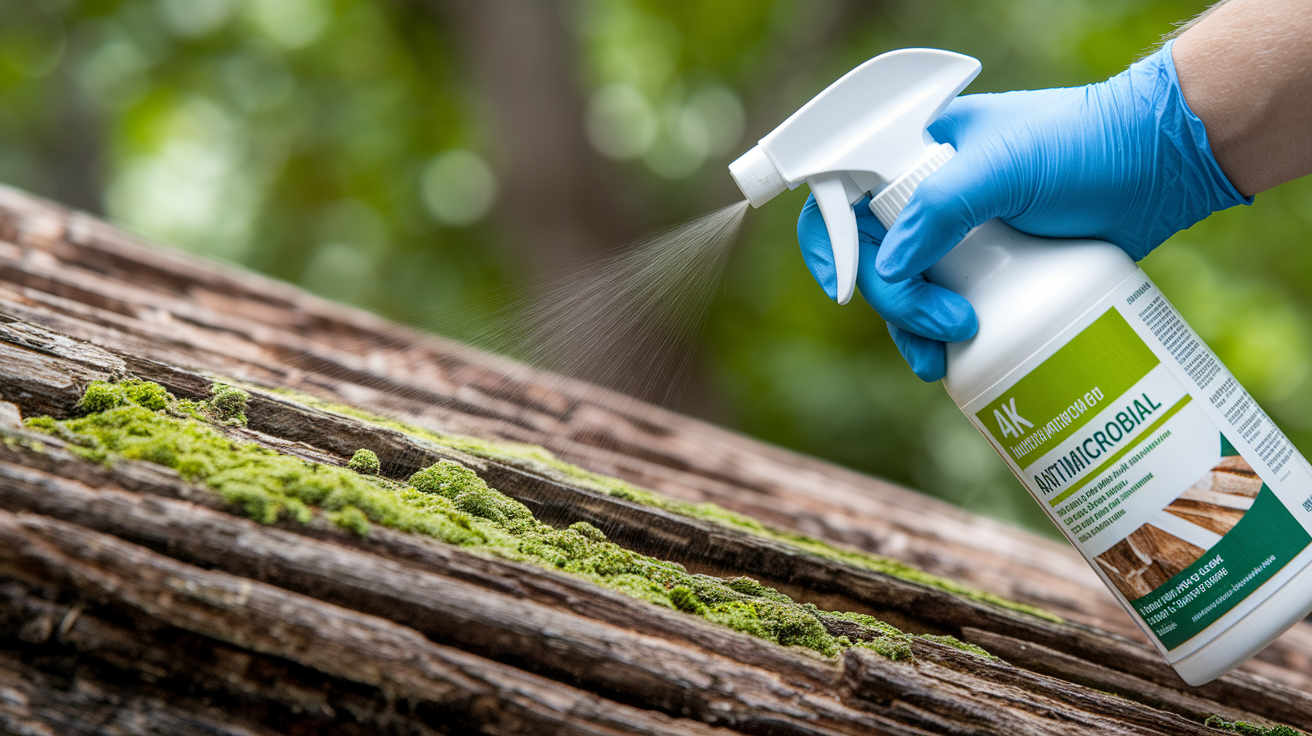
Any subfloor that’s been wet for more than 48 hours likely has at least surface mold growth. You might see visible fuzzy patches or dark discoloration, or it might be microscopic colonies that haven’t formed visible fruiting bodies yet. Either way, mold treatment needs to happen before you seal new materials over the area.
Surface mold on wood that’s still structurally sound can often be treated and killed without removing the material. When mold has penetrated deep into the wood grain or the wood fibers are crumbling, the affected section needs complete removal. No amount of surface treatment will kill mold that’s grown into deteriorated wood fibers. If you see extensive black mold, thick fuzzy growth, or mold covering more than about ten square feet, consider bringing in a professional mold remediation company. Large scale mold contamination requires containment, proper disposal, and sometimes negative air pressure systems that aren’t practical for DIY work.
For treatable surface mold, antimicrobial solutions formulated specifically for mold work better than household products. These products are designed to penetrate porous surfaces like wood and continue working after the initial application. Spray the solution generously on all affected surfaces and let it sit for the time specified on the product label, usually 10 to 15 minutes. Scrub with a stiff brush to remove dead mold and surface staining, then spray again and allow to air dry.
Some people use diluted bleach solutions, typically one cup bleach to one gallon of water. Bleach kills surface mold on contact but doesn’t penetrate into wood grain, so it works only for very light surface contamination on non porous sections. Bleach also breaks down quickly and leaves no residual protection. It’s better than nothing if you don’t have access to proper antimicrobial products, but it’s not the preferred treatment method. Never mix bleach with other cleaning products, and ensure good ventilation since the fumes are harsh in enclosed spaces. When you’re dealing with significant mold growth, extensive contamination that covers more than ten square feet of surface area, visible black mold colonies, or anyone in the household has respiratory issues or compromised immune systems, that’s when you need professional remediation services. Professionals have proper containment equipment, commercial grade treatment products, and experience to handle the work safely without spreading contamination throughout your home.
Locating Joists, Planning Cuts, and Removing Damaged Subfloor
Cutting out damaged subfloor sections requires precision because the edges of your new material need to land on solid joist support. Random cuts that don’t align with framing leave you with unsupported edges that will flex, squeak, and eventually fail.
Floor joists typically run perpendicular to the longest dimension of the room and are spaced at standard intervals. In conventional construction, that’s usually 16 inches on center. Mobile homes often use 22 to 23 inch spacing. Find your joists using these methods:
- Look for fastener patterns in the existing subfloor where screws or nail heads indicate joist locations below
- Tap across the floor listening for the solid sound over joists versus the hollow sound between them
- Use an electronic stud finder set for deep scan mode to locate framing through the subfloor
- Identify high points and sags since the floor typically rises slightly over joists and dips in the spans between them
- Measure from known points like walls where you can see joist ends, then mark at the appropriate spacing intervals
Mark joist centerlines with a chalk line snapped across the damaged area. Your cuts need to run down the center of joists so both the old and new subfloor edges have full bearing surface. Plan your cut boundaries to include all damaged material plus about six inches of solid subfloor in each direction if possible. This confirms your new material seats on good wood.
Set your circular saw blade depth to just slightly deeper than the subfloor thickness. For 3/4 inch subfloor, set the blade at 7/8 inch. This cuts through the subfloor cleanly without gouging into the joists or severing any mechanicals that might run through joist bays. Always cut with the blade on the waste side of your cut line so you’re removing material from the damaged section, not the good subfloor that’s staying.
Follow this cutting sequence:
- Start by cutting along both joist centerlines that border the damaged area using your circular saw, running the full length of the section you’re removing
- Make relief cuts across the middle of the damaged section every 12 to 18 inches to break it into manageable pieces
- Use a reciprocating saw with a metal cutting blade to cut around any plumbing vents, drain pipes, or other penetrations without damaging the fixtures
- Make the final cross cuts at each end of the damaged section, connecting your joist cuts to complete the perimeter
- If cutting near walls or in tight spaces where a circular saw won’t fit, finish the cuts with a jigsaw or hand saw
- For irregular shapes or curved cuts around pipes, use a jigsaw with a fresh wood cutting blade
Once cuts are complete, break the glue bond between the subfloor and joists by stepping on alternating sides of the cut sections. Stand on one edge and press down, then step to the opposite edge and press down there. This rocking motion loosens the construction adhesive and breaks staple or nail connections without damaging the joist tops. Work the pieces back and forth until they lift free. Use a pry bar for stubborn sections, but place a scrap wood block under the pry bar so you don’t crush the joist edge.
After removing all damaged subfloor, clean the joist surfaces thoroughly. Pull any remaining nails or staples using a cat’s paw or the claw side of your hammer. Scrape off old construction adhesive with a putty knife or paint scraper. You want clean, flat bearing surfaces for the new subfloor. When cutting around plumbing vents or floor drains, remove fasteners in those areas first so you don’t tear the vent opening or distort the drain flange when you pull the damaged section.
Preparing Joists and Installing Support Framing
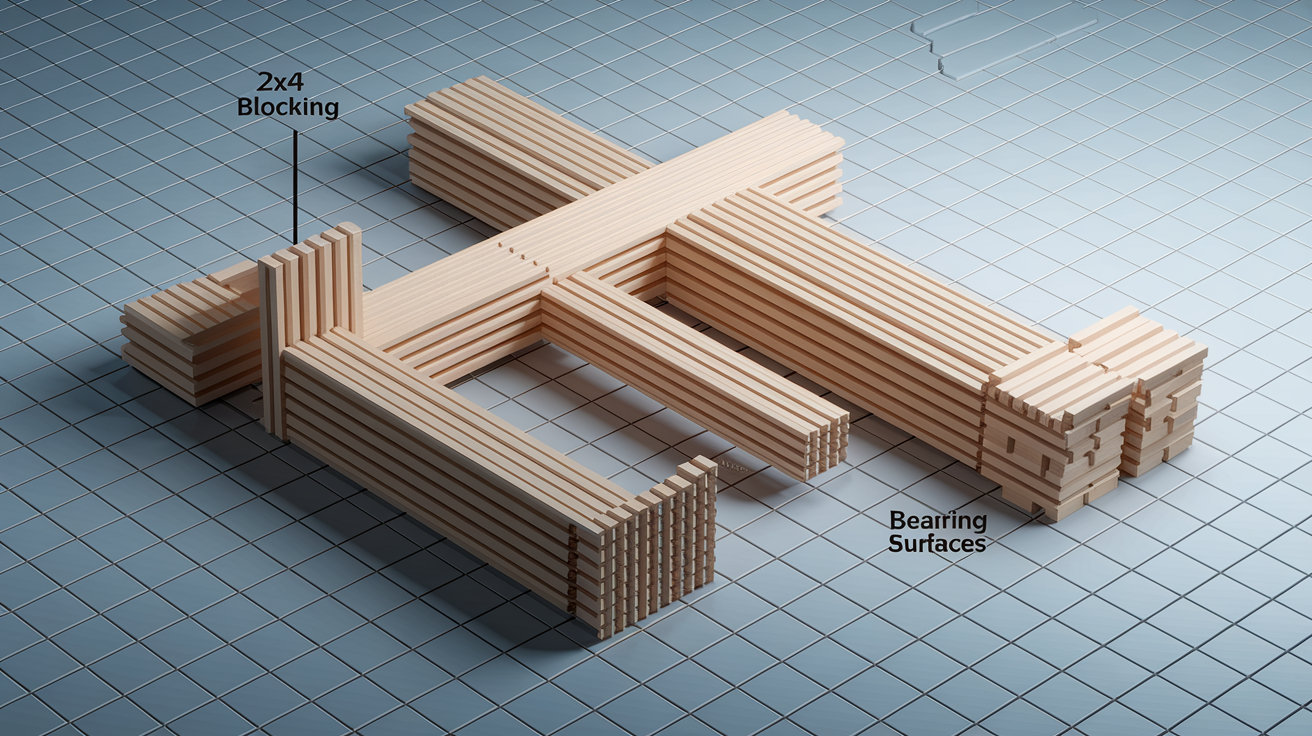
Before installing new subfloor, inspect every joist that will support it and prepare the surfaces for installation. Old adhesive, embedded fasteners, and debris prevent the new subfloor from sitting flat and compromising your fastener connections.
Remove these obstacles in sequence:
- Pull all remaining nails, staples, and screws from joist tops using appropriate tools for each fastener type
- Scrape away dried construction adhesive using a sharp putty knife or paint scraper held at a low angle
- Sweep or vacuum joist tops to remove sawdust, dirt, and small debris
- Sand high spots or dried adhesive ridges with coarse sandpaper or a belt sander if they prevent level contact
- Inspect each joist for rot, cracks, or damage that might require reinforcement or replacement before proceeding
Check joists carefully for soft spots or deteriorated wood. Press a screwdriver into questionable areas. If it sinks easily into the wood, that section is compromised. Joists with isolated soft spots can sometimes be reinforced by sistering a new board alongside the damaged section. Joists with extensive rot or structural cracks need replacement, and that work requires temporary support and usually means bringing in a professional. If the wood is solid but you notice old water stains, make sure you’ve actually fixed the leak source and the area has fully dried.
Once joists are clean and sound, apply a continuous bead of construction adhesive along the top of each joist where the new subfloor will land. This bonds the subfloor to the framing, reduces squeaks, and adds significant strength to the floor system.
Proper support framing prevents future floor problems and ensures every edge of your new subfloor has something solid beneath it. Never install subfloor with unsupported edges between joists.
Add support framing at these critical locations:
Room perimeter between joists where subfloor edges meet walls, using blocking every 24 to 36 inches. All cut edges where new subfloor meets existing subfloor, running support boards perpendicular to joists and flush with the joist tops. Seams between sheets when installing multiple pieces, ensuring both edges of the seam have solid bearing. Toilet flange locations with extra blocking around the perimeter to support floor loads at fixture points. Heavy fixture locations like bathtubs or kitchen islands where concentrated loads require additional support. Transition points where subfloor height changes or different materials meet. Penetration edges around large openings for ductwork, plumbing chases, or access panels.
In situations where you can’t easily access the underside of the floor to install blocking, use the stacked 2×4 technique. One 2×4 laid flat on the joist plus one 2×4 standing on edge equals the same height as a 2×6 standing on edge. This lets you build support on top of existing framing without crawling under the structure. Secure the flat 2×4 to the joist top with 3 inch screws driven through into the joist. Then face screw the vertical 2×4 to the flat piece, creating a T shaped support that brings the height flush with adjacent joist tops.
When support framing needs to cross over existing framing at a different height, notch your support boards to maintain a consistent level surface. Measure the height difference, then cut a notch 1.5 inches wide and deep enough to bring the support board flush with surrounding joists. This keeps the new subfloor from rocking or creating high spots. Secure all blocking and support boards with 3 inch construction screws spaced every 16 inches, driving them at angles to lock the pieces together and prevent shifting. The goal is a flat, solid framework where every inch of new subfloor edge sits on at least 1.5 inches of bearing surface.
Measuring, Cutting, and Installing New Subfloor Material
Proper installation of replacement subfloor creates a solid base that won’t squeak, flex, or fail under normal use. Measure carefully, because mistakes in subfloor work show up in every layer above it.
Follow this sequence from layout to final fastening:
- Measure the opening dimensions carefully, accounting for the gap between the new piece and existing subfloor
- Mark your measurements on the new sheet, using a carpenter’s square to ensure 90 degree corners
- Double check measurements before cutting, particularly in irregular spaces or around obstacles
- Cut the new subfloor to size using a circular saw with a sharp blade for clean edges
- Test fit the piece before applying adhesive, confirming it sits flat and edges land on solid support
- Mark and cut any penetrations for plumbing vents, drains, or electrical boxes using a jigsaw
- Apply construction adhesive to joist tops and blocking in a continuous serpentine pattern
- Set the new subfloor in place, seating it firmly into the adhesive and aligning edges with support framing
| Subfloor Type | Recommended Thickness | Joist Spacing |
|---|---|---|
| CDX Plywood | 3/4 inch (23/32) | 16 or 24 inches on center |
| Tongue and Groove OSB | 3/4 inch (23/32) | 16 or 24 inches on center |
| Advantech or Moisture Resistant OSB | 3/4 inch (23/32) | 16 or 24 inches on center |
Always install new subfloor with the long dimension running perpendicular to the floor joists. This means the 8 foot dimension crosses multiple joists rather than running parallel along them. Cross installation distributes loads across more joists and creates a significantly stronger floor system than running sheets lengthwise. For tongue and groove products, the tongue edge should face the direction of installation so you’re always nailing into the solid edge rather than trying to capture the groove.
Wood based subfloor materials expand and contract with changes in humidity and temperature. Expansion gaps prevent buckling when materials swell. Leave 1/8 inch gaps between sheets of new subfloor material where they meet each other or existing subfloor. Leave 1/4 inch gaps at all walls and vertical obstructions like toilet flanges and pipe penetrations. These small gaps accommodate movement without creating floor problems. Use shims or spacers to maintain consistent gaps during installation rather than eyeballing it.
For proper fastening that prevents squeaks and floor movement, drive screws every 6 inches along all edges where subfloor meets joists or support blocking. Field fasten through the center area every 8 to 12 inches in both directions, creating a grid pattern. Always fasten both sides of seams where two pieces meet on a support board, alternating screws 2 inches back from each edge. Predrill holes 1 inch from sheet edges to prevent splitting when driving screws near the perimeter. Countersink screw heads flush with the surface, not overdriven into the wood. Use 2 inch construction screws for 3/4 inch subfloor into joists.
Construction adhesive in combination with mechanical fasteners creates the strongest connection and virtually eliminates floor squeaks. The adhesive forms a continuous bond between the subfloor and framing. Even if a few screws work loose over time, the glue holds everything solid. Apply adhesive liberally but not excessively. You want good coverage without adhesive squeezing up through gaps when you press the subfloor into place. Always fasten both sides of edges where new plywood meets over support blocking. This prevents the unsecured edge from lifting or flexing when someone steps near the seam. Fasten within 2 inches of the edge on both sides, offset from each other so screws don’t run into each other through the blocking.
Reinstalling Flooring Over Repaired Subfloor
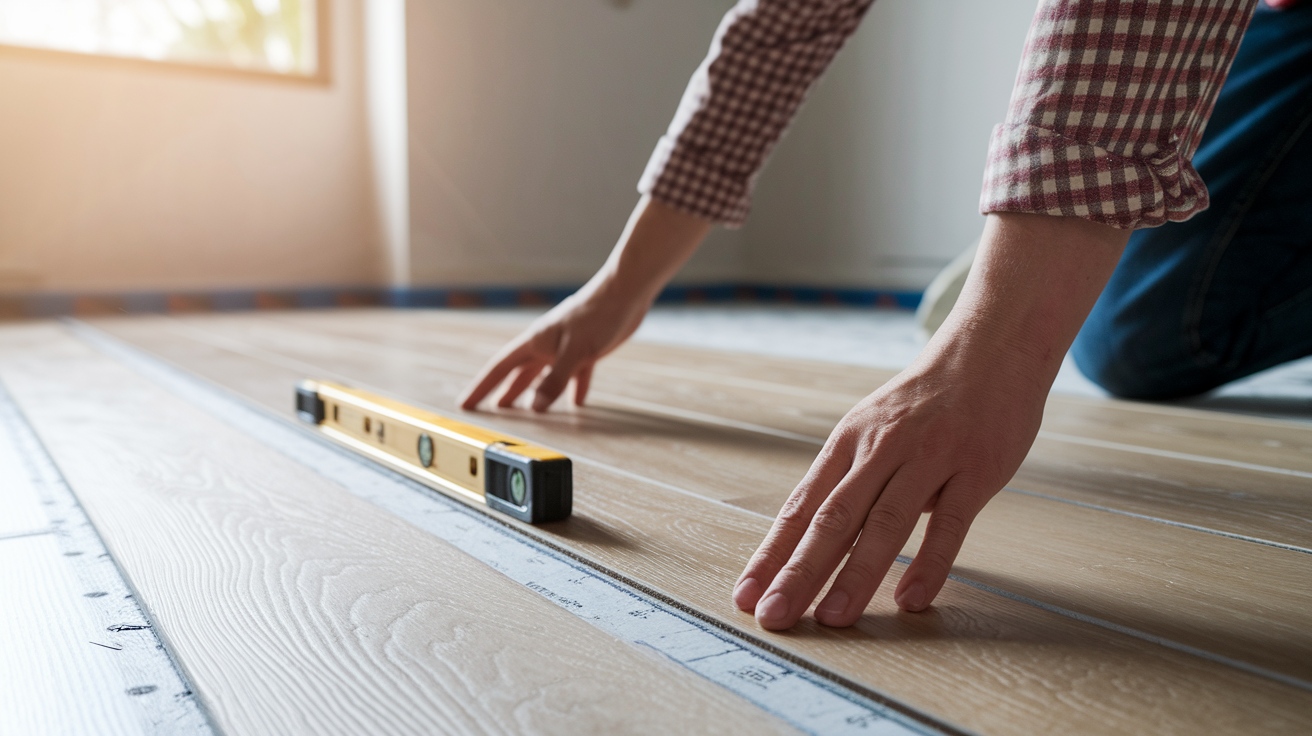
With the subfloor repair complete, you’re ready to transition back to finish flooring, but timing matters. Moving too fast with this final step can compromise everything you’ve just fixed.
Give construction adhesive at least 24 hours to cure before walking on the new subfloor or installing flooring over it. Some adhesive types need 48 to 72 hours for full strength development. Check the product label for specific cure times. During this period, keep traffic off the repair area and don’t stack heavy materials on the new subfloor. Run your moisture meter one final time before proceeding. You want readings consistently below 12 percent across both the new and surrounding original subfloor.
Prepare for flooring installation in this sequence:
- Verify adhesive cure time has elapsed per manufacturer specifications
- Sweep and vacuum the entire subfloor surface to remove sawdust and debris
- Inspect screw heads to confirm none are protruding above the surface
- Check the entire repair area with a straightedge to identify any high or low spots
- Sand down any ridges or high points flush with surrounding subfloor
- Fill gaps wider than 1/4 inch with appropriate patching compound if required by your flooring type
Different flooring types have different subfloor requirements. Carpet installation
Final Words
Water damaged subfloors need a methodical approach. Locate the source, dry everything completely, and assess whether to patch or replace based on structural damage and rot. Don’t rush the drying phase or skip mold treatment.
Cut damaged sections properly along joist centers, install solid support framing, and secure new subfloor with both adhesive and fasteners. Leave expansion gaps. Let adhesives cure before reinstalling flooring.
When you follow these steps to fix water damaged subfloor damage, you’re protecting your home’s structure and preventing future problems. Take your time. Do it right once.
FAQ
Can a water damaged subfloor be repaired?
A water damaged subfloor can be repaired if the damage is caught early and hasn’t compromised the structural integrity. Minor surface damage, small soft spots, or limited warping can often be patched or reinforced without full replacement. However, extensive rot, severe sagging, or deep mold penetration usually requires replacing damaged sections completely to restore safe load-bearing capacity.
How much does it cost to repair a water damaged subfloor?
Water damaged subfloor repair costs typically range from $7 to $15 per square foot for DIY work (materials and tool rental) and $25 to $50 per square foot for professional repair including labor. Total project costs depend on damage extent, material choice (plywood vs. OSB), mold treatment needs, and whether you’re patching sections or replacing entire rooms.
Is the subfloor ruined if it gets wet?
A subfloor is not necessarily ruined if it gets wet, but the outcome depends on how quickly you dry it and the material type. Plywood and OSB can often be saved if dried completely within 48 hours before rot and mold set in. Particle board deteriorates faster and usually requires replacement even after moderate water exposure. Standing water or prolonged moisture causes permanent structural damage.
What does water damage subfloor look like?
Water damaged subfloor looks like discolored or darkened wood with visible staining patterns, warped or cupped boards, and soft spots that flex when you walk on them. You might see white or black mold growth on the surface, notice a musty smell, or hear squeaking and creaking sounds. Severe damage shows sagging areas, visible rot with crumbling edges, and separation between subfloor sheets.
How long does it take to dry out a water damaged subfloor?
Drying out a water damaged subfloor typically takes 3 to 7 days for minor moisture and 2 to 4 weeks for severe saturation, depending on ventilation, humidity levels, and equipment used. Use dehumidifiers, fans, and heat to speed the process, but never rush installation before moisture meter readings confirm the subfloor has reached acceptable levels (12% to 15% for wood materials).
Can you install new flooring over water damaged subfloor?
You cannot install new flooring over water damaged subfloor without repairing or replacing the damaged sections first. Installing over compromised subfloor causes finish flooring to crack, warp, or sag, and traps moisture that continues rotting the structure beneath. Always dry the subfloor completely, treat any mold, verify structural integrity, and repair damaged areas before reinstalling flooring.
Do I need a permit to replace subfloor?
You need a permit to replace subfloor in most jurisdictions when the work involves structural repairs, affects load-bearing capacity, or covers more than a small patch. Requirements vary by location, but extensive damage requiring joist reinforcement or multi-room replacement typically requires permits and inspections. Check with your local building department before starting work to avoid complications during home sales or insurance claims.
What type of plywood is best for subfloor replacement?
The best plywood for subfloor replacement is CDX or BC grade exterior plywood in 3/4-inch thickness for joists spaced 16 inches on center. Tongue-and-groove edges provide better support between joists and reduce squeaking. OSB (oriented strand board) is a cost-effective alternative with similar performance, but avoid particle board in any moisture-prone areas due to its poor water resistance.