

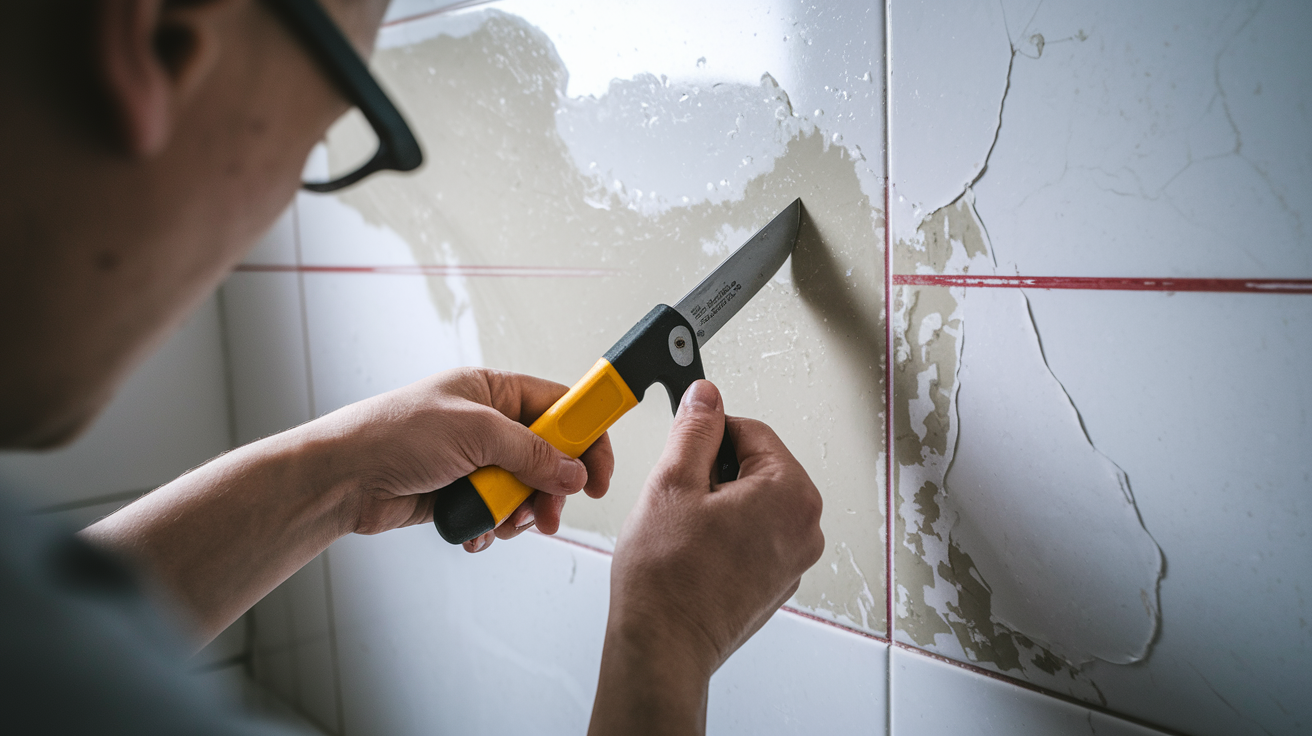

Ever notice how a small bathroom leak always seems worse once you start looking closer? That’s because water doesn’t just damage the spot you see. It travels along pipes, seeps behind walls, and soaks into floors before you notice the first stain or soft spot. The good news is that most bathroom water damage can be repaired without tearing out entire walls or calling in a restoration crew. You just need to find the real source, dry things properly, and rebuild the damaged section the right way.
Repairing Minor to Moderate Bathroom Wall Water Damage: Immediate Action Steps
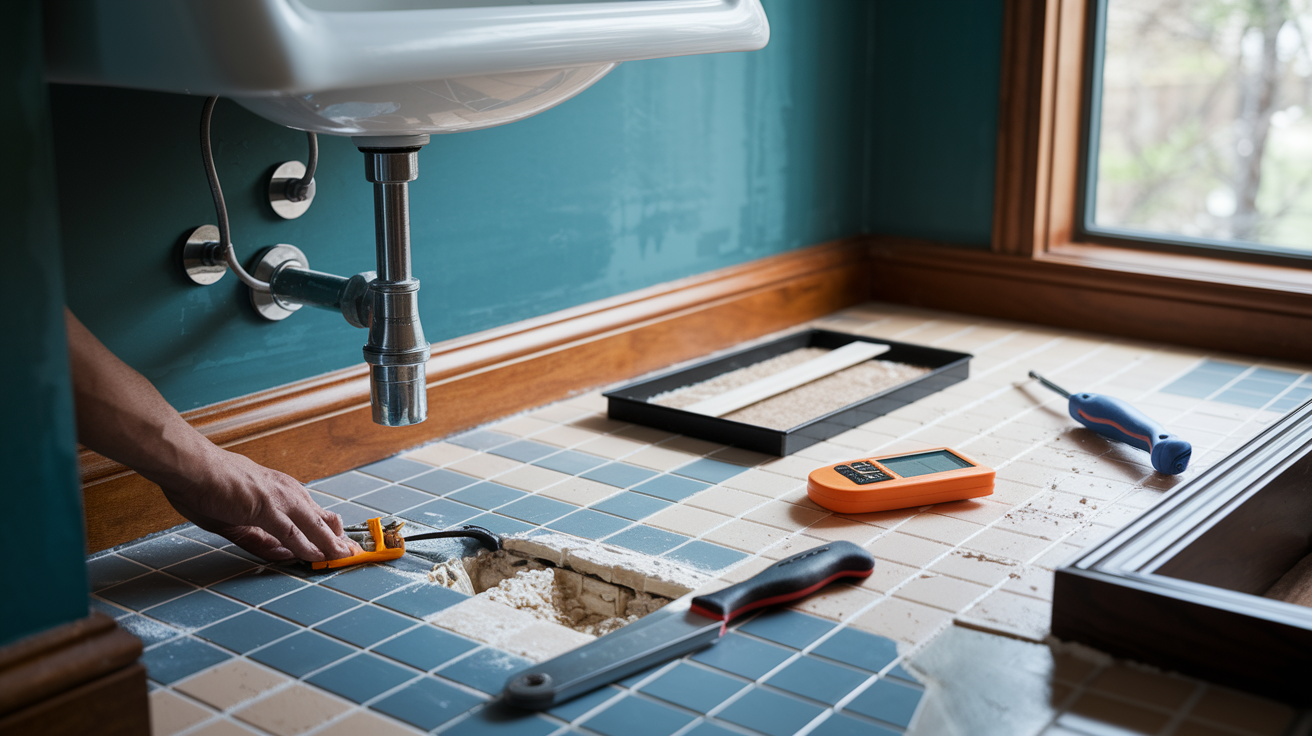
This section covers immediate repairs for typical leak scenarios affecting bathroom walls with under 10 square feet of damage that hasn’t compromised structural framing. Most homeowner level water damage falls into this category and can be handled without extensive demolition or professional help.
Numbered repair steps:
-
Stop the water source and turn off electricity. Shut off the water supply valve feeding the leaking fixture or turn off the main water supply at the meter. Switch off the circuit breaker powering the affected bathroom area at your electrical panel. Use a non-contact voltage tester ($20-30 at hardware stores) to verify power is off before touching any switches or outlets. Never work around water with active electricity.
-
Remove baseboards and trim around damage. Use a flat pry bar and hammer to carefully remove baseboards, quarter round molding, and any decorative trim near the damaged section. Work slowly to avoid breaking trim pieces you’ll reuse. Place a thin piece of wood between the pry bar and wall to protect undamaged surfaces. Set removed trim aside with any finish nails pulled or bent flat.
-
Mark cut lines to nearest studs beyond damaged area. Locate studs using a stud finder or by tapping the wall and listening for a solid sound versus hollow. Standard stud spacing is 16 inches on center. Use a level and pencil to draw straight vertical lines centered on studs at least 4 inches past visible damage on each side. Draw horizontal lines at top and bottom to create a rectangle that extends into solid, undamaged drywall.
-
Cut out damaged drywall section with utility knife. Score the marked lines repeatedly with a sharp utility knife, cutting through the paper face and into the gypsum core. Make 4 or 5 passes along each line, applying firm pressure. Once scored deeply, push the drywall section from behind or use a drywall saw to complete the cut. Pull the damaged section away from the studs, cutting through any remaining paper backing. Wear safety glasses and a dust mask during cutting.
-
Remove wet insulation if present. If you see fiberglass or cellulose insulation behind the drywall, check it for moisture. Wet insulation loses its insulating value and holds moisture against framing. Remove any damp insulation by pulling it out with gloved hands and placing it in heavy duty trash bags. Wear long sleeves, gloves, safety glasses, and an N95 respirator when handling insulation. Dispose according to local regulations.
-
Allow cavity to dry completely (3 to 5 days with fans and dehumidifier). Set up air movers (high velocity fans) aimed into the wall cavity from multiple angles. Position a dehumidifier in the bathroom running continuously. Keep bathroom doors and windows closed to contain the drying area. Run fans and dehumidifier 24 hours per day. Check progress daily using a moisture meter on the exposed studs and remaining drywall edges. Continue drying until readings drop below target levels.
-
Apply antimicrobial spray to exposed studs. Once surfaces are dry, spray all exposed wood framing with an EPA registered antimicrobial solution designed for mold prevention. Products containing quaternary ammonium compounds work well. Spray until surfaces are wet but not dripping. Pay special attention to areas that had visible staining or suspected mold growth. Allow the treatment to dry completely (typically 2 to 4 hours) before proceeding. Open windows for ventilation during application.
-
Cut replacement drywall to fit opening. Measure the opening width and height precisely. Transfer measurements to a new piece of moisture resistant drywall (purple or green board for bathrooms). Score the face paper with a utility knife using a straight edge, then snap the board along the score line. Cut through the back paper to separate pieces. Test fit the new piece in the opening. It should fit snugly with about 1/8 inch gap around all edges. Trim as needed for proper fit.
-
Secure new drywall with screws every 8 inches into studs. Position the new drywall piece in the opening, making sure edges land centered on studs. Drive 1 1/4 inch drywall screws through the drywall into studs, spacing screws every 8 inches along each stud. Drive screws until heads sit just below the surface, creating a small dimple, but don’t break through the paper face. You should be able to feel the dimple with your finger but not see torn paper. Use a drill with a Phillips bit and clutch setting for consistent depth.
-
Apply drywall tape over seams. Apply a thin base coat of setting type joint compound (also called hot mud) along all seams where new drywall meets old. While compound is wet, press paper drywall tape or fiberglass mesh tape into the compound, smoothing from center outward to remove air bubbles and excess compound. Wipe away excess with your knife, leaving tape embedded in a thin layer of compound. Let dry 24 hours. Setting type compound dries harder than premixed compound and resists moisture better in bathrooms.
-
Apply three coats of joint compound (sanding between coats). After tape coat dries, apply a second coat of joint compound 6 to 8 inches wide, feathering edges thin. Let dry 24 hours, then sand smooth with 120 grit sandpaper on a sanding block. Apply a third coat 10 to 12 inches wide, again feathering edges. Dry 24 hours and sand with 150 grit paper. The goal is a smooth, imperceptible transition between old and new surfaces. Use a work light held at an angle to highlight imperfections. Also coat all screw dimples with compound at each stage.
-
Prime and paint with moisture resistant products. After final sanding, wipe walls with a damp cloth to remove dust. Apply a coat of stain blocking primer designed for bathrooms (look for mold resistant formulas). Let dry per label instructions (typically 1 to 2 hours). Apply two coats of bathroom paint with mold and mildew resistance, allowing proper drying time between coats. Use semi gloss or satin finish rather than flat for better moisture resistance and cleanability.
Your moisture meter readings should show wood studs below 16 percent moisture content and drywall below 1 percent before you install new drywall. These numbers confirm materials are dry enough that mold won’t grow and new materials won’t wick moisture from old. If readings stay above these targets after a week of drying, you may have an ongoing moisture source that needs attention before repair. Digital pin type moisture meters ($30 to $100) give reliable readings when you push pins into the material about 1/4 inch deep.
If your damage assessment reveals sagging or soft studs, damage spreading to adjacent rooms, visible mold covering more than 10 square feet, or sewage contamination, the repair exceeds this basic approach. Those scenarios require the structural repairs, professional mold remediation, and comprehensive restoration covered in later sections.
Assessing Water Damage and Identifying the Source
Finding the actual water source and determining the full extent of damage prevents incomplete repairs that lead to recurring problems and wasted work. A leak might show damage in one spot on the wall while the water actually enters somewhere else and travels along framing before appearing.
Common Bathroom Water Damage Sources
Toilet base leaks. Check for water seeping from under the toilet base, which indicates a failed wax ring seal or loose closet bolts. Rock the toilet gently to test if it moves on the floor. Remove the tank lid and flush while watching connection points. Look for cracks in the tank or bowl, especially older porcelain fixtures.
Supply line failures. Inspect braided stainless steel or plastic supply lines feeding the toilet, sink, and shower for bulges, corrosion, or wet connections. These lines typically last 5 to 10 years before developing pinhole leaks. Check shutoff valves for drips, crusty mineral deposits, or water stains on nearby walls. Turn valves slowly while watching for leaks.
Shower pan deterioration. Step into the shower or tub and watch for flexing or movement in the floor, which signals a failing shower pan. Look for cracked or missing grout and caulk around the base. Check for staining or soft spots on the ceiling below the bathroom. Shower pan leaks often go unnoticed for months because water travels under flooring before appearing as damage.
Tub overflow. Examine the overflow cover plate and gasket for gaps or deterioration that allow water to seep into the wall during baths. Test by filling the tub to the overflow while watching the wall behind for moisture. Look for water stains or soft drywall around the overflow opening on the opposite side of the wall. The overflow assembly sits inside the wall, so leaks here saturate framing before you notice surface damage.
Sink drain leaks. Open the vanity cabinet and check for moisture on the P trap, tailpiece, and pop up assembly connections. Place paper towels under connections and run water for 2 minutes, then check for wetness. Look for corrosion on chrome pipes or deterioration of plastic pipes. Check if the sink basin has separated from the countertop, allowing water to run behind the vanity.
Cracked tile and grout allowing seepage. Press on wall tiles around the shower to test for movement, which indicates water has compromised the adhesive or damaged the substrate behind. Tap tiles with your knuckle listening for hollow sounds versus solid sounds. Check grout lines for cracks, missing sections, or discoloration. Look for a grayish crust forming where shower floor meets walls.
Condensation from poor ventilation. High humidity from inadequate ventilation causes moisture to condense on cool surfaces like exterior walls, mirrors, and windows. Check if paint is peeling or bubbling on walls and ceilings. Feel the walls during or right after someone showers. Exterior walls will feel damp if condensation is a chronic problem. Verify the exhaust fan works and vents outside, not into the attic.
Leaking fixtures. Inspect faucet bases, shower valves, and mixing valves for water seeping around the trim plate or dripping from behind. Remove the aerator from faucets and look for corrosion inside. Check if the cartridge or valve needs replacement. Look behind removable shower trim plates for moisture on the wall. Water behind fixtures saturates walls before you see it at the surface.
Pipe bursts behind walls. Listen for running water sounds when all fixtures are off. Watch your water meter with all water off throughout the house. If the meter dial moves, you have a leak somewhere. Check walls for warm spots if you suspect a hot water line leak. Cold spots sometimes indicate a cold water leak. Look for unexplained increases in water bills, which signal hidden leaks.
The water meter check identifies hidden leaks reliably. Turn off all water using appliances and fixtures in the house, including ice makers, washing machines, and outdoor hoses. Locate your water meter (usually near the street or in a basement) and note the position of the leak indicator dial or sweep hand. Wait 30 minutes without using any water. If the indicator has moved, water is flowing somewhere in the system, revealing a hidden leak that needs investigation.
Visual damage indicators include discoloration ranging from light yellow to dark brown on walls or ceilings, swelling or bulging of drywall or painted surfaces, paint blistering or bubbling, peeling paint or wallpaper, visible water stains with defined edges showing where water wicked through, soft spots when you press on walls or ceilings, and visible mold growth appearing as black, green, or white fuzzy patches. Physical signs include musty damp odors even when surfaces look dry, tiles that move under pressure when you push on them, grout that’s become moldy and soft, caulking that’s pulled away from seams or cracked, and a hollow sound when you tap on tile versus a solid thunk on properly bonded tile.
Use a moisture meter to get objective data about what’s wet and what’s dry. Pin type meters work by pushing two pins into the material and measuring electrical resistance. Higher moisture increases conductivity, giving higher readings. Pinless meters use radio frequency sensors that scan without damaging surfaces. For wood framing studs, readings below 16 percent indicate dry, safe conditions. Drywall should measure below 1 percent. Concrete subfloors need to be below 4 percent. Hardwood flooring should stay under 12 percent. Test in multiple spots around the visible damage and extend testing several feet beyond what looks damaged to map the full wet area.
Document everything with clear photos showing the damage from multiple angles, measurements of affected areas (length, width, and height of damaged zones), notes about what you found during inspection, and dates when you discovered the problem and began investigation. This documentation supports insurance claims and helps contractors provide accurate estimates when you’re comparing bids for professional help.
Complete Damage Assessment Techniques
Walk through your visual inspection systematically by examining all walls in the bathroom at eye level and below, looking specifically for discoloration, swelling, and blistering. Check corners where walls meet the floor and ceiling, since water often accumulates in these areas. Inspect behind and under fixtures by looking in vanity cabinets, behind the toilet, and around the tub surround. Look at the ceiling for staining, sagging, or bubbling paint texture. Check adjacent rooms on the other side of bathroom walls for damage that spread.
For physical testing, tap on all tile surfaces with your knuckle, listening for changes in sound that indicate voids behind the tile. Press on walls gently but firmly, feeling for soft spots or areas that compress more than surrounding surfaces. Check that wall surfaces are still firmly attached to studs rather than loose or spongy. Test floor firmness by walking slowly across the bathroom, feeling for sagging, squeaking, or areas that bounce more than they should. Verify structural soundness by checking for cracks in corners, separation where walls meet ceilings, or doors and drawers that suddenly don’t close properly because framing has shifted.
Apply your moisture meter by testing along the base of walls every 12 inches, moving up the wall in a grid pattern across any suspect areas. Test on both sides of walls when possible by checking adjacent rooms. Push meter pins through paint into drywall or wood to get accurate readings. Pinless meters should be held flat against the surface and moved slowly across the area. Mark the boundaries of elevated moisture readings with tape so you know exactly how far the damage extends. These target readings give you clear go or no go numbers: wood below 16 percent for studs and framing, drywall below 1 percent, concrete below 4 percent for slabs and tub surrounds.
Essential Tools and Materials Needed for Bathroom Water Damage Repair
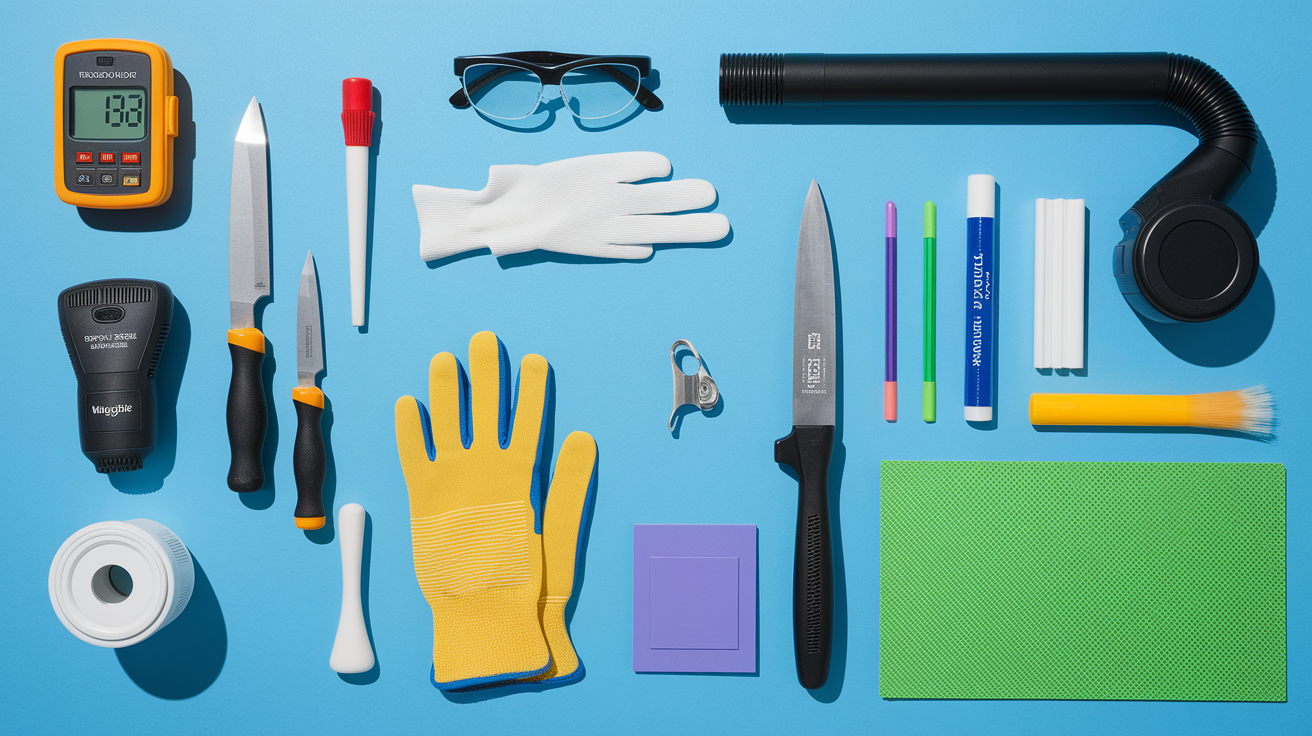
Gathering everything before you start prevents mid project trips to the hardware store and keeps work moving efficiently. Having proper equipment, especially safety gear and moisture detection tools, makes the difference between a thorough repair and one that fails within months.
| Category | Item | Purpose |
|---|---|---|
| Safety Gear | Safety glasses | Protect eyes from falling debris during demolition and dust during sanding |
| Safety Gear | N95 respirator | Filter mold spores and drywall dust during removal and treatment |
| Safety Gear | Work gloves | Protect hands from sharp edges, splinters, and chemical exposure |
| Detection Tools | Moisture meter | Measure moisture content in wood and drywall to verify dryness before closing repairs |
| Removal Tools | Utility knife | Score and cut drywall along marked lines for clean removal |
| Removal Tools | Flat pry bar | Remove baseboards, trim, and damaged materials without damaging surrounding areas |
| Removal Tools | Wet/dry vacuum | Remove standing water and clean up debris during demolition |
| Drying Equipment | Dehumidifier | Extract moisture from air to speed drying and prevent mold growth |
| Drying Equipment | High-velocity fans | Circulate air across wet surfaces and into wall cavities to accelerate evaporation |
| Installation Materials | Moisture-resistant drywall | Replace damaged sections with purple or green board designed for high-humidity areas |
| Installation Materials | Joint compound | Fill seams, tape joints, and smooth transitions between old and new drywall |
| Installation Materials | Waterproof caulk and primer | Seal penetrations and prepare surfaces with moisture-resistant coatings |
Think carefully about what to rent versus buy when pricing equipment. Moisture meters in the $30 to $100 range provide reliable readings for occasional use and will be useful for future home maintenance. Good dehumidifiers cost $200 to $400 but pay for themselves compared to renting at $40 to $70 per day for the week or more needed for thorough drying. High velocity fans can be rented for $20 to $35 per day or purchased for $80 to $150. Basic tools like utility knives, pry bars, trowels, and sanding blocks are inexpensive enough to buy rather than rent. Specialized tools like drywall lifts for ceiling work ($50 to $80 per day rental) make sense to rent for single use projects.
Safety gear is not optional when dealing with water damage and potential mold exposure. Standard construction glasses protect against falling drywall chunks and flying fasteners during demolition. N95 respirators filter out 95 percent of airborne particles including mold spores, dust, and fiberglass. Regular dust masks don’t provide adequate protection for water damage work. Work gloves with rubber coating protect against splinters from damaged wood, sharp metal edges from fixtures and fasteners, and exposure to antimicrobial treatments. A hard hat protects from falling debris when working on ceiling repairs or in cramped spaces where you might stand up into overhead framing.
Safety Protocols and Mold Treatment During Water Damage Repair
Water damage creates genuine health risks through mold exposure, electrical hazards, and potential contact with contaminated water. Mold spores begin growing within 24 to 48 hours of water exposure, making quick action critical not just for the repair but for health safety. Understanding proper safety protocols and mold treatment protects you during the repair process.
Critical safety steps to take before and during repairs:
Turn off electricity to affected areas by switching off circuit breakers at the main panel. Never assume switches and outlets are safe just because they look dry. Water can travel inside walls along wiring. Use a non-contact voltage tester to verify power is off before touching anything electrical. Don’t restore power until surfaces are completely dry and you’ve inspected for damaged wiring or fixtures.
Wear proper personal protective equipment including an N95 or N100 respirator rated to filter mold spores and drywall dust. Regular paper dust masks don’t provide adequate protection. Use nitrile or latex gloves that cover your wrists when handling wet materials. Wear safety glasses or goggles to protect eyes from falling debris and chemical splash. Disposable coveralls or clothes you’ll wash separately prevent carrying contaminants to other areas of the home. Use a hard hat during demolition since wet drywall becomes heavy and can fall unexpectedly when cutting overhead.
Ventilate the work area by opening windows and positioning fans to blow air from inside the bathroom toward the outside. Create negative pressure that pulls contaminated air out rather than pushing it into other rooms. Never blow air from the bathroom into the rest of the house. Close doors to adjacent rooms and seal gaps under doors with rolled towels to contain dust and spores.
Identify contaminated water categories before starting, since this determines whether DIY work is safe. Clean water from supply lines presents minimal health risk. Gray water from washing machines, dishwashers, or bathtubs contains some contamination and requires more safety precautions. Black water from sewage backups or toilet overflows contains dangerous pathogens and always requires professional remediation. Never attempt cleanup of black water contamination.
Establish when professional mold remediation becomes necessary. Areas of visible mold growth larger than 10 square feet (roughly a 3 foot by 3 foot section) should be handled by certified professionals with proper containment procedures and equipment. Multiple separate areas of mold totaling over 10 square feet also warrant professional service. Mold growth on HVAC systems requires professional cleaning to prevent spore distribution throughout the house.
Use containment procedures for mold areas between 3 and 10 square feet by sealing the work area with 6 mil plastic sheeting taped over doorways and vents. Create a small entry flap rather than opening and closing the plastic barrier repeatedly. Keep the work area under negative pressure with a fan exhausting outside through a window. This prevents spores from spreading during scrubbing and removal.
Verify GFCI outlet requirements before plugging in any equipment in bathrooms. All outlets within 6 feet of water sources must have ground fault circuit interrupter protection that shuts off power instantly if a ground fault occurs. Never use extension cords rated for lower amperage than the tool requires. Plug dehumidifiers and fans into different circuits to avoid overloading a single breaker.
Use hard hats during demolition phases when removing ceiling materials, upper wall sections, or cabinets mounted overhead. Water damaged materials become surprisingly heavy and can fall suddenly when cut. Even small chunks of wet drywall can cause injury when falling from 7 to 8 feet. A chunk of wet drywall the size of a dinner plate can weigh 10 to 15 pounds and will hurt if it hits you.
Distinguishing black mold (Stachybotrys chartarum) from common bathroom mildew helps you make smart decisions about professional help. True black mold appears as dark greenish black splotches with a slimy or powdery texture and grows on materials with high cellulose content like drywall paper, wood, and ceiling tiles. It typically develops after extended water exposure (weeks to months) and produces a distinctly musty, earthy smell. Common bathroom mildew grows in pink, gray, or light black patches usually on grout, caulk, and tile surfaces. It wipes off easily with basic cleaners and doesn’t penetrate into materials. Mildew grows from daily bathroom humidity without water damage. If you see mold on drywall paper, behind walls, or on wood framing, treat it as potentially hazardous mold regardless of exact species and follow proper treatment protocols or call professionals.
Six step DIY mold treatment process for contained areas under 10 square feet:
-
Contain the work area. Seal the bathroom from adjacent spaces using 6 mil plastic sheeting taped over doorways. Close floor vents and cover them with plastic and tape. Open a window and position a box fan in the window blowing outward to create negative pressure. Wear full protective gear including respirator, gloves, eye protection, and disposable coveralls before disturbing any moldy materials. Place a damp towel at the door base to prevent dust from escaping underneath.
-
Apply antimicrobial solutions. Mix a solution of 1 cup bleach per gallon of water for non porous surfaces like tile and tubs. For porous surfaces like wood studs or exposed subfloor, use EPA registered antimicrobial products designed for mold remediation (brands like Concrobium, Microban, or Foster 40-80). Spray surfaces until wet but not dripping. Let the solution dwell for 10 to 15 minutes to kill mold at the root level. Never mix bleach with other cleaners, especially ammonia, which creates toxic fumes.
-
Scrub affected surfaces. Use a stiff nylon brush to scrub treated surfaces, working the antimicrobial solution into the material texture. Scrub wood framing in the direction of the grain. Pay extra attention to joints, seams, and areas where mold appeared darkest. Wipe surfaces with disposable shop towels or rags you’ll throw away. Place used rags directly into trash bags. Mist surfaces again after scrubbing and allow to dry completely.
-
HEPA vacuum debris. Once surfaces are dry, vacuum all dust and debris using a shop vacuum equipped with a HEPA filter. Standard vacuum filters don’t trap mold spores, which pass through and blow back into the air. Vacuum all surfaces in the contained area including floors, remaining walls, exposed framing, and horizontal ledges where dust settled. Empty the vacuum into a sealed trash bag immediately after use.
-
Apply mold resistant primers. After surfaces pass moisture testing (wood below 16 percent, drywall below 1 percent), apply a coat of mold resistant primer to all exposed wood framing and existing drywall that will remain. Primers containing antimicrobial additives provide ongoing resistance. Products like KILZ Mold and Mildew or Zinsser Mold Killing Primer both kill residual mold and create a protective barrier. Apply according to label directions and allow full drying time before installing new materials.
-
Restore air quality. After completing reconstruction, run air scrubbers or HEPA air purifiers in the bathroom for 2 to 3 days to remove any lingering spores. Clean all surfaces in the bathroom including those not directly affected by water damage, since dust from the repair settles everywhere. Vacuum the entire bathroom including behind the toilet, inside cabinets, and on light fixtures using HEPA filtration. Wash any fabric items that were in the bathroom during repairs.
Eliminate persistent odors by removing all sources of remaining moisture first, since odors come from ongoing microbial activity in damp materials. Clean all surfaces with an enzymatic cleaner designed for organic odors. Place bowls of activated charcoal or baking soda in the bathroom for several days to absorb remaining odors. Run the exhaust fan continuously for 24 to 48 hours after repairs to exchange air completely. Consider air quality testing if musty smells persist after thorough cleaning and drying, since this may indicate hidden mold behind surfaces you haven’t opened. Professional air quality tests cost $300 to $700 but confirm whether spore levels are normal or require additional remediation.
Use mold resistant products throughout the reconstruction phase to prevent future problems. Install moisture resistant drywall (purple or green board) rather than standard white board. Choose mold resistant joint compound formulated for high humidity areas. Apply mold resistant primer before painting. Use bathroom paint containing antimicrobial additives and mildewcides. Select silicone caulk specifically labeled for mold resistance over standard acrylic caulk. These products cost 10 to 30 percent more than standard versions but provide real protection in bathroom environments with daily moisture exposure.
Water Extraction and Drying Techniques for Bathroom Repairs
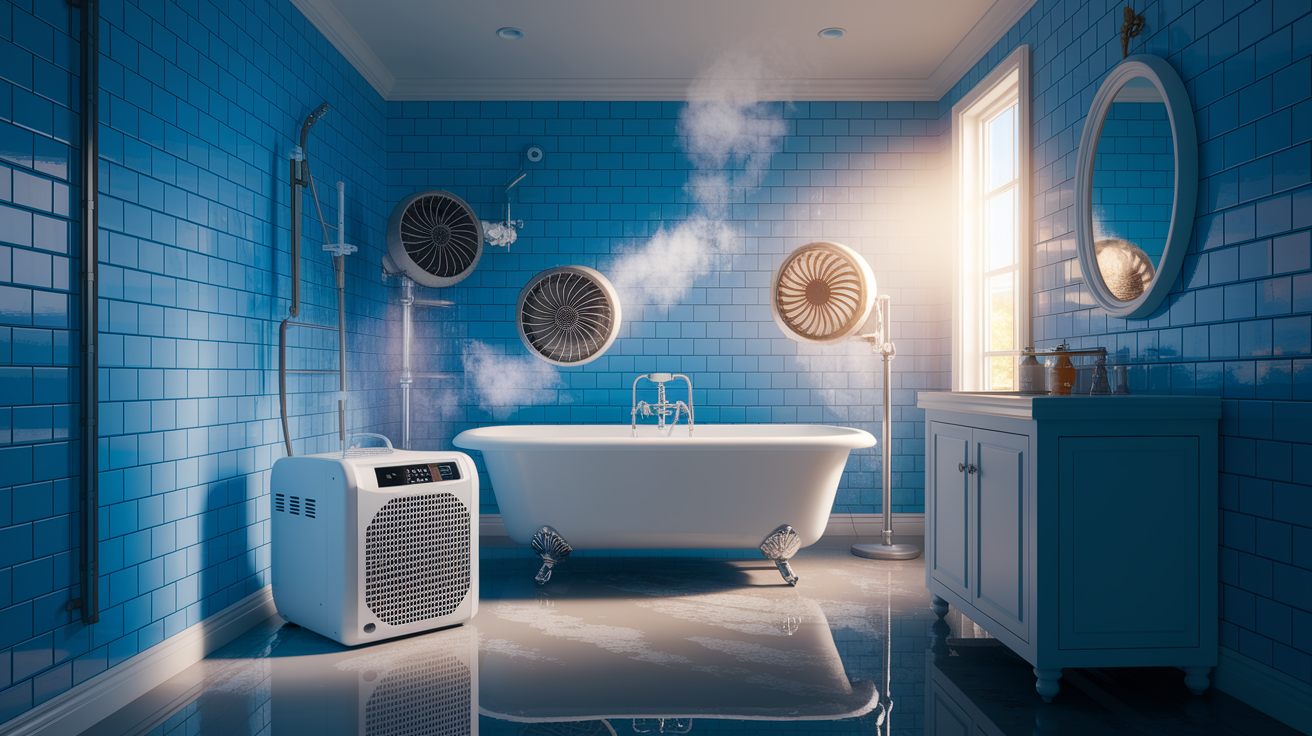
Thorough drying prevents future mold growth and material failure that undermines repair work. Rushing to close walls before materials fully dry traps moisture that continues causing damage. Proper water removal and drying setup makes the difference between a repair that holds up and one that fails within months.
Five step process for water extraction and complete drying:
-
Remove standing water. Use a wet/dry vacuum to remove any standing water from floors and inside wall cavities. Work from the outer edges toward the center, moving slowly to give water time to flow into the vacuum intake. Empty the tank frequently before it reaches full to maintain suction. Mop remaining water with absorbent towels. For significant standing water (more than an inch deep), you may need to rent a submersible pump to remove the bulk before vacuuming.
-
Set up airflow. Position high velocity fans (also called air movers) to blow air directly across wet surfaces and into open wall cavities. Place fans 3 to 5 feet from walls angled to create air circulation that sweeps surfaces continuously. Use at least one fan per 10 to 15 feet of affected wall. Point one fan into any opened wall cavities to dry framing and insulation spaces. Open bathroom doors and windows to promote air exchange. Never use fans to blow contaminated air into other rooms.
-
Use dehumidifiers continuously. Place a dehumidifier in the bathroom sized appropriately for the space (30 to 50 pint capacity for typical bathrooms). Position it centrally in the room away from walls and furniture. Close windows and doors to create a contained space where the dehumidifier can extract moisture effectively. Empty the collection bucket twice daily or connect a drain hose to a sink or floor drain. Run the dehumidifier 24 hours per day during drying.
-
Monitor moisture levels daily. Check moisture readings each day using a pin type moisture meter on exposed wood framing and edges of remaining drywall. Record readings and dates to track drying progress. Test at the same locations each day to see declining moisture content. Check multiple spots including higher and lower areas on walls since moisture rises and may concentrate at top plates. Also test floors and subfloors if water reached those areas.
-
Confirm dryness before reconstruction. Continue drying until moisture meter readings drop below target levels: wood studs and plates below 16 percent, drywall edges below 1 percent, concrete surfaces below 4 percent. Take readings at multiple locations across the affected area. All spots must reach safe levels, not just averages. If any location remains elevated, continue drying until all areas meet targets. Don’t trust visual dryness or your hand feeling surfaces, since materials can hold moisture internally that you can’t see or feel.
Expect drywall to require 3 to 5 days of continuous drying with proper air circulation and dehumidification. Standard 1/2 inch drywall dries faster than thicker moisture resistant board. The front face may feel dry within 24 hours while the back against studs and the interior gypsum core retain moisture. Wood subfloors typically need 5 to 7 days to dry thoroughly depending on thickness and how saturated they became. Plywood subfloor dries faster than OSB (oriented strand board), which can delaminate if soaked. Concrete surfaces require 2 to 4 weeks to dry completely since concrete is porous and absorbs water deeply. Concrete also dries primarily through evaporation from the surface, making it a slow process.
Proper ventilation setup pulls moisture out of the building rather than moving it around inside. Position fans to create a flow path where dry air enters the bathroom, moves across wet surfaces picking up moisture, then exits through an open window or door leading outside. This through flow pattern changes the air rather than recirculating humid air. In bathrooms without exterior windows, use the exhaust fan running continuously while maintaining an air path from an adjacent room into the bathroom and out through the fan. Place a small fan in the doorway blowing into the bathroom from the hallway to replace air being exhausted. Maintain relative humidity in the bathroom below 50 percent using your dehumidifier, which prevents new mold growth while existing materials dry. Check humidity with an inexpensive digital hygrometer ($10 to $20) placed in the bathroom throughout the drying period.
Removing Damaged Drywall and Bathroom Wall Materials
Cutting back to sound material ensures your repair has a solid foundation and doesn’t leave hidden damage that continues deteriorating. Proper removal also minimizes dust and makes the reconstruction phase cleaner and more efficient.
Seven detailed steps for removing water damaged wall materials:
-
Remove baseboards and trim. Insert a flat pry bar behind baseboards at stud locations where nails attach them to the wall. Place a thin piece of wood scrap between the pry bar and wall to protect the surface. Pry gently, working along the length of the baseboard. Once the board starts coming away, use your hands to pull it free while supporting its weight. Pull or bend over any nails left in the trim. Set baseboards aside for reinstallation if they’re in good condition. Mark the back of each piece to note where it came from for easier reinstallation. Remove quarter round, shoe molding, and any other trim around the damaged area.
-
Mark cut lines to studs. Use a stud finder to locate studs on both sides of the visible damage. Standard studs are 1.5 inches wide. Center your cut line on each stud so the new drywall edge and existing edge both land on solid backing for fastening. Use a 4 foot level to draw perfectly vertical lines from floor to ceiling. Draw horizontal lines with the level at top and bottom of the rectangle. Extend your cuts at least 4 inches beyond visible damage on all sides to ensure you capture all compromised material.
-
Cut drywall. Score along marked lines with a sharp utility knife, pressing firmly. Make 4 to 6 passes to cut through the paper face and deep into the gypsum core. For cuts on stud lines, cut from the damaged side. Insert the tip of a drywall saw into the scored line to finish the cut. Pull the damaged section away from the wall. Cut through any remaining backing paper from behind using your utility knife. Wear safety glasses since drywall dust and pieces will fall. Place a drop cloth on the floor to catch debris for easier cleanup.
-
Remove wet insulation. Pull out any fiberglass batt insulation that feels damp or looks compressed and darkened from water exposure. Wet insulation loses its insulating value and holds moisture against wood framing. Wear long sleeves, gloves, and a respirator since disturbing insulation releases fine particles. Don’t try to dry and reuse wet insulation because compressed and moldy insulation won’t perform. Place removed insulation directly into heavy duty trash bags. Check the insulation for mold growth indicated by black or green discoloration. Spray any mold affected framing with antimicrobial treatment before installing new insulation.
-
Inspect studs for rot. Press firmly on exposed wood studs with a screwdriver or ice pick to test for soft spots that indicate rotting wood. Solid, healthy wood resists penetration. Rotted wood allows the tool to sink in easily and feels spongy. Smell for sour or musty odors coming from the wood. Look for dark staining, surface mushiness, or areas where wood has started separating into layers. Any stud showing signs of rot needs replacement before drywall installation.
-
Check electrical and plumbing.
Final Words
Stop the water source, dry everything completely, and fix what’s broken. That’s how to repair bathroom water damage without letting it turn into a bigger problem.
The key is thorough drying before you seal anything back up. Use a moisture meter. Wait for the numbers to drop.
Get the root cause, not just the stain. Replace damaged materials with moisture-resistant ones. Seal it properly when you’re done.
If you see structural rot, extensive mold, or you’re not sure what you’re looking at, call someone who does this every day.
Your bathroom should be dry, safe, and solid when you’re finished.
FAQ
How do you repair water damage in a bathroom?
To repair water damage in a bathroom, start by stopping the water source and turning off electricity to the affected area. Remove damaged drywall, allow the cavity to dry completely (3-5 days with fans), apply antimicrobial spray, install new moisture-resistant drywall, tape and mud the seams, then prime and paint with waterproof products.
How quickly does mold grow after water damage occurs?
Mold begins growing 24-48 hours after water damage occurs in a bathroom. Acting immediately to remove standing water, dry all materials thoroughly, and treat exposed surfaces with antimicrobial solutions prevents mold from taking hold and spreading throughout the space.
Can I repair bathroom water damage myself?
You can repair minor bathroom water damage yourself if the affected area is under 10 square feet, involves no structural damage, and contains clean water only. Larger areas, contaminated water, extensive mold (over 10 square feet), rotted studs, or permit-required work need professional restoration services.
Will homeowners insurance cover bathroom water damage?
Homeowners insurance typically covers sudden bathroom water damage from burst pipes or fixture failures, but excludes gradual damage from neglected maintenance or lack of repairs. Document all damage with photos, keep receipts, and file claims promptly. Deductibles usually range from $500 to $2,500.