


Ever notice cold air sneaking in around your windows on a windy day, even when they’re closed tight? Those gaps let in drafts, waste energy, and drive up your heating bill. The good news is you can seal most window gaps yourself in a few hours with basic tools and the right materials. This guide walks you through exactly which products to use for different gap sizes, how to prep surfaces so the seal actually holds, and the step-by-step process to stop air leaks for good.
Essential Tools and Materials for Window Gap Sealing

You need the right stuff before you start sealing window gaps. Budget around $30 to $80 depending on how many windows you’re tackling and how big the gaps are. Most homeowners finish in 2 to 4 hours.
What you’ll actually use:
- Caulking gun with a thumb release
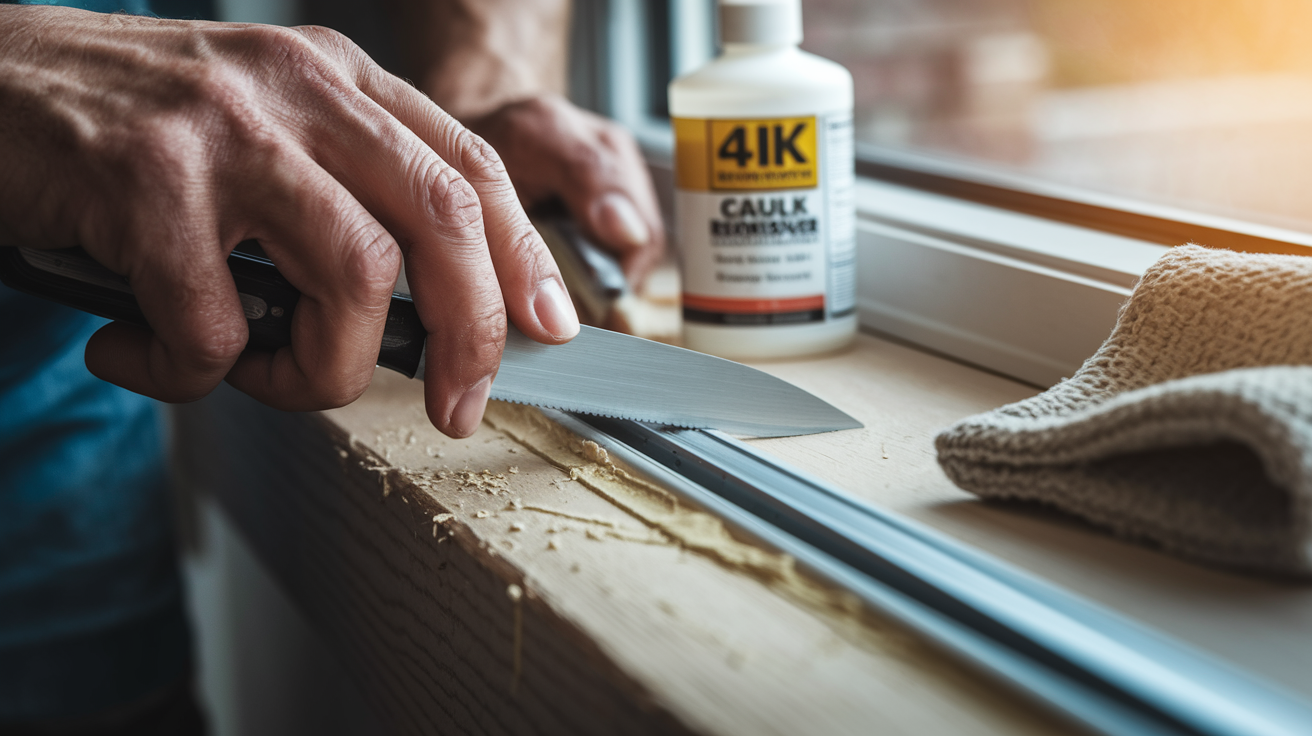
- Flat razor knife
- Caulk remover tool
- Towel and water bucket
- Painter’s tape
- Something to smooth with (your finger works, or grab a tool)
- Measuring tape
- Utility knife
- Ladder if you’re going upstairs
- Safety glasses
Picking caulk isn’t complicated once you know where it’s going. Outside windows do best with GE Advanced Silicone 2 Window & Door Sealant. It tested better than the competition and runs $8 to $12 per tube. Inside surfaces you plan to paint? White Lightning Painter’s Preferred Acrylic Latex Caulk gets the job done for $5 to $8. Bathrooms and other wet spots need waterproof formulas like Kwik Seal Ultra that resist mold. Measure your window perimeters first since each tube only covers so much distance.
Foam products handle different gap sizes. Low expansion window and door foam costs $6 to $10 per can and fills gaps between ¼ inch and ½ inch without pushing your frames out of alignment. Regular expanding foam will mess up your windows. Don’t use it. Backer rods come in various diameters starting at 3/8 inch and cost $5 to $15 per roll. They’re made of closed-cell polyethylene. Use straight caulk for anything under ¼ inch, foam for ¼ to ⅜ inch gaps, and backer rod plus caulk when you’re dealing with wider gaps up to 3 inches.
| Material Type | Best For | Cost Range | Key Feature |
|---|---|---|---|
| Silicone Window Sealant | Exterior window frames | $8-12 per tube | Weather-resistant, flexible |
| Latex Acrylic Caulk | Interior paintable surfaces | $5-8 per tube | Paintable, easy cleanup |
| Low-Expansion Foam | ¼-½ inch gaps | $6-10 per can | Won’t warp frames |
| Foam Backer Rod | Gaps wider than ¼ inch | $5-15 per roll | Reusable, non-adhesive |
| Waterproof Caulk | High-moisture areas | $7-10 per tube | Mold-resistant |
Break down your time into three parts. Surface prep takes 30 to 45 minutes. Application needs 1 to 2 hours depending on window count. You can smooth or close windows after about 2 hours of drying, but wait the full 24 hours before painting or getting it wet.
Step-by-Step Method for Sealing Window Gaps
Gap size tells you which product to grab. Different materials handle different widths.
- Measure your gap width around the frame with a tape measure or folded paper
- Scrape out all the old caulk with a flat razor knife until you hit clean wood or frame material
- Wipe down surfaces with a dry cloth to get rid of dirt, dust, and moisture. Everything needs to be completely dry.
- Pick your product based on gap size: caulk for under ¼ inch, foam for ¼ to ⅜ inch, backer rod plus caulk for wider gaps
- Cut just the very tip off your caulk tube to make a small bead. You can always cut more. You can’t uncut it.
- Use two hands when applying. Your dominant hand pulls the trigger while your other hand supports the barrel near the tip. Keep your wrists straight and move from your elbows and body instead of bending at the wrist to keep a consistent angle.
- Smooth right away in 6 inch sections starting from the bottom. Dip your finger or tool in water between sections if you’re using latex caulk, or rubbing alcohol for silicone.
- Seal both the inside and outside gaps for complete protection
Sealing both sides creates double coverage that stops air, water, and bugs from getting through your window frames. Most people only seal one side, but gaps exist on both. The exterior seal blocks weather. The interior seal stops your heated or cooled air from escaping into wall cavities. This double barrier approach works way better for energy efficiency and moisture control than just doing one side.
Check your work after finishing each window, but do it within that 2 hour window when the caulk’s still workable. Wait the full 24 hours before you paint or expose it to moisture from cleaning or rain.
Preparing Window Surfaces Before Sealing Gaps
How you prep the surface matters more than how you apply the caulk. Perfect application over dirty or wet surfaces fails within months. Proper prep extends your seal to 5 years or longer.
You’ve got to remove all the old caulk by scraping with a flat razor knife or caulk remover tool until you reach the original surface. Caulking over what’s already there makes a messy, thick line that looks bad and pulls away as the new stuff cures. That old caulk acts like a release layer that stops proper adhesion. Work your blade under the old bead and pull it away in strips. Stubborn spots might need chemical caulk remover. Apply it, wait the recommended time, then scrape. Keep your towel and water bucket close for cleanup.
Surface cleaning gets rid of dirt, dust, moisture, and leftover residue that messes with adhesion. Wipe the window frame and trim with a dry cloth first, then look for damp spots that need drying time. Corners and crevices collect debris, so pay attention there. If you spot mildew or mold, clean it with something appropriate for your window material and let it all dry completely. Touch the surface to confirm it feels dry before opening any caulk tubes.
Temperature and weather affect how well this goes. Don’t work on hot or humid days when caulk gets too runny and hard to control. Aim for 50 to 80°F. Cold makes caulk thick and tough to apply smoothly. Heat makes it flow too fast and sag before it sets.
Using Foam Insulation for Larger Window Gaps
Gaps from ¼ inch to 3 inches need foam instead of caulk. Caulk sags in wider gaps and doesn’t fill the space enough to actually block air movement.
The difference between low expansion window foam and regular expanding foam matters permanently. Low expansion foam grows about 1 inch, filling the gap without pushing on your window frame. Standard expanding foam can triple in size and generate enough force to warp your frames. Makes windows impossible to open. It also breaks seals in insulated glass units and damages the window’s structure. Always read the label and confirm it says “low expansion” or “window and door” formula.
- Shake the can hard for one minute to mix everything inside
- Apply from bottom to top, making sure foam reaches from the exterior sheathing to the interior framing side
- Wait for the first layer to expand (about 1 inch) before you evaluate coverage
- Add a second layer if you need more coverage in deeper gaps
Trim the excess dried foam flush with your frame using a flat razor knife after it cures. Usually takes 2 to 4 hours depending on temperature and humidity. Hold the knife flat against the extension jamb or frame edge and slice through in smooth strokes. You want a flush surface so drywall or trim sits right without gaps or bumps. Foam cuts easy when it’s fully cured but tears and compresses if you try trimming too soon.
| Gap Size | Recommended Product | Application Method |
|---|---|---|
| Under ¼ inch | Caulk only | Apply bead, smooth immediately |
| ¼-⅜ inch | Low-expansion foam | Apply bottom to top in layers |
| ⅜ inch to 3 inches | Backer rod plus caulk | Press rod in, caulk over surface |
| Wider than 3 inches | Open-cell spray foam (professional) | Requires specialized equipment |
Weatherstripping Options for Sealing Window Sashes
Sealing fixed gaps is different from sealing parts that move. Caulk and foam work where surfaces don’t rub against each other. But window sashes that slide or swing need weatherstripping that compresses and releases without sticking.
Adhesive foam strips install along the channels where your sash slides or at contact points where two surfaces meet. Clean the spot thoroughly before you peel off the backing and press the strip down. These compress when the window closes, blocking air while the window still operates normally. Most adhesive foam weatherstripping lasts 1 to 3 years before the adhesive quits or the foam loses compression. Check it every fall before heating season and replace worn sections.
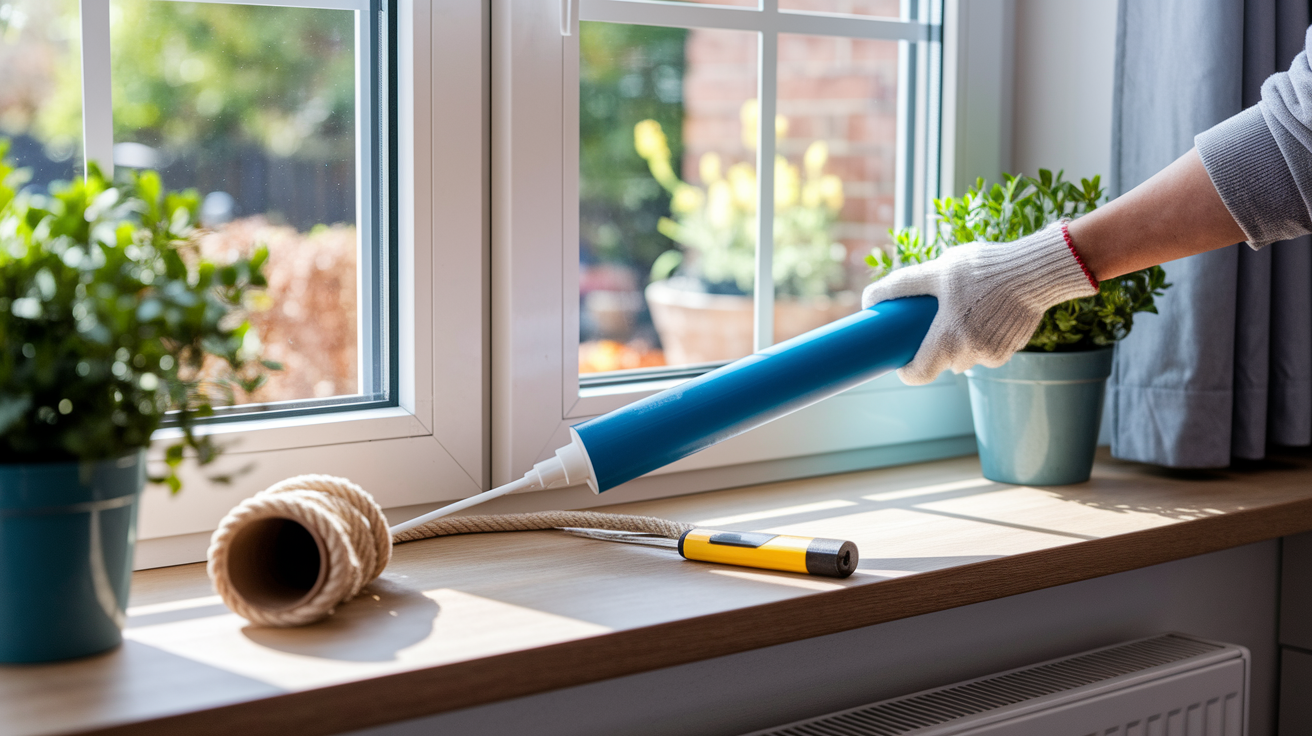
Rope caulk gives you a temporary fix that needs no tools and leaves no residue when you pull it out. It comes in 1/8 inch strips in neutral shades like gray and brown that blend into frames. Press it into gaps around windows you don’t open or into sash channels for seasonal sealing. When spring shows up, pull it out and store it for next winter. Rope caulk stays usable for 4 to 5 years if you keep it clean and dry. Perfect for rentals or situations where permanent sealing isn’t allowed.
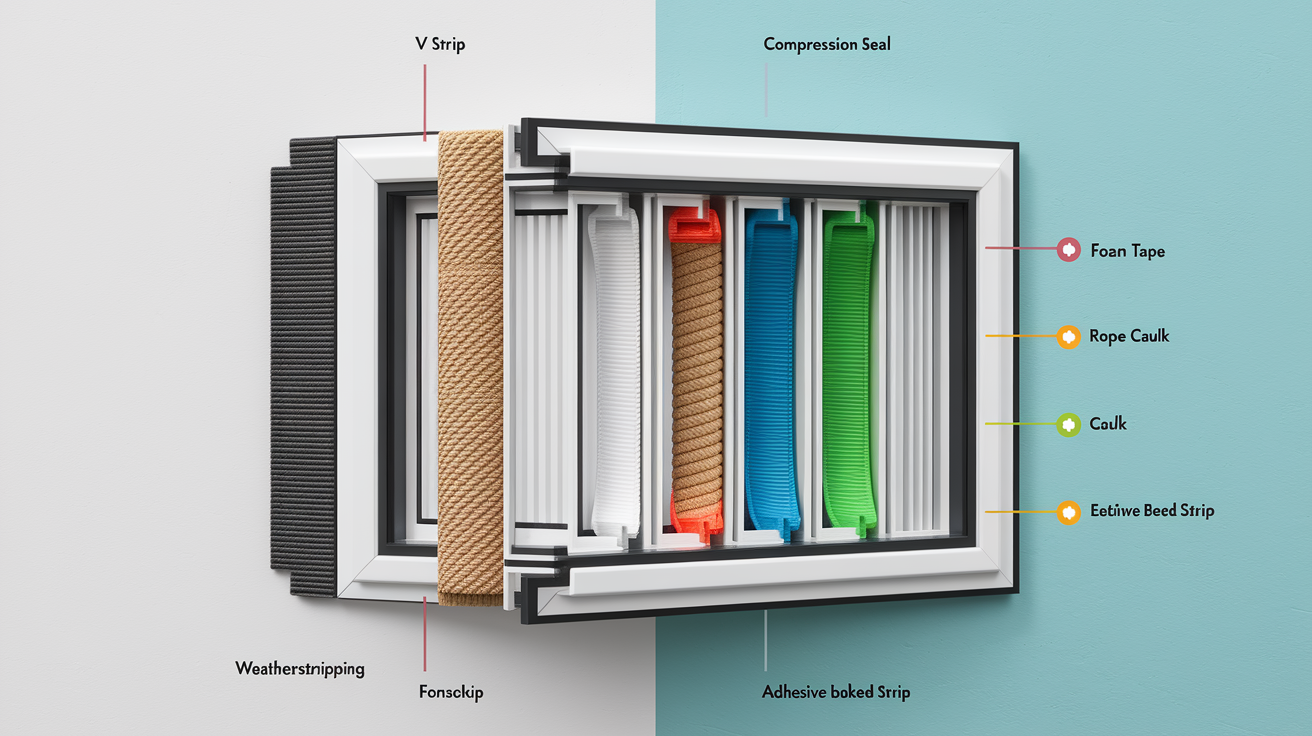
Weatherstripping types for different uses:
- V strip (tension seal): folds into channels, creates invisible seal, lasts 2 to 5 years
- Compression seal: foam or rubber bulb pressed between surfaces, visible but works
- Foam tape: adhesive backed strips for irregular gaps, easiest install
- Rope caulk: temporary press in seal, removable and reusable for 4 to 5 years
- Adhesive backed strips: permanent foam or rubber attached to frame edges
Replace weatherstripping when you notice visible wear, loss of compression that leaves gaps, or adhesive failure that makes strips peel. Run your hand along closed windows on a cold day. If you feel air movement, the weatherstripping’s failed.
Benefits of Proper Window Sealing
Gap sealing delivers energy savings and prevents water damage. That addresses two of the most expensive home maintenance problems at once.
Energy benefits come from stopping air leaks that make HVAC systems work harder. Heated or cooled air escaping through window gaps gets replaced by outside air, creating continuous load on your equipment. This bumps energy costs up 10 to 25% in most homes depending on how bad the gaps are and your climate. Drafts near windows make rooms feel colder in winter and warmer in summer no matter what your thermostat says. Insulation alone doesn’t stop airflow. Fiberglass lets air pass through regardless of how tight it’s packed. The insulation provides thermal resistance, but moving air carries heat energy right through it, bypassing the insulation’s effectiveness completely.
Moisture protection prevents water from entering through gaps, traveling behind window frames, and causing hidden damage. Water follows the easiest path, seeping into wall cavities where it contacts wood framing and sheathing. Creates conditions for mold growth, wood rot, and structural deterioration that often goes unnoticed until damage gets severe. Window sills collect water during rain, and even small gaps let it penetrate. Thicker caulk beads between fiber cement siding and windows handle thermal cycling better. That’s the expansion and contraction from weather changes that would crack thin beads.
What proper window gap sealing gets you:
- Lower energy bills from stopping heated and cooled air loss
- Better home comfort by getting rid of drafts and temperature swings
- Improved indoor air quality blocking dust, pollen, and outdoor pollutants
- Less noise from traffic and outdoor activity
- Prevention of water damage, mold growth, and wood rot
- Protection against pests getting in through gaps and cracks
Long term savings come from both reduced utility bills and avoided repair costs. A $50 material investment saves $10 to $30 monthly on heating and cooling in most homes, paying for itself in 2 to 5 months. More importantly, preventing water infiltration avoids expensive repairs that can hit thousands of dollars when rot damages framing or mold needs professional remediation. When water damage goes beyond surface staining (visible wood rot, persistent musty odors, recurring mold despite cleaning), you need professional assessment. This type of damage requires structural repair beyond DIY sealing. For repair needs that go beyond simple gap sealing, like structural issues or extensive moisture damage, professional house repair services can diagnose root causes and restore damaged areas correctly.
Temporary Solutions for Seasonal Window Gap Sealing
Temporary solutions make sense for rentals where you can’t make permanent changes, storm windows that only close seasonally, or vacation homes you’re not in year round. These methods block drafts and cut energy loss without creating permanent alterations.
Rope caulk installs by pressing 1/8 inch strips into gaps around window frames. No tools needed. Just unroll it, press it in with your fingers, and it stays put through compression instead of adhesive. Neutral colors like gray and brown blend into most frames without drawing attention. When you don’t need it anymore, pull it out in one continuous strip. Leaves no residue, so your window frame looks exactly like it did before. Store the rope caulk in a plastic bag or its original packaging for 4 to 5 years of repeated use.
Removable caulk works on cracks up to 1/4 inch wide and needs a caulk gun for proper application. One tube covers up to 56 feet, handling multiple windows in most rooms. Apply it like regular caulk, smoothing with a wet finger or tool. It dries clear and rubbery, becoming tack free in minutes. The surface stays flexible rather than hardening like permanent caulk. When spring arrives or you move out, peel it off completely starting at one end. Comes away as a rubbery strip without scraping or chemicals. Useful for renters who need to restore the property to original condition.
Foam backer rods work as reusable temporary fills if you don’t crush them too much. These closed cell polyethylene rods press into gaps without adhesive, staying put through compression fit. They’re non sticky and come out as easy as they went in. But crushing them into gaps much smaller than their diameter permanently compresses the cells and ruins reuse. Size your backer rod 1/8 inch larger than the gap width for proper fit.
Temporary solutions work as winter weatherproofing that cuts energy loss during cold months. Larger gaps (wider than ½ inch or gaps around entire window perimeters) typically mean your windows need professional repair or replacement. These gaps suggest installation problems, frame deterioration, or structural settling that temporary sealing won’t fix long term.
Maintaining and Inspecting Window Seals
Regular inspection prevents costly damage by catching seal failures before water gets into walls and causes hidden rot or mold.
How long seals last varies by exposure and material quality. Caulking around window frames lasts about 5 years depending on weather. South and west facing windows get intense UV exposure that speeds up deterioration, breaking down the chemical bonds in caulk. You’ll see discoloration first, then hardening, cracking, and eventual failure. North facing windows in shaded spots might see 7 to 8 years from quality caulk. Harsh climates with extreme temperature swings (hot summers and freezing winters) stress seals more than moderate climates.
What to check for in window seals:
- Cracks and stress fractures appearing as fine lines in the caulk
- Peeling or separation where caulk pulls away from frame or siding
- Discoloration, fading, or yellowing showing UV damage
- Flexibility by pressing the caulk. Brittleness means failure.
- Gaps that have reopened where caulk shrunk
- Damage after severe weather, particularly after freeze thaw cycles
When you inspect matters for catching problems before they cause damage. Fall inspections before heating season spot gaps that’ll leak warm air all winter. Spring inspections after freeze thaw cycles reveal cracks from ice expansion. Run your inspection on a calm day so wind doesn’t give false readings. Look at the caulk from different angles. Side lighting shows cracks and separation that look invisible from straight on.
Fix failures right when you find them instead of waiting until next season. Small cracks expand fast as temperature changes work the edges open. Water gets in through hairline cracks and freezes, expanding and forcing the crack wider with each freeze thaw cycle. Recaulking one or two problem windows takes 30 minutes and costs a few dollars. Waiting until multiple windows fail turns it into a weekend project, and water damage from delayed repairs can cost hundreds or thousands to fix.
When to Call a Professional for Window Gap Repairs
Not all window gap problems make sense to DIY. Recognizing when you need professional help prevents wasted time, money, and potential injury.
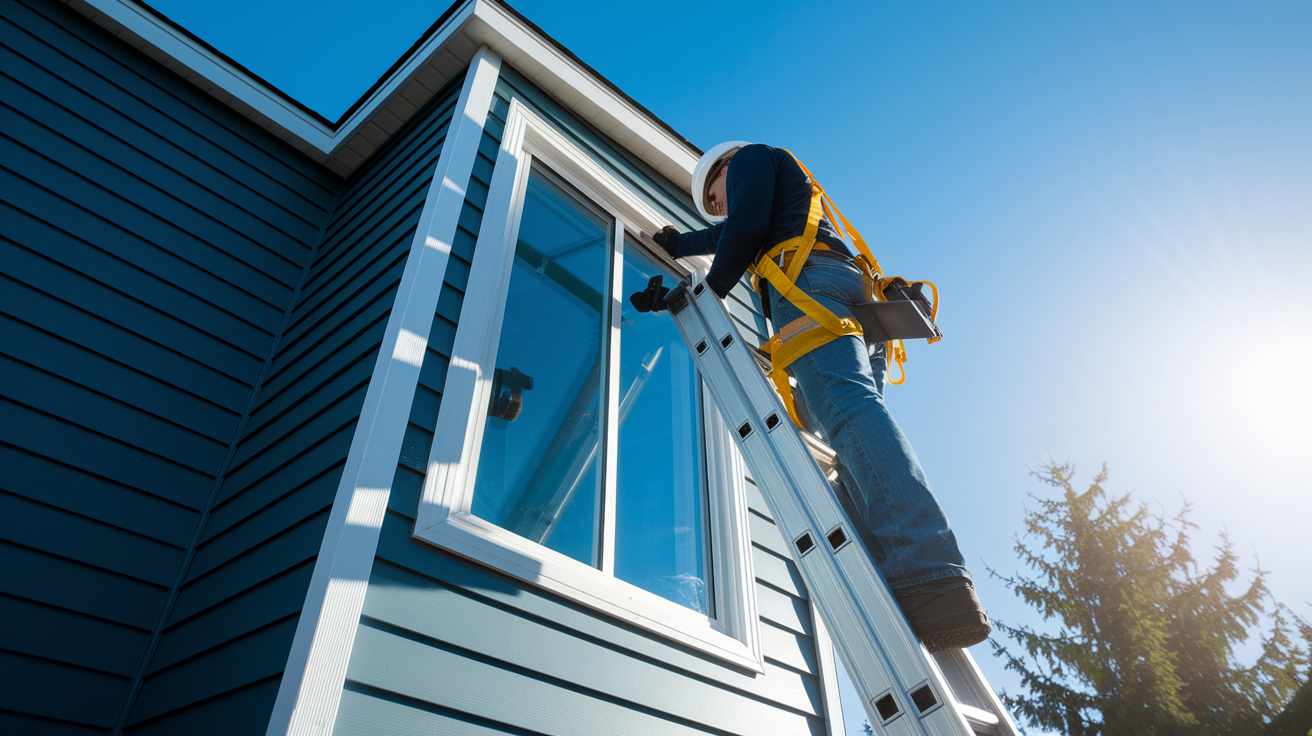
Safety matters more than DIY savings in certain situations. Second story work requiring ladders gets dangerous without proper equipment and experience. Reaching windows above the first floor from a ladder demands three point contact, proper ladder angle, and secure footing. Skills that come with training and practice. Working at height without confidence or appropriate fall protection equipment isn’t worth the risk. If the job needs working on two story heights without proper tools or safety equipment, or if you’re not confident in your ability, call a professional immediately. Safety comes first.
When you need professional assessment:
- Gaps wider than 3 inches showing installation problems or structural issues
- Visible wood rot around frames with brown discoloration, soft spots, or crumbling wood
- Water staining on interior walls near windows suggesting water infiltration paths
- Mold growth near windows despite cleaning, showing moisture source
- Warped or damaged window frames that won’t close right
- Structural cracks in surrounding walls extending beyond the window opening
- Recurring seal failures despite proper DIY application
Cost benefit analysis helps determine when professional diagnosis saves money long term. If you’ve resealed the same window three times in two years and gaps keep coming back, something beyond surface sealing is wrong. The window might’ve been installed wrong with inadequate flashing, or structural settling might be pulling the frame out of square. Professional window installers identify installation errors, flashing failures where water gets behind exterior cladding, and structural settling that DIY sealing can’t address. Spending $150 to $300 for professional diagnosis beats spending $50 repeatedly on materials for temporary fixes that don’t solve the underlying problem.
Professionals diagnose root causes you can’t see from inside the home. Improper window installation might leave gaps in the drainage plane or missing head flashing that lets water run down the wall behind the window. Flashing failures direct water into wall cavities instead of away from the building. Structural settling from foundation movement creates gaps that reopen as the building keeps shifting. These problems need removing exterior siding to inspect and correct, work that goes beyond gap sealing into carpentry and waterproofing. When water damage extends beyond what surface sealing can address, professionals have the tools and knowledge to repair damaged framing, replace rotted materials, and restore proper water management.
Final Words
Sealing gaps around windows protects your home from water damage, cuts energy waste, and stops drafts that make rooms uncomfortable.
The right approach depends on gap size. Caulk handles gaps under ¼ inch. Foam works for ¼ to ⅜ inch openings. Wider gaps need backer rod plus caulk on top.
Always remove old caulk completely before starting. Use low-expansion foam near frames to avoid damage. Seal both interior and exterior sides for full protection.
Regular inspection catches small cracks before they turn into bigger problems. Most seals last about five years, then need replacing.
If you see wood rot, water stains, or gaps that keep reopening, that’s when professional help makes sense.
FAQ
How to seal a gap around a window?
To seal a gap around a window, first measure the gap width to pick the right material. For gaps under ¼ inch, use caulk alone. For gaps between ¼ inch and ⅜ inch, apply low-expansion foam. For wider gaps, insert a backer rod first, then run caulk on top.
What is the best product to fill gaps around windows?
The best product to fill gaps around windows depends on location and gap size. For exterior gaps, use silicone sealant like GE Advanced Silicone 2. For interior paintable surfaces, use acrylic latex caulk like White Lightning Painter’s Preferred. For gaps wider than ¼ inch, use low-expansion window foam before caulking.
Where not to caulk around windows?
Do not caulk where water needs to drain out. Avoid sealing weep holes at the bottom of exterior window frames. These small openings let trapped moisture escape. Also skip caulking between window sashes that open and close. Use weatherstripping there instead.
Should you use caulk or sealant around windows?
You should use caulk or sealant around windows depending on the specific location and conditions. Both terms often describe the same products. For exterior window frames exposed to weather, use silicone sealant for flexibility and waterproofing. For interior trim, use paintable acrylic latex caulk.
What causes gaps to form around window frames?
Gaps form around window frames from settling, temperature changes, and improper installation. Houses shift over time as foundations settle. Wood frames expand and contract with seasonal humidity. During installation, if shims aren’t placed correctly or foam wasn’t applied properly, gaps appear from the start.
How long does window caulk last before needing replacement?
Window caulk lasts approximately 5 years depending on weather exposure and product quality. UV rays, temperature swings, and moisture accelerate breakdown. Replace caulk when you notice cracking, peeling, discoloration, or brittleness. Regular inspections help catch early failure signs before water gets in.
Can I paint over window caulk after sealing gaps?
You can paint over window caulk after sealing gaps if you used paintable acrylic latex caulk. Wait 24 hours for full cure before painting. Silicone caulk used on exterior gaps won’t accept paint. Check the product label before buying if you plan to paint the finished seal.
What’s the difference between rope caulk and regular caulk?
Rope caulk differs from regular caulk because it’s a temporary, removable putty that requires no tools or gun. It comes in 1/8-inch strips, presses into gaps by hand, and leaves no residue when removed. Regular caulk is permanent, applied with a gun, and bonds to surfaces.
How do I know if my window gaps need foam or caulk?
Your window gaps need foam instead of caulk when they measure between ¼ inch and ⅜ inch wide. Gaps smaller than ¼ inch seal fine with caulk alone. Gaps wider than ⅜ inch need a backer rod pressed in first, then caulk on top to prevent sagging.
What temperature is best for sealing window gaps?
The best temperature for sealing window gaps is between 50°F and 80°F. Avoid caulking on hot or humid days when caulk becomes too runny and hard to control. Cold temperatures below 40°F make caulk thick and difficult to apply smoothly. Check the product label for specific temperature ranges.
Why does new caulk pull away from old caulk?
New caulk pulls away from old caulk because it doesn’t bond to the cured surface underneath. Old caulk creates a barrier that prevents proper adhesion to the actual window frame and wall. Always scrape out old caulk completely before applying new material for a lasting seal.
How much does it cost to seal window gaps yourself?
Sealing window gaps yourself typically costs $30 to $80 for an average home depending on the number of windows and gap sizes. Budget $8 to $12 per tube of exterior silicone, $5 to $8 for interior latex caulk, and $6 to $10 for low-expansion foam if needed.
When should I call a professional instead of sealing gaps myself?
Call a professional when you see visible wood rot, water stains on interior walls, mold growth near windows, or gaps wider than 3 inches. Also get professional help for second-story work without proper safety equipment, structural cracks in surrounding walls, or recurring seal failures despite correct application.